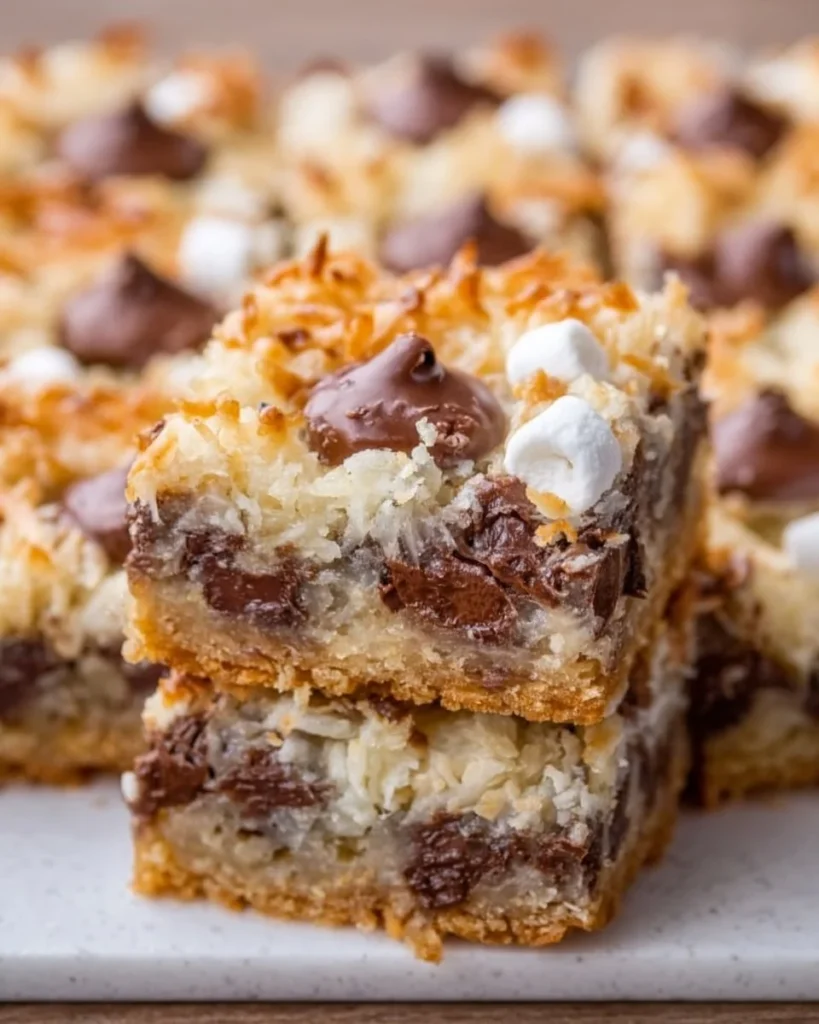
There’s an undeniable magic that unfurls in your kitchen when you embark on the journey of making 7 Layer Bars. Imagine layers upon layers of playful textures and flavors, each one more delightful than the last. The warmth of melted butter combines with the sweet crunch of graham crackers, creating a base that beckons for attention. As you sprinkle in rich chocolate chips and sweet butterscotch morsels, the aroma fills the air, awakening memories of family gatherings and festive celebrations that make your heart sing. And those toasted coconut shavings! Their subtle nuttiness adds a whimsical twist, while the gooey embrace of sweetened condensed milk envelops everything in creamy bliss.
Each bite is a revelation—an explosion of tastes that dances on your palate. The crispness of chopped nuts gives way to the tender chewiness of mini marshmallows, tempting you to savor a little bit longer. You find yourself reaching for another piece, enchanted by the symphony of sweetness and crunch. It’s no wonder that these bars, often a cherished staple at potlucks and bake sales, hold a special place in our hearts. They’re more than just a dessert; they’re a celebration of togetherness, a treat that beckons friends and family to indulge in a moment of joy.
Why You’ll Love This 7 Layer Bars
What sets 7 Layer Bars apart is their irresistible combination of flavors and textures that invite both nostalgia and excitement. This dessert captivates the senses with every bite, blending smooth sweetness with a delightful crunch that you won’t be able to resist. Perfect for any occasion—be it a cozy gathering with friends, a festive family celebration, or even a simple afternoon treat with a cup of coffee—these bars scream happiness.
They accommodate everyone’s cravings with layers of chocolatey goodness, creamy textures, and nutty notes that harmoniously blend together. Plus, the beauty of 7 Layer Bars lies in their versatility. You can easily customize them based on your taste preferences or what you have on hand. And of course, let’s not forget the best part: they’re incredibly easy to whip up with just a handful of ingredients, bringing homemade comfort to your kitchen in no time.
Preparation Phase & Tools to Use
To create the perfect batch of 7 Layer Bars, you’ll want to arm yourself with a few essential tools that streamline the process and ensure a stunning outcome. Here’s what you’ll need:
- Mixing Bowls: Having separate bowls for your crust and toppings makes it easier to manage the ingredients and keeps the layering process smooth.
- 9×13 Inch Baking Pan: This size pan is ideal for baking evenly and cutting uniform bars. Don’t forget to grease it well; you want those bars to slide out effortlessly.
- Spatula: A trusty spatula helps you press down the crust firmly into the pan, ensuring every piece holds together perfectly.
- Measuring Cups and Spoons: Precise measurements make a significant difference in the success of your recipe, especially with layered desserts like this.
Preparation Tip: Make sure all your ingredients are at room temperature, especially the butter. This ensures even mixing and helps the crust adhere beautifully.
Ingredients for 7 Layer Bars
- 1 cup graham cracker crumbs: The sweet and slightly salty flavor adds the perfect touch to the crust. For a gluten-free option, substitute with almond flour.
- 1/2 cup unsalted butter, melted: This holds the crust together while imparting richness. Do use unsalted butter to control the saltiness.
- 1 cup sweetened shredded coconut: This adds texture and a delightful chewiness. You can swap it for unsweetened coconut for a less sweet alternative.
- 1 cup chocolate chips: The heart of decadence! Use semi-sweet for balanced sweetness or dark chocolate for a richer taste.
- 1 cup butterscotch chips: Their buttery sweetness complements chocolate perfectly. If you’re in a pinch, white chocolate can work too.
- 1 cup chopped nuts (e.g., walnuts or pecans): They bring in that coveted crunch. If nut allergies are a concern, consider substituting with sunflower seeds.
- 1 can (14 ounces) sweetened condensed milk: This binds everything together, creating a sweet and creamy texture. It’s the trick to that gooey center.
- 1 cup mini marshmallows (optional): For a chewy surprise! Feel free to skip them for a more classic bar, or substitute with a layer of caramel if you desire.
How to Make 7 Layer Bars
- Preheat your oven to 350°F (175°C): A hissing sound gives way to the beautiful gold and brown hue you desire.
- Grease a 9×13 inch baking pan: A little butter or cooking spray ensures easy removal later.
- Combine graham cracker crumbs and melted butter in a mixing bowl: Stir until the crumbs are well coated and have a sandy texture.
- Press the mixture firmly into the bottom of the prepared pan: Use the back of a measuring cup or your hands to create an even layer.
- Layer the shredded coconut, chocolate chips, butterscotch chips, and nuts evenly over the crust: Allow each ingredient to shine through.
- If using, sprinkle mini marshmallows on top: They will puff up into delicious clouds when baked.
- Pour sweetened condensed milk evenly over the entire pan: This nourishes the layers and creates a beautifully cohesive dessert.
- Bake for about 25-30 minutes, or until the edges are golden, and the center is set: Watch as the layers meld together; your kitchen will smell heavenly.
- Let cool completely before cutting into bars: As tempting as it is to dive in right away, patience will yield cleaner cuts and a better texture. Enjoy with family and friends!
Chef’s Notes & Helpful Tips
- Make-ahead tips: These bars keep well! You can prepare the crust a day in advance and add the toppings just before baking.
- Cooking alternatives: If your kitchen is feeling cozy, consider using an air fryer to bake them in smaller batches. Adjust the time based on your appliance, as air fryers cook faster.
- Customization ideas: Swap chocolate chips for peanut butter chips or add a layer of chopped dried fruit for an interesting twist. Experiment with spices like cinnamon or nutmeg to personalize the flavor further.
Common Mistakes to Avoid
Creating a masterpiece takes effort, but avoiding common pitfalls is crucial. Here are a few mistakes to steer clear of:
- Not packing the crust firmly: This leads to a crumbly base that may fall apart. Press it down firmly.
- Overbaking the bars: Watch the edges closely; they should be golden, and the center should still look slightly soft before cooling.
- Skimping on the layers: The magic lies in the combination. Ensure each layer is plentiful for the perfect bite.
What to Serve With 7 Layer Bars
To elevate your dessert experience even further, consider pairing these indulgent bars with delightful companions:
- A scoop of vanilla ice cream: The creaminess balances the sweetness and adds a luxurious touch.
- Fresh berries: Their tartness cuts through the richness of the bars, refreshing your palate.
- Coffee or espresso: The bold flavors of coffee complement the sweet layers perfectly.
- Hot chocolate: A cozy beverage that echoes the warm, sweet flavors of your creations.
- Milk: Always a classic that brings balance to the richness.
- Whipped cream: A dollop on the side enhances the experience with added creaminess.
- Caramel sauce: Drizzle some on top for an extra layer of indulgence.
- Fruit-infused sparkling water: A light, bubbly drink brings a refreshing contrast.
Storage & Reheating Instructions
Your precious 7 Layer Bars deserve proper storage to maintain their texture and flavor. Keep them in an airtight container at room temperature for up to four days. If you want to keep them longer, slice them into squares and freeze them wrapped in plastic wrap, followed by foil or a freezer bag. They can last up to three months this way. When you’re ready to enjoy, simply thaw them in the refrigerator for a few hours or at room temperature for about an hour.
Estimated Nutrition Information
- Calories: ~240 per bar (varies based on ingredients and portion size)
- Fat: 10g
- Carbohydrates: 35g
- Protein: 3g
Note: Nutrition values are approximations and can vary significantly based on ingredient brands and portion sizes.
FAQs
-
Can I make 7 Layer Bars gluten-free?
Absolutely! Simply substitute graham cracker crumbs with gluten-free alternatives, such as almond flour or gluten-free cookie crumbs, and ensure your chocolate and butterscotch chips are also gluten-free. -
How do I know when my bars are done baking?
Look for a golden edge and a slightly set center. The bars firm up as they cool, so they may appear a little soft in the middle when they are ready to come out. -
Can I use sweetened coconut instead of unsweetened?
Yes, sweetened shredded coconut adds an extra layer of sweetness, but be mindful that it might make the bars sweeter overall. -
What can I do if my bars don’t hold together?
If they crumble, it likely means the crust wasn’t packed firmly enough. Next time, press down harder, or consider adding a touch more melted butter to bind the crumbs. -
How can I store leftover bars?
Keep them in an airtight container at room temperature for up to four days or freeze them for up to three months. Ensure they are individually wrapped or separated by parchment paper to maintain freshness.
Conclusion
Baking 7 Layer Bars transforms your kitchen into a haven of sweet warmth and joy. With each component working in harmony, these bars weave together texture and flavor in a way that will delight your senses and enliven any gathering. Whether you share them with loved ones or savor them on your own, each luscious layer stands as a testament to the joy of homemade treats. So gather your ingredients, roll up your sleeves, and dive into this enchanting journey of sweetness. You might just discover your new favorite dessert!
Print
7 Layer Bars
- Total Time: 45 minutes
- Yield: 16 servings 1x
- Diet: Vegetarian
Description
Indulge in the delightful layers of chocolate, butterscotch, coconut, and more with these easy-to-make 7 Layer Bars, perfect for any occasion.
Ingredients
- 1 cup graham cracker crumbs
- 1/2 cup unsalted butter, melted
- 1 cup sweetened shredded coconut
- 1 cup chocolate chips
- 1 cup butterscotch chips
- 1 cup chopped nuts (e.g., walnuts or pecans)
- 1 can (14 ounces) sweetened condensed milk
- 1 cup mini marshmallows (optional)
Instructions
- Preheat your oven to 350°F (175°C).
- Grease a 9×13 inch baking pan.
- Combine graham cracker crumbs and melted butter in a mixing bowl.
- Press the mixture firmly into the bottom of the prepared pan.
- Layer the shredded coconut, chocolate chips, butterscotch chips, and nuts evenly over the crust.
- If using, sprinkle mini marshmallows on top.
- Pour sweetened condensed milk evenly over the entire pan.
- Bake for about 25-30 minutes, or until the edges are golden.
- Let cool completely before cutting into bars.
Notes
For best results, make sure all your ingredients are at room temperature. These bars can be made ahead and stored for up to four days at room temperature.
- Prep Time: 15 minutes
- Cook Time: 30 minutes
- Category: Dessert
- Method: Baking
- Cuisine: American
Nutrition
- Serving Size: 1 bar
- Calories: 240
- Sugar: 20g
- Sodium: 100mg
- Fat: 10g
- Saturated Fat: 6g
- Unsaturated Fat: 4g
- Trans Fat: 0g
- Carbohydrates: 35g
- Fiber: 2g
- Protein: 3g
- Cholesterol: 20mg
Keywords: dessert, 7 layer bars, chocolate, butterscotch, baking


