Sensory-Rich Introduction with Immediate Craving
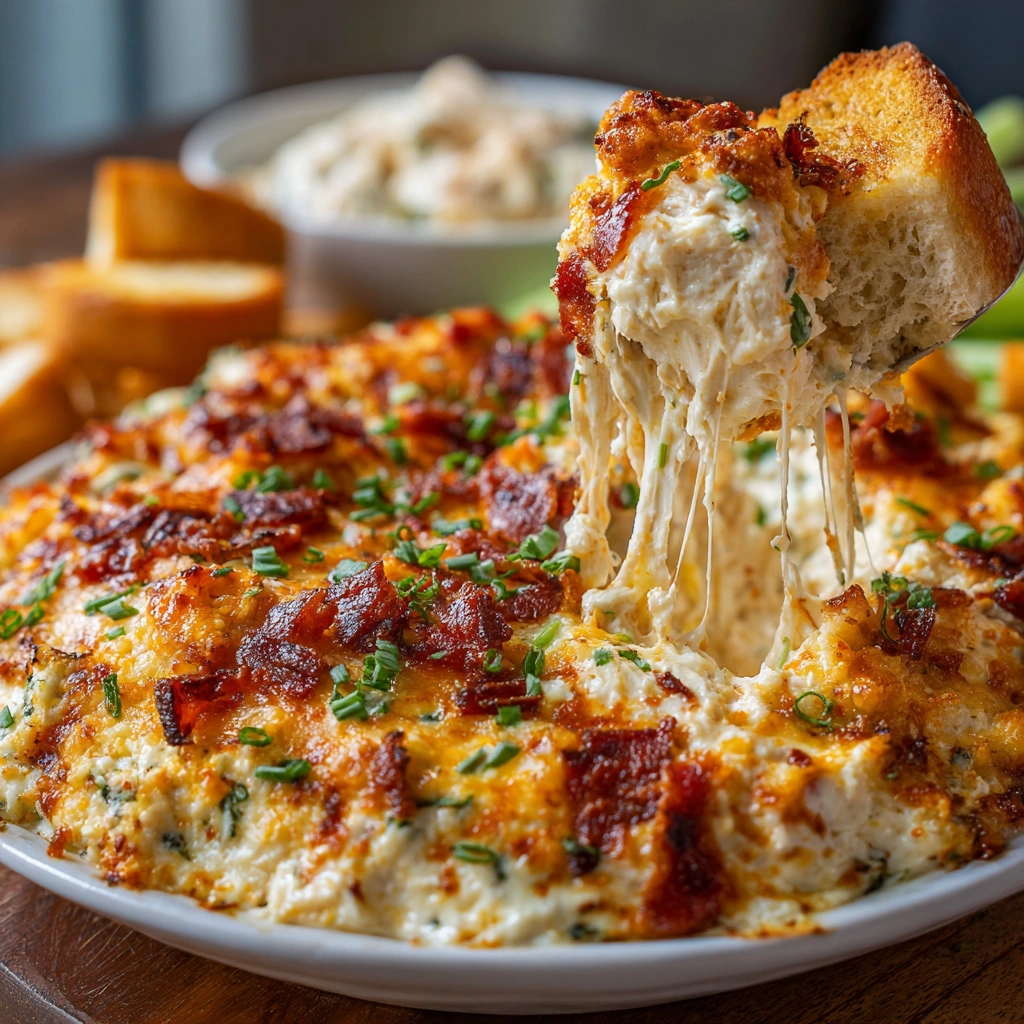
Imagine walking into a room filled with the irresistible aroma of Baked Chicken Cheese Dip wafting through the air, beckoning you closer. The moment you lay eyes on it, you see a bubbling, golden surface, glistening with melted cheese that promises a creamy, savory experience. As you dip a crunchy tortilla chip into the warm, velvety mixture, you can almost taste the delightful blend of seasoned chicken, tangy cream cheese, and a hint of spice from the hot sauce. It’s a dip that not only satisfies your hunger but also ignites your senses!
This dip holds a special place in my heart, as it was the star of my cousin’s game day gathering last fall. I remember the laughter and cheers echoing around the room as we huddled around the table, eagerly scooping up the dip with chips. It was a moment of pure joy, where the flavors mingled with the excitement of the game, creating a memory that I cherish. Every bite was a reminder of the warmth of family and the comfort that comes from sharing good food.
Food has a magical way of bringing people together, doesn’t it? This Baked Chicken Cheese Dip is perfect for any occasion—whether it’s a lively game day, a cozy family gathering, or a casual get-together with friends. It’s the kind of dish that invites everyone to gather around, share stories, and create lasting memories. So, let’s dive into this creamy, cheesy delight that’s sure to become a staple at your next event!
Why You’ll Love This Baked Chicken Cheese Dip
Let me tell you, this Baked Chicken Cheese Dip is not just another appetizer; it’s a culinary experience that will have your taste buds dancing with joy! Here’s why this dip deserves a special spot in your recipe repertoire:
Texture Contrast
Picture this: you scoop a crunchy tortilla chip into the warm, creamy dip, and as you lift it, the cheese stretches and pulls, creating a tantalizing visual. The contrast between the smooth, velvety dip and the crispy chip is simply divine. If you prefer a healthier option, fresh veggies like carrots and celery provide a satisfying crunch that complements the dip beautifully.
Flavor Balance
Each bite of this dip is a harmonious blend of flavors. The savory chicken melds perfectly with the tangy cream cheese, while the hot sauce adds just the right amount of kick. It’s a flavor explosion that keeps you coming back for more, and trust me, your guests will be raving about it long after the last scoop is gone!
Versatility
This dip isn’t just for parties; it’s incredibly versatile! Use it as a hearty appetizer, a satisfying snack, or even as a filling for baked potatoes. The possibilities are endless, and it’s a fantastic way to elevate any meal or gathering.
Ease of Preparation
Let’s face it, we all have busy lives, and this dip is a lifesaver! With simple steps and minimal cooking time, you can whip it up in no time. Whether you’re a seasoned chef or a kitchen novice, you’ll find this recipe accessible and straightforward. Plus, it’s a great way to impress your friends without spending hours in the kitchen!
Universal Appeal
One of the best things about this Baked Chicken Cheese Dip is its universal appeal. It caters to various tastes and dietary preferences, making it a true crowd-pleaser. Whether your guests are cheese lovers, spice enthusiasts, or just looking for something comforting, this dip has something for everyone. It’s the kind of dish that brings people together, sparking joy and conversation around the table.
So, are you ready to dive into this creamy, cheesy delight? Let’s gather our ingredients and get started on creating a dip that will surely become a favorite in your home!
Essential Tools & Preparation Strategy
Before diving into the creamy goodness of this Baked Chicken Cheese Dip, let’s gather our tools and set the stage for a seamless cooking experience. Trust me, having the right equipment makes all the difference, especially when you’re juggling multiple tasks in the kitchen!
Essential Tools
- Mixing Bowl: A large bowl is essential for combining all the ingredients smoothly. If you have a stand mixer, it can save you some elbow grease!
- Baking Dish: A 9×9 inch baking dish works perfectly, but a cast-iron skillet adds a rustic charm and keeps the dip warm longer.
- Measuring Cups and Spoons: Precision is key! Accurate measurements ensure consistent results every time.
- Spatula: A silicone spatula is great for mixing and spreading the dip evenly in the baking dish, plus it can withstand high heat.
- Oven Mitts: Safety first! Protect your hands when handling hot dishes. I recommend silicone mitts for a better grip.
- Whisk: A whisk is helpful for blending the cream cheese and sour cream until smooth. If you’re in a pinch, a fork can do the trick!
Preparation Strategy
Now that we have our tools ready, let’s talk about how to streamline the preparation process:
- Prep Ingredients: Chop your vegetables and shred the chicken ahead of time. This will save you precious minutes when you’re ready to mix everything together.
- Soften Cream Cheese: Remember to take your cream cheese out of the fridge at least 30 minutes before you start. Cold cream cheese can lead to a lumpy dip, and nobody wants that!
- Preheat the Oven: Don’t forget to preheat your oven to 350°F (175°C) before you start mixing. This ensures your dip bakes evenly and comes out bubbly and golden.
With these tools and strategies in place, you’re well on your way to creating a dip that will have everyone coming back for seconds (or thirds!). Let’s move on to the ingredients that make this dip a true crowd-pleaser!
Ingredients & Their Roles in This Baked Chicken Cheese Dip
Now that we’ve set the stage with our tools and preparation strategy, let’s dive into the star players of this Baked Chicken Cheese Dip. Each ingredient plays a crucial role in creating that creamy, cheesy delight that will have everyone coming back for more!
Chicken
2 cups cooked, shredded chicken is the backbone of this dip, providing protein and heartiness. I often use leftover rotisserie chicken for convenience, but any cooked chicken will do. The savory flavor of the chicken melds beautifully with the other ingredients, making each bite satisfying and filling.
Cheese
- 1 cup cream cheese: This is the secret to the dip’s creaminess. It creates a luscious base that holds everything together. Make sure it’s softened for easy mixing!
- 1 cup shredded cheddar: This cheese adds a sharp, tangy flavor that balances the richness of the cream cheese. It’s a classic choice that never disappoints.
- 1 cup shredded mozzarella: Known for its stretchiness, mozzarella brings a delightful gooeyness to the dip. When melted, it creates that irresistible pull that makes you want to dive right in!
Vegetables
- 1/2 cup diced green onions: These add a fresh, mild onion flavor that brightens up the dip. Plus, they give it a lovely pop of color!
- 1/2 cup diced red bell pepper: Sweet and vibrant, red bell peppers not only enhance the visual appeal but also contribute a subtle sweetness that balances the savory elements.
Condiments
- 1/2 cup sour cream: This ingredient adds a tangy richness that complements the cheeses. If you’re looking for a lighter option, Greek yogurt works wonderfully as a substitute!
- 1/4 cup hot sauce: This is where the magic happens! The hot sauce adds a kick of heat that elevates the flavor profile. Feel free to adjust the amount based on your spice tolerance—more for the brave, less for the faint of heart!
Spices
- 1 teaspoon garlic powder: This adds depth and a savory note that enhances the overall flavor of the dip.
- 1 teaspoon onion powder: A touch of sweetness from onion powder rounds out the flavor, making it more complex.
- Salt and black pepper: These are essential for enhancing the overall taste. Don’t forget to taste and adjust as needed!
With these ingredients in hand, you’re well on your way to creating a dip that’s not only delicious but also packed with flavor and texture. Let’s move on to the step-by-step guide to bring this creamy masterpiece to life!
Step-by-Step Guide to Perfect Baked Chicken Cheese Dip
Now that we have all our ingredients prepped and ready, it’s time to bring this Baked Chicken Cheese Dip to life! Follow these simple steps, and you’ll have a creamy, cheesy masterpiece that will wow your guests (and yourself!).
- Preheat Your Oven: Start by preheating your oven to 350°F (175°C). This ensures that your dip bakes evenly and comes out perfectly bubbly and golden.
- Mix the Base: In a large mixing bowl, combine 2 cups of shredded chicken, 1 cup of softened cream cheese, 1/2 cup of sour cream, and 1/4 cup of hot sauce. Use a whisk or spatula to mix until the mixture is smooth and creamy. The aroma of the chicken and cream cheese blending together is simply irresistible!
- Add the Cheeses and Veggies: Next, fold in 1 cup of shredded cheddar, 1 cup of shredded mozzarella, 1/2 cup of diced green onions, 1/2 cup of diced red bell pepper, 1 teaspoon of garlic powder, 1 teaspoon of onion powder, 1/2 teaspoon of salt, and 1/2 teaspoon of black pepper. Mix until everything is well combined. You’ll notice the vibrant colors and textures coming together beautifully!
- Transfer to Baking Dish: Grease a baking dish (a 9×9 inch dish works great) and transfer the dip mixture into it. Spread it evenly with your spatula, making sure it’s nice and smooth on top.
- Bake to Perfection: Place the baking dish in the preheated oven and bake for 25-30 minutes, or until the dip is bubbly and golden on top. Keep an eye on it—your kitchen will start to fill with the mouthwatering aroma of melted cheese!
- Cool and Serve: Once it’s out of the oven, let the dip cool for a few minutes before serving. This will help prevent any burns and allow the flavors to settle. Trust me, the wait will be worth it!
And there you have it! A step-by-step guide to creating a Baked Chicken Cheese Dip that’s sure to be a hit at your next gathering. Now, let’s move on to some chef’s notes and pro tips to ensure your dip turns out flawless every time!
Chef’s Notes & Pro Tips for Flawless Results
As you embark on your journey to create the perfect Baked Chicken Cheese Dip, here are some invaluable tips and tricks that I’ve gathered over the years. These insights will help you achieve a dip that’s not only delicious but also impressively consistent!
Make-ahead Instructions
If you’re planning for a gathering, consider preparing the dip a day in advance. Simply mix all the ingredients, transfer them to your baking dish, cover it tightly with plastic wrap, and refrigerate. When you’re ready to serve, just pop it in the oven! This not only saves you time but also allows the flavors to meld beautifully.
Storage
Leftovers? No problem! Store any remaining dip in an airtight container in the fridge for up to 3 days. Just reheat it in the oven at 350°F (175°C)</strong) until warmed through, or microwave it in short intervals, stirring in between.
Equipment Recommendations
If you prefer a super smooth texture, consider using a food processor to blend the cream cheese and other ingredients. This will give your dip a velvety consistency that’s hard to resist. Just be careful not to over-process; you still want to maintain some texture from the chicken and veggies!
Customization Options
One of the best things about this dip is its versatility! Feel free to get creative:
- Add jalapeños: For those who crave a little extra heat, finely chop some jalapeños and mix them in. They’ll add a delightful kick!
- Swap in different cheeses: Experiment with your favorite cheeses! Gouda, pepper jack, or even a sprinkle of blue cheese can elevate the flavor profile.
- Incorporate herbs: Fresh herbs like cilantro or parsley can add a refreshing touch. Just fold them in right before baking for a burst of flavor.
With these tips in your back pocket, you’re well-equipped to create a Baked Chicken Cheese Dip that will have everyone asking for the recipe. Now, let’s explore some common cooking mistakes to avoid, ensuring your dip turns out perfect every time!
Avoid These Common Cooking Mistakes
Even the best recipes can go awry if you’re not careful. Here are some common pitfalls to watch out for when making your Baked Chicken Cheese Dip. Trust me, I’ve learned these lessons the hard way, and I want to save you from the same fate!
- Using cold cream cheese: This is a big no-no! Cold cream cheese can lead to a lumpy dip that’s less than appetizing. Always remember to soften your cream cheese before mixing. A quick tip: leave it out at room temperature for about 30 minutes, or microwave it for 10-15 seconds if you’re in a hurry.
- Overbaking: It’s easy to get distracted while cooking, but overbaking can dry out your dip. Keep an eye on it and bake just until it’s bubbly and golden on top—usually around 25-30 minutes at 350°F (175°C).
- Not seasoning enough: A bland dip is a sad dip! Make sure to taste and adjust your spices as needed. Don’t be afraid to add a little more salt, pepper, or hot sauce to elevate the flavors.
- Using low-quality cheese: The quality of your cheese can make or break this dip. Opt for good quality cheese for the best flavor and texture. Trust me, it’s worth the extra few bucks!
- Skipping the hot sauce: Hot sauce is essential for adding that kick of flavor. If you’re not a fan of heat, you can adjust the amount, but don’t skip it entirely. It’s what gives the dip its character!
- Not letting it cool: I know the temptation to dive right in is strong, but serving immediately can lead to burns. Allow the dip to cool for a few minutes before serving. Your taste buds will thank you!
- Not mixing thoroughly: Uneven flavor is a common issue if you don’t mix well. Make sure all ingredients are well combined for a consistent taste throughout the dip.
By avoiding these common mistakes, you’ll be well on your way to creating a Baked Chicken Cheese Dip that’s creamy, cheesy, and utterly delicious. Now, let’s explore some creative variations and customizations to make this dip your own!
Creative Variations & Customizations
One of the best things about this Baked Chicken Cheese Dip is its versatility! You can easily customize it to suit your taste preferences or dietary needs. Here are some creative variations that will keep your dip exciting and fresh:
- Buffalo Chicken Dip: For those who crave a little extra heat, simply add more hot sauce and crumble in some blue cheese. This spicy twist will take your dip to the next level, making it a favorite for any game day gathering!
- Vegetarian Version: If you’re looking for a meatless option, substitute the chicken with 1 can of black beans or 1 can of chickpeas. This not only makes the dip vegetarian-friendly but also adds a hearty texture that everyone will enjoy.
- Seasonal Spin: Embrace the flavors of the season by incorporating roasted vegetables like zucchini or butternut squash. These additions not only enhance the flavor but also add a beautiful color to your dip!
- Cheesy Spinach Dip: For a nutritious boost, fold in 1 cup of fresh or frozen spinach before baking. This variation adds a lovely green hue and a wealth of vitamins, making it a guilt-free indulgence.
- Southwestern Style: Mix in 1 cup of corn and 1 can of black beans for a Tex-Mex flair. This combination brings a delightful sweetness and a hearty texture that pairs perfectly with the creamy base.
Feel free to experiment with these variations or come up with your own! The beauty of this Baked Chicken Cheese Dip is that it can be tailored to fit any occasion or palate. So, get creative and make it your own!
Perfect Pairings: What to Serve With Baked Chicken Cheese Dip
Now that you’ve whipped up a delicious Baked Chicken Cheese Dip, it’s time to think about what to serve alongside it. The right accompaniments can elevate your dip experience, creating a delightful spread that will impress your guests. Here are some perfect pairings that complement the creamy, cheesy goodness of your dip:
- Tortilla Chips: The classic choice! Their crunchy texture provides a delightful contrast to the creamy dip, making each bite a satisfying experience. Plus, they’re perfect for scooping!
- Sliced Vegetables: For a healthier option, serve with fresh veggies like carrots and celery. Their crispness adds a refreshing crunch that balances the richness of the dip.
- Toasted Baguette Slices: Elevate your dip to gourmet status by serving it with toasted baguette slices. The warm, crusty bread is perfect for spreading the dip and adds a touch of elegance to your gathering.
- Baked Potatoes: Get creative and use the dip as a filling for baked potatoes. This hearty option transforms your dip into a satisfying meal that’s perfect for a cozy night in.
- Crackers: A variety of crackers make for a great addition to your spread. They’re easy to grab and pair wonderfully with the creamy dip, making them a hit at parties and gatherings.
- Additional Cheese: For the ultimate cheese lover, top your dip with more cheese before baking for a cheesy crust. This extra layer of melted goodness will have everyone coming back for seconds!
- Guacamole: Add a flavor explosion by serving your dip alongside guacamole. The creamy avocado dip complements the flavors of the chicken cheese dip beautifully, creating a delicious contrast.
- Light Beer or White Wine: Refreshing beverages like a light beer or a crisp white wine enhance the flavors of the dip. They provide a perfect balance to the richness, making your gathering even more enjoyable.
With these pairings, your Baked Chicken Cheese Dip will shine even brighter, creating a memorable experience for you and your guests. So, gather your friends, pour some drinks, and enjoy the deliciousness together!
Storage & Meal Prep Instructions
Now that you’ve created a delicious Baked Chicken Cheese Dip, it’s important to know how to store and reheat it properly to maintain its creamy, cheesy goodness. Whether you have leftovers or want to prepare it in advance, these tips will ensure your dip stays fresh and flavorful!
Fridge Storage
After your gathering, if you find yourself with any leftover dip (which is rare, but it happens!), simply transfer it to an airtight container. This will keep it fresh for up to 3 days in the refrigerator. Just make sure to let it cool completely before sealing it up to avoid condensation, which can make the dip watery.
Freezer Storage
If you want to prepare your Baked Chicken Cheese Dip ahead of time, you can freeze it! Place the dip in a suitable freezer-safe container, ensuring it’s tightly sealed to prevent freezer burn. It can be stored for up to 2 months. When you’re ready to enjoy it, simply thaw it in the fridge overnight before reheating.
Reheating Methods
To reheat your dip, you have a couple of options:
- Oven: Preheat your oven to 350°F (175°C). Transfer the dip to an oven-safe dish and warm it until heated through, about 15-20 minutes. This method helps maintain the creamy texture and ensures it’s evenly heated.
- Microwave: If you’re short on time, you can microwave the dip in short intervals. Start with 30 seconds, then stir and continue heating in 15-second increments until warmed through. Just be careful not to overheat, as this can cause the dip to become rubbery.
With these storage and reheating tips, you can enjoy your Baked Chicken Cheese Dip even after the party is over. Whether you’re savoring leftovers or preparing it in advance, you’ll always have a delicious, creamy treat ready to go!
Nutrition Facts & Health Insights
As we indulge in the creamy goodness of this Baked Chicken Cheese Dip, it’s important to consider the nutritional aspects that come with it. This dip not only satisfies your cravings but also provides some valuable nutrients. Here’s a closer look at the nutrition facts:
Nutrition Table
| Nutrient | Amount per Serving (1/2 cup) |
|---|---|
| Calories | 300 |
| Sugar | 2 grams |
| Sodium | 600 milligrams |
| Fat | 20 grams |
| Saturated Fat | 10 grams |
| Unsaturated Fat | 8 grams |
| Trans Fat | 0 grams |
| Carbohydrates | 6 grams |
| Fiber | 1 gram |
| Protein | 20 grams |
| Cholesterol | 60 milligrams |
Health Benefits
This Baked Chicken Cheese Dip is not just a delicious treat; it also packs a nutritional punch! The protein content from the chicken and cheese makes it a satisfying option that can help keep you full and energized. Each serving provides:
- High Protein: With 20 grams of protein per serving, this dip is a great source of energy, making it perfect for active individuals or those looking to maintain muscle mass.
- Calcium Boost: The combination of cream cheese, cheddar, and mozzarella contributes to your daily calcium intake, supporting bone health.
- Vegetable Goodness: The addition of green onions and red bell peppers not only enhances the flavor but also adds vitamins and minerals, including vitamin C and fiber, which are essential for overall health.
So, while you enjoy this creamy, cheesy delight, you can feel good knowing that it offers some nutritional benefits too. It’s the perfect balance of indulgence and nourishment!
Frequently Asked Questions
As you embark on your journey to create the perfect Baked Chicken Cheese Dip, you might have a few questions along the way. Don’t worry; I’ve got you covered! Here are some of the most common queries I’ve encountered, along with helpful answers to guide you:
1. Can I use rotisserie chicken instead of cooking my own?
Absolutely! Using rotisserie chicken is a fantastic time-saver and adds great flavor to your dip. Just shred the chicken and mix it in as you would with any cooked chicken. It’s a win-win!
2. What can I substitute for cream cheese?
If you’re looking for a lighter option, you can substitute cream cheese with Greek yogurt or cottage cheese. Both will give you a creamy texture, though the flavor will be slightly different. Just make sure to blend them well for a smooth consistency!
3. How do I adjust the spice level?
Adjusting the spice level is easy! Simply increase or decrease the amount of hot sauce based on your preference. If you want to add more heat, consider mixing in some finely chopped jalapeños or a dash of cayenne pepper. Taste as you go to find your perfect balance!
4. Can I make this dip in advance?
Yes, you can! Prepare the dip a day ahead by mixing all the ingredients and transferring them to a baking dish. Cover it tightly with plastic wrap and refrigerate. When you’re ready to serve, just pop it in the oven and bake as directed. It’s a great way to save time on the day of your gathering!
5. What’s the best way to reheat leftovers?
The best way to reheat your Baked Chicken Cheese Dip is in the oven. Preheat it to 350°F (175°C), transfer the dip to an oven-safe dish, and warm it for about 15-20 minutes until heated through. You can also use the microwave, heating in short intervals, but the oven helps maintain that creamy texture.
6. Is there a gluten-free option for the chips?
Absolutely! Many brands offer gluten-free tortilla chips that pair perfectly with this dip. Just check the packaging to ensure they meet your dietary needs. You can also serve the dip with fresh veggies or gluten-free crackers for a delicious alternative!
7. How long can I store the dip in the fridge?
You can store your Baked Chicken Cheese Dip in an airtight container in the fridge for up to 3 days. Just make sure it’s cooled completely before sealing it up to keep it fresh!
8. Can I freeze the dip before baking?
Yes, you can freeze the dip before baking! Just transfer it to a freezer-safe container, seal it tightly, and it can be stored for up to 2 months. When you’re ready to enjoy it, thaw it in the fridge overnight and bake as directed. It’s a great way to have a delicious dip ready to go at a moment’s notice!
With these FAQs answered, you’re well-equipped to tackle any challenges that may arise while making your Baked Chicken Cheese Dip. Now, let’s get cooking and create something truly delicious!
Final Inspiration & Kitchen Confidence
As you wrap up your culinary adventure with this Baked Chicken Cheese Dip, remember that cooking is not just about following a recipe; it’s a journey of creativity and joy. Each time you step into the kitchen, you have the opportunity to express yourself, experiment with flavors, and create something truly special. Embrace the process, and don’t be afraid to make it your own!
Celebrate your achievements, no matter how big or small! Whether you nailed the perfect cheese pull or discovered a new flavor combination, take a moment to appreciate your hard work. And don’t keep your delicious creations to yourself—share them with friends and family! There’s nothing quite like the joy of gathering around a table, enjoying good food, and making memories together.
So, I invite you to try this Baked Chicken Cheese Dip recipe and let your taste buds embark on a delightful journey. I’d love to hear about your experiences, any variations you’ve tried, or even your own personal twists on this classic dip. Share your stories, and let’s inspire each other to keep cooking and creating in the kitchen!
Print
Baked Chicken Cheese Dip: Creamy, Cheesy, Irresistibly Delicious!
- Total Time: 45 minutes
- Yield: 8 servings
- Diet: Gluten-Free
Description
This Baked Chicken Cheese Dip is a creamy, cheesy delight that tantalizes your taste buds with every bite. The smooth texture, combined with the savory flavor of seasoned chicken and melted cheese, creates an irresistible dip perfect for any gathering.
Ingredients
- Chicken: 2 cups cooked, shredded chicken
- Cheese: 1 cup cream cheese, softened; 1 cup shredded cheddar cheese; 1 cup shredded mozzarella cheese
- Vegetables: 1/2 cup diced green onions; 1/2 cup diced red bell pepper
- Condiments: 1/2 cup sour cream; 1/4 cup hot sauce (adjust to taste)
- Spices: 1 teaspoon garlic powder; 1 teaspoon onion powder; 1/2 teaspoon salt; 1/2 teaspoon black pepper
Instructions
- Preheat your oven to 350°F (175°C).
- In a large mixing bowl, combine the shredded chicken, cream cheese, sour cream, and hot sauce until smooth.
- Add the shredded cheddar and mozzarella cheeses, diced green onions, red bell pepper, garlic powder, onion powder, salt, and black pepper. Mix until well combined.
- Transfer the mixture to a greased baking dish and spread it evenly.
- Bake in the preheated oven for 25-30 minutes, or until the dip is bubbly and golden on top.
- Remove from the oven and let it cool for a few minutes before serving.
Notes
- This dip can be made ahead of time and stored in the refrigerator for up to 2 days before baking.
- Store leftovers in an airtight container in the fridge for up to 3 days.
- For a lighter version, substitute Greek yogurt for sour cream.
- Prep Time: 15 minutes
- Cook Time: 30 minutes
- Category: appetizers
- Method: baking
- Cuisine: American
Nutrition
- Serving Size: 1/2 cup
- Calories: 300
- Sugar: 2 grams
- Sodium: 600 milligrams
- Fat: 20 grams
- Saturated Fat: 10 grams
- Unsaturated Fat: 8 grams
- Trans Fat: 0 grams
- Carbohydrates: 6 grams
- Fiber: 1 gram
- Protein: 20 grams
- Cholesterol: 60 milligrams
Keywords: Baked Chicken Cheese Dip, creamy dip, cheese dip recipe, party appetizer, easy dip, chicken dip, baked dip, cheesy appetizer, comfort food, game day snack, gluten-free dip, savory dip, crowd-pleaser


