
Introduction to Bannock Bread
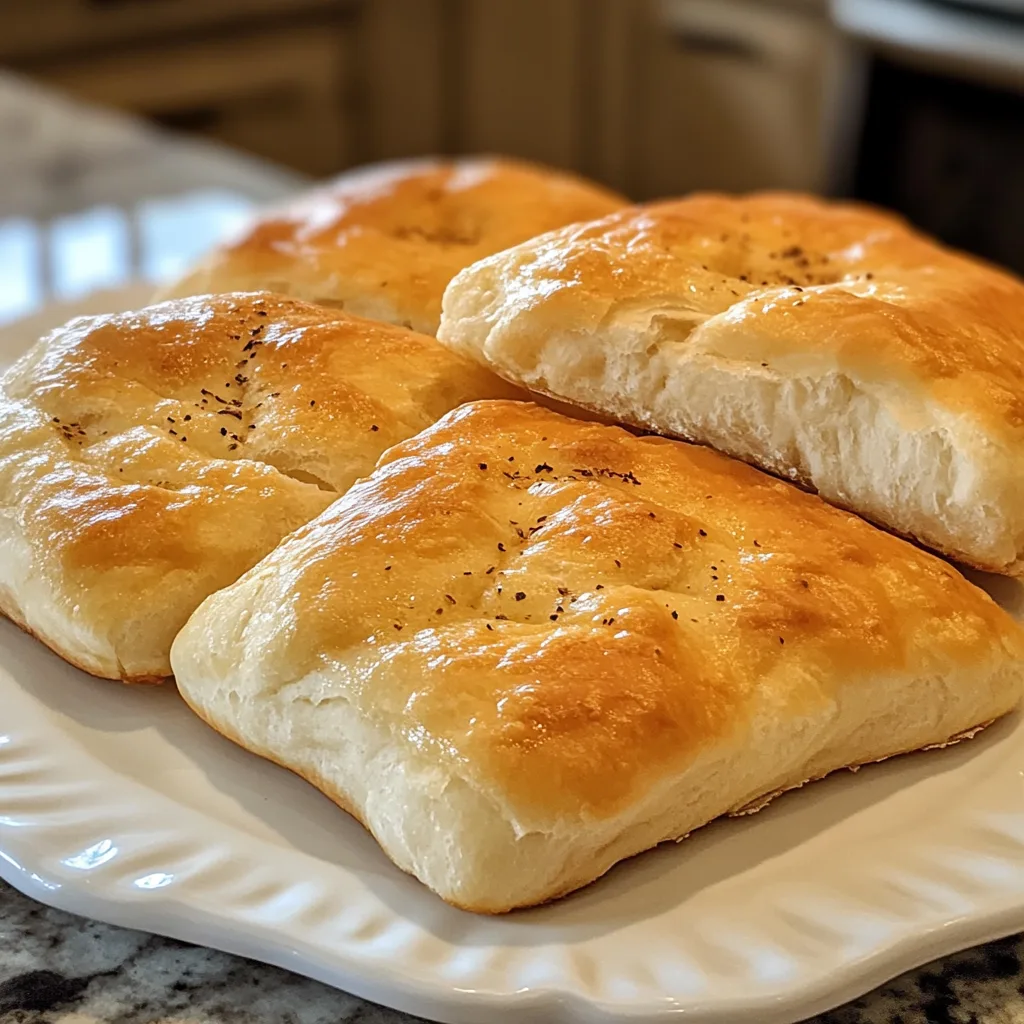
As a passionate home cook, I love discovering recipes that not only taste amazing but also carry a rich history. Bannock Bread is one such gem. This traditional Indigenous bread is not just a quick solution for a busy day; it’s a delightful way to connect with culture and family. Imagine the warm, comforting aroma wafting through your kitchen as you bake this simple yet flavorful loaf. Whether you’re looking to impress your loved ones or simply enjoy a slice with your morning coffee, Bannock Bread is sure to become a cherished favorite in your home.
Why You’ll Love This Bannock Bread
Bannock Bread is a true lifesaver for busy moms and professionals alike. It’s incredibly easy to whip up, taking just 35 minutes from start to finish. The taste? Oh, it’s wonderfully unique, with a slightly crispy crust and a soft, fluffy interior. Plus, it’s versatile! You can enjoy it plain, with butter, or even jazz it up with herbs. Trust me, this bread will quickly become a staple in your kitchen!
Ingredients for Bannock Bread
Gathering the right ingredients is the first step to creating your delicious Bannock Bread. Here’s what you’ll need:
- All-purpose flour: This is the base of your bread, providing structure and texture. You can substitute with whole wheat flour for a nuttier flavor.
- Baking powder: This leavening agent helps the bread rise, giving it that lovely fluffy texture. Make sure it’s fresh for the best results!
- Salt: A pinch of salt enhances the flavors, balancing the sweetness of the bread. You can use sea salt or kosher salt, depending on your preference.
- Sugar: Just a touch of sugar adds a hint of sweetness. If you’re watching your sugar intake, feel free to reduce the amount or use a sugar substitute.
- Vegetable oil: This adds moisture and richness to the dough. You can swap it for melted butter or olive oil for a different flavor profile.
- Water: The binding agent that brings everything together. Use warm water to help activate the baking powder.
For those who like to experiment, consider adding herbs like rosemary or spices like garlic powder for an extra kick. You can find the exact quantities for each ingredient at the bottom of the article, ready for printing!

How to Make Bannock Bread
Now that you have your ingredients ready, let’s dive into the fun part—making your Bannock Bread! Follow these simple steps, and you’ll have a delicious loaf in no time.
Step 1: Preheat the Oven
First things first, preheat your oven to 400°F (200°C). This step is crucial because it ensures that your bread bakes evenly. A hot oven helps create that beautiful golden crust we all love. So, don’t skip this step!
Step 2: Mix Dry Ingredients
In a large bowl, combine the all-purpose flour, baking powder, salt, and sugar. Use a whisk or fork to mix them well. This helps distribute the baking powder evenly, ensuring your bread rises beautifully. It’s like giving your dry ingredients a little dance party!
Step 3: Add Wet Ingredients
Next, pour in the vegetable oil and water. The oil adds moisture, while the water helps bind everything together. Mix until a dough forms. Don’t worry if it looks a bit shaggy at first; it will come together as you knead.
Step 4: Knead the Dough
Now, it’s time to knead! Dust your countertop with a little flour and turn out the dough. Knead it gently for about 5 minutes until it’s smooth and elastic. This step is key for developing the right texture. Think of it as giving your dough a little workout!
Step 5: Shape the Dough
Shape your dough into a round loaf. This doesn’t have to be perfect; just make sure it’s even. The shape matters because it affects how the bread bakes. A round loaf will cook more evenly, giving you that lovely crust all around.
Step 6: Bake the Bread
Place your shaped dough on a baking sheet and pop it into the preheated oven. Bake for 20-25 minutes, or until it’s golden brown. To check for doneness, tap the bottom of the loaf; it should sound hollow. This is the moment you’ve been waiting for!
Step 7: Cool and Serve
Once baked, remove the bread from the oven and let it cool for a few minutes. This is important! Cooling allows the steam to escape, preventing a soggy loaf. After a short wait, slice it up and enjoy your homemade Bannock Bread!
Tips for Success
- Always measure your flour correctly; too much can lead to dense bread.
- Use warm water to help activate the baking powder for a better rise.
- Don’t over-knead the dough; just enough to make it smooth is perfect.
- Experiment with flavors by adding herbs or spices to the dough.
- Store leftover bread in an airtight container to keep it fresh longer.
Equipment Needed
- Mixing bowl: A large bowl for combining ingredients. A sturdy pot can work in a pinch.
- Whisk or fork: For mixing dry ingredients. A spoon will do if that’s all you have.
- Baking sheet: To bake your bread. A cast-iron skillet is a great alternative.
- Oven: Essential for baking. If you don’t have one, try using a stovetop griddle.
Variations of Bannock Bread
- Herb-Infused Bannock: Add fresh or dried herbs like rosemary, thyme, or oregano to the dough for a fragrant twist.
- Cheesy Bannock: Mix in shredded cheese, such as cheddar or mozzarella, for a savory, gooey delight.
- Sweet Bannock: Incorporate cinnamon and raisins or chocolate chips for a sweet treat that pairs perfectly with coffee.
- Gluten-Free Bannock: Substitute all-purpose flour with a gluten-free blend to accommodate dietary needs.
- Spicy Bannock: Add a pinch of cayenne pepper or chopped jalapeños for a kick of heat.
Serving Suggestions for Bannock Bread
- Spread it: Serve warm with butter, honey, or your favorite jam for a delightful treat.
- Pair it: Enjoy with a hearty soup or stew for a comforting meal.
- Presentation: Slice the bread and arrange it on a rustic wooden board for a charming display.
- Drink it: Complement with a cup of herbal tea or a rich coffee for a cozy afternoon snack.
FAQs about Bannock Bread
As you embark on your Bannock Bread journey, you might have a few questions. Here are some common queries I’ve encountered, along with helpful answers to guide you.
Can I make Bannock Bread ahead of time?
Absolutely! You can prepare the dough in advance and store it in the fridge for up to 24 hours. Just let it come to room temperature before baking. This is a great time-saver for busy days!
What can I serve with Bannock Bread?
Bannock Bread pairs wonderfully with soups, stews, or even as a side for breakfast with eggs. You can also enjoy it with butter, jam, or honey for a sweet treat.
Can I freeze Bannock Bread?
Yes, you can freeze it! Once cooled, wrap the bread tightly in plastic wrap and then in aluminum foil. It can last up to three months in the freezer. Just thaw and reheat when you’re ready to enjoy!
Is Bannock Bread suitable for a gluten-free diet?
Yes! You can easily make a gluten-free version by substituting all-purpose flour with a gluten-free flour blend. Just ensure that your baking powder is also gluten-free.
What makes Bannock Bread unique?
Bannock Bread is unique due to its rich Indigenous history and its versatility. It can be baked or fried, and you can customize it with various flavors, making it a delightful addition to any meal.
Final Thoughts
Bannock Bread is more than just a recipe; it’s a warm embrace from the past, connecting us to traditions and stories. Each bite is a reminder of the joy that comes from sharing food with loved ones. Whether you’re enjoying it fresh from the oven or experimenting with flavors, this bread brings a sense of comfort and satisfaction. I hope you find as much joy in making and sharing Bannock Bread as I do. So, roll up your sleeves, gather your ingredients, and let the delightful aroma fill your home. Happy baking!
Print
Bannock Bread: Discover Its Unique Taste and History!
- Total Time: 35 minutes
- Yield: 1 loaf 1x
- Diet: Vegetarian
Description
Bannock Bread is a traditional Indigenous bread known for its unique taste and historical significance.
Ingredients
- 2 cups all-purpose flour
- 1 tablespoon baking powder
- 1 teaspoon salt
- 2 tablespoons sugar
- 2 tablespoons vegetable oil
- 3/4 cup water
Instructions
- Preheat your oven to 400°F (200°C).
- In a large bowl, mix together the flour, baking powder, salt, and sugar.
- Add the vegetable oil and water, mixing until a dough forms.
- Knead the dough on a floured surface for a few minutes until smooth.
- Shape the dough into a round loaf and place it on a baking sheet.
- Bake in the preheated oven for 20-25 minutes or until golden brown.
- Let it cool slightly before slicing and serving.
Notes
- Bannock can be fried instead of baked for a different texture.
- Feel free to add herbs or spices for additional flavor.
- Serve with butter, jam, or your favorite spread.
- Prep Time: 10 minutes
- Cook Time: 25 minutes
- Category: Bread
- Method: Baking
- Cuisine: Indigenous
Nutrition
- Serving Size: 1 slice
- Calories: 150
- Sugar: 1g
- Sodium: 200mg
- Fat: 5g
- Saturated Fat: 1g
- Unsaturated Fat: 4g
- Trans Fat: 0g
- Carbohydrates: 24g
- Fiber: 1g
- Protein: 3g
- Cholesterol: 0mg
Keywords: Bannock Bread, Indigenous bread, traditional bread, baking


