There’s a magic that happens in the kitchen, an invigorating alchemy of scents and textures that enthralls your senses and awakens cherished memories. Picture this: the warm aroma of freshly melted butter wafts through the air, mingling beautifully with the deep, caramelly sweetness of brown sugar and the inviting scent of vanilla. As you whisk ingredients together, the thick batter becomes almost velvety, promising a decadent experience that’s both comforting and indulgent.
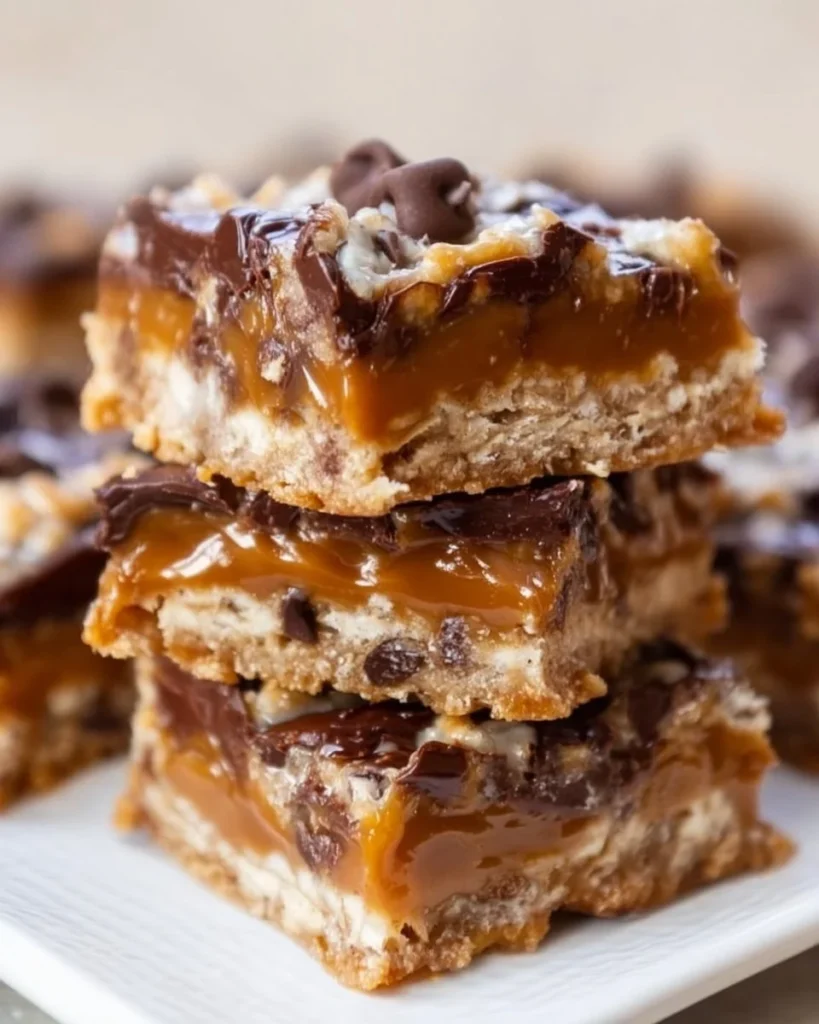
What awaits you is something truly special—Carmelites. These delightful bars layer rich caramel and gooey chocolate amidst a crunchy oat crust, creating an irresistible contrast that’s impossible to resist. Each bite delivers a harmonious blend of flavors, from the nutty undertones of whole-rolled oats to the smoothness of chocolate, all brought together by the luxurious sweetness of caramel. Picture the sound of your knife slicing through the crisp edge, only to reveal a chewy center that feels like a warm hug in your mouth. You’ll marvel at how the delightful crunch gives way to a melty, gooey core, leaving you yearning for just one more piece.
When you share Carmelites with friends or family, you pass around more than just a dessert—you gift them an experience. These bars capture the essence of celebration and comfort, perfect for everything from cozy family nights to festive gatherings. One bite will transport you to that warm kitchen, where the love and joy of baking are ever-present in every crumb.
Why You’ll Love This Recipe
Carmelites enchant with their luscious layers and satisfying textures. The combination of buttery oats, gooey caramel, and rich chocolate creates a symphony of flavors that dance on your palate. These bars stand out enough to be the star of any dessert table and yet are simple enough for a casual weeknight treat. Their sticky sweetness makes them highly shareable, perfect for potlucks or weekend gatherings. With every chewy bite, the balance of crunch and creaminess beckons you to indulge further.
Moreover, these bars can easily please various palates. With subtle tweaks, you can transform them to suit any occasion or dietary need. You might even find they become a cherished family tradition, with everyone clamoring for the first slice as soon as they see the tantalizing layers coming together.
Preparation Phase & Tools to Use
To embark on your journey to make these irresistible Carmelites, gather the following essential tools. Each one plays a pivotal role in ensuring your baking venture not only goes smoothly but delivers the mouthwatering results you desire.
- 8×8-inch baking pan: Essential for the perfect thickness of your bars. A sturdy pan allows for even baking and easy removal.
- Aluminum foil: Line your pan with foil for effortless removal and cleanup. The stickiness of caramel can be daunting, so this little trick saves you time and frustration.
- Microwave-safe mixing bowls: Useful for melting your butter and caramels evenly. A large bowl gives you ample space for mixing.
- Whisk and spatula: A whisk blends the ingredients into a smooth batter while a spatula helps to evenly distribute the mixture in the pan.
- Parchment paper (optional): If you prefer not using foil, parchment provides a non-stick surface and helps maintain the bars’ shape.
Preparation tips:
- Gather your ingredients before starting to avoid running around the kitchen mid-recipe.
- For optimal results, allow butter to cool for a minute after melting before whisking in the other ingredients.
Ingredients for Carmelites
A simple yet effective list of ingredients transforms into a delightful blend of sensations each time you prepare Carmelites.
- 3/4 cup unsalted butter (melted): This creates a rich base that beautifully melds with the other components. You can substitute for salted butter if preferred, but be mindful of your salt adjustments.
- 3/4 cup light brown sugar (packed): This ingredient is key to achieving that luscious caramel note. Dark brown sugar will deepen the flavor if you desire a more robust taste.
- 1 tablespoon vanilla extract: Adds warmth and depth, balancing the sweetness of the other ingredients.
- 1 cup all-purpose flour: The foundation that holds these bars together, ensuring they bake nicely.
- 1 cup whole-rolled old-fashioned oats: Their texture provides a lovely chewiness that contrasts beautifully with the smooth caramel and chocolate.
- 1 teaspoon baking soda: A must for leavening, allowing the bars to rise just slightly.
- 1/2 teaspoon salt: Highlights sweetness and creates a well-rounded taste. You can adjust to your preference.
- 35 caramel squares: The heart of the recipe, bringing that iconic sticky sweetness. You can use store-bought caramel candies or homemade caramel, depending on your ambitions.
- 1/2 cup heavy cream: For a silky caramel sauce that coats your chocolate and brings richness to the bars.
- 1 cup semi-sweet chocolate chips or chunks: If you desire an extra touch of indulgence, mix dark and milk chocolate varieties.
How to Make Carmelites
Begin your Carmelites adventure with a preheated oven, ready to transform your ingredients into delectable treats.
-
Preheat your oven to 350°F. Prepare your pan by lining an 8×8-inch dish with aluminum foil, leaving some overhang for easy removal. Spray the foil lightly with cooking spray to prevent sticking.
-
In a large microwave-safe mixing bowl, add the melted butter. Heat on high power for about 90 seconds until fully melted and bubbling.
-
Whisk in the brown sugar and vanilla extract until the mixture becomes smooth and velvety.
-
Add flour, oats, baking soda, and a pinch of salt to the bowl. Stir until combined, noticing how the batter thickens.
-
Spread half of the mixture (approximately half) into the bottom of your prepared pan. Use a spatula or the back of a spoon to create an even, flat layer.
-
Bake this layer for 10 minutes. As it bakes, transition to making your caramel sauce.
-
In another large microwave-safe mixing bowl, combine the caramels and heavy cream along with a pinch of salt. Heat on high power in 60-second bursts, stirring after each burst. It will take around 4 to 5 minutes. You want it to be smooth and creamy.
-
After your crust has baked, remove it from the oven and sprinkle chocolate chips evenly across the warm layer.
-
Pour the caramel sauce slowly and evenly over the chocolate, creating a gooey layer that adds to the excitement.
-
Crumble the reserved oat mixture over the top, ensuring you cover the caramel evenly.
-
Return the pan to the oven and bake for an additional 15 to 18 minutes until the edges turn lightly golden and the center bubbles.
-
Let the bars cool completely in the pan before slicing. This crucial step helps the caramel firm up. If you’re in a hurry, place them in the fridge for a quick chill, covered with foil to avoid any strange odors.
Chef’s Notes & Helpful Tips:
- Make-Ahead Tips: Prepare the caramel layer ahead and refrigerate. You can assemble and bake when ready.
- Cooking Alternatives: An air fryer can produce equally delicious results. Keep an eye on them, adjusting baking time as necessary.
- Customization Ideas: Feel free to add nuts, like pecans or walnuts, for added texture, or drizzle melted chocolate over the top!
Common Mistakes to Avoid
Even the best of us can stumble in the kitchen. Here are common pitfalls you should steer clear of while making Carmelites:
- Skipping the cooling time: If you cut the bars too early, the caramel will ooze out, ruining the aesthetics and making a sticky mess. Patience is key!
- Not lining the pan: Trying to remove sticky bars from an unlined pan can lead to disaster. Use foil or parchment for effortless removal.
- Heating the caramel too quickly: Melting the caramels too fast can cause them to seize. Stick to microwave bursts or medium-low stovetop heat for a gentle touch.
- Using quick-cooking oats: Whole rolled oats provide the necessary texture and chewiness. Quick oats will not yield the same delicious result.
What to Serve With Carmelites
These delightful bars shine on their own, but pairing them with complementary treats can elevate your dessert experience:
- Vanilla Ice Cream: The creamy richness balances the bar’s sweetness, while the cold temperature offers a pleasing contrast.
- Coffee or Espresso: A steaming cup of coffee brings out the rich flavors of caramel and chocolate, making it the perfect companion.
- Fresh Berries: The tartness of strawberries, raspberries, or blueberries adds a refreshing touch to cut through the sweetness.
- Whipped Cream: A dollop of freshly whipped cream adds an airy creaminess, enhancing the entire dessert experience.
- Chocolate Sauce: Drizzle over the top for the ultimate indulgence—chocolate on chocolate is always a winning combination.
- Crushed Nuts: Sprinkle chopped nuts on top for a crunch factor and an added layer of flavor and texture.
- Milk: A classic pairing; the creamy sweetness of milk enriches every bite.
Storage & Reheating Instructions
To savor these bars beyond a single day, follow these storage tips:
- Refrigerator: Store in an airtight container for up to a week. The cold can enhance the caramel’s texture, making them even more delightful.
- Freezer: You can freeze the bars for up to three months. Just cut them into squares, layer with parchment paper, and place them in an airtight freezer bag.
- Reheating: When ready to enjoy, let them defrost at room temperature or pop them in the microwave for a few seconds to enjoy them warm and gooey again!
Estimated Nutrition Information
While you delve into the bliss of Carmelites, be aware of their decadent nature. These numbers are estimates and may vary based on your specific ingredients and serving sizes:
- Calories: Approximately 250 per bar
- Total Fat: 14g
- Saturated Fat: 9g
- Cholesterol: 35mg
- Sodium: 125mg
- Carbohydrates: 30g
- Fiber: 1g
- Sugar: 20g
- Protein: 2g
FAQs
Can I make Carmelites gluten-free?
Absolutely! Substitute all-purpose flour with your favorite gluten-free flour blend, and ensure that your caramel squares are gluten-free.
How long do Carmelites keep?
These bars keep well in an airtight container in the refrigerator for up to a week, but they’re sure to be devoured long before that!
Can I use store-bought caramel sauce instead of squares?
You can! Heat the sauce together with heavy cream until it’s smooth. Just be cautious of the consistency, as it may be more runny than melted squares.
Is it necessary to wait for the bars to cool completely?
Yes! Waiting allows the caramel to firm up for neat slicing. Cutting too soon results in a gooey mess.
Can I make these in a larger pan?
Yes, just remember to adjust the baking time accordingly. A larger pan will yield thinner bars with quicker baking times.
Conclusion
With their irresistible blend of flavors and textures, Carmelites promise to enchant anyone lucky enough to taste them. The warmth of melted caramel alongside the crunch of oats brings together a comforting experience reminiscent of cherished moments spent in the kitchen. Give in to the temptation, and dive into making a batch today. Whether for a festive gathering or a cozy evening at home, the joy of enjoying these delicious bars will have everyone asking for the recipe. Don’t let another day pass without experiencing the bliss of Carmelites—your taste buds will thank you!
Print
Carmelites
- Total Time: 45 minutes
- Yield: 16 servings 1x
- Diet: Vegetarian
Description
Deliciously layered bars of rich caramel and chocolate atop a crunchy oat crust, perfect for any occasion.
Ingredients
- 3/4 cup unsalted butter (melted)
- 3/4 cup light brown sugar (packed)
- 1 tablespoon vanilla extract
- 1 cup all-purpose flour
- 1 cup whole-rolled old-fashioned oats
- 1 teaspoon baking soda
- 1/2 teaspoon salt
- 35 caramel squares
- 1/2 cup heavy cream
- 1 cup semi-sweet chocolate chips or chunks
Instructions
- Preheat your oven to 350°F. Prepare your pan by lining an 8×8-inch dish with aluminum foil, leaving some overhang for easy removal.
- Spray the foil lightly with cooking spray to prevent sticking.
- In a large microwave-safe mixing bowl, add the melted butter, heat on high for about 90 seconds until fully melted.
- Whisk in the brown sugar and vanilla extract until smooth.
- Add flour, oats, baking soda, and salt to the bowl, stir until combined.
- Spread half of the mixture into the bottom of your prepared pan.
- Bake this layer for 10 minutes.
- In another bowl, combine the caramels and heavy cream, heat in 60-second bursts until smooth.
- After crust has baked, sprinkle chocolate chips over the warm layer.
- Pour caramel sauce over the chocolate.
- Crumble remaining oat mixture on top.
- Return to the oven and bake for an additional 15 to 18 minutes.
- Let the bars cool completely before slicing.
Notes
For best results, refrigerate after making and allow to cool fully before cutting. You can customize these bars by adding nuts or drizzling chocolate on top.
- Prep Time: 15 minutes
- Cook Time: 28 minutes
- Category: Dessert
- Method: Baking
- Cuisine: American
Nutrition
- Serving Size: 1 bar
- Calories: 250
- Sugar: 20g
- Sodium: 125mg
- Fat: 14g
- Saturated Fat: 9g
- Unsaturated Fat: 5g
- Trans Fat: 0g
- Carbohydrates: 30g
- Fiber: 1g
- Protein: 2g
- Cholesterol: 35mg
Keywords: Carmelites, dessert bars, chocolate, caramel, baking


