Sensory-Rich Introduction with Immediate Craving
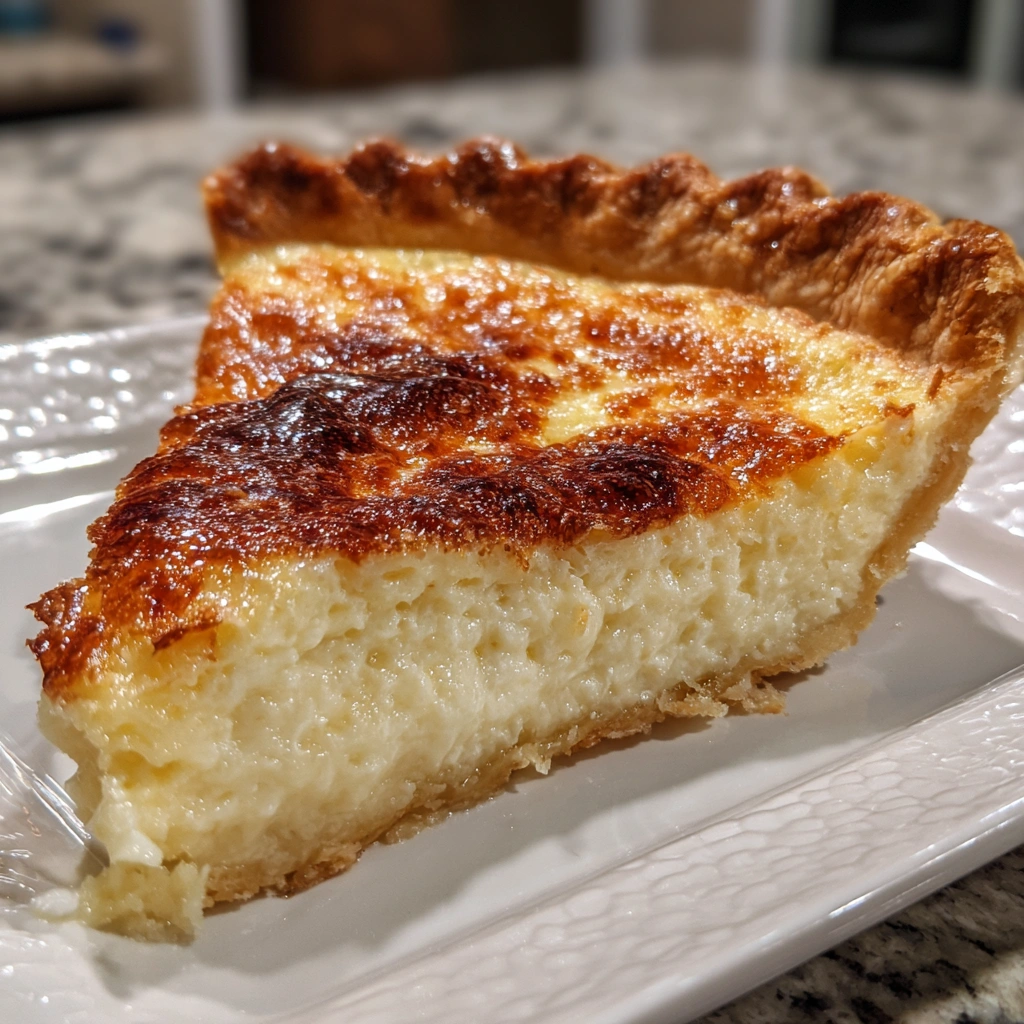
Imagine walking into a kitchen filled with the warm, inviting aroma of freshly baked pie. The golden crust, perfectly flaky and slightly crisp, cradles a creamy filling that glistens with a hint of sweetness. As you take a slice, the first bite reveals a delightful contrast of textures—the buttery crust giving way to the velvety smoothness of the ricotta and cream cheese filling. It’s a slice of nostalgia that transports you back to carefree school days, where this pie was a cherished treat shared among friends during lunch breaks.
Growing up, my friends and I would eagerly await the days when our lunchboxes included a slice of this Homemade School Cheese Pie. It was more than just a dessert; it was a symbol of comfort and joy, a sweet reminder of the simple pleasures in life. I can still hear the laughter echoing in the cafeteria as we swapped stories and savored each bite, the creamy filling melting in our mouths, leaving us with smiles that lingered long after the last crumb was gone.
This pie is not just a dessert; it’s a warm embrace, a taste of home that evokes feelings of nostalgia and comfort. Whether it’s a family gathering, a potluck with friends, or a special treat for the kids after school, this Homemade School Cheese Pie is the perfect addition to any occasion. It brings people together, creating memories that are as sweet as the pie itself. So, let’s roll up our sleeves and get started on this delightful journey of baking!
Why You’ll Love This Homemade School Cheese Pie
Let me tell you, this Homemade School Cheese Pie is a true gem in the world of desserts, and here’s why you’ll fall head over heels for it!
- Texture Contrast: The moment you take a bite, you’ll experience the delightful contrast between the flaky, buttery crust and the smooth, creamy filling. It’s like a little party in your mouth, where each texture plays its part perfectly!
- Flavor Balance: The filling strikes a harmonious balance between sweetness and a refreshing hint of tanginess from the lemon juice. It’s not overly sweet, making it a delightful treat that leaves you wanting more without feeling overwhelmed.
- Versatility: Whether you serve it warm, straight from the oven, or chilled after a few hours in the fridge, this pie adapts beautifully to any season. It’s just as comforting in the summer as it is in the winter, making it a year-round favorite.
- Ease of Preparation: With simple ingredients and straightforward steps, this recipe is accessible for all skill levels. Even if you’re a novice baker, you’ll find that making this pie is a breeze—no fancy techniques required!
- Universal Appeal: This pie is a crowd-pleaser, loved by both children and adults alike. It’s the kind of dessert that brings everyone together, making it the perfect addition to any gathering, from birthday parties to family dinners.
So, whether you’re reminiscing about school days or creating new memories with loved ones, this Homemade School Cheese Pie is sure to bring joy and satisfaction to your table!
Essential Tools & Preparation Strategy
Before diving into the delightful world of Homemade School Cheese Pie, let’s gather our trusty kitchen tools. Having the right equipment not only makes the process smoother but also enhances your baking experience. Trust me, a well-prepared kitchen is half the battle won!
- Mixing Bowls: Necessary for combining ingredients smoothly; opt for glass or stainless steel for durability. I always keep a set of various sizes handy, as they come in useful for everything from mixing to marinating.
- Pie Pan: A sturdy 9-inch pie pan is crucial for maintaining the pie’s shape during baking. I prefer a glass pan because it allows me to monitor the crust’s browning.
- Electric Mixer: Ensures a creamy, lump-free filling; a hand mixer can be a good alternative if you’re looking to save space. I remember my grandmother using a hand mixer, and it always felt like a workout!
- Measuring Cups and Spoons: Accurate measurements are key; consider using a kitchen scale for precision. Baking is a science, and precision is your best friend here.
- Rubber Spatula: Ideal for scraping down the sides of bowls and transferring filling without waste. I can’t tell you how many times I’ve saved a batch of batter with a good spatula!
- Fork: Used for pricking the crust to prevent bubbling; a pastry cutter can also be handy for mixing dough. It’s a simple tool, but it makes a world of difference in achieving that perfect crust.
- Cooling Rack: Essential for cooling the pie evenly after baking. I always let my pies cool on a rack to avoid sogginess; it’s a little trick I learned from my mom.
With these tools at your side, you’re ready to embark on your pie-making adventure. Remember, the kitchen is a place of joy and creativity, so don’t hesitate to make it your own!
Ingredients & Their Roles in This Homemade School Cheese Pie
Understanding the ingredients that go into your Homemade School Cheese Pie is key to mastering this delightful dessert. Each component plays a vital role, contributing to the overall flavor, texture, and success of the pie. Let’s break it down!
Crust Ingredients:
- All-purpose flour: This is the backbone of your crust, providing the necessary structure. It creates that flaky texture we all love, making each bite a delightful experience.
- Unsalted butter: Adds richness and flavor to the crust. The butter melts during baking, creating a tender, flaky texture that perfectly complements the creamy filling.
- Granulated sugar: Sweetens the crust just enough to balance the flavors. It also helps achieve that lovely golden color as it caramelizes during baking.
- Egg yolk: Acts as a binding agent, bringing the crust ingredients together. It also adds a touch of richness and helps with the overall structure.
- Cold water: Essential for forming the dough. It helps to hydrate the flour without melting the butter, ensuring a flaky crust.
Filling Ingredients:
- Ricotta cheese: The star of the filling! It provides a creamy texture and a mild flavor that serves as the perfect base for this pie.
- Cream cheese: Adds an extra layer of richness and smoothness to the filling. It helps create that velvety mouthfeel that makes each bite irresistible.
- Granulated sugar: Sweetens the filling, balancing the tanginess of the cheeses. It’s the secret ingredient that makes this pie a true dessert delight!
- Eggs: These act as a binder, providing structure to the filling. They help the pie set properly during baking, ensuring a perfect slice every time.
- Vanilla extract: Enhances the overall flavor profile, adding a warm, aromatic note that complements the sweetness of the filling.
- Lemon juice: Adds a refreshing tang that brightens the flavors. If you’re feeling adventurous, you can substitute it with lime juice for a zesty twist!
With these ingredients in hand, you’re well on your way to creating a Homemade School Cheese Pie that not only tastes amazing but also brings back those cherished memories of school days. Let’s get baking!
Step-by-Step Guide to Perfect Homemade School Cheese Pie
Now that we have our ingredients and tools ready, it’s time to roll up our sleeves and dive into the step-by-step process of creating this delightful Homemade School Cheese Pie. Follow along closely, and I promise you’ll be rewarded with a creamy, golden masterpiece that will have everyone asking for seconds!
- Preheat the oven: Start by preheating your oven to 350°F (175°C). This ensures that your pie bakes evenly and achieves that perfect golden crust.
- Make the crust: In a mixing bowl, combine 1 ½ cups all-purpose flour, ½ cup unsalted butter (softened), and ¼ cup granulated sugar until the mixture resembles coarse crumbs. Add 1 large egg yolk and 2-3 tablespoons cold water, mixing until a dough forms. Don’t overmix; we want a tender crust!
- Shape the crust: Press the dough into a 9-inch pie pan, evenly spreading it across the bottom and up the sides. Use your fingers to create a nice edge. Prick the bottom with a fork to prevent bubbling during baking.
- Bake the crust: Place the crust in the preheated oven and bake for 15 minutes or until it’s lightly golden. Once done, remove it from the oven and let it cool completely. This step is crucial to avoid a soggy bottom!
- Prepare the filling: In a large bowl, beat together 2 cups ricotta cheese, 1 cup cream cheese (softened), and ¾ cup granulated sugar until smooth and creamy. The aroma of the cheeses blending together is simply divine!
- Add the eggs: Incorporate 3 large eggs one at a time, mixing well after each addition. This helps to create a light and airy filling. Stir in 1 teaspoon vanilla extract and 1 tablespoon lemon juice for that perfect flavor balance.
- Fill the crust: Pour the creamy filling into the cooled crust, smoothing the top with a spatula. Take a moment to admire the beautiful contrast of the creamy filling against the golden crust!
- Bake the pie: Return the pie to the oven and bake for 40-45 minutes, or until the filling is set and the top is lightly golden. The center should slightly jiggle when shaken—this is a sign of a perfectly baked pie!
- Cool and chill: Allow the pie to cool at room temperature for a bit, then refrigerate for at least 2 hours before serving. This chilling time allows the flavors to meld beautifully and makes slicing easier.
And there you have it! A step-by-step guide to creating your very own Homemade School Cheese Pie. Each step is a building block towards a delicious dessert that’s sure to bring back fond memories and create new ones. Let’s get baking!
Chef’s Notes & Pro Tips for Flawless Results
As you embark on your journey to create the perfect Homemade School Cheese Pie, here are some invaluable tips and tricks I’ve gathered over the years. These insights will help you achieve a flawless pie that not only tastes amazing but also looks stunning!
- Make-ahead instructions: This pie can be prepared a day in advance, making it a fantastic option for busy schedules. Just bake it, let it cool, and refrigerate. The flavors deepen overnight, making it even more delicious!
- Storage: Keep any leftovers in an airtight container in the fridge for up to 3 days. Trust me, this pie is just as delightful the next day, and it’s perfect for a quick snack or dessert!
- Equipment recommendations: For quick and easy dough preparation, consider using a food processor. It saves time and ensures that your crust comes together effortlessly. Just pulse the ingredients until they resemble coarse crumbs, and you’re good to go!
- Customization options: Feel free to get creative! You can add chocolate chips or fresh fruit to the filling for a fun twist. I love tossing in some blueberries or raspberries for a burst of flavor and color. It’s a delightful surprise that elevates the classic recipe!
With these pro tips in your back pocket, you’re well-equipped to tackle any challenges that may arise in the kitchen. Remember, baking is as much about enjoying the process as it is about the final product. So, have fun, experiment, and let your creativity shine!
Avoid These Common Cooking Mistakes
Even the most seasoned bakers can run into a few hiccups when making a Homemade School Cheese Pie. To help you achieve that perfect creamy, golden delight, here are some common mistakes to watch out for, along with tips to avoid them. Trust me, learning from these will save you time and frustration!
- Overmixing the filling: This can lead to a dense texture that’s far from the creamy dream we’re aiming for. Mix just until combined; a few lumps are perfectly fine!
- Not cooling the crust: If you add the filling to a warm crust, you risk a soggy bottom. Always let the crust cool completely before pouring in that luscious filling.
- Baking at too high a temperature: This can cause the filling to crack, ruining the beautiful presentation. Stick to the recommended 350°F (175°C) for even baking.
- Not allowing the pie to chill: Chilling is crucial for the texture. Refrigerate for at least 2 hours to let the flavors meld and the filling set properly.
- Using cold ingredients: Cold dairy can lead to lumps in your filling. Make sure all your dairy ingredients are at room temperature for a smooth, creamy mixture.
- Skipping the pricking of the crust: This simple step prevents the crust from puffing up during baking. Always prick the bottom with a fork before it goes in the oven!
- Not measuring ingredients accurately: Baking is a science, and precise measurements are key to success. Use proper measuring tools to ensure your pie turns out just right.
By keeping these common pitfalls in mind, you’ll be well on your way to creating a Homemade School Cheese Pie that’s not only delicious but also visually stunning. Happy baking!
Creative Variations & Customizations
One of the beautiful things about Homemade School Cheese Pie is its versatility. While the classic recipe is undeniably delicious, there’s always room for creativity in the kitchen! Here are some fun variations and customizations that can elevate your pie to new heights:
- Gluten-Free Option: If you’re looking to make this pie gluten-free, simply substitute the all-purpose flour with a gluten-free flour blend. This way, everyone can enjoy a slice of nostalgia without any worries!
- Fruit-Infused Filling: For a refreshing twist, consider adding fresh berries or a swirl of fruit puree to the filling. Blueberries, raspberries, or even a hint of peach can add a delightful burst of flavor and color to your pie.
- Chocolate Lovers: If you or your loved ones are chocolate enthusiasts, why not incorporate some cocoa powder or chocolate chips into the filling? It transforms the pie into a rich, decadent dessert that’s sure to impress!
- Nutty Flavor: For those who enjoy a bit of crunch, adding crushed nuts to the crust can provide an exciting texture contrast. Almonds, walnuts, or pecans can enhance the flavor profile and add a delightful crunch.
- Seasonal Spices: To warm up the flavors, consider incorporating spices like cinnamon or nutmeg into the filling. These spices can add a cozy, comforting aroma that’s perfect for fall or winter gatherings.
Feel free to mix and match these ideas to create a Homemade School Cheese Pie that reflects your personal taste and style. The kitchen is your canvas, so let your creativity shine!
Perfect Pairings: What to Serve With Homemade School Cheese Pie
Now that you’ve created your delicious Homemade School Cheese Pie, it’s time to think about how to elevate the experience even further! The right accompaniments can enhance the flavors and textures of the pie, making each bite even more delightful. Here are some perfect pairings that I absolutely love:
- Whipped Cream: A dollop of freshly whipped cream adds a touch of richness and lightness to each slice. It’s like a cloud of sweetness that complements the creamy filling beautifully!
- Fresh Berries: Serve your pie with a side of fresh berries for a refreshing contrast. The tartness of strawberries, blueberries, or raspberries cuts through the richness of the pie, creating a delightful balance.
- Chocolate Sauce: For those with a sweet tooth, a decadent drizzle of chocolate sauce enhances the dessert experience. It adds a luxurious touch that chocolate lovers will adore!
- Vanilla Ice Cream: A classic pairing, a scoop of vanilla ice cream complements the pie’s flavors perfectly. The creaminess of the ice cream melds beautifully with the pie, creating a comforting dessert experience.
- Coffee or Tea: A warm beverage like coffee or tea balances the sweetness of the pie. The rich flavors of a good brew can enhance the overall experience, making it a delightful afternoon treat.
- Powdered Sugar: A simple sprinkle of powdered sugar on top of the pie adds an elegant touch. It not only looks beautiful but also adds a hint of sweetness that’s visually appealing.
- Fruit Compote: A side of fruit compote adds a fruity twist and enhances flavor complexity. Whether it’s a berry compote or a citrus blend, it brings a fresh element to the dessert.
- Light Salad: For a refreshing side that balances the richness of the pie, consider serving a light salad. A simple mix of greens with a tangy vinaigrette can provide a nice contrast to the creamy dessert.
These pairings not only enhance the flavors of your Homemade School Cheese Pie but also create a well-rounded dessert experience that everyone will love. So, gather your loved ones, serve up a slice, and enjoy the delightful combinations!
Storage & Meal Prep Instructions
Now that you’ve baked your delicious Homemade School Cheese Pie, it’s important to know how to store it properly to maintain its creamy texture and delightful flavors. Whether you’re planning to enjoy it right away or save some for later, here are some handy storage and meal prep tips!
- Fridge Storage: If you have leftovers (which is rare, but it happens!), store the pie in an airtight container in the refrigerator. It will stay fresh for up to 3 days. Just be sure to cover it well to prevent it from absorbing any odors from the fridge!
- Freezer Storage: For longer storage, you can freeze the pie. Wrap it tightly in plastic wrap and then in foil to protect it from freezer burn. It can be frozen for up to 2 months. Just remember to label it with the date so you know when it was made!
- Reheating Methods: When you’re ready to enjoy your frozen pie, thaw it in the fridge overnight. To reheat, place it in a 350°F (175°C) oven for 10-15 minutes until warmed through. This will help restore its creamy texture and bring back that freshly baked flavor!
With these storage and meal prep instructions, you can enjoy your Homemade School Cheese Pie at your own pace, savoring each delicious slice whenever the craving strikes. Happy baking and storing!
Nutrition Facts & Health Insights
Understanding the nutritional profile of your Homemade School Cheese Pie can help you enjoy it guilt-free while appreciating its delightful flavors. Here’s a closer look at the nutrition facts and some health insights that make this pie not just a treat, but also a source of beneficial nutrients!
Nutrition Table:
| Nutrient | Amount per Serving (1 slice, 1/8 of pie) |
|---|---|
| Calories | 320 |
| Sugar | 18 grams |
| Sodium | 250 milligrams |
| Fat | 20 grams |
| Saturated Fat | 12 grams |
| Unsaturated Fat | 6 grams |
| Trans Fat | 0 grams |
| Carbohydrates | 30 grams |
| Fiber | 1 gram |
| Protein | 8 grams |
| Cholesterol | 90 milligrams |
Health Benefits:
This Homemade School Cheese Pie not only satisfies your sweet tooth but also offers some nutritional benefits:
- Ricotta Cheese: A key ingredient, ricotta cheese is rich in protein and calcium, which are essential for strong bones and muscle health. It’s a great way to sneak in some nutrients while enjoying a delicious dessert!
- Lemon Juice: The addition of lemon juice not only enhances the flavor but also provides a boost of vitamin C, which is important for immune function and skin health. It’s a refreshing touch that brightens the pie!
So, as you indulge in a slice of this creamy delight, remember that you’re not just treating yourself to a nostalgic dessert; you’re also enjoying some wholesome ingredients that contribute to your overall well-being. Now, who says you can’t have your pie and eat it too?
Frequently Asked Questions
As you embark on your journey to create the perfect Homemade School Cheese Pie, you might have a few questions along the way. Don’t worry; I’ve got you covered! Here are some frequently asked questions that can help guide you through the process:
- Can I use low-fat cheese for the filling?
Absolutely! You can use low-fat ricotta or cream cheese if you prefer a lighter version. Just keep in mind that the texture and flavor may be slightly different, but it will still be delicious! - How do I know when the pie is done baking?
The pie is done when the filling is set and the top is lightly golden. You can gently shake the pie; if the center slightly jiggles but is not liquid, it’s ready. A toothpick inserted in the center should come out clean or with just a few moist crumbs. - What can I substitute for eggs in the filling?
If you’re looking for an egg substitute, you can use ¼ cup of unsweetened applesauce or a flax egg (1 tablespoon ground flaxseed mixed with 2.5 tablespoons water, let sit for 5 minutes). These alternatives will help bind the filling while keeping it creamy. - Can I make this pie ahead of time?
Yes! This pie can be made a day in advance. Just bake it, let it cool, and refrigerate. The flavors deepen overnight, making it even more delicious when you serve it! - How do I prevent the crust from burning?
To prevent the crust from burning, you can cover the edges with aluminum foil during the last 10-15 minutes of baking. This shields the crust from direct heat while allowing the filling to set perfectly. - Is it possible to use a store-bought crust?
Yes, using a store-bought crust is a great time-saver! Just make sure to follow the package instructions for pre-baking if required, and then fill it with your delicious homemade filling. - Can I add chocolate to the filling?
Absolutely! You can incorporate cocoa powder or chocolate chips into the filling for a rich chocolate version of this pie. Just remember to adjust the sugar accordingly to balance the flavors. - What’s the best way to serve leftovers?
Leftovers can be enjoyed chilled straight from the fridge or warmed up in the oven at 350°F (175°C) for about 10-15 minutes. Pair it with a dollop of whipped cream or fresh berries for an extra treat!
With these answers in hand, you’re well-equipped to tackle any questions that may arise while making your Homemade School Cheese Pie. Happy baking!
Final Inspiration & Kitchen Confidence
As you take a moment to admire your beautifully baked Homemade School Cheese Pie, let’s celebrate the joy of baking together! There’s something truly magical about creating a beloved dessert that not only fills the kitchen with delightful aromas but also warms the hearts of those who gather around the table. Each slice you serve is a testament to your hard work and creativity, and I can assure you, the satisfaction of sharing this pie with loved ones is unparalleled.
Remember, every pie you make is a step towards mastering your baking skills. Whether it’s your first attempt or your hundredth, each experience teaches you something new. Embrace the process, learn from any mishaps, and don’t be afraid to experiment. After all, the kitchen is a place of joy, creativity, and delicious discoveries!
Now, I encourage you to share your experiences and variations of this recipe with friends and family. Did you add a twist of your own? Perhaps a sprinkle of cinnamon or a handful of chocolate chips? Whatever it may be, your unique touch can inspire others to embark on their own baking adventures. So, snap a photo, share your story, and let’s keep the love for Homemade School Cheese Pie alive!
Print
Homemade School Cheese Pie: Creamy, Golden Delight!
- Total Time: 2 hours 15 minutes
- Yield: 8 servings 1x
- Diet: Vegetarian
Description
Homemade School Cheese Pie is a nostalgic treat that boasts a creamy, velvety filling nestled in a perfectly golden crust. Each bite offers a delightful balance of sweetness and a hint of tanginess, making it a comforting dessert that evokes fond memories of school lunches.
Ingredients
- Crust:
- 1 ½ cups all-purpose flour
- ½ cup unsalted butter, softened
- ¼ cup granulated sugar
- 1 large egg yolk
- 2–3 tablespoons cold water
- Filling:
- 2 cups ricotta cheese
- 1 cup cream cheese, softened
- ¾ cup granulated sugar
- 3 large eggs
- 1 teaspoon vanilla extract
- 1 tablespoon lemon juice
Instructions
- Preheat the oven to 350°F (175°C).
- In a mixing bowl, combine flour, butter, and sugar until crumbly. Add egg yolk and cold water, mixing until a dough forms.
- Press the dough into a 9-inch pie pan evenly across the bottom and up the sides. Prick the bottom with a fork.
- Bake the crust for 15 minutes or until lightly golden. Remove from the oven and let cool.
- In a large bowl, beat together ricotta cheese, cream cheese, and sugar until smooth.
- Add eggs one at a time, mixing well after each addition. Stir in vanilla extract and lemon juice.
- Pour the filling into the cooled crust and smooth the top.
- Bake for 40-45 minutes, or until the filling is set and the top is lightly golden. The center should slightly jiggle when shaken.
- Allow to cool at room temperature, then refrigerate for at least 2 hours before serving.
Notes
- This pie can be made a day in advance and stored in the refrigerator.
- Store leftovers in an airtight container in the fridge for up to 3 days.
- For a gluten-free option, substitute the all-purpose flour with a gluten-free flour blend.
- Prep Time: 30 minutes
- Cook Time: 45 minutes
- Category: desserts
- Method: baking
- Cuisine: American
Nutrition
- Serving Size: 1 slice (1/8 of pie)
- Calories: 320
- Sugar: 18 grams
- Sodium: 250 milligrams
- Fat: 20 grams
- Saturated Fat: 12 grams
- Unsaturated Fat: 6 grams
- Trans Fat: 0 grams
- Carbohydrates: 30 grams
- Fiber: 1 gram
- Protein: 8 grams
- Cholesterol: 90 milligrams
Keywords: Homemade School Cheese Pie, cheese pie recipe, creamy dessert, nostalgic dessert, easy pie recipe, school lunch dessert, ricotta cheese pie, American desserts, homemade pie, sweet cheese pie, classic dessert, comfort food, baking recipes, vegetarian dessert


