Introduction to Mini Donut Tower
Welcome to the delightful world of the Mini Donut Tower! If you’re like me, juggling a busy schedule while trying to whip up something special can feel overwhelming. This recipe is a quick solution for those hectic days when you want to impress your loved ones without spending hours in the kitchen. Imagine a stunning tower of mini donuts, each one a sweet little bite of joy. Perfect for parties, celebrations, or just a fun family treat, this Mini Donut Tower will surely bring smiles to your table!
Why You’ll Love This Mini Donut Tower
This Mini Donut Tower is not just a treat; it’s a game-changer for busy moms and professionals alike. It’s incredibly easy to make, taking only 25 minutes from start to finish. The taste? Oh, it’s a delightful combination of fluffy and sweet, perfect for satisfying those cravings. Plus, the visual appeal of a stacked donut tower will wow your guests, making it a hit at any gathering!
Ingredients for Mini Donut Tower
Gathering the right ingredients is the first step to creating your Mini Donut Tower. Here’s what you’ll need:
- All-purpose flour: The backbone of your donuts, providing structure and fluffiness.
- Granulated sugar: This sweetener adds that delightful sweetness we all crave.
- Baking powder: A leavening agent that helps the donuts rise and become light.
- Baking soda: Works alongside baking powder for that perfect fluffy texture.
- Salt: Just a pinch enhances the flavors and balances the sweetness.
- Buttermilk: This adds moisture and a slight tang, making the donuts tender.
- Egg: Acts as a binder, giving the donuts structure and richness.
- Melted butter: Adds a rich flavor and keeps the donuts moist.
- Vanilla extract: A splash of this brings warmth and depth to the flavor.
- Powdered sugar: Perfect for dusting, it adds a sweet finishing touch.
- Chocolate glaze (optional): For those who want to indulge, this adds a decadent layer of flavor.
Feel free to get creative! You can swap out buttermilk for regular milk or a dairy-free alternative if needed. The exact measurements for these ingredients are at the bottom of the article, ready for you to print and use.
How to Make Mini Donut Tower
Step 1: Preheat and Prepare
Let’s kick things off by preheating your oven to 350°F (175°C). This step is crucial for achieving that perfect golden-brown color. While the oven warms up, grab your mini donut pan and give it a good greasing. I like to use a non-stick spray or a little melted butter to ensure the donuts pop out easily. Trust me, there’s nothing worse than a stuck donut! With the oven preheating and the pan ready, you’re all set to dive into the mixing!
Step 2: Mix Dry Ingredients
In a large mixing bowl, combine your all-purpose flour, granulated sugar, baking powder, baking soda, and salt. Whisk them together until they’re well blended. This step is essential because it ensures that the leavening agents are evenly distributed, which helps your mini donuts rise beautifully. I love the way the flour and sugar look together, like a fluffy cloud of sweetness! Once mixed, set this bowl aside while you prepare the wet ingredients.
Step 3: Combine Wet Ingredients
In another bowl, whisk together the buttermilk, egg, melted butter, and vanilla extract. The buttermilk adds a lovely tang, while the melted butter brings richness. As you whisk, you’ll notice the mixture becoming smooth and creamy. This is where the magic begins! The aroma of vanilla wafting through the air is simply irresistible. Once everything is well combined, it’s time to bring the wet and dry ingredients together.
Step 4: Combine Mixtures
Now, pour the wet ingredients into the bowl of dry ingredients. Gently mix them together until just combined. Be careful not to overmix; a few lumps are perfectly fine! Overmixing can lead to dense donuts, and we want them light and fluffy. As you stir, you’ll see the batter come together, and the anticipation of those mini donuts starts to build. It’s like a sweet promise waiting to be fulfilled!
Step 5: Fill the Pan
Using a spoon or a piping bag, fill each donut cavity about two-thirds full with the batter. This is important because if you overfill, the donuts will spill over and lose their cute shape. I like to use a small ice cream scoop for this—it makes the process quick and easy! As you fill the pan, imagine the delightful mini donut tower you’re about to create. It’s all about the excitement of what’s to come!
Step 6: Bake the Donuts
Place the filled donut pan in the preheated oven and bake for 8-10 minutes. Keep an eye on them! You’ll know they’re done when a toothpick inserted into the center comes out clean. The smell of baking donuts will fill your kitchen, making it hard to resist sneaking a taste. Once baked, let them cool in the pan for a few minutes before transferring them to a wire rack. Patience is key here!
Step 7: Cool and Dust
After a few minutes, carefully remove the donuts from the pan and let them cool completely on a wire rack. This step is crucial for achieving that perfect texture. Once cooled, you can dust them with powdered sugar for a classic touch or dip them in chocolate glaze for a decadent twist. The choice is yours! Just imagine how beautiful they’ll look, all dressed up and ready to shine!
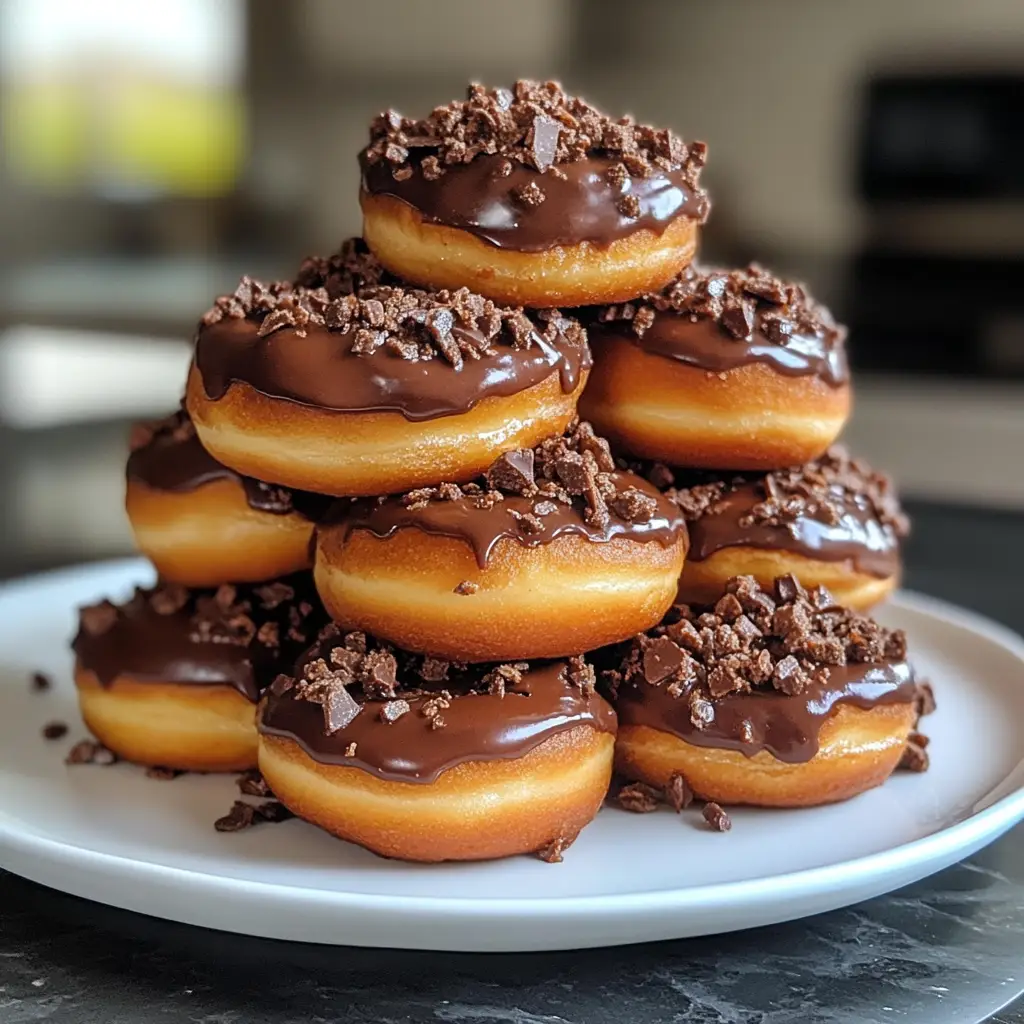
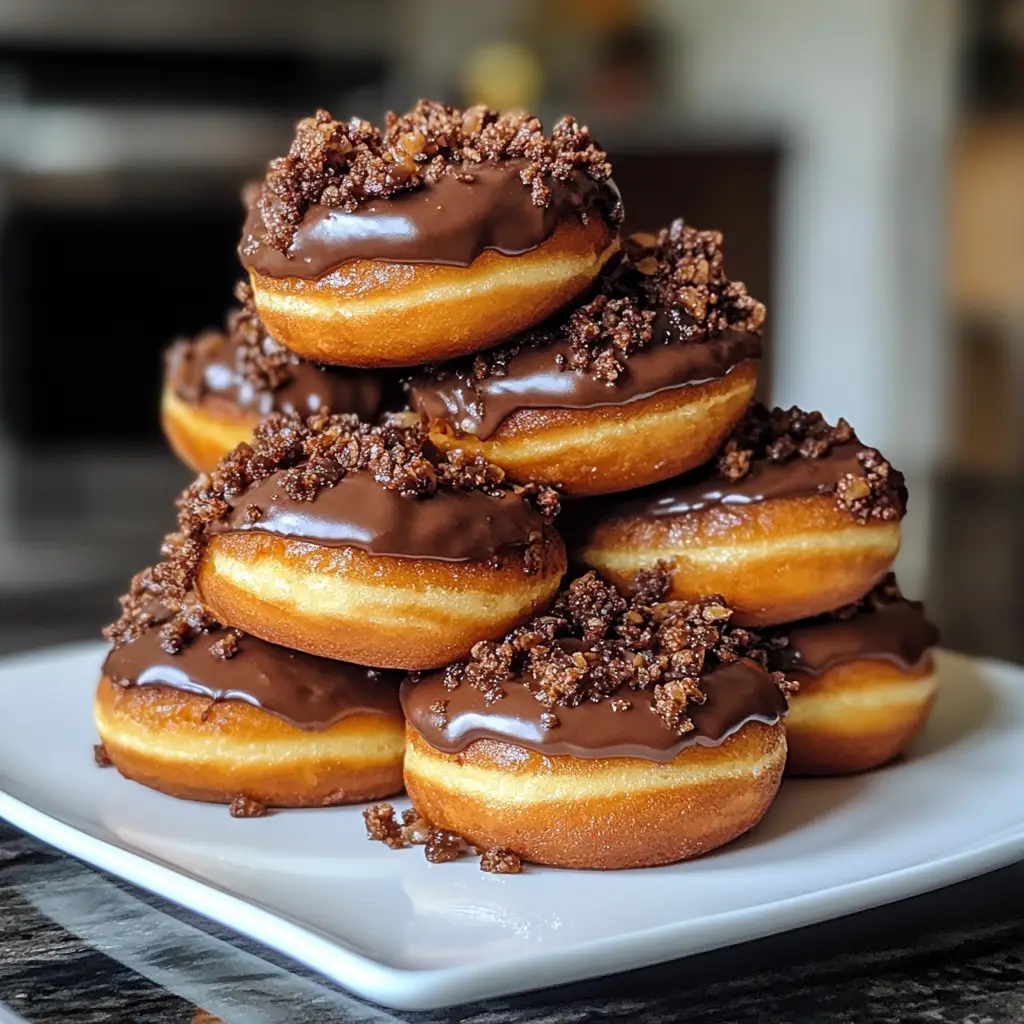
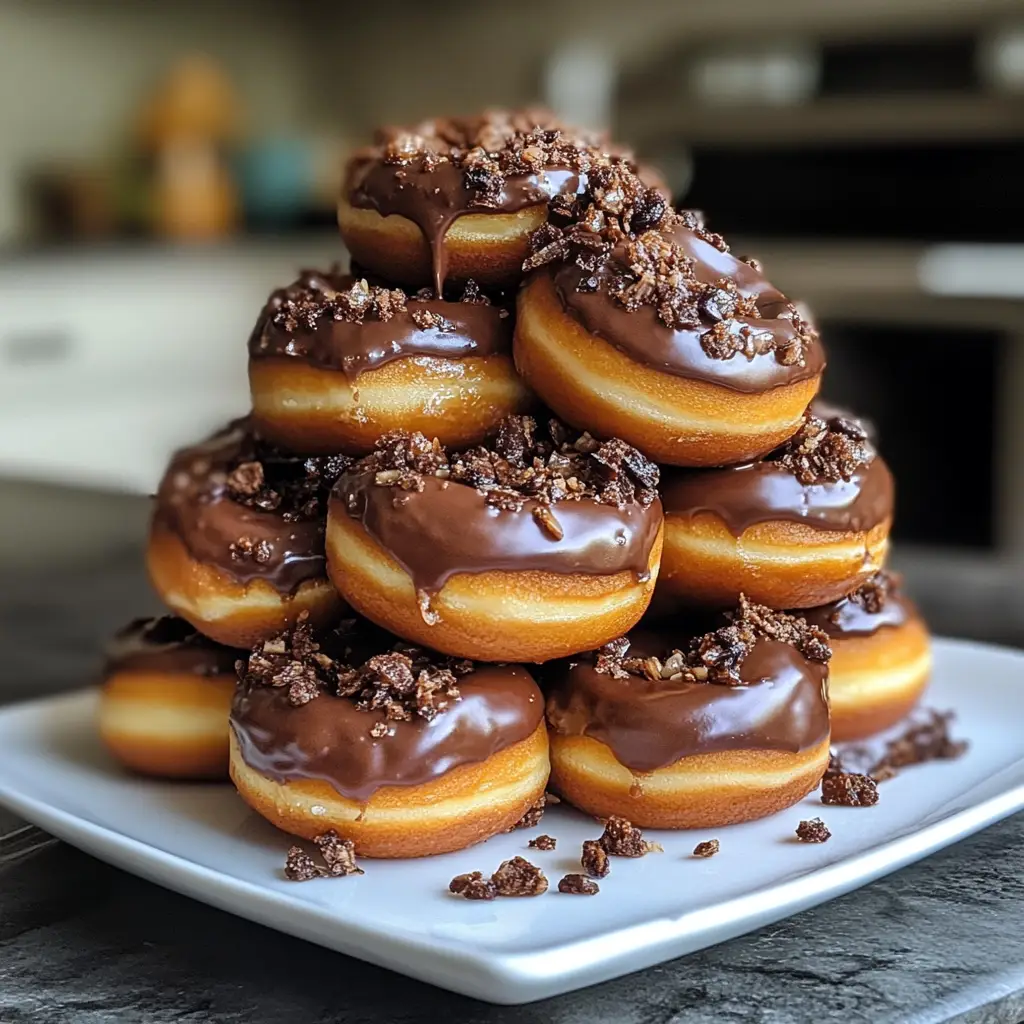
Step 8: Assemble the Mini Donut Tower
Now comes the fun part—assembling your Mini Donut Tower! Stack the donuts in a whimsical tower, alternating flavors or colors if you like. You can use a cake stand or a simple plate to display your creation. As you stack, let your creativity flow! This is your moment to shine, and your guests will be in awe of your delicious masterpiece. Get ready for the compliments to roll in!
Tips for Success
- Don’t overmix the batter; it’s okay to have a few lumps for fluffy donuts.
- Use a piping bag for easy filling of the donut cavities.
- Experiment with different toppings like sprinkles or nuts for added fun.
- Let the donuts cool completely before dusting or glazing for the best results.
- Store leftovers in an airtight container to keep them fresh for up to two days.
Equipment Needed
- Mini donut pan: Essential for shaping your donuts; a muffin pan can work in a pinch.
- Mixing bowls: Use two medium-sized bowls for wet and dry ingredients.
- Whisk: Perfect for blending ingredients; a fork can also do the job.
- Measuring cups and spoons: Accurate measurements are key; a kitchen scale is a great alternative.
- Cooling rack: Helps donuts cool evenly; a plate can suffice if you don’t have one.
Variations
- Gluten-Free: Substitute all-purpose flour with a gluten-free blend for a delicious alternative.
- Vegan: Use a flax egg (1 tablespoon ground flaxseed mixed with 2.5 tablespoons water) instead of an egg and replace buttermilk with almond milk mixed with a splash of vinegar.
- Flavor Infusions: Add spices like cinnamon or nutmeg to the batter for a warm, cozy flavor.
- Fruit Add-Ins: Fold in mini chocolate chips, dried fruit, or fresh berries for a burst of flavor.
- Different Glazes: Experiment with different glazes like maple or caramel for a unique twist.
Serving Suggestions
- Pair your Mini Donut Tower with a steaming cup of coffee or tea for a delightful afternoon treat.
- Serve with fresh fruit like strawberries or blueberries for a refreshing contrast.
- For a festive touch, add colorful sprinkles on top of the donuts.
- Display on a tiered cake stand for an eye-catching presentation.
FAQs about Mini Donut Tower
Can I make the Mini Donut Tower ahead of time?
Absolutely! You can prepare the donuts a day in advance. Just store them in an airtight container to keep them fresh. When you’re ready to serve, dust with powdered sugar or glaze them for that fresh-baked look.
What can I use instead of buttermilk?
If you don’t have buttermilk on hand, you can easily make a substitute. Just mix one cup of regular milk with a tablespoon of vinegar or lemon juice. Let it sit for about 5 minutes, and you’ll have a perfect buttermilk replacement!
How do I store leftover mini donuts?
To keep your mini donuts fresh, store them in an airtight container at room temperature. They’ll stay delicious for up to two days. If you want to keep them longer, consider freezing them!
Can I customize the flavors of my Mini Donut Tower?
<pDefinitely! Feel free to add spices, chocolate chips, or even fruit to the batter. You can also experiment with different glazes and toppings to create a unique flavor profile that suits your taste!
How do I make my Mini Donut Tower more visually appealing?
Presentation is key! Stack the donuts in a fun, whimsical way. Use colorful sprinkles, fresh fruit, or even edible flowers to decorate. A tiered cake stand can elevate the look, making it a showstopper at any gathering!
Final Thoughts
Creating a Mini Donut Tower is more than just baking; it’s about crafting sweet memories with your loved ones. The joy of stacking those fluffy donuts, dusting them with powdered sugar, and watching everyone’s eyes light up is truly priceless. This recipe is a delightful way to bring a little magic to your kitchen, whether it’s for a special occasion or a simple family treat. So, roll up your sleeves, embrace the fun, and let your creativity shine. I promise, this Mini Donut Tower will become a cherished favorite in your home!
Print
Mini Donut Tower: A Sweet Treat That Will Delight You!
- Total Time: 25 minutes
- Yield: 24 mini donuts 1x
- Diet: Vegetarian
Description
A delightful and visually appealing mini donut tower that is perfect for parties and celebrations.
Ingredients
- 1 cup all-purpose flour
- 1/2 cup granulated sugar
- 1/2 teaspoon baking powder
- 1/4 teaspoon baking soda
- 1/4 teaspoon salt
- 1/2 cup buttermilk
- 1 large egg
- 2 tablespoons melted butter
- 1 teaspoon vanilla extract
- Powdered sugar for dusting
- Chocolate glaze (optional)
Instructions
- Preheat the oven to 350°F (175°C) and grease a mini donut pan.
- In a mixing bowl, combine flour, sugar, baking powder, baking soda, and salt.
- In another bowl, whisk together buttermilk, egg, melted butter, and vanilla extract.
- Pour the wet ingredients into the dry ingredients and mix until just combined.
- Fill each donut cavity in the pan about 2/3 full with the batter.
- Bake for 8-10 minutes or until a toothpick comes out clean.
- Let the donuts cool for a few minutes before removing them from the pan.
- Dust with powdered sugar or dip in chocolate glaze if desired.
- Stack the mini donuts to create a tower and serve.
Notes
- Make sure not to overmix the batter for fluffy donuts.
- Feel free to add sprinkles or toppings of your choice.
- Store any leftovers in an airtight container for up to 2 days.
- Prep Time: 15 minutes
- Cook Time: 10 minutes
- Category: Dessert
- Method: Baking
- Cuisine: American
Nutrition
- Serving Size: 2 mini donuts
- Calories: 150
- Sugar: 10g
- Sodium: 100mg
- Fat: 5g
- Saturated Fat: 3g
- Unsaturated Fat: 2g
- Trans Fat: 0g
- Carbohydrates: 22g
- Fiber: 1g
- Protein: 2g
- Cholesterol: 30mg
Keywords: Mini Donut Tower, Mini Donuts, Sweet Treats, Party Desserts


