Sensory-Rich Introduction with Immediate Craving
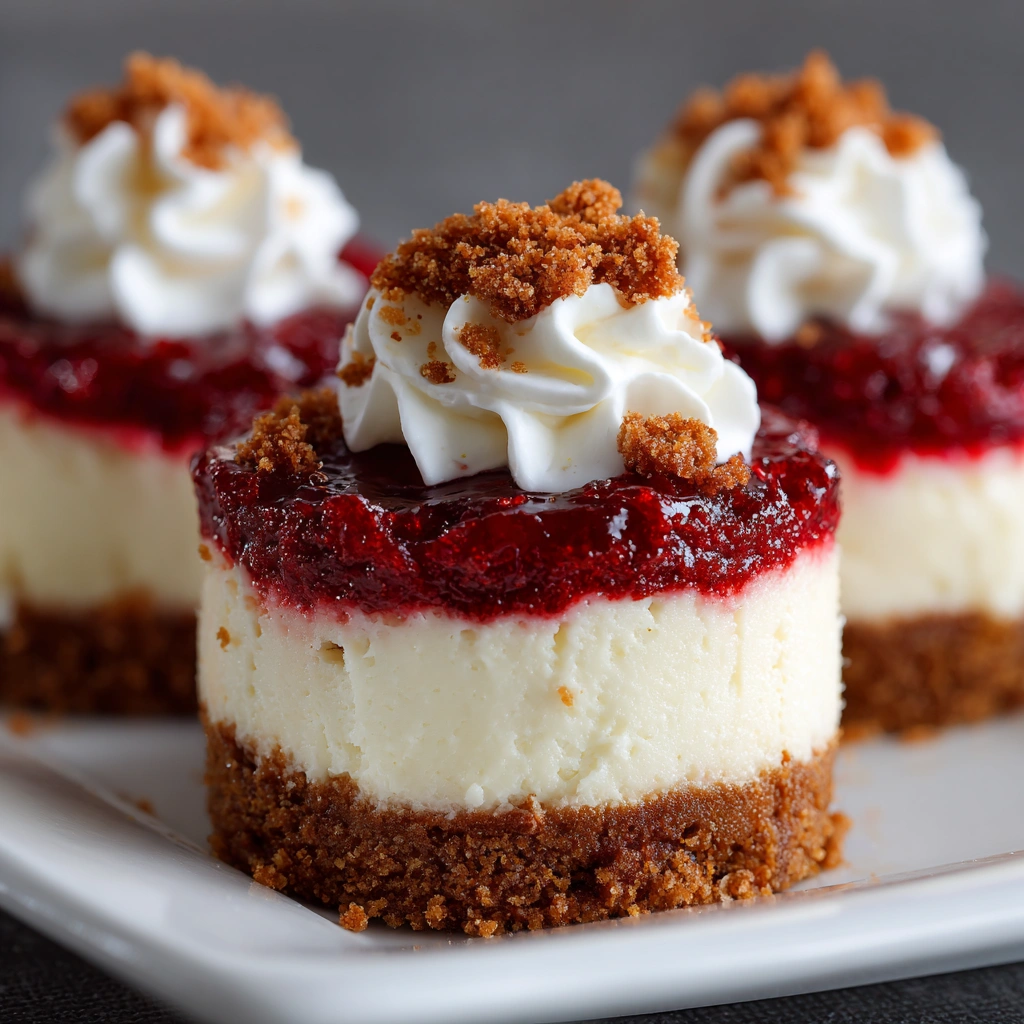
Imagine a dessert that captures the essence of celebration in every bite—these Mini Red Velvet Cheesecakes do just that! With their rich, crimson hue, they beckon you to indulge. The moment you take a bite, the creamy texture envelops your palate, while the decadent layers of cheesecake and graham cracker crust create a delightful contrast that dances on your taste buds. The aroma of freshly baked cheesecakes wafts through the kitchen, mingling with hints of cocoa and vanilla, making it nearly impossible to resist.
One of my fondest memories is the first time I baked these cheesecakes for my best friend’s birthday. I remember the excitement in the air as I carefully mixed the ingredients, the vibrant red batter swirling in the bowl like a promise of joy. When I pulled them from the oven, the sight of those perfectly puffed mini cheesecakes brought a smile to my face. As we gathered around the table, the laughter and love shared over those little treats made the occasion unforgettable. Each cheesecake was not just a dessert; it was a token of friendship and celebration.
These Mini Red Velvet Cheesecakes evoke feelings of warmth and happiness, making them the perfect addition to any gathering. Whether it’s a holiday feast, a birthday bash, or simply a sweet treat to brighten your day, these cheesecakes are sure to bring smiles and create lasting memories. So, gather your loved ones and prepare to indulge in a dessert that’s as delightful to share as it is to savor!
Why You’ll Love This Mini Red Velvet Cheesecakes
Let me tell you, there’s something truly magical about these Mini Red Velvet Cheesecakes that makes them a must-try for any dessert lover. Here’s why they hold a special place in my heart (and my kitchen!).
- Texture Contrast: The moment you sink your fork into one of these beauties, you’ll experience a delightful crunch from the graham cracker crust, which perfectly complements the smooth, creamy cheesecake filling. It’s a textural experience that keeps you coming back for more!
- Flavor Balance: Each bite is a harmonious blend of sweet and tangy notes from the cream cheese, beautifully balanced with a subtle hint of cocoa. It’s like a love letter to your taste buds, where every flavor plays its part without overshadowing the others.
- Versatility: Whether you’re hosting a casual family dinner or an elegant soirée, these cheesecakes fit right in. They’re the kind of dessert that can elevate any occasion, making them a versatile addition to your baking repertoire.
- Ease of Preparation: Don’t let the fancy name fool you! These cheesecakes are surprisingly simple to make. With just a few straightforward steps, even novice bakers can whip up a batch that looks and tastes like it came from a gourmet bakery.
- Universal Appeal: It’s hard to find someone who doesn’t love cheesecake or red velvet cake. These mini treats combine the best of both worlds, making them a crowd-pleaser that’s sure to satisfy everyone’s sweet tooth.
So, whether you’re looking to impress guests or simply treat yourself, these Mini Red Velvet Cheesecakes are the perfect choice. Trust me, once you try them, you’ll understand why they’re a favorite in my home!
Essential Tools & Preparation Strategy
Before diving into the delightful world of Mini Red Velvet Cheesecakes, it’s essential to gather the right tools and set up your kitchen for success. Trust me, having the right equipment can make all the difference in your baking experience!
- Muffin Tin: This is your key player for shaping the mini cheesecakes. I recommend using a non-stick muffin tin or even a silicone one for easy removal. Nothing is more frustrating than a cheesecake that sticks!
- Mixing Bowls: You’ll need a couple of mixing bowls to combine your crust and filling ingredients. I prefer glass bowls because they allow you to see the mixing progress and are easy to clean.
- Electric Mixer: A stand mixer or hand mixer will help you achieve that smooth, creamy filling we all crave. If you don’t have one, a good old-fashioned whisk will do the trick, but be prepared for a bit of a workout!
- Rubber Spatula: This handy tool is perfect for scraping down the sides of your mixing bowl and ensuring every bit of deliciousness is incorporated. Silicone spatulas are my go-to because they’re heat-resistant and flexible.
- Measuring Cups and Spoons: Accurate measurements are crucial in baking. I recommend investing in a good set of nesting measuring cups and spoons for easy storage and quick access.
- Whisk: A whisk is essential for mixing your filling ingredients thoroughly. A balloon whisk is particularly great for incorporating air into the mixture, giving your cheesecakes that light, fluffy texture.
With these tools at your disposal, you’ll be well on your way to creating the most delightful Mini Red Velvet Cheesecakes. Remember, preparation is key, so take a moment to set everything up before you start mixing. Happy baking!
Ingredients & Their Roles in This Mini Red Velvet Cheesecakes
Understanding the role of each ingredient in your Mini Red Velvet Cheesecakes is key to achieving that perfect balance of flavor and texture. Let’s break down the essential components that come together to create this delightful dessert.
For the Crust:
- Graham Cracker Crumbs: These little gems provide a sweet, crunchy base that contrasts beautifully with the creamy filling. Their subtle flavor adds a delightful depth to the overall taste.
- Granulated Sugar: This ingredient enhances the sweetness of the crust and helps bind the crumbs together, ensuring a sturdy base for your cheesecakes.
- Unsalted Butter: Adding richness and moisture, melted butter is crucial for achieving that perfect texture in the crust. It helps the crumbs hold together while providing a buttery flavor that complements the cheesecake.
For the Cheesecake Filling:
- Cream Cheese: The star ingredient! Cream cheese provides the signature creaminess and tang that makes cheesecake so irresistible. Make sure it’s softened for a smooth filling.
- Granulated Sugar: This sweetens the filling, balancing the tanginess of the cream cheese and enhancing the overall flavor profile.
- Sour Cream: Adding a touch of tanginess and creaminess, sour cream elevates the filling’s texture, making it even more luscious.
- Eggs: Eggs are essential for binding the filling together and providing structure. They help the cheesecake set perfectly while keeping it creamy.
- Vanilla Extract: A splash of vanilla enhances the depth of flavor, adding warmth and richness to the filling.
- Red Food Coloring: This is what gives our cheesecakes their signature vibrant hue! Just a tablespoon is enough to achieve that stunning red without altering the flavor.
- Cocoa Powder: A subtle addition that brings a hint of chocolate flavor, cocoa powder complements the red velvet theme beautifully.
For the Topping:
- Whipped Cream: Light and airy, whipped cream adds a creamy finish that balances the richness of the cheesecake. It’s the perfect topping for a touch of elegance!
- Chocolate Shavings: While optional, chocolate shavings make for a beautiful garnish that adds a touch of sophistication and an extra layer of flavor.
With these ingredients, you’re well on your way to creating Mini Red Velvet Cheesecakes that are not only visually stunning but also a delight to the palate. Each component plays a vital role in crafting a dessert that’s sure to impress!
Step-by-Step Guide to Perfect Mini Red Velvet Cheesecakes
Now that you have all your ingredients and tools ready, it’s time to dive into the delightful process of making Mini Red Velvet Cheesecakes. Follow these steps closely, and you’ll be rewarded with a batch of creamy, decadent treats that are sure to impress!
- Preheat the oven: Start by preheating your oven to 325°F (160°C). This ensures that your cheesecakes bake evenly and achieve that perfect texture.
- Prepare the crust: In a mixing bowl, combine 1 cup of graham cracker crumbs, 1/4 cup of granulated sugar, and 1/2 cup of melted unsalted butter until well mixed. The mixture should resemble wet sand.
- Form the crust: Press the graham cracker mixture firmly into the bottom of a lined muffin tin, creating a solid base for your cheesecakes. Make sure to pack it down well to prevent crumbling later.
- Make the filling: In another bowl, beat 16 oz of softened cream cheese until smooth. Gradually add 1/2 cup of granulated sugar, 1/2 cup of sour cream, 2 large eggs, 1 tsp of vanilla extract, 1 tbsp of red food coloring, and 1 tbsp of cocoa powder. Mix until fully combined and creamy, ensuring there are no lumps.
- Fill the cups: Pour the cheesecake filling over the crusts, filling each cup about 3/4 full. This allows room for the cheesecakes to rise slightly while baking.
- Bake: Place the muffin tin in the preheated oven and bake for 20-25 minutes, or until the edges are set but the center is still slightly jiggly. This slight jiggle is key to achieving that creamy texture!
- Cool down: Once baked, remove the cheesecakes from the oven and let them cool to room temperature. This step is crucial to prevent a soggy crust—patience is key!
- Chill: After cooling, refrigerate the cheesecakes for at least 4 hours before serving. This allows the flavors to meld and the texture to set perfectly.
- Top and serve: Just before serving, top each cheesecake with 1 cup of whipped cream and sprinkle with chocolate shavings if desired. This adds a beautiful finishing touch and an extra layer of indulgence!
And there you have it! A step-by-step guide to creating Mini Red Velvet Cheesecakes that are not only visually stunning but also a delight to the palate. Enjoy the process, and don’t forget to share your delicious creations with friends and family!
Chef’s Notes & Pro Tips for Flawless Results
As I’ve navigated the world of baking, I’ve learned that a few simple tips can elevate your Mini Red Velvet Cheesecakes from good to absolutely divine. Here are my tried-and-true recommendations to ensure your cheesecakes turn out perfectly every time.
- Make-Ahead Instructions: These cheesecakes can be made a day in advance, which not only saves time but also allows the flavors to meld beautifully. Just keep them covered in the fridge until you’re ready to serve.
- Storage: If you happen to have leftovers (which is rare in my house!), store them in an airtight container in the fridge for up to 3 days. They’re just as delicious the next day!
- Equipment Recommendations: For larger batches, consider using a springform pan instead of a muffin tin. It makes for easier removal and presentation. A food processor can also be a game-changer for quickly preparing the crust.
- Customization Options: Don’t hesitate to get creative! Experiment with different toppings like crushed nuts, fresh fruit, or flavored whipped cream to make each batch uniquely yours.
Remember, baking is as much about the journey as it is about the destination. Enjoy the process, and don’t be afraid to make these cheesecakes your own!
Avoid These Common Cooking Mistakes
Even the most seasoned bakers can run into a few hiccups when making Mini Red Velvet Cheesecakes. I’ve certainly had my share of baking blunders, but with a little awareness, you can avoid these common pitfalls and ensure your cheesecakes turn out perfectly every time. Here’s what to watch out for:
- Overmixing the Filling: This is a classic mistake that can lead to cracks in your cheesecakes. Mix just until combined to keep the filling smooth and creamy.
- Not Cooling Before Refrigerating: If you pop your cheesecakes straight into the fridge while they’re still warm, you risk a soggy crust. Always let them cool to room temperature first—patience pays off!
- Skipping the Water Bath: A water bath helps regulate the temperature and moisture level in the oven, leading to even baking. If you want to avoid uneven textures, don’t skip this step!
- Using Cold Cream Cheese: Cold cream cheese can create lumps in your filling, which is a big no-no for a smooth cheesecake. Always use softened cream cheese for the best results.
- Overbaking: It’s tempting to leave your cheesecakes in the oven longer, but overbaking can dry them out. Bake until the edges are set and the center is slightly jiggly for that perfect creamy texture.
- Not Chilling Long Enough: If you’re eager to dig in, I get it! But not chilling your cheesecakes for at least 4 hours can affect their texture. Give them time to set properly.
- Using Too Much Food Coloring: While we want that vibrant red hue, using too much food coloring can alter the flavor. Stick to just enough for the desired color to keep the taste intact.
By keeping these tips in mind, you’ll be well on your way to creating Mini Red Velvet Cheesecakes that are not only beautiful but also delicious. Happy baking!
Creative Variations & Customizations
One of the joys of baking Mini Red Velvet Cheesecakes is the opportunity to get creative and make them your own! Here are some delightful variations and customizations that can elevate your cheesecakes to new heights:
- Gluten-Free Option: If you or your guests are gluten-sensitive, simply swap out regular graham crackers for gluten-free graham crackers. This way, everyone can enjoy these delicious treats without worry!
- Chocolate Swirl: For those who can’t resist chocolate, consider adding a swirl of melted chocolate to the cheesecake filling. Just fold in about 1/4 cup of melted chocolate after mixing the filling for a rich, decadent twist that will have chocolate lovers swooning.
- Nutty Crust: If you’re looking to add a bit of crunch, incorporate crushed nuts into the crust. Simply mix in 1/2 cup of finely chopped nuts (like pecans or walnuts) with the graham cracker crumbs for an added layer of texture and flavor.
- Seasonal Flavors: Embrace the changing seasons by adding warm spices like 1/2 tsp of cinnamon or 1/4 tsp of nutmeg to the filling. This not only enhances the flavor but also adds a cozy touch that’s perfect for fall or winter gatherings.
- Fruit Topping: For a refreshing contrast to the rich cheesecake, top your mini cheesecakes with fresh berries or a homemade berry compote. A mix of strawberries, blueberries, and raspberries not only adds a pop of color but also a burst of tartness that beautifully balances the sweetness.
Feel free to mix and match these ideas to create your own signature version of Mini Red Velvet Cheesecakes. The possibilities are endless, and the best part is that you can tailor them to suit your taste and the occasion. Happy baking!
Perfect Pairings: What to Serve With Mini Red Velvet Cheesecakes
When it comes to enjoying your Mini Red Velvet Cheesecakes, the right accompaniments can elevate the experience to new heights. Here are some delightful pairings that will complement the rich, creamy flavors of your cheesecakes:
- Cold Milk: There’s something timeless about pairing dessert with a glass of cold milk. The creamy texture of the milk perfectly complements the sweetness of the cheesecakes, making each bite even more enjoyable.
- Fresh Berries: The tartness of fresh berries, such as strawberries, raspberries, or blueberries, provides a refreshing contrast to the rich cheesecake. Their vibrant colors also add a beautiful touch to your dessert presentation!
- Vanilla Ice Cream: For those who crave extra creaminess, a scoop of vanilla ice cream is the perfect addition. The cold, velvety ice cream enhances the overall dessert experience, creating a delightful combination of flavors and textures.
- Chocolate Sauce: If you’re feeling indulgent, drizzle some warm chocolate sauce over the top of your cheesecakes. This adds a luxurious touch and a rich chocolate flavor that pairs beautifully with the red velvet.
- Coffee: A cup of freshly brewed coffee is a fantastic way to balance the sweetness of the cheesecakes. The robust flavors of coffee enhance the overall taste experience, making it a perfect pairing for dessert lovers.
- Mini Dessert Table: For gatherings, consider serving your Mini Red Velvet Cheesecakes alongside a variety of other mini desserts. This not only offers guests a delightful selection but also creates a visually stunning dessert table that’s sure to impress!
- Sweet Dessert Wine: For a sophisticated touch, pair your cheesecakes with a sweet dessert wine. The fruity notes of the wine will complement the flavors of the cheesecake, making it a perfect pairing for special occasions.
- Crushed Nuts: Sprinkle some crushed nuts, like pecans or walnuts, on top of your cheesecakes for added texture and flavor contrast. The crunchiness of the nuts provides a delightful bite that enhances the overall dessert experience.
With these perfect pairings, your Mini Red Velvet Cheesecakes will shine even brighter. Whether you’re hosting a gathering or enjoying a quiet evening at home, these accompaniments will take your dessert experience to the next level!
Storage & Meal Prep Instructions
Once you’ve created your delightful Mini Red Velvet Cheesecakes, it’s important to know how to store them properly to maintain their deliciousness. Here’s how to keep your cheesecakes fresh and ready to enjoy!
- Fridge Storage: If you find yourself with leftovers (which is rare in my house!), simply store your cheesecakes in an airtight container in the refrigerator. They’ll stay fresh for up to 3 days, allowing you to savor the creamy goodness for a little longer.
- Freezer Storage: Want to make a batch ahead of time? No problem! Your Mini Red Velvet Cheesecakes can be frozen for up to 2 months. Just wrap each cheesecake individually in plastic wrap and then place them in a freezer-safe container. This way, you can enjoy a sweet treat whenever the craving strikes!
- Reheating Methods: When you’re ready to indulge in your frozen cheesecakes, simply thaw them in the fridge overnight. This gentle thawing method helps maintain their creamy texture. You can serve them chilled straight from the fridge or let them sit at room temperature for about 15-20 minutes for a softer bite.
With these storage and meal prep tips, you can enjoy your Mini Red Velvet Cheesecakes at your leisure, whether it’s a spontaneous dessert craving or a planned gathering. Happy baking and storing!
Nutrition Facts & Health Insights
Understanding the nutritional profile of your Mini Red Velvet Cheesecakes can help you enjoy them guilt-free. Here’s a detailed breakdown of the nutrition facts per serving, so you can indulge with confidence!
| Nutrient | Amount per Serving |
|---|---|
| Calories | 250 |
| Sugar | 18 grams |
| Sodium | 200 milligrams |
| Fat | 18 grams |
| Saturated Fat | 10 grams |
| Unsaturated Fat | 6 grams |
| Trans Fat | 0 grams |
| Carbohydrates | 22 grams |
| Fiber | 1 gram |
| Protein | 4 grams |
| Cholesterol | 60 milligrams |
Now, let’s talk about some of the health benefits of key ingredients in these delightful cheesecakes:
- Cream Cheese: This creamy delight is not just delicious; it’s also a good source of calcium, which is essential for strong bones and teeth. Plus, it provides a rich, creamy texture that makes these cheesecakes irresistible!
- Eggs: Packed with high-quality protein, eggs are a powerhouse ingredient that helps build and repair tissues. They also contain essential vitamins and minerals, including vitamin D and B12, which are important for overall health.
- Sour Cream: This tangy addition not only enhances the flavor but also provides probiotics, which are beneficial for gut health. A healthy gut can improve digestion and boost your immune system.
- Graham Crackers: While they may seem like a simple ingredient, graham crackers provide a source of whole grains, which can contribute to your daily fiber intake. Fiber is important for digestive health and can help keep you feeling full longer.
So, while indulging in these Mini Red Velvet Cheesecakes, you can feel good knowing that they contain ingredients that offer some nutritional benefits. Enjoy them as a special treat, and remember that balance is key in any diet!
Frequently Asked Questions
As you embark on your journey to create the perfect Mini Red Velvet Cheesecakes, you may have a few questions along the way. Here are some of the most common inquiries I’ve encountered, along with my expert answers to help you navigate any uncertainties!
- Can I substitute the cream cheese?
While cream cheese is the star of this recipe, you can use mascarpone cheese for a slightly different flavor and texture. Just keep in mind that it may alter the overall taste of your cheesecakes. - How do I know when the cheesecakes are done?
The key to knowing when your cheesecakes are ready is to look for set edges and a slightly jiggly center. They should not be completely firm; a little jiggle in the middle is perfectly normal and indicates a creamy texture. - Can I use a different type of crust?
Absolutely! Feel free to experiment with different crusts. A chocolate cookie crust or an almond flour crust can add unique flavors and textures to your cheesecakes. Just make sure to adjust the measurements accordingly! - What if I don’t have red food coloring?
If you’re out of red food coloring, you can use beet juice or pomegranate juice as a natural alternative. Keep in mind that the color may not be as vibrant, but it will still add a lovely hue and a hint of flavor. - How long can I store these cheesecakes?
Your Mini Red Velvet Cheesecakes can be stored in an airtight container in the refrigerator for up to 3 days. If you want to keep them longer, consider freezing them for up to 2 months! - Can I make these without eggs?
Yes, you can make eggless cheesecakes by using substitutes like silken tofu or a mixture of unsweetened applesauce and baking powder. This will help bind the filling while keeping it creamy. - What’s the best way to remove them from the muffin tin?
To easily remove your cheesecakes, let them cool completely before attempting to take them out. If you used a non-stick muffin tin, gently run a knife around the edges to loosen them. If you used silicone, simply push from the bottom to pop them out! - Can I double the recipe?
Absolutely! Doubling the recipe is a great way to ensure you have enough cheesecakes for a crowd. Just make sure to use a larger muffin tin or bake them in batches, and adjust the baking time as needed.
With these FAQs answered, you’re well-equipped to tackle any challenges that may arise while making your Mini Red Velvet Cheesecakes. Happy baking, and enjoy the delicious journey ahead!
Final Inspiration & Kitchen Confidence
As you take a moment to admire your beautiful Mini Red Velvet Cheesecakes, I want you to celebrate the joy of baking that brought you here. There’s something truly magical about creating a dessert from scratch, and each cheesecake you’ve crafted is a testament to your hard work and creativity. The satisfaction of pulling these little delights from the oven, knowing you’ve mastered a new recipe, is a feeling like no other!
Remember, every time you step into the kitchen, you’re not just following a recipe; you’re creating memories, sharing love, and bringing joy to those around you. Whether it’s a special occasion or just a sweet treat for yourself, your Mini Red Velvet Cheesecakes are sure to bring smiles and happiness to everyone who gets to enjoy them.
Now, I encourage you to share your baking journey! Snap a photo of your stunning cheesecakes and post it on social media. Tag your friends, family, and fellow bakers, and let them know about your delicious creation. Your experience might inspire someone else to dive into the world of baking, and who knows? You might just spark a new tradition in your circle!
So, go ahead and take pride in your culinary achievement. You’ve created something truly special, and I can’t wait to hear all about your adventures with Mini Red Velvet Cheesecakes. Happy baking, and may your kitchen always be filled with love and laughter!
Print
Mini Red Velvet Cheesecakes: Creamy, Decadent Bliss!
- Total Time: 4 hours 55 minutes
- Yield: 12 servings 1x
- Diet: Vegetarian
Description
These Mini Red Velvet Cheesecakes are a delightful fusion of rich, velvety cake and creamy cheesecake, creating a luxurious dessert experience. Each bite offers a perfect balance of sweetness and tanginess, with a smooth texture that melts in your mouth, complemented by a hint of cocoa and a subtle cream cheese flavor.
Ingredients
- For the crust:
- 1 cup graham cracker crumbs
- 1/4 cup granulated sugar
- 1/2 cup unsalted butter, melted
- For the cheesecake filling:
- 16 oz cream cheese, softened
- 1/2 cup granulated sugar
- 1/2 cup sour cream
- 2 large eggs
- 1 tsp vanilla extract
- 1 tbsp red food coloring
- 1 tbsp cocoa powder
- For the topping:
- 1 cup whipped cream
- Chocolate shavings (optional)
Instructions
- Preheat the oven to 325°F (160°C).
- In a mixing bowl, combine graham cracker crumbs, sugar, and melted butter until well mixed.
- Press the mixture into the bottom of a lined muffin tin to form the crust.
- In another bowl, beat the cream cheese until smooth, then add sugar, sour cream, eggs, vanilla, food coloring, and cocoa powder, mixing until fully combined.
- Pour the cheesecake filling over the crusts, filling each cup about 3/4 full.
- Bake for 20-25 minutes, or until the edges are set but the center is slightly jiggly.
- Remove from the oven and let cool to room temperature, then refrigerate for at least 4 hours before serving.
- Top with whipped cream and chocolate shavings before serving.
Notes
- These cheesecakes can be made a day in advance and stored in the refrigerator.
- Store leftovers in an airtight container in the fridge for up to 3 days.
- For a gluten-free option, use gluten-free graham crackers for the crust.
- Prep Time: 30 minutes
- Cook Time: 25 minutes
- Category: desserts
- Method: baking
- Cuisine: American
Nutrition
- Serving Size: 1 mini cheesecake
- Calories: 250
- Sugar: 18 grams
- Sodium: 200 milligrams
- Fat: 18 grams
- Saturated Fat: 10 grams
- Unsaturated Fat: 6 grams
- Trans Fat: 0 grams
- Carbohydrates: 22 grams
- Fiber: 1 gram
- Protein: 4 grams
- Cholesterol: 60 milligrams
Keywords: Mini Red Velvet Cheesecakes, red velvet dessert, cheesecake recipe, mini desserts, holiday treats, easy cheesecake, creamy desserts, party desserts, red velvet cake, individual cheesecakes, decadent desserts, sweet treats, baking recipes


