Sensory-Rich Introduction with Immediate Craving
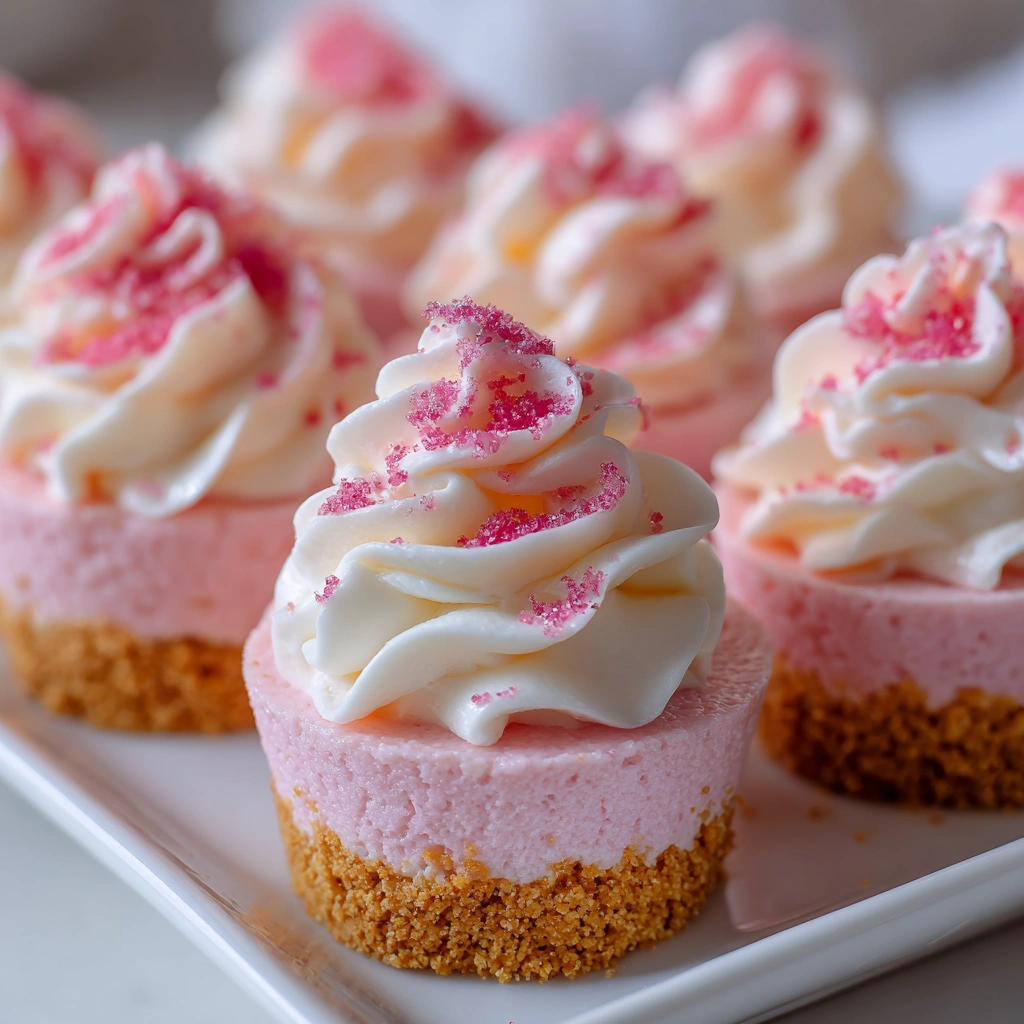
Imagine a dessert that not only tantalizes your taste buds but also captivates your eyes. The No-Bake Pink Velvet Cheesecake Bites are just that—each bite is a creamy, velvety morsel that melts in your mouth, leaving behind a delightful sweetness that lingers long after the last crumb has vanished. Their vibrant pink hue, reminiscent of cotton candy, adds a playful touch to any dessert table, making them a feast for the eyes as well as the palate.
I still remember the first time I made these delightful bites. It was for my niece’s birthday party, and I wanted to create something special that would not only impress the guests but also bring a smile to her face. As I mixed the ingredients, the sweet aroma of vanilla and cream cheese wafted through the kitchen, instantly transporting me back to my childhood, where my grandmother would whip up her famous cheesecakes for family gatherings. The joy of creating something that would evoke such happiness in others filled my heart with warmth.
These cheesecake bites are more than just a dessert; they are a celebration of togetherness. Whether it’s a birthday, a bridal shower, or a festive holiday gathering, serving these bites creates an atmosphere of joy and connection. They are perfect for sharing, and I can guarantee that they will spark conversations and laughter around the table. So, gather your loved ones, and let these No-Bake Pink Velvet Cheesecake Bites be the sweet centerpiece of your next celebration!
Why You’ll Love This No-Bake Pink Velvet Cheesecake Bites
Let me tell you, there are countless reasons to fall head over heels for these No-Bake Pink Velvet Cheesecake Bites. Each aspect of this dessert is designed to delight your senses and make your life a little sweeter!
- Texture Contrast: The creamy filling paired with a crunchy graham cracker crust creates a delightful mouthfeel. As you take a bite, the smoothness of the cheesecake envelops your palate, while the crust adds a satisfying crunch that keeps you coming back for more.
- Flavor Balance: The sweetness of the cheesecake is perfectly balanced with a hint of tang from the cream cheese. This harmonious blend ensures that each bite is not overly sweet, making it a refreshing treat that you can enjoy without feeling guilty.
- Versatility: These bites can be customized with different toppings or flavors to suit any occasion. Whether you want to add a drizzle of chocolate, a sprinkle of nuts, or even a layer of fruit, the possibilities are endless. You can easily adapt this recipe to match the season or your personal taste!
- Ease of Preparation: No baking required, making it a quick and simple dessert option. In just a few steps, you can whip up a batch of these delightful bites, perfect for those busy days when you want to impress without the fuss.
- Universal Appeal: Loved by both kids and adults, making it a crowd-pleaser at any gathering. I’ve seen even the pickiest eaters devour these bites with glee, proving that they truly are a hit for all ages!
So, whether you’re planning a party, celebrating a special occasion, or simply treating yourself, these No-Bake Pink Velvet Cheesecake Bites are sure to bring joy and satisfaction to your table. Trust me, once you try them, you’ll understand why they’ve become a staple in my kitchen!
Essential Tools & Preparation Strategy
Before we embark on this delightful journey of creating No-Bake Pink Velvet Cheesecake Bites, let’s gather the essential tools that will make the process smooth and enjoyable. Trust me, having the right equipment can make all the difference in your kitchen experience!
- Mixing Bowls: These are necessary for combining ingredients smoothly. I recommend opting for glass or stainless steel bowls for their durability and ease of cleaning. Plus, they won’t retain odors or stains, which is a bonus!
- Electric Mixer: An electric mixer is essential for achieving that creamy texture in the filling. If you don’t have one, a hand mixer is a great alternative. Just be prepared for a little extra arm workout!
- 9-inch Square Baking Dish: This is the ideal size for setting the cheesecake bites. If you prefer, you can also use a round dish, but I find the square shape makes for easier cutting and serving.
- Spatula: A good spatula is useful for spreading the filling evenly over the crust. I highly recommend a silicone spatula for its flexibility and ease of cleanup—no more battling with stubborn mixtures stuck to the sides!
- Measuring Cups and Spoons: Accurate measurements are key to a successful recipe. I suggest using a set of measuring cups and spoons, and if you want to be precise, consider investing in a kitchen scale for those tricky ingredients.
- Refrigerator: This is critical for setting the cheesecake bites properly. Make sure your fridge is at the right temperature (around 37°F) to ensure that your bites set beautifully and maintain their creamy texture.
With these tools at your disposal, you’ll be well-equipped to create the most delightful No-Bake Pink Velvet Cheesecake Bites. Remember, the journey in the kitchen should be as enjoyable as the delicious outcome, so take your time and have fun with it!
Ingredients & Their Roles in This No-Bake Pink Velvet Cheesecake Bites
Understanding the ingredients in your No-Bake Pink Velvet Cheesecake Bites is key to mastering this delightful dessert. Each component plays a vital role in creating the perfect balance of flavor and texture. Let’s break it down!
Crust:
- Graham Cracker Crumbs: These little gems provide a sweet and crunchy base that contrasts beautifully with the creamy filling. The aroma of freshly crushed graham crackers will transport you to summer picnics and backyard barbecues.
- Granulated Sugar: This ingredient enhances the sweetness in the crust, making each bite a delightful treat. Just the right amount of sugar ensures that the crust complements the filling without overpowering it.
- Unsalted Butter: The unsalted butter binds the crust together and adds richness. It also contributes to that irresistible buttery flavor that makes the crust so addictive. Trust me, you’ll want to sneak a few bites before the filling even makes it in!
Filling:
- Cream Cheese: The star of the show! Cream cheese provides the luscious creaminess and tang that makes cheesecake so beloved. Make sure it’s softened to room temperature for the smoothest texture—nobody wants a lumpy filling!
- Powdered Sugar: This sweetener is perfect for the filling as it dissolves easily, ensuring a smooth and creamy consistency without any grittiness. It’s the secret to achieving that melt-in-your-mouth experience.
- Heavy Cream: Adding heavy cream introduces lightness and a fluffy texture to the filling. When whipped, it creates a cloud-like consistency that elevates the cheesecake to new heights of indulgence.
- Vanilla Extract: A splash of vanilla enhances the flavor depth, bringing warmth and richness to the filling. It’s like a hug for your taste buds, making every bite feel comforting and familiar.
- Pink Food Coloring: This ingredient gives the cheesecake its signature hue, making it visually appealing and fun. Just a tablespoon is all you need to achieve that vibrant pink without altering the flavor—perfect for festive occasions!
Topping:
- Whipped Cream: A dollop of whipped cream adds a light and airy finish to the cheesecake bites. It’s the perfect way to balance the richness of the filling and adds a touch of elegance to your presentation.
- Sprinkles: While optional, sprinkles bring a festive touch that makes these bites even more delightful. They add a pop of color and a bit of crunch, making them irresistible to both kids and adults alike!
With these ingredients, you’re well on your way to creating the most delightful No-Bake Pink Velvet Cheesecake Bites. Each component works in harmony to create a dessert that’s not only delicious but also a feast for the eyes. So, gather your ingredients and let’s get ready to whip up some magic in the kitchen!
Step-by-Step Guide to Perfect No-Bake Pink Velvet Cheesecake Bites
Now that you’re all set with the ingredients and tools, let’s dive into the delightful process of creating these No-Bake Pink Velvet Cheesecake Bites. Trust me, the moment you take that first bite, you’ll understand why they’re a favorite in my kitchen!
- Prepare the Crust: In a medium bowl, combine 1 cup of graham cracker crumbs, 1/4 cup of granulated sugar, and 1/2 cup of melted unsalted butter. Mix until the crumbs are evenly coated and the mixture resembles wet sand. The aroma of buttery sweetness will fill your kitchen, making it hard to resist tasting a spoonful!
- Form the Base: Press the crumb mixture firmly into the bottom of a 9-inch square baking dish. Use the back of a measuring cup or your fingers to ensure it’s compact. This step is crucial; a well-pressed crust will hold together beautifully when you cut into the bites later.
- Make the Filling: In a large mixing bowl, beat 16 oz of softened cream cheese with an electric mixer until smooth and creamy, about 2-3 minutes. The texture should be velvety, and the aroma will be heavenly!
- Add Sweetness and Flavor: Gradually add 1 cup of powdered sugar, 1/2 cup of heavy cream, 1 tsp of vanilla extract, and 1 tbsp of pink food coloring to the cream cheese. Beat until fully combined and fluffy, approximately 3-4 minutes. The mixture should be light and airy, with a beautiful pink hue that’s simply irresistible.
- Spread the Filling: Carefully spread the cheesecake filling evenly over the crust using a spatula. Take your time with this step; a smooth top will make for a stunning presentation when you serve these bites.
- Chill to Perfection: Refrigerate for at least 4 hours or until set. For the best results, I recommend letting them chill overnight. The anticipation will be worth it when you finally cut into these creamy bites!
- Finish with a Touch of Whipped Cream: Once set, top with 1/2 cup of whipped cream and sprinkle with optional sprinkles for that festive touch. Cut into bite-sized squares and prepare for the compliments to roll in!
And there you have it! A simple yet rewarding process that results in a dessert that’s as delightful to look at as it is to eat. Remember, the key to these No-Bake Pink Velvet Cheesecake Bites is patience—allowing them to set properly will ensure a perfect texture and flavor. Enjoy the process, and don’t forget to share your creations with loved ones!
Chef’s Notes & Pro Tips for Flawless Results
As you embark on your journey to create these delightful No-Bake Pink Velvet Cheesecake Bites, I want to share some invaluable tips that I’ve gathered over the years. These insights will help you achieve the best results and make your baking experience even more enjoyable!
- Make-ahead Instructions: These cheesecake bites can be made up to 2 days in advance and stored in the refrigerator. This is a lifesaver for busy schedules or when you want to impress guests without the last-minute rush. Just remember to cover them well to keep that creamy texture intact!
- Storage: Keep any leftovers in an airtight container in the fridge for up to 5 days. I often find that the flavors deepen a bit after a day or two, making them even more delicious. Just be sure to keep them chilled to maintain that perfect creamy consistency.
- Equipment Recommendations: If you have a stand mixer, use it! It can save you time and effort when mixing the filling, allowing you to achieve that dreamy, fluffy texture with minimal elbow grease. Plus, it frees up your hands for other tasks—like sneaking a taste of the filling!
- Customization Options: Don’t be afraid to get creative! Experiment with different food colorings to match your occasion or add flavor extracts like almond or lemon for a delightful twist. You can even fold in some crushed fruit or chocolate chips for added texture and flavor. The beauty of these bites is their versatility!
With these tips in your back pocket, you’re well on your way to creating the most scrumptious No-Bake Pink Velvet Cheesecake Bites that will leave everyone asking for seconds. Enjoy the process, and remember, cooking is all about having fun and making memories!
Avoid These Common Cooking Mistakes
As you embark on your journey to create the perfect No-Bake Pink Velvet Cheesecake Bites, it’s essential to be aware of some common pitfalls that can derail your dessert dreams. Trust me, I’ve made these mistakes myself, and I want to save you from the same fate! Here are the key missteps to avoid:
- Not softening the cream cheese: This can lead to a lumpy filling that’s less than appealing. Always let your cream cheese sit at room temperature for at least 30 minutes before mixing. The result? A smooth, creamy texture that’s a joy to eat!
- Overmixing the filling: While it’s tempting to whip it into a frenzy, overmixing can cause the cheesecake to crack. Mix just until combined to maintain that perfect, fluffy consistency. Think of it as a gentle dance rather than a wild party!
- Skipping the refrigeration step: Patience is key! If you skip chilling, your bites won’t set properly, resulting in a gooey mess instead of delightful squares. Always chill for at least 4 hours—or better yet, overnight for the best results.
- Using too much food coloring: While we want that vibrant pink hue, too much can alter the flavor. Start with a small amount and adjust as needed. A little goes a long way, and you want the taste to shine through!
- Not pressing the crust firmly: A crumbly base can ruin the whole experience. Ensure you press the crust mixture firmly into the baking dish to create a solid foundation for your cheesecake. Think of it as building a sturdy house—no one wants a wobbly structure!
- Using a warm baking dish: This can melt your filling before it even has a chance to set. Always use a cool dish for best results. It’s a simple step that can make a world of difference in the final product.
- Not measuring ingredients accurately: Precision is key in baking! Not measuring ingredients accurately can affect both the texture and taste of your cheesecake bites. Use measuring tools for precision, and you’ll be rewarded with a dessert that’s just right.
By keeping these common mistakes in mind, you’ll be well on your way to creating the most delightful No-Bake Pink Velvet Cheesecake Bites that will impress your family and friends. Remember, every great cook learns from their missteps, so don’t be discouraged—just keep these tips in your back pocket for a flawless outcome!
Creative Variations & Customizations
One of the best things about the No-Bake Pink Velvet Cheesecake Bites is their versatility! You can easily adapt this recipe to suit different dietary needs or seasonal flavors. Here are some creative variations and customizations that I’ve tried and loved:
- Gluten-Free Version: If you or your guests are gluten-sensitive, simply substitute the graham crackers with gluten-free alternatives. There are many delicious options available that will still give you that satisfying crunch without compromising on flavor.
- Dairy-Free Option: For those who are dairy-free, you can use dairy-free cream cheese and whipped topping. Brands like Tofutti or Kite Hill offer great alternatives that will still yield a creamy and delightful filling.
- Seasonal Flavors: Embrace the seasons by adding a twist to your cheesecake bites! For fall, consider incorporating pumpkin spice into the filling, or for winter, a splash of peppermint extract can create a festive flavor that’s perfect for holiday gatherings.
- Fruit-Infused: Want to add a fruity flair? Incorporate pureed strawberries or raspberries into the filling for a burst of flavor and a beautiful color contrast. This not only enhances the taste but also adds a lovely visual appeal to your bites.
- Chocolate Lovers: If you’re a chocolate fanatic, swirl in some melted chocolate or add cocoa powder to the filling for a rich chocolate version. This decadent twist will satisfy any chocolate cravings and make your cheesecake bites even more indulgent!
These variations not only keep things exciting but also allow you to cater to different tastes and dietary preferences. So, don’t hesitate to experiment and make these No-Bake Pink Velvet Cheesecake Bites your own. The kitchen is your playground, and I can’t wait to hear about the delicious creations you come up with!
Perfect Pairings: What to Serve With No-Bake Pink Velvet Cheesecake Bites
When it comes to serving your No-Bake Pink Velvet Cheesecake Bites, the right accompaniments can elevate the experience to new heights. Here are some delightful pairings that will complement the creamy sweetness of your cheesecake bites and create a memorable dessert spread:
- Fresh Strawberries: Their tartness beautifully complements the sweetness of the cheesecake, creating a harmonious balance of flavors. Plus, the vibrant red color adds a lovely contrast to the pink bites!
- Vanilla Ice Cream: A scoop of creamy vanilla ice cream adds an extra layer of richness and balances the flavors perfectly. The cold creaminess against the chilled cheesecake is a match made in dessert heaven.
- Chocolate Sauce: Drizzling some rich chocolate sauce over the cheesecake bites provides a decadent touch that chocolate lovers will adore. It adds a luxurious element that takes these bites to the next level.
- Whipped Cream: A dollop of fluffy whipped cream enhances the lightness of the dessert and adds a touch of elegance. It’s the perfect finishing touch that makes each bite feel like a special treat.
- Mint Leaves: Garnishing with fresh mint leaves offers a refreshing flavor boost that cuts through the sweetness. It also adds a pop of color and a lovely aroma that will entice your guests.
- Assorted Cookies: Create a delightful dessert spread by serving your cheesecake bites alongside an assortment of cookies. The variety will please every palate and make for a fun, interactive dessert experience.
- Sparkling Rosé: For a festive touch, pair your cheesecake bites with a glass of sparkling rosé. The bubbles and lightness of the wine complement the creamy texture of the cheesecake, making it a perfect pairing for celebrations.
- Coffee: A cup of coffee balances the sweetness of the cheesecake and enhances the overall experience. The rich, bold flavors of coffee create a delightful contrast that many will appreciate.
These pairings not only enhance the flavors of your No-Bake Pink Velvet Cheesecake Bites but also create a beautiful presentation that will impress your guests. So, gather your favorite accompaniments and get ready to indulge in a dessert experience that’s truly unforgettable!
Storage & Meal Prep Instructions
Now that you’ve created your delightful No-Bake Pink Velvet Cheesecake Bites, it’s essential to know how to store them properly to maintain their creamy texture and flavor. Here are some handy storage and meal prep tips to keep your bites fresh and delicious!
- Fridge Storage: Keep your cheesecake bites in an airtight container in the refrigerator for up to 5 days. This will help preserve their creamy texture and prevent them from absorbing any unwanted odors from the fridge. I often find that the flavors deepen a bit after a day or two, making them even more enjoyable!
- Freezer Storage: If you want to make these bites ahead of time, they can be frozen for up to 2 months. Just be sure to wrap them tightly in plastic wrap and then place them in a freezer-safe container. When you’re ready to enjoy, simply thaw them in the refrigerator before serving. This way, you’ll always have a sweet treat on hand for unexpected guests or cravings!
- Reheating Methods: Not applicable, as these cheesecake bites are best served cold. Simply slice and enjoy straight from the fridge. The cool, creamy texture is part of what makes them so delightful, so there’s no need for any reheating!
With these storage and meal prep instructions, you can enjoy your No-Bake Pink Velvet Cheesecake Bites at your leisure, ensuring that every bite is just as delicious as the first. Happy indulging!
Nutrition Facts & Health Insights
Understanding the nutritional profile of your No-Bake Pink Velvet Cheesecake Bites can help you enjoy them guilt-free. Here’s a detailed breakdown of the nutrition facts, so you can savor each bite with confidence!
| Nutrient | Amount per Serving |
|---|---|
| Serving Size | 1 square (approximately 1.5 oz) |
| Calories | 150 |
| Sugar | 10 grams |
| Sodium | 120 milligrams |
| Fat | 10 grams |
| Saturated Fat | 6 grams |
| Unsaturated Fat | 3 grams |
| Trans Fat | 0 grams |
| Carbohydrates | 15 grams |
| Fiber | 0 grams |
| Protein | 2 grams |
| Cholesterol | 30 milligrams |
These No-Bake Pink Velvet Cheesecake Bites not only satisfy your sweet tooth but also offer some nutritional benefits. The cream cheese provides a good source of calcium and protein, essential for maintaining strong bones and muscles. Meanwhile, the graham cracker crust contributes a source of carbohydrates for energy, making these bites a delightful treat that can fuel your day.
So, whether you’re enjoying them as a dessert or a sweet snack, you can feel good about indulging in these creamy bites. Just remember, moderation is key, and sharing them with friends and family makes the experience even sweeter!
Frequently Asked Questions
- Can I use low-fat cream cheese?
Absolutely! Low-fat cream cheese can be used as a substitute, but keep in mind that it may alter the texture slightly, making it less creamy. If you’re looking to cut calories, this is a great option, but for the best flavor and texture, I recommend sticking with regular cream cheese if possible. - How long do these cheesecake bites last in the fridge?
These delightful bites can be stored in the refrigerator for up to 5 days in an airtight container. They often taste even better after a day or two as the flavors meld together, so don’t hesitate to make them ahead of time! - Can I make these bites without food coloring?
Yes, you can definitely make these cheesecake bites without food coloring! The pink hue is purely for visual appeal, so feel free to skip it if you prefer a more natural look. The flavor will remain just as delicious! - What can I substitute for heavy cream?
If you’re looking for a substitute for heavy cream, you can use whipping cream or coconut cream for a dairy-free option. Both will provide a similar texture, but keep in mind that coconut cream will impart a slight coconut flavor. - Is it necessary to use a mixer for the filling?
While using a mixer is highly recommended for achieving that smooth, creamy texture, you can also mix by hand if you don’t have one. Just be prepared to put in a little extra elbow grease to ensure everything is well combined! - Can I freeze the cheesecake bites?
Yes, you can freeze these cheesecake bites for up to 2 months. Just wrap them tightly in plastic wrap and place them in a freezer-safe container. When you’re ready to enjoy, thaw them in the refrigerator overnight for the best texture. - How do I know when the cheesecake is set?
The cheesecake bites are set when they are firm to the touch and have a slight jiggle in the center. If you gently press the surface and it springs back, they’re ready to be enjoyed! Refrigerating them overnight is the best way to ensure they set perfectly. - What if I don’t have a square baking dish?
No worries! If you don’t have a square baking dish, you can use a round dish instead. Just keep in mind that the cutting process may be a bit different, but the bites will still turn out delicious! - Can I add fruit to the filling?
Absolutely! Adding pureed fruit like strawberries or raspberries can enhance the flavor and add a lovely color contrast. Just be sure to adjust the sugar accordingly, as the fruit will add natural sweetness. - How can I make these bites more festive for holidays?
To make your cheesecake bites more festive, consider adding seasonal flavors like pumpkin spice for fall or peppermint extract for winter. You can also decorate them with themed sprinkles or edible glitter to match the occasion!
Final Inspiration & Kitchen Confidence
As you stand in your kitchen, ready to embark on the delightful journey of making No-Bake Pink Velvet Cheesecake Bites, I want to remind you of the joy that comes from creating something beautiful and delicious. Each step you take is not just about following a recipe; it’s about pouring your heart into a creation that will bring smiles and happiness to those you love. The vibrant pink hue and creamy texture of these bites are sure to evoke joy, making them a perfect centerpiece for any gathering.
Remember, cooking is an art, and like any artist, you have the freedom to experiment and enjoy the process. Don’t be afraid to make these bites your own—whether it’s adding a twist of flavor or decorating them in a way that reflects your personality. The kitchen is a place of creativity, and every attempt, whether perfect or not, is a step towards mastering your culinary skills.
I encourage you to share your creations with friends and family, as food has a magical way of bringing people together. Snap a photo of your No-Bake Pink Velvet Cheesecake Bites and share it with your loved ones or on social media. I would love to see how your bites turn out! Your feedback and stories not only inspire me but also foster a sense of community among fellow cooking enthusiasts. So, let’s celebrate the joy of cooking together—one delicious bite at a time!
Print
No-Bake Pink Velvet Cheesecake Bites: Creamy Bliss Awaits!
- Total Time: 4 hours 20 minutes
- Yield: 16 servings 1x
- Diet: Vegetarian
Description
Indulge in the velvety smoothness of these No-Bake Pink Velvet Cheesecake Bites, where each bite melts in your mouth, leaving a delightful sweetness that lingers. The rich cream cheese base is perfectly complemented by a hint of vanilla and a subtle tang, while the vibrant pink hue adds a playful touch to your dessert table.
Ingredients
- Crust:
- 1 cup graham cracker crumbs
- 1/4 cup granulated sugar
- 1/2 cup unsalted butter, melted
- Filling:
- 16 oz cream cheese, softened
- 1 cup powdered sugar
- 1/2 cup heavy cream
- 1 tsp vanilla extract
- 1 tbsp pink food coloring
- Topping:
- 1/2 cup whipped cream
- Sprinkles (optional)
Instructions
- In a medium bowl, combine graham cracker crumbs, granulated sugar, and melted butter. Mix until well combined.
- Press the mixture firmly into the bottom of a 9-inch square baking dish to form the crust.
- In a large mixing bowl, beat the softened cream cheese until smooth and creamy.
- Add powdered sugar, heavy cream, vanilla extract, and pink food coloring to the cream cheese. Beat until fully combined and fluffy.
- Spread the cheesecake filling evenly over the crust.
- Refrigerate for at least 4 hours or until set.
- Once set, top with whipped cream and sprinkle with optional sprinkles before cutting into bite-sized squares.
Notes
- Make-ahead: These cheesecake bites can be made up to 2 days in advance and stored in the refrigerator.
- Storage: Keep leftovers in an airtight container in the fridge for up to 5 days.
- Substitutions: Use gluten-free graham crackers for a gluten-free version or swap cream cheese for a dairy-free alternative.
- Prep Time: 20 minutes
- Cook Time: 0 minutes
- Category: desserts
- Method: no-bake
- Cuisine: American
Nutrition
- Serving Size: 1 square (approximately 1.5 oz)
- Calories: 150
- Sugar: 10 grams
- Sodium: 120 milligrams
- Fat: 10 grams
- Saturated Fat: 6 grams
- Unsaturated Fat: 3 grams
- Trans Fat: 0 grams
- Carbohydrates: 15 grams
- Fiber: 0 grams
- Protein: 2 grams
- Cholesterol: 30 milligrams
Keywords: No-Bake Pink Velvet Cheesecake Bites, cheesecake bites, no-bake desserts, pink velvet cheesecake, easy cheesecake recipe, creamy cheesecake, dessert bites, party desserts, festive treats, sweet snacks, no-bake treats, pink desserts, cream cheese dessert


