
The aroma of freshly baked bread wafts through the kitchen, warm and comforting, inviting you to step a little closer. The deep, crackled crust, golden-brown and rustic, encases a tender, creamy crumb, bursting with flavor. You can almost hear the delightful crunch as you slice into it, steam gently escaping, revealing the airy texture crafted with love and patience. This is not just any bread; this is No-Bulk-Fermentation Sourdough Bread, your new signature loaf that embodies the essence of homemade goodness and the joy of artisanal baking.
Imagine serving this bread warm, the crust crackling under your fingertips, the inner texture soft and slightly tangy, with just a hint of nuts from the fermentation process. Each bite transports you through a symphony of flavors, beautifully complex yet remarkably simple. Picture yourself enjoying it with a smear of creamy, herb-infused butter, or perhaps alongside a rich, hearty soup. This is the kind of bread that turns a meal into a celebration, filling your home with warmth and laughter, as the scent of baking bread lingers in the air long after the last slice is gone.
Why You’ll Love This No-Bulk-Fermentation Sourdough Bread
This No-Bulk-Fermentation Sourdough Bread distinguishes itself in the world of homemade bread with its unique approach. The absence of a lengthy bulk fermentation stage allows you to create this delightful loaf in a fraction of the time without sacrificing flavor or texture. Perfect for busy weeknights or spontaneous weekend baking sessions, this recipe results in a crusty exterior that gives way to a soft, chewy interior—a delectable combination that lingers on your taste buds.
Imagine welcoming friends or family over, cutting into this loaf while they marvel at the glorious sight of the steam rising from the freshly sliced bread. It is a crowd-pleaser, ideal as a sandwich base, served alongside your favorite meals, or even toasted for breakfast slathered with jam. The ability to customize flavors—from adding herbs to incorporating nuts or dried fruits—makes it your own, a reflection of your culinary creativity.
Preparation Phase & Tools to Use
To embark on your bread-making journey, having the right tools can make all the difference. Here’s a rundown of the essentials:
- Mixing Bowl: A large, sturdy bowl provides enough space to combine your ingredients without the risk of a flour explosion.
- Dutch Oven: This magical vessel retains heat beautifully, mimicking a traditional bread oven that creates that irresistible crust. Preheating it ensures a perfect environment for your dough to rise and develop its crust.
- Lame or Sharp Knife: A good scoring tool ensures precise cuts on your loaf, allowing it to expand properly during baking and enhancing the visual appeal.
- Proofing Basket (Banneton): This helps shape your dough and creates those lovely ribbed patterns on the crust, an added touch of artistry to your bread.
- Kitchen Scale: Precision is the name of the game in sourdough baking. A scale guarantees that you’re measuring your ingredients accurately for the best results.
Before diving into the baking process, take a moment to read through the steps and gather your ingredients. While baking is a science, it’s also an art; allow your instincts to guide you as you craft this delightful loaf.
Ingredients for No-Bulk-Fermentation Sourdough Bread
This recipe requires:
- 500g Bread Flour: High-protein flour aids in gluten development, resulting in a beautiful texture. You can substitute a portion with whole wheat flour for a nuttier flavor.
- 350ml Water: Use filtered water at room temperature to promote a healthy fermentation environment.
- 100g Sourdough Starter: Your active, bubbly starter is crucial; make sure it’s well-fed and at its peak. You can also experiment with different starter types to discover unique flavors.
- 10g Salt: Sea salt or kosher salt works best, framing the bread’s flavor and enhancing the overall taste.
How to Make No-Bulk-Fermentation Sourdough Bread
-
Combine Ingredients: In a large bowl, mix the sourdough starter, flour, and water. Stir gently until no dry bits remain.
Tip: Use a spatula or your hands to help incorporate everything smoothly.
-
Rest (Autolyse): Let the mixture rest for about 30 minutes. This step allows the flour to absorb the water, initiating gluten development.
-
Add Salt: Sprinkle the salt over the dough and mix it in. Ensure it’s fully incorporated for a well-balanced flavor.
-
Folding Time: Allow the dough to rest at room temperature for 4 hours. Each hour, perform a series of folds—gently stretch and fold the dough over itself.
Tip: This technique strengthens the dough while introducing air, vital for airy bread.
-
Shape the Dough: After 4 hours, shape the dough into a round loaf by gently folding the edges inward toward the center.
-
Proofing: Place the shaped dough into a proofing basket, seam side up. Cover and let it rest for another 30 minutes.
-
Preheat Oven: Preheat the oven to 450°F (230°C), making sure your Dutch oven is inside to heat up as well.
-
Transfer Dough: Carefully transfer the dough into the hot Dutch oven. Score the top with your lame or knife to create steam valves.
-
Bake: Cover and bake for 30 minutes. Then, remove the lid and continue baking for an additional 15-20 minutes until the loaf turns golden brown.
-
Cool & Slice: Allow the bread to cool on a wire rack. This step is essential for preserving texture. After about an hour, slice and enjoy!
Chef’s Notes & Helpful Tips
- Make-Ahead: Prepare your dough in the evening, allow it to rise slowly in the fridge overnight, then bake the next day for a delightful morning treat.
- Alternate Baking Methods: If you don’t have a Dutch oven, try using an air fryer or a conventional oven with a baking stone for an alternative baking strategy. Just ensure you add steam for that coveted crust.
- Customization Ideas: Add a sprinkle of herbs, seeds, or even cheese for a gourmet twist!
Common Mistakes to Avoid
- Rushing the Autolyse: Skipping or shortening this critical step can lead to dense bread. Give those enzymes time to work!
- Ignoring Dough Temperature: If your kitchen is too cold, the dough may under-ferment. Find a warm spot for successful fermentation.
- Overworking the Dough: This can lead to a tough texture. Handle with gentleness during folding and shaping to maintain that airy crumb.
What to Serve With No-Bulk-Fermentation Sourdough Bread
This bread pairs beautifully with various dishes, enhancing your meals with its crusty exterior and flavorful crumb:
- Soups: Dip a slice in a hearty tomato basil soup or a creamy clam chowder for a comforting meal.
- Grilled Cheese: The chewy texture complements melted cheese perfectly, making your sandwich an indulgent experience.
- Salads: Serve it alongside a fresh, vibrant salad drizzled with olive oil and balsamic vinegar for a balanced meal.
- Charcuterie Board: Slice it up for a stunning cheese platter; its flavor adds depth to various cheeses and meats.
- Bruschetta: Top toasted slices with fresh tomatoes, basil, and mozzarella for a delightful starter.
- Jam or Honey: The sweetness of jam or honey contrasts beautifully with the bread’s tang, perfect for breakfast.
Storage & Reheating Instructions
This bread stays fresh on your counter for about 3 days when wrapped in a clean kitchen towel. For longer storage, slice and freeze the loaf in an airtight container or freezer bag to preserve its flavor. When ready to enjoy, thaw at room temperature or briefly reheat in the oven for that fresh-baked taste.
Estimated Nutrition Information
Approximate values per slice:
- Calories: 150
- Protein: 5g
- Carbohydrates: 30g
- Fat: 1g
(Values may vary based on ingredients and methods used.)
FAQs
1. Can I use whole wheat flour instead of bread flour?
Yes, you can substitute a portion of bread flour with whole wheat flour. However, expect a denser texture and adjust water accordingly.
2. How do I know if my sourdough starter is active?
Your starter should double in size and have a pleasant, slightly tangy aroma. A drop test (adding a spoonful to water) can also indicate readiness—if it floats, it’s active.
3. Can I bake without a Dutch oven?
Absolutely! You can use a baking stone or a cast-iron skillet. Just ensure to introduce steam into your oven during baking for a better crust.
4. How do I store leftover bread?
Wrap it in a kitchen towel and place it in a paper bag. For longer storage, slice it and freeze it—this preserves its freshness.
5. What if my dough feels too wet?
Don’t panic! Wet doughs yield incredible results. Use a bench scraper to help shape your dough rather than adding more flour, which can alter the texture.
Conclusion
Crafting No-Bulk-Fermentation Sourdough Bread transforms an everyday activity into an exhilarating adventure of flavor and texture. With every crusty slice, you invite the joy of home-baked goodness into your kitchen, ensuring each meal becomes a cherished occasion. So grab your flour, nurture that starter, and embark on a journey that promises not only delicious bread but unforgettable moments around the table. You’ll find that this recipe not only satisfies cravings but also brings warmth and love to every home it graces. Happy baking!
Print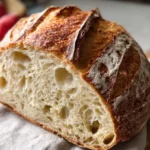
No-Bulk-Fermentation Sourdough Bread
- Total Time: 60 minutes
- Yield: 1 loaf 1x
- Diet: Vegetarian
Description
A delightful sourdough bread with a crusty exterior and soft, chewy interior, made without the lengthy bulk fermentation process.
Ingredients
- 500g Bread Flour
- 350ml Water
- 100g Sourdough Starter
- 10g Salt
Instructions
- Combine the sourdough starter, flour, and water in a large bowl. Stir gently until no dry bits remain.
- Rest the mixture for about 30 minutes to allow the flour to absorb the water.
- Add the salt over the dough and mix it in until fully incorporated.
- Folding time: Let the dough rest for 4 hours, performing folds each hour to strengthen it.
- Shape the dough into a round loaf by folding the edges inward.
- Proof the shaped dough in a proofing basket, seam side up, for another 30 minutes.
- Preheat the oven to 450°F (230°C) with the Dutch oven inside.
- Transfer the dough into the hot Dutch oven and score the top.
- Bake for 30 minutes covered, then remove the lid and bake for an additional 15-20 minutes until golden brown.
- Cool on a wire rack for about an hour before slicing.
Notes
For make-ahead, prepare the dough in the evening and let it rise in the fridge overnight. Customize by adding herbs, seeds, or cheese.
- Prep Time: 15 minutes
- Cook Time: 45 minutes
- Category: Bread
- Method: Baking
- Cuisine: American
Nutrition
- Serving Size: 1 slice
- Calories: 150
- Sugar: 0g
- Sodium: 400mg
- Fat: 1g
- Saturated Fat: 0g
- Unsaturated Fat: 0g
- Trans Fat: 0g
- Carbohydrates: 30g
- Fiber: 1g
- Protein: 5g
- Cholesterol: 0mg
Keywords: sourdough bread, homemade bread, baking


