
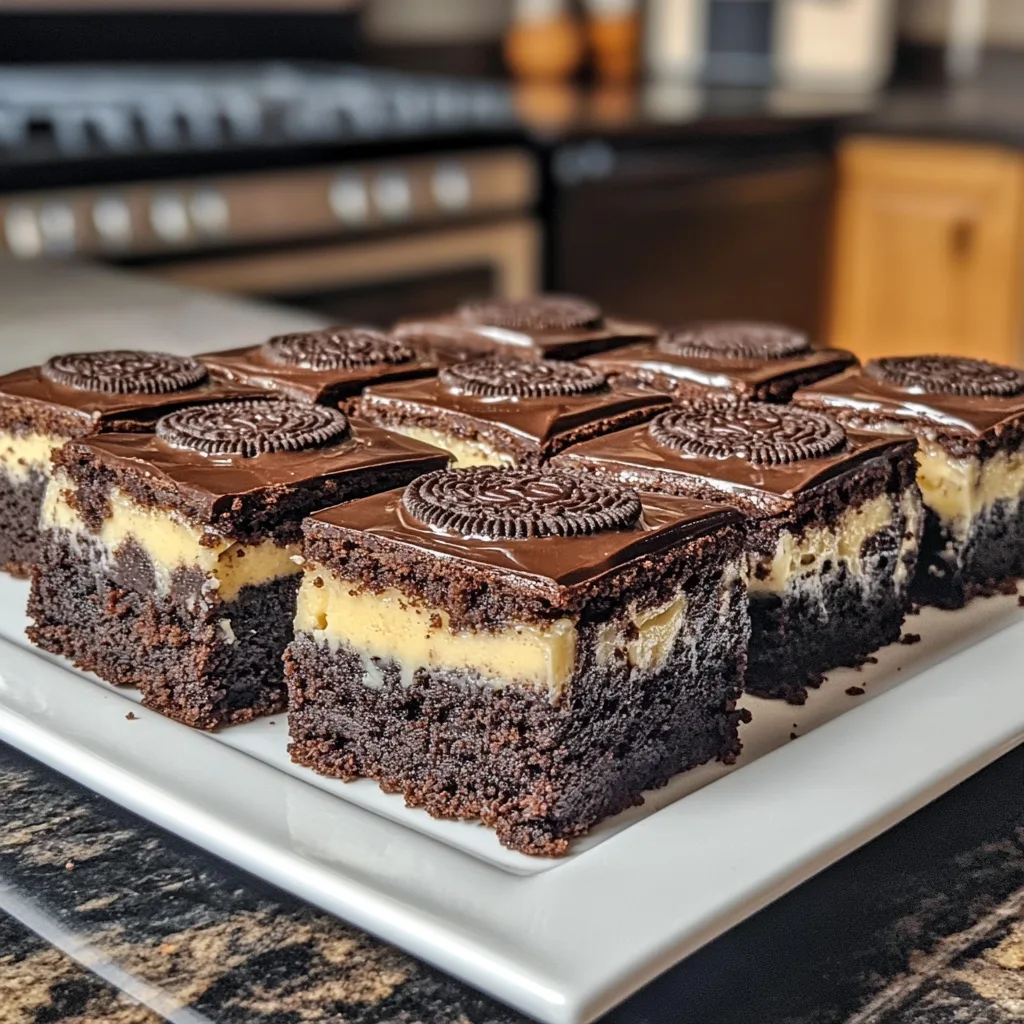
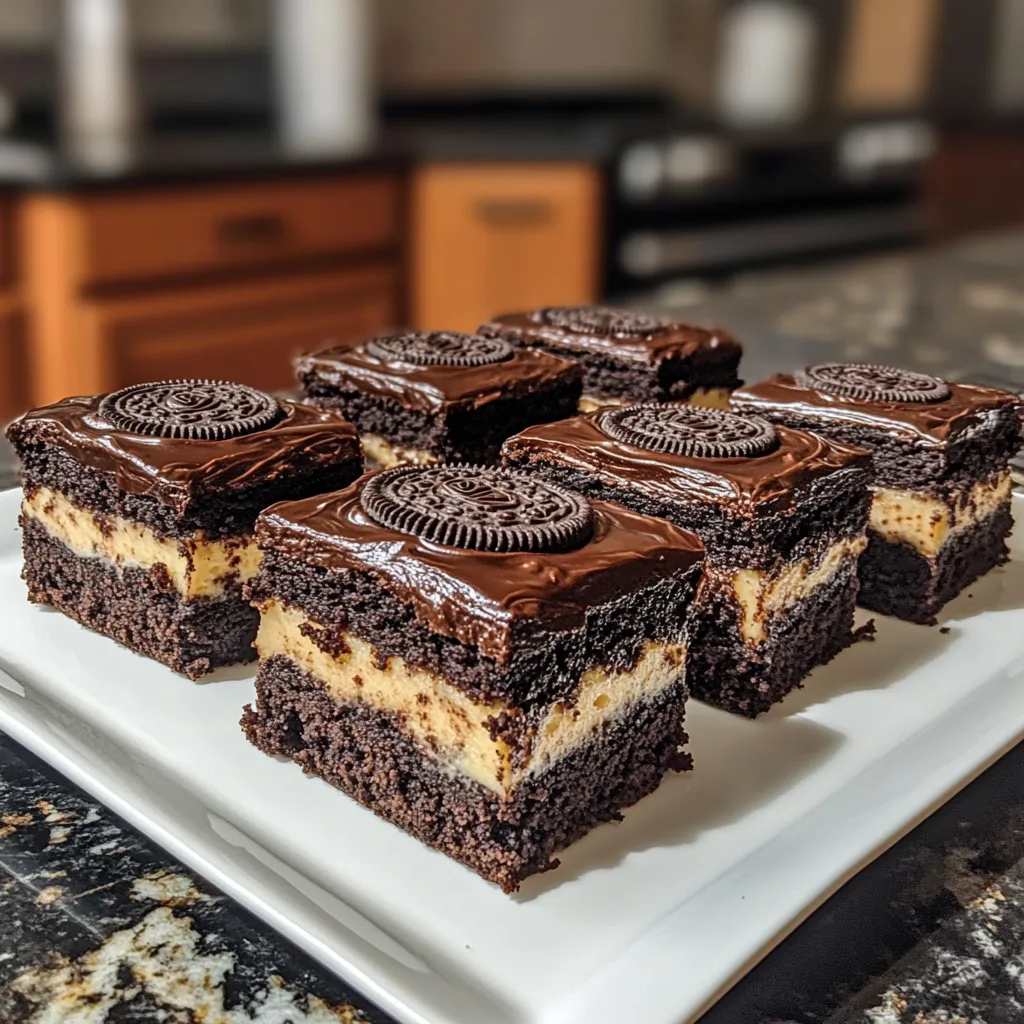
Introduction to Oreo Layered Halloween Brownies
As the leaves turn and the air gets crisp, I find myself craving something sweet and a little spooky. That’s where my Oreo Layered Halloween Brownies come in! These delightful treats are not just a feast for the eyes; they’re a quick solution for busy days filled with Halloween festivities. With layers of rich brownie, creamy filling, and crunchy Oreos, they’re sure to impress your loved ones. Whether you’re hosting a party or just looking to indulge, these brownies are the perfect way to celebrate the season. Let’s dive into this delicious adventure!
Why You’ll Love This Oreo Layered Halloween Brownies
These Oreo Layered Halloween Brownies are a game-changer for busy moms and professionals alike. They come together in just under an hour, making them perfect for last-minute gatherings. The combination of fudgy brownies and crunchy Oreos creates a taste sensation that’s hard to resist. Plus, they’re a hit with kids and adults, ensuring smiles all around. Trust me, these brownies will become your go-to treat for any Halloween celebration!
Ingredients for Oreo Layered Halloween Brownies
Gathering the right ingredients is half the fun of baking! For these Oreo Layered Halloween Brownies, you’ll need a mix of pantry staples and a few special treats. Here’s what you’ll need:
- Brownie mix: The base of our dessert, providing that rich, fudgy goodness. You can use your favorite brand or even make it from scratch if you’re feeling adventurous!
- Large eggs: These help bind everything together, giving the brownies their moist texture. If you’re out of eggs, you can substitute with applesauce or a flaxseed mixture.
- Vegetable oil: This adds moisture and richness. You can swap it for melted butter for a more decadent flavor.
- Water: Just a little to help the brownie mix come together. It’s a simple ingredient, but it plays a crucial role!
- Oreo cookies: The star of the show! Their crunchy texture and chocolatey flavor create a delightful contrast in every bite. Feel free to use any flavor of Oreos you love!
- Cream cheese: This adds a creamy layer that balances the sweetness of the brownies. Make sure it’s softened for easy mixing.
- Powdered sugar: This sweetens the cream cheese mixture and gives it a smooth texture. If you’re looking for a healthier option, you can use a sugar substitute.
- Vanilla extract: A splash of this adds depth to the cream cheese layer. It’s a small but mighty ingredient!
- Whipped topping: This is optional but adds a light, fluffy finish to your brownies. You can use homemade whipped cream for a fresher taste.
- Halloween-themed sprinkles: These are purely for fun! They add a festive touch and make your brownies extra special.
For exact measurements, check the bottom of the article where you can find everything listed for easy printing. Now that we have our ingredients ready, let’s get to the fun part—baking!
How to Make Oreo Layered Halloween Brownies
Now that we have our ingredients ready, let’s dive into the fun part—making these Oreo Layered Halloween Brownies! Follow these simple steps, and you’ll have a spooky treat that’s sure to impress.
Step 1: Preheat the Oven
First things first, preheat your oven to 350°F (175°C). Preheating is crucial because it ensures that your brownies bake evenly. If you skip this step, you might end up with gooey centers or burnt edges. Trust me, a little patience here goes a long way!
Step 2: Prepare the Brownie Mix
Next, grab your brownie mix and follow the package instructions. Typically, you’ll need to mix it with eggs, vegetable oil, and water. Stir until everything is well combined, but don’t overmix! A few lumps are okay. This will help achieve that perfect fudgy texture we all love.
Step 3: Layer the Brownie Batter
Now, pour half of the brownie batter into a greased baking pan. Use a spatula to spread it evenly across the bottom. This layer is the foundation of your Oreo Layered Halloween Brownies, so make sure it’s nice and smooth!
Step 4: Add the Oreo Cookies
Time to add the magic! Layer half of the Oreo cookies on top of the brownie batter. You can break them in half if you like, but I prefer to keep them whole for that delightful crunch. These cookies are essential for flavor, adding a rich chocolatey taste that pairs perfectly with the brownies.
Step 5: Make the Cream Cheese Mixture
In a separate bowl, mix the softened cream cheese, powdered sugar, and vanilla extract until smooth. Use an electric mixer if you have one; it makes the job easier! The goal is a creamy, lump-free mixture that will add a delicious layer to your brownies.
Step 6: Spread the Cream Cheese Layer
Now, gently spread the cream cheese mixture over the Oreo layer. Use a spatula to ensure it’s evenly distributed. This creamy layer is what makes these brownies so special, so take your time to get it just right!
Step 7: Add More Oreos
Next, it’s time for round two of Oreos! Add the remaining cookies on top of the cream cheese layer. This second layer of Oreos adds even more texture and flavor, making every bite a delightful surprise.
Step 8: Pour the Remaining Brownie Batter
Carefully pour the rest of the brownie batter over the Oreos. Make sure to cover them completely. This step is crucial because it seals in all that deliciousness. Use your spatula to spread it evenly, ensuring no Oreos peek through!
Step 9: Bake the Brownies
Pop your pan into the preheated oven and bake for 30-35 minutes. Keep an eye on them! To check for doneness, insert a toothpick into the center. If it comes out clean or with a few moist crumbs, they’re ready. If it’s wet, give them a few more minutes.
Step 10: Cool and Top
Once baked, remove the brownies from the oven and let them cool in the pan. This cooling time is essential for the flavors to meld together. After they’ve cooled, top with whipped topping and sprinkle with Halloween-themed sprinkles for that festive touch. Now, you’re ready to serve these spooky delights!
Tips for Success
- Always preheat your oven for even baking.
- Use room temperature cream cheese for a smoother mixture.
- Don’t overmix the brownie batter; a few lumps are fine!
- Let the brownies cool completely before cutting for cleaner slices.
- Experiment with different Oreo flavors for a fun twist!
Equipment Needed
- Baking pan: A 9×13 inch pan works best, but an 8×8 inch pan is fine for thicker brownies.
- Mixing bowls: Use medium and large bowls for mixing ingredients.
- Spatula: A rubber spatula is perfect for spreading batter and cream cheese.
- Electric mixer: Optional, but it makes mixing the cream cheese easier.
- Toothpick: Essential for checking if your brownies are done baking.
Variations
- Gluten-Free: Use a gluten-free brownie mix to make these brownies suitable for those with gluten sensitivities.
- Nutty Delight: Add chopped nuts, like walnuts or pecans, to the brownie batter for an extra crunch.
- Minty Fresh: Swap regular Oreos for mint-flavored ones to give your brownies a refreshing twist.
- Vegan Option: Use a vegan brownie mix and substitute eggs with flaxseed meal or applesauce.
- Chocolate Overload: Mix in chocolate chips into the brownie batter for an even richer chocolate experience.
Serving Suggestions
- Pair these brownies with a scoop of vanilla ice cream for a delightful contrast.
- Serve with a glass of cold milk or a warm cup of coffee to enhance the flavors.
- For a festive touch, arrange brownies on a Halloween-themed platter.
- Top with extra whipped cream and a sprinkle of crushed Oreos for added flair.
FAQs about Oreo Layered Halloween Brownies
As you embark on your baking adventure with these Oreo Layered Halloween Brownies, you might have a few questions. Here are some common queries that can help you along the way:
Can I use homemade brownie batter instead of a mix?
Absolutely! If you have a favorite homemade brownie recipe, feel free to use it. Just ensure it has a similar texture to a boxed mix for the best results.
How do I store leftover brownies?
Store any leftovers in an airtight container in the refrigerator. They’ll stay fresh for up to a week, but I doubt they’ll last that long!
Can I make these brownies ahead of time?
Yes! These brownies can be made a day in advance. Just let them cool completely, then cover and refrigerate. They’ll taste even better the next day!
What can I substitute for cream cheese?
If you’re looking for a lighter option, you can use Greek yogurt or whipped cream cheese. Both will give you a creamy layer without the heaviness.
Are there any nut-free options for these brownies?
Yes! The ingredients listed are nut-free, but always double-check your brownie mix and any add-ins to ensure they meet your dietary needs.
Final Thoughts
Creating these Oreo Layered Halloween Brownies is more than just baking; it’s about making memories. The joy of layering those rich brownies with creamy filling and crunchy Oreos brings a smile to my face every time. Whether you’re sharing them at a Halloween party or enjoying them with your family, these brownies are sure to spark joy and laughter. Plus, they’re a fantastic way to get everyone involved in the kitchen. So, roll up your sleeves, embrace the mess, and let the spirit of Halloween inspire your baking adventure. Happy Halloween baking!
Print
Oreo Layered Halloween Brownies: A Spooky Treat You’ll Love!
- Total Time: 55 minutes
- Yield: 12 servings 1x
- Diet: Vegetarian
Description
Deliciously spooky brownies layered with Oreo cookies, perfect for Halloween celebrations.
Ingredients
- 1 box brownie mix
- 2 large eggs
- 1/2 cup vegetable oil
- 1/4 cup water
- 1 package Oreo cookies
- 1 cup cream cheese, softened
- 1/2 cup powdered sugar
- 1 teaspoon vanilla extract
- 1 cup whipped topping
- Halloween-themed sprinkles (optional)
Instructions
- Preheat the oven to 350°F (175°C).
- Prepare the brownie mix according to package instructions using eggs, oil, and water.
- Pour half of the brownie batter into a greased baking pan.
- Layer half of the Oreo cookies on top of the brownie batter.
- In a separate bowl, mix cream cheese, powdered sugar, and vanilla extract until smooth.
- Spread the cream cheese mixture over the Oreo layer.
- Add the remaining Oreo cookies on top of the cream cheese layer.
- Pour the remaining brownie batter over the Oreo cookies.
- Bake for 30-35 minutes or until a toothpick comes out clean.
- Let cool, then top with whipped topping and Halloween sprinkles if desired.
Notes
- For a richer flavor, add chocolate chips to the brownie batter.
- Store leftovers in an airtight container in the refrigerator.
- These brownies can be made a day in advance for easier serving.
- Prep Time: 20 minutes
- Cook Time: 35 minutes
- Category: Dessert
- Method: Baking
- Cuisine: American
Nutrition
- Serving Size: 1 brownie
- Calories: 250
- Sugar: 20g
- Sodium: 150mg
- Fat: 12g
- Saturated Fat: 5g
- Unsaturated Fat: 7g
- Trans Fat: 0g
- Carbohydrates: 30g
- Fiber: 1g
- Protein: 3g
- Cholesterol: 30mg
Keywords: Oreo Layered Halloween Brownies, Halloween desserts, spooky treats, brownies


