Oven-Baked Cheesy Tacos: Crispy, Loaded, and Irresistibly Delicious!
Sensory-Rich Introduction with Immediate Craving
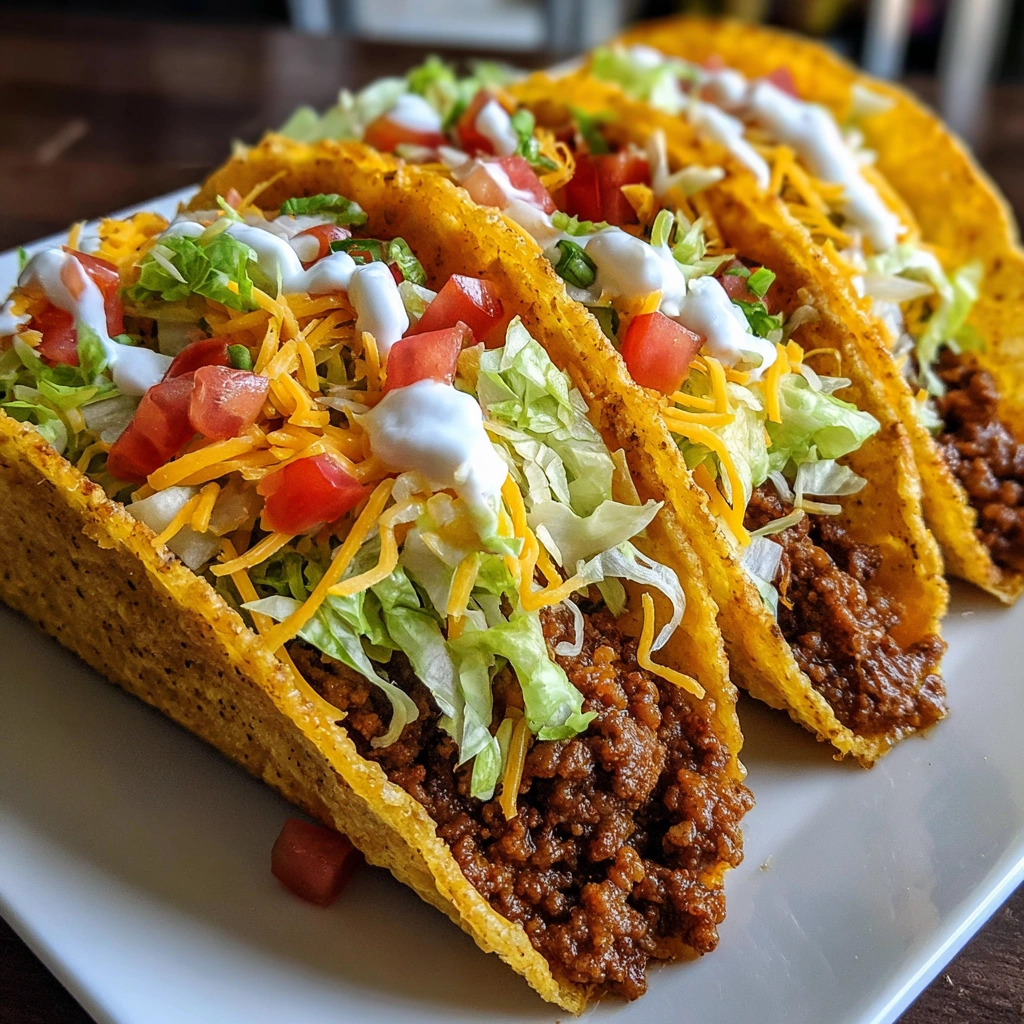
Imagine the aroma of seasoned ground beef sizzling in a skillet, mingling with the sharp, inviting scent of melting cheddar cheese. As you pull a tray of Oven-Baked Cheesy Tacos from the oven, the golden-brown shells glisten, promising a satisfying crunch. Each taco is a treasure trove of flavors, bursting with juicy tomatoes, crisp lettuce, and a dollop of creamy sour cream. This dish is not just a meal; it’s a celebration of family taco night, a gathering of friends, or a cozy dinner for one. The joy of biting into a crispy taco, feeling the crunch give way to a savory filling, creates an emotional connection that transcends mere sustenance. Whether it’s a casual weeknight dinner or a festive occasion, these tacos are sure to evoke smiles and satisfied bellies.
Why You’ll Love This Oven-Baked Cheesy Tacos
- Texture Contrast: The crispy taco shells provide a delightful crunch that contrasts beautifully with the tender, seasoned beef and gooey cheese.
- Flavor Balance: Each bite is a harmonious blend of savory, spicy, and fresh flavors, enhanced by your choice of toppings.
- Versatility: Customize your tacos with various fillings and toppings to suit any palate, making them perfect for everyone.
- Ease of Preparation: With a straightforward recipe and minimal prep time, these tacos are quick to make, even on busy nights.
- Universal Appeal: Loved by kids and adults alike, these cheesy tacos are a guaranteed crowd-pleaser at any gathering.
Essential Tools & Preparation Strategy
- Skillet: Essential for browning the ground beef and mixing in the taco seasoning.
- Baking Sheet: Needed to hold the taco shells while they bake, ensuring even cooking.
- Spatula: Useful for mixing the filling and serving the tacos without breaking them.
- Measuring Cups: Important for accurately measuring ingredients like water and cheese to ensure the right consistency.
- Knife: Required for chopping fresh vegetables like tomatoes and lettuce, adding freshness to your tacos.
- Cutting Board: Provides a safe and stable surface for chopping ingredients.
- Oven Mitts: Protect your hands when handling hot trays and dishes.
- Serving Platter: Ideal for presenting your finished tacos in an appealing way.
Ingredients & Their Roles in This Oven-Baked Cheesy Tacos
For the Taco Filling:
- Ground Beef (1 lb): The main protein source, providing a hearty base for the tacos.
- Taco Seasoning (1 packet): Infuses the beef with essential spices for authentic flavor.
- Water (1/2 cup): Helps to hydrate the seasoning and create a cohesive filling.
For the Tacos:
- Taco Shells (12): The crispy vessel that holds all the delicious fillings.
- Shredded Cheddar Cheese (2 cups): Melts beautifully, adding richness and flavor.
- Diced Tomatoes (1 cup): Freshness and acidity to balance the richness of the cheese and beef.
- Shredded Lettuce (1 cup): Adds crunch and a refreshing element.
- Sour Cream (1/2 cup, optional): Creaminess that complements the spices.
- Sliced Jalapeños (1/4 cup, optional): A spicy kick for those who enjoy heat.
Substitutions:
- Ground Turkey or Chicken: For a leaner option.
- Dairy-Free Cheese: For a vegan version.
Step-by-Step Guide to Perfect Oven-Baked Cheesy Tacos
- Preheat the Oven: Set your oven to 375°F (190°C) to ensure it’s hot enough for baking.
- Cook the Beef: In a skillet over medium heat, brown the ground beef for about 5-7 minutes until fully cooked.
- Add Seasoning: Stir in the taco seasoning and water, simmering for 5 minutes until the mixture thickens.
- Prepare Taco Shells: Arrange the taco shells upright on a baking sheet, ready to be filled.
- Fill the Shells: Spoon the seasoned beef mixture into each taco shell, then generously top with shredded cheese.
- Bake: Place the baking sheet in the oven and bake for 10-12 minutes, or until the cheese is melted and bubbly.
- Cool Slightly: Remove from the oven and let the tacos cool for 2 minutes to set before adding toppings.
- Add Toppings: Top with diced tomatoes, shredded lettuce, and a dollop of sour cream as desired.
Chef’s Notes & Pro Tips for Flawless Results
- Make-Ahead: Prepare the taco filling a day in advance and store it in the refrigerator for quick assembly.
- Storage: Leftover tacos can be stored in an airtight container in the fridge for up to 3 days.
- Equipment Recommendations: A non-stick skillet can help prevent the beef from sticking and make cleanup easier.
- Customization Options: Experiment with different cheeses, such as Monterey Jack or pepper jack, for varied flavors.
Avoid These Common Cooking Mistakes
- Overfilling Taco Shells: Can lead to spills; fill moderately to avoid mess.
- Baking at Too High a Temperature: Can burn the cheese; stick to 375°F for optimal results.
- Not Letting Tacos Cool: Serving immediately can result in a messy experience; allow 2 minutes to set.
- Using Stale Taco Shells: Leads to a soggy texture; always use fresh shells.
- Skipping the Seasoning: Results in bland filling; always use taco seasoning for flavor.
- Not Preheating the Oven: Can lead to uneven cooking; always preheat before baking.
- Forgetting Toppings: Makes the dish less appealing; always include fresh toppings for color and flavor.
Creative Variations & Customizations
- Vegetarian Option: Substitute ground beef with black beans or lentils for a plant-based filling.
- Spicy Tacos: Add diced green chilies to the beef mixture for an extra kick.
- Breakfast Tacos: Use scrambled eggs and breakfast sausage for a morning twist.
- Fish Tacos: Replace beef with seasoned grilled fish for a lighter option.
- Seasonal Toppings: Use fresh corn in summer or roasted pumpkin in fall for seasonal flair.
Perfect Pairings: What to Serve With Oven-Baked Cheesy Tacos
- Guacamole: Creamy and rich, it balances the crunch of the tacos.
- Mexican Rice: A hearty side that complements the flavors of the tacos.
- Fresh Salsa: Adds a zesty kick and freshness to each bite.
- Refried Beans: A classic side that enhances the meal’s heartiness.
- Chilled Margaritas: A festive drink that pairs perfectly with the flavors of the tacos.
- Light Salad: A refreshing side that balances the richness of the tacos.
- Pickled Onions: A tangy topping that adds brightness to the dish.
- Tortilla Chips and Queso: A fun appetizer spread to start the meal.
Storage & Meal Prep Instructions
- Fridge Storage: Store leftover tacos in an airtight container for up to 3 days.
- Freezer Storage: Freeze unbaked taco shells filled with beef and cheese for up to 2 months. Bake directly from frozen, adding a few extra minutes to the cooking time.
- Reheating: Reheat in the oven at 350°F (175°C) for about 10 minutes or until heated through.
Nutrition Facts & Health Insights
| Nutrient | Amount per Taco |
|---|---|
| Calories | 250 |
| Sugar | 2 grams |
| Sodium | 450 milligrams |
| Fat | 15 grams |
| Saturated Fat | 7 grams |
| Unsaturated Fat | 5 grams |
| Trans Fat | 0 grams |
| Carbohydrates | 20 grams |
| Fiber | 2 grams |
| Protein | 12 grams |
| Cholesterol | 40 milligrams |
Health Insights: Ground beef provides essential protein, while fresh vegetables add vitamins and minerals. Opting for leaner meats or plant-based proteins can enhance the nutritional profile.
Frequently Asked Questions
- Can I use a different type of meat? Yes, ground turkey or chicken can be used for a leaner option.
- What if I don’t have taco seasoning? You can make your own using chili powder, cumin, garlic powder, and paprika.
- Can I make these tacos gluten-free? Yes, use gluten-free taco shells and ensure your seasoning is gluten-free.
- How do I prevent soggy taco shells? Use fresh taco shells and avoid overfilling them.
- Can I freeze the taco filling? Yes, the filling can be frozen for up to 2 months.
- What toppings do you recommend? Fresh tomatoes, lettuce, sour cream, and jalapeños are great options.
- How long do leftovers last? Leftover tacos can be stored in the fridge for up to 3 days.
- Can I bake the tacos without meat? Absolutely! You can fill them with beans, cheese, or vegetables for a vegetarian option.
Final Inspiration & Kitchen Confidence
As you savor the last bite of your Oven-Baked Cheesy Tacos, take a moment to appreciate the flavors and textures you’ve created. Cooking is not just about following a recipe; it’s about expressing creativity and sharing joy with those you love. Celebrate your culinary achievements, and don’t hesitate to experiment with new variations. Your kitchen is a canvas, and every meal is an opportunity to create something delicious. So gather your ingredients, invite your friends or family, and let the taco night festivities begin!
Print
Oven-Baked Cheesy Tacos: Crispy, Loaded, and Irresistibly Delicious!
- Total Time: 30 minutes
- Yield: 12 servings 1x
- Diet: Gluten-Free option available
Description
These Oven-Baked Cheesy Tacos are a delightful fusion of crispy taco shells filled with savory seasoned meat, fresh vegetables, and a generous layer of melted cheese. Each bite offers a satisfying crunch followed by a burst of flavor, making them an irresistible treat for any taco lover.
Ingredients
- For the Taco Filling:
- 1 lb ground beef
- 1 packet taco seasoning
- 1/2 cup water
- For the Tacos:
- 12 taco shells
- 2 cups shredded cheddar cheese
- 1 cup diced tomatoes
- 1 cup shredded lettuce
- 1/2 cup sour cream (optional)
- 1/4 cup sliced jalapeños (optional)
Instructions
- Preheat your oven to 375°F (190°C).
- In a skillet over medium heat, cook the ground beef until browned, about 5-7 minutes.
- Add the taco seasoning and water to the skillet, stirring to combine. Simmer for 5 minutes until thickened.
- Arrange the taco shells on a baking sheet.
- Fill each taco shell with the seasoned beef mixture, then top with shredded cheese.
- Bake in the preheated oven for 10-12 minutes, or until the cheese is melted and bubbly.
- Remove from the oven and let cool for 2 minutes before adding toppings like tomatoes, lettuce, and sour cream.
Notes
- Make-ahead: You can prepare the taco filling a day in advance and store it in the refrigerator.
- Storage: Leftover tacos can be stored in an airtight container in the fridge for up to 3 days.
- Substitutions: Use ground turkey or chicken for a leaner option, or replace cheese with a dairy-free alternative for a vegan version.
- Prep Time: 15 minutes
- Cook Time: 15 minutes
- Category: main-dish
- Method: baking
- Cuisine: Mexican
Nutrition
- Serving Size: 1 taco
- Calories: 250
- Sugar: 2 grams
- Sodium: 450 milligrams
- Fat: 15 grams
- Saturated Fat: 7 grams
- Unsaturated Fat: 5 grams
- Trans Fat: 0 grams
- Carbohydrates: 20 grams
- Fiber: 2 grams
- Protein: 12 grams
- Cholesterol: 40 milligrams
Keywords: Oven-Baked Cheesy Tacos, Crispy Tacos, Loaded Tacos, Easy Taco Recipe, Mexican Cuisine, Family Dinner, Taco Night, Cheesy Tacos, Baked Tacos, Quick Meal, Comfort Food, Ground Beef Tacos, Taco Shells, Homemade Tacos, Taco Toppings


