
Introduction to Pickle-Brined Fried Chicken with Dill Dip
As a busy mom, I know how challenging it can be to whip up a meal that pleases everyone. That’s why I’m excited to share my recipe for Pickle-Brined Fried Chicken with Dill Dip. This dish is not just a quick solution for a hectic weeknight; it’s also a delightful way to impress your loved ones. The crispy, flavorful chicken paired with a creamy dill dip is a match made in culinary heaven. Trust me, once you try this recipe, it will become a staple in your kitchen!
Why You’ll Love This Pickle-Brined Fried Chicken with Dill Dip
This Pickle-Brined Fried Chicken with Dill Dip is a game-changer for busy families. It’s incredibly easy to prepare, making it perfect for those hectic evenings when time is short. The brining process ensures the chicken is juicy and packed with flavor, while the crispy coating adds that satisfying crunch we all crave. Plus, the creamy dill dip elevates the dish, making it a hit for both kids and adults alike!
Ingredients for Pickle-Brined Fried Chicken with Dill Dip
Gathering the right ingredients is the first step to creating this mouthwatering dish. Here’s what you’ll need:
- Pickle juice: This is the star of the show! It brines the chicken, infusing it with tangy flavor and moisture.
- Chicken thighs: I prefer thighs for their juiciness, but you can use drumsticks or breasts if you like.
- Buttermilk: This creamy goodness tenderizes the chicken and adds a rich flavor that pairs perfectly with the spices.
- All-purpose flour: This is the base for your crispy coating. It helps create that golden crust we all love.
- Garlic powder: A must-have for adding depth and savory notes to the chicken.
- Onion powder: This enhances the overall flavor profile, making each bite irresistible.
- Paprika: Not only does it add a beautiful color, but it also brings a subtle smokiness to the dish.
- Salt and pepper: Essential for seasoning, these staples elevate the flavors of the chicken.
- Vegetable oil: For frying, choose an oil with a high smoke point, like canola or peanut oil, to achieve that perfect crispiness.
- Sour cream: This creamy base for the dill dip adds a tangy richness that complements the chicken beautifully.
- Fresh dill: The star of the dip! Its bright, herbaceous flavor pairs wonderfully with the fried chicken.
- Lemon juice: A splash of acidity brightens the dip and balances the richness of the sour cream.
For exact measurements, check the bottom of the article where you can find everything listed for easy printing. Happy cooking!
How to Make Pickle-Brined Fried Chicken with Dill Dip
Now that you have your ingredients ready, let’s dive into the steps for making this delicious Pickle-Brined Fried Chicken with Dill Dip. Each step is simple, and I’ll share some tips along the way to ensure your chicken turns out perfectly crispy and flavorful!
Step 1: Brine the Chicken
Brining the chicken is crucial for infusing flavor and moisture. By soaking the chicken in pickle juice, you’re allowing it to absorb that tangy goodness. This process not only enhances the taste but also helps keep the chicken juicy during frying. Aim for at least four hours, but overnight is even better. Trust me, the extra time is worth it!
Step 2: Soak in Buttermilk
After brining, it’s time for the buttermilk soak. This step is essential for tenderizing the chicken and adding a rich flavor. The acidity in buttermilk breaks down the proteins, making the chicken incredibly tender. Soak the chicken for about 30 minutes. This will also help the flour mixture stick better, ensuring a crispy coating.
Step 3: Prepare the Flour Mixture
Next, let’s whip up the flour mixture. Combine all-purpose flour with garlic powder, onion powder, paprika, salt, and pepper. Each spice plays a role in creating a well-rounded flavor. Garlic and onion powders add depth, while paprika gives a lovely color and a hint of smokiness. Mix it well to ensure every bite is packed with flavor!
Step 4: Heat the Oil
Now, it’s time to heat the oil. Use a deep skillet and fill it with vegetable oil, about two inches deep. Heat the oil over medium-high heat until it reaches around 350°F. To test if it’s ready, drop a small piece of bread into the oil; if it sizzles, you’re good to go! Proper oil temperature is key for achieving that golden, crispy exterior.
Step 5: Dredge and Fry the Chicken
Once the oil is hot, it’s time to dredge the chicken. Take each piece out of the buttermilk and coat it in the flour mixture, shaking off any excess. Carefully place the chicken in the hot oil, frying in batches if necessary. Fry each piece for about 8-10 minutes per side, or until golden brown and cooked through. The result? A crunchy, mouthwatering crust!
Step 6: Make the Dill Dip
While the chicken is frying, let’s prepare the dill dip. In a bowl, mix together sour cream, fresh dill, and lemon juice. This dip is the perfect complement to the fried chicken, adding a creamy, tangy contrast. The fresh dill brings a burst of flavor that pairs beautifully with the crispy chicken. Set it aside until you’re ready to serve!
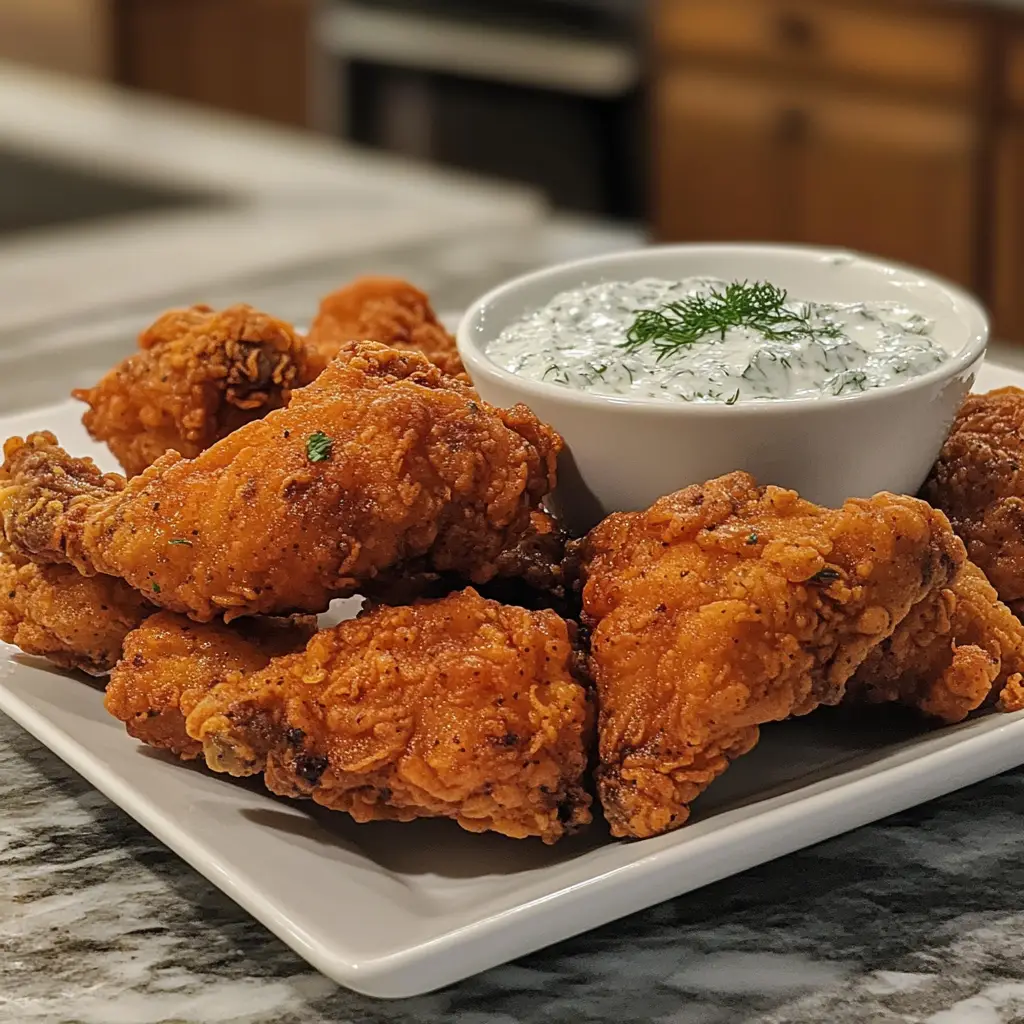
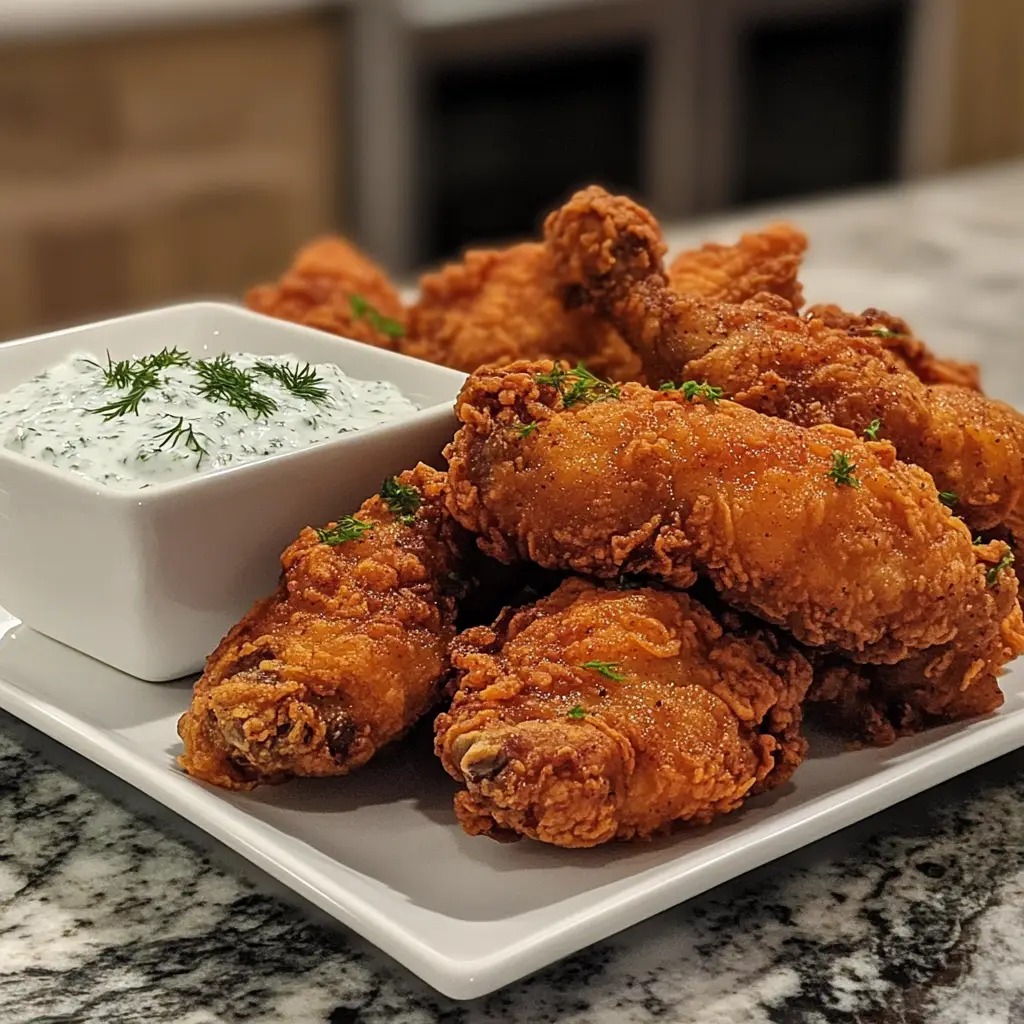
Step 7: Serve and Enjoy
Once your chicken is golden and crispy, it’s time to serve! Place the fried chicken on a platter and serve it hot with the dill dip on the side. For an attractive presentation, garnish with extra dill or lemon wedges. This dish is perfect for family dinners or gatherings, and I guarantee it will be a hit!
Tips for Success
- Brine the chicken overnight for maximum flavor and juiciness.
- Use a thermometer to check oil temperature for perfect frying.
- Don’t overcrowd the pan; fry in batches for even cooking.
- Let the fried chicken rest on a wire rack to maintain crispiness.
- Feel free to adjust spices in the flour mixture to suit your taste.
Equipment Needed
- Deep skillet: A cast-iron skillet works great, but any heavy-bottomed pan will do.
- Thermometer: A kitchen thermometer ensures your oil is at the right temperature. If you don’t have one, the bread test works too!
- Wire rack: This helps keep the chicken crispy. A baking sheet can be a good alternative.
- Mixing bowls: You’ll need a couple for the brine and the dip.
Variations
- Spicy Kick: Add cayenne pepper or hot sauce to the buttermilk for a spicy twist that will make your taste buds dance.
- Herb-Infused: Mix in dried herbs like thyme or oregano into the flour mixture for an aromatic flavor boost.
- Gluten-Free Option: Substitute all-purpose flour with a gluten-free flour blend to make this dish suitable for gluten-sensitive eaters.
- Air Fryer Version: For a healthier take, try cooking the brined chicken in an air fryer. It’ll still be crispy with less oil!
- Vegetarian Alternative: Use thick slices of eggplant or cauliflower florets, brined and coated, for a delicious vegetarian option.
Serving Suggestions
- Classic Sides: Serve with coleslaw or potato salad for a traditional touch.
- Fresh Salad: A crisp garden salad with a light vinaigrette complements the richness of the chicken.
- Refreshing Drinks: Pair with iced tea or lemonade to balance the flavors.
- Presentation: Garnish with lemon wedges and extra dill for a pop of color.
FAQs about Pickle-Brined Fried Chicken with Dill Dip
Can I use chicken breasts instead of thighs? Absolutely! While I love the juiciness of thighs, chicken breasts can work just as well. Just keep an eye on the cooking time, as they may cook faster.
How long can I brine the chicken? For the best flavor, brine the chicken for at least four hours, but overnight is even better. This allows the pickle juice to really penetrate the meat.
Can I make the dill dip ahead of time? Yes! You can prepare the dill dip a day in advance. Just store it in the fridge until you’re ready to serve. The flavors will meld beautifully!
What can I serve with this dish? This Pickle-Brined Fried Chicken pairs wonderfully with classic sides like coleslaw, potato salad, or a fresh garden salad. Don’t forget a refreshing drink like iced tea!
Is this recipe gluten-free? To make this dish gluten-free, simply substitute the all-purpose flour with a gluten-free flour blend. It will still be deliciously crispy!
Final Thoughts
Cooking is more than just preparing a meal; it’s about creating memories and sharing joy with loved ones. This Pickle-Brined Fried Chicken with Dill Dip brings that joy to the table, combining crispy textures with tangy flavors that everyone will love. Whether it’s a busy weeknight or a special gathering, this dish is sure to impress. I hope you find as much happiness in making it as I do. So roll up your sleeves, gather your family, and enjoy the deliciousness that awaits. Happy cooking, and may your kitchen be filled with laughter and love!
Print
Pickle-Brined Fried Chicken with Dill Dip: Irresistibly Crispy!
- Total Time: 4 hours 35 minutes
- Yield: 4 servings 1x
- Diet: Gluten Free
Description
A deliciously crispy fried chicken recipe brined in pickle juice, served with a creamy dill dip.
Ingredients
- 4 cups pickle juice
- 4 chicken thighs
- 1 cup buttermilk
- 1 cup all-purpose flour
- 1 teaspoon garlic powder
- 1 teaspoon onion powder
- 1 teaspoon paprika
- Salt and pepper to taste
- Vegetable oil for frying
- 1/2 cup sour cream
- 2 tablespoons fresh dill, chopped
- 1 tablespoon lemon juice
Instructions
- Brine the chicken in pickle juice for at least 4 hours or overnight.
- Remove chicken from brine and pat dry. Soak in buttermilk for 30 minutes.
- In a bowl, mix flour, garlic powder, onion powder, paprika, salt, and pepper.
- Heat oil in a deep skillet over medium-high heat.
- Dredge chicken in the flour mixture, shaking off excess.
- Fry chicken in hot oil until golden brown and cooked through, about 8-10 minutes per side.
- For the dill dip, mix sour cream, dill, and lemon juice in a bowl.
- Serve fried chicken hot with dill dip on the side.
Notes
- For extra flavor, let the chicken brine overnight.
- Adjust the spices in the flour mixture to your taste.
- Ensure the oil is hot enough before frying to achieve crispiness.
- Prep Time: 15 minutes
- Cook Time: 20 minutes
- Category: Main Course
- Method: Frying
- Cuisine: American
Nutrition
- Serving Size: 1 piece of chicken with dip
- Calories: 450
- Sugar: 2g
- Sodium: 1200mg
- Fat: 25g
- Saturated Fat: 5g
- Unsaturated Fat: 15g
- Trans Fat: 0g
- Carbohydrates: 30g
- Fiber: 1g
- Protein: 30g
- Cholesterol: 100mg
Keywords: Pickle-Brined Fried Chicken, Dill Dip, Crispy Chicken, Fried Chicken Recipe


