
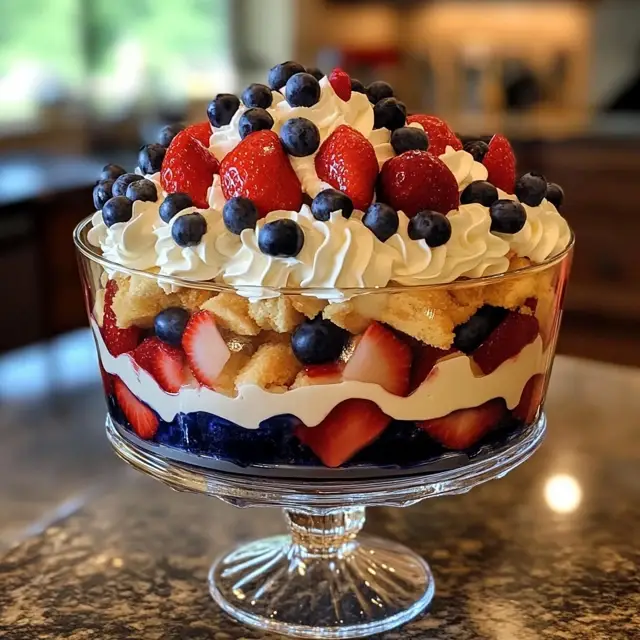
Introduction to Red, White, and Blue Trifle
As a busy mom, I know how important it is to have a go-to dessert that wows without taking hours to prepare. That’s where my Red, White, and Blue Trifle comes in! This delightful dessert is not only visually stunning but also incredibly easy to whip up. With layers of fresh berries, fluffy cake, and creamy whipped goodness, it’s perfect for summer gatherings or festive occasions. Plus, it’s a fantastic way to get the kids involved in the kitchen. Trust me, this trifle will impress your loved ones and leave them asking for seconds!
Why You’ll Love This Red, White, and Blue Trifle
This Red, White, and Blue Trifle is a dream come true for busy moms like us! It’s quick to assemble, making it a lifesaver on hectic days. The vibrant colors and delicious layers create a show-stopping dessert that tastes as good as it looks. Plus, it’s versatile—perfect for any occasion, from backyard barbecues to holiday celebrations. You’ll love how it brings smiles to the table without the stress!
Ingredients for Red, White, and Blue Trifle
Gathering the right ingredients is the first step to creating your stunning Red, White, and Blue Trifle. Here’s what you’ll need:
- Strawberries: Fresh, juicy strawberries add a sweet and tangy flavor. Look for ripe ones for the best taste.
- Blueberries: These little gems bring a burst of sweetness and a pop of color. They’re also packed with antioxidants!
- White cake mix: A convenient base for your trifle. You can use homemade cake if you prefer, but a box mix saves time.
- Whipped cream: Light and fluffy, it adds a creamy texture. You can use store-bought or whip your own for a fresher taste.
- Vanilla pudding: This creamy layer enhances the dessert’s richness. Instant pudding works well for quick prep.
- Fresh mint leaves: A lovely garnish that adds a refreshing touch. Plus, it looks beautiful on top!
Feel free to get creative! You can substitute other berries based on what’s in season or what your family loves. If you’re looking for a lighter version, consider using low-fat whipped cream and pudding. For exact measurements, check the bottom of the article where you can find everything available for printing.
How to Make Red, White, and Blue Trifle
Now that you have all your ingredients ready, let’s dive into the fun part—making your Red, White, and Blue Trifle! This process is simple and enjoyable, perfect for involving the kids or just letting your creativity shine. Follow these steps, and you’ll have a stunning dessert in no time!
Step 1: Prepare the White Cake
Start by preparing the white cake according to the package instructions. This usually involves mixing the cake mix with water, eggs, and oil. Once everything is combined, pour the batter into a greased baking pan. Bake until golden brown, and then let it cool completely. Patience is key here; a cooled cake is easier to cut!
Step 2: Cut the Cake into Cubes
Once your cake has cooled, it’s time to cut it into cubes. Use a sharp knife to slice the cake into even squares, about one inch in size. This will make layering easier and ensure every bite has a bit of cake. Trust me, the more uniform the pieces, the prettier your trifle will look!
Step 3: Layer the Cake Cubes
Grab your trifle dish and start layering! Begin by placing half of the cake cubes at the bottom. Spread them out evenly to create a solid base. This layer is the foundation of your Red, White, and Blue Trifle, so make sure it’s nice and cozy!
Step 4: Add Vanilla Pudding
Next, it’s time for the vanilla pudding. Spoon a generous layer over the cake cubes, spreading it evenly. The creamy pudding adds a delightful richness that complements the cake perfectly. Don’t be shy—this layer is essential for that luscious texture!
Step 5: Layer the Strawberries
Now, let’s bring in the strawberries! Take your sliced strawberries and layer them on top of the pudding. Arrange them in a circular pattern for a beautiful presentation. Their vibrant red color will pop against the white pudding, making your trifle visually stunning!
Step 6: Add Blueberries
Following the strawberries, it’s time for the blueberries. Scatter them generously over the strawberries. Their deep blue hue adds a lovely contrast and a burst of flavor. Plus, they’re packed with nutrients, making this dessert a bit healthier!
Step 7: Spread Whipped Cream
Now for the fun part—whipped cream! Spread a thick layer over the berries, covering them completely. This fluffy topping is what makes the Red, White, and Blue Trifle so indulgent. Use a spatula to create swirls for a beautiful finish!
Step 8: Repeat the Layers
It’s time to repeat the layering process! Start with the remaining cake cubes, followed by another layer of pudding, strawberries, blueberries, and whipped cream. This second round will create a stunning visual effect and ensure every bite is packed with flavor!
Step 9: Garnish and Chill
Finally, garnish your trifle with fresh mint leaves on top. They add a pop of green and a refreshing aroma. Now, cover your trifle with plastic wrap and chill it in the refrigerator for at least two hours. This allows the flavors to meld beautifully. Trust me, the wait will be worth it!
Tips for Success
- Use fresh, ripe berries for the best flavor and presentation.
- Let the cake cool completely before cutting to avoid crumbling.
- For a fun twist, try adding a layer of lemon curd for extra zing.
- Make your trifle a day ahead to save time and enhance flavors.
- Keep the whipped cream chilled until ready to use for the best texture.
Equipment Needed
- Trifle dish: A clear glass bowl is ideal for showcasing layers. A large mixing bowl works too!
- Sharp knife: Essential for cutting the cake into cubes. A serrated knife works wonders!
- Spatula: Perfect for spreading whipped cream and pudding evenly.
- Measuring cups: Handy for precise ingredient measurements, especially if you’re not using a box mix.
Variations of Red, White, and Blue Trifle
- Berry Medley: Swap out strawberries and blueberries for raspberries and blackberries for a different flavor profile.
- Gluten-Free Option: Use a gluten-free cake mix to make this dessert suitable for those with gluten sensitivities.
- Chocolate Lovers: Add a layer of chocolate pudding instead of vanilla for a rich twist on the classic.
- Yogurt Layer: Substitute whipped cream with Greek yogurt for a healthier, protein-packed version.
- Nutty Crunch: Sprinkle crushed nuts or granola between layers for added texture and flavor.
Serving Suggestions for Red, White, and Blue Trifle
- Pair with Lemonade: A refreshing glass of lemonade complements the sweetness of the trifle perfectly.
- Serve with Grilled Chicken: This dessert is a delightful finish after a savory meal like grilled chicken or burgers.
- Presentation Tip: Use clear cups for individual servings, making it easy for guests to enjoy!
- Garnish with Berries: Top each serving with extra berries for a pop of color and freshness.
FAQs about Red, White, and Blue Trifle
Can I make the Red, White, and Blue Trifle a day in advance?
Absolutely! In fact, making it a day ahead allows the flavors to meld beautifully. Just cover it tightly and store it in the refrigerator until you’re ready to serve.
What can I substitute for the white cake mix?
If you prefer a homemade touch, you can bake a white cake from scratch. Alternatively, a lemon or almond-flavored cake can add a delightful twist to your Red, White, and Blue Trifle.
How do I store leftovers?
Store any leftovers in an airtight container in the refrigerator. Enjoy them within a couple of days for the best taste and texture!
Can I use frozen berries instead of fresh?
Yes, frozen berries work well! Just make sure to thaw and drain them before layering to avoid excess moisture in your trifle.
Is this dessert suitable for a gluten-free diet?
Yes! Simply use a gluten-free cake mix and ensure all other ingredients are gluten-free. Your guests will love this festive dessert without any worries!
Final Thoughts
Creating this Red, White, and Blue Trifle is more than just making a dessert; it’s about bringing joy to your table. Each layer tells a story, from the sweet strawberries to the fluffy whipped cream. I love how this trifle can turn an ordinary day into a celebration, whether it’s a family gathering or a simple weeknight treat. Plus, it’s a fantastic way to involve the kids in the kitchen, making memories that last a lifetime. So, roll up your sleeves, gather your ingredients, and let the magic of this dessert brighten your day!
Print
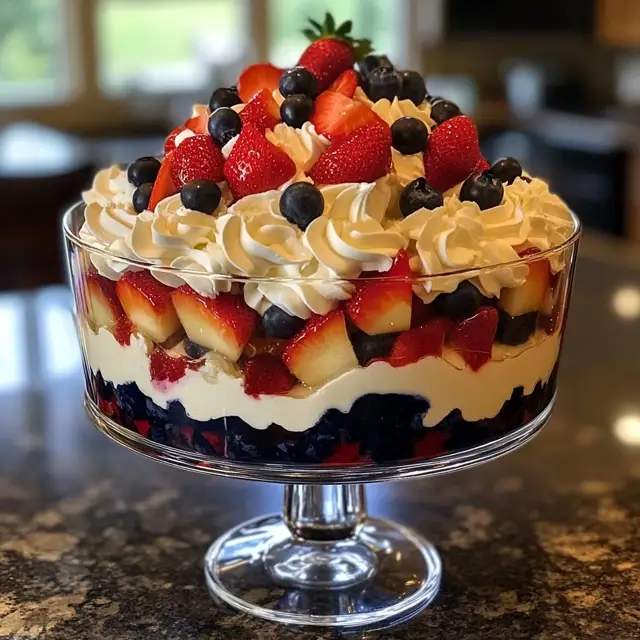
Red, White, and Blue Trifle: A Festive Dessert Delight!
- Total Time: 2 hours 55 minutes
- Yield: 8 servings 1x
- Diet: Vegetarian
Description
A delicious and visually stunning dessert featuring layers of red berries, white cake, and blue whipped cream, perfect for festive occasions.
Ingredients
- 2 cups strawberries, sliced
- 2 cups blueberries
- 1 box of white cake mix
- 3 cups whipped cream
- 1 cup vanilla pudding
- Fresh mint leaves for garnish
Instructions
- Prepare the white cake according to package instructions and let it cool.
- Once cooled, cut the cake into cubes.
- In a large trifle dish, layer half of the cake cubes at the bottom.
- Add a layer of vanilla pudding over the cake cubes.
- Next, add a layer of sliced strawberries.
- Add a layer of blueberries on top of the strawberries.
- Spread a layer of whipped cream over the berries.
- Repeat the layers with the remaining ingredients, finishing with whipped cream on top.
- Garnish with fresh mint leaves.
- Chill in the refrigerator for at least 2 hours before serving.
Notes
- For a lighter version, use low-fat whipped cream and pudding.
- Feel free to substitute other berries based on availability.
- This dessert can be made a day in advance for convenience.
- Prep Time: 30 minutes
- Cook Time: 25 minutes
- Category: Dessert
- Method: Layering
- Cuisine: American
Nutrition
- Serving Size: 1 serving
- Calories: 250
- Sugar: 20g
- Sodium: 150mg
- Fat: 10g
- Saturated Fat: 5g
- Unsaturated Fat: 3g
- Trans Fat: 0g
- Carbohydrates: 35g
- Fiber: 2g
- Protein: 4g
- Cholesterol: 30mg
Keywords: Red, White, and Blue Trifle, festive dessert, summer dessert, berry trifle


