Introduction to S’mores Bars
As a busy mom, I know how precious time can be, especially when it comes to whipping up something sweet for the family. That’s why I absolutely adore these S’mores Bars! They capture the nostalgic flavors of classic s’mores without the fuss of a campfire. Imagine indulging in a delicious treat that requires no baking and can be prepped in just 15 minutes! Perfect for those hectic days, these bars are a delightful way to impress your loved ones while keeping your sanity intact. Trust me, once you try them, they’ll become a staple in your dessert rotation!
Why You’ll Love This S’mores Bars
These S’mores Bars are a game-changer for busy days! They’re incredibly easy to make, requiring just a handful of ingredients and minimal effort. In less than 15 minutes, you can create a dessert that tastes like a campfire treat, but without the mess. Plus, they’re perfect for satisfying sweet cravings or impressing guests. Trust me, once you taste these bars, you’ll be hooked on their delightful flavor and convenience!
Ingredients for S’mores Bars
Gathering the right ingredients is the first step to creating these delightful S’mores Bars. Here’s what you’ll need:
- Graham cracker crumbs: These provide the classic base and a sweet crunch. You can crush whole graham crackers if you prefer.
- Unsweetened cocoa powder: This adds a rich chocolate flavor, making your bars even more indulgent. Opt for high-quality cocoa for the best taste.
- Sugar: A touch of sweetness is essential. You can substitute with brown sugar for a deeper flavor.
- Unsalted butter: This binds everything together and adds richness. Melt it for easy mixing.
- Mini marshmallows: These are the star of the show! They give that gooey, marshmallowy goodness reminiscent of traditional s’mores.
- Chocolate chips: Use semi-sweet or dark chocolate chips for a decadent finish. You can even mix in some white chocolate for a fun twist.
For those who want to get creative, feel free to add nuts or other toppings for extra texture. If you’re looking for a healthier option, consider using whole grain graham crackers or reducing the sugar. The exact quantities for each ingredient are listed at the bottom of the article, ready for you to print out and take to the kitchen!

How to Make S’mores Bars
Now that you have all your ingredients ready, let’s dive into making these scrumptious S’mores Bars! Follow these simple steps, and you’ll have a delightful dessert that everyone will love.
Step 1: Prepare the Base
Start by grabbing a mixing bowl. Combine the graham cracker crumbs, cocoa powder, sugar, and melted butter. Mix until everything is well combined. The mixture should resemble wet sand. This base is the foundation of your S’mores Bars, so make sure it’s mixed thoroughly!
Step 2: Press the Mixture
Next, take your mixture and press it firmly into the bottom of a greased 9×9 inch baking dish. Use the back of a measuring cup or your hands to create an even layer. This step is crucial for a sturdy base that holds up when you cut the bars later. Don’t rush it; a well-pressed base makes all the difference!
Step 3: Add the Marshmallows
Now comes the fun part! Evenly spread the mini marshmallows over the crust. You can be generous here; after all, who doesn’t love gooey marshmallows? Make sure they cover the entire surface for that classic s’mores experience. The marshmallows will melt slightly when you add the chocolate chips, creating a deliciously gooey layer.
Step 4: Sprinkle the Chocolate Chips
Time to sprinkle those chocolate chips on top of the marshmallows! You can use semi-sweet or dark chocolate chips, depending on your preference. If you’re feeling adventurous, mix in some white chocolate chips for a fun twist. The chocolate will melt into the marshmallows, creating a rich, decadent topping.
Step 5: Refrigerate to Set
Once you’ve added the chocolate chips, it’s time to refrigerate your creation. Cover the dish with plastic wrap and let it chill for at least 2 hours. This step is essential for the bars to set properly. Patience is key here; the wait will be worth it when you take that first bite!
Step 6: Cut and Serve
After the bars have set, remove them from the refrigerator. Use a sharp knife to cut them into squares. I recommend wiping the knife with a damp cloth between cuts for cleaner edges. Serve these delightful S’mores Bars chilled, and watch as your family devours them in no time!
Tips for Success
- Make sure to press the base firmly for a sturdy structure.
- Use a sharp knife to cut the bars for clean edges.
- Chill the bars longer if you prefer a firmer texture.
- Experiment with different chocolate types for unique flavors.
- Store leftovers in an airtight container to keep them fresh.
Equipment Needed
- Mixing bowl: A large bowl works best, but any bowl will do.
- 9×9 inch baking dish: If you don’t have one, a similar-sized dish or pan will work.
- Measuring cups: Essential for accurate ingredient measurements.
- Sharp knife: For cutting the bars into perfect squares.
- Plastic wrap: To cover the dish while refrigerating.
Variations of S’mores Bars
- Nutty Delight: Add chopped nuts like walnuts or pecans for a crunchy texture that complements the softness of the marshmallows.
- Peanut Butter Swirl: Drizzle melted peanut butter over the marshmallows before adding the chocolate chips for a delicious twist.
- Gluten-Free Option: Use gluten-free graham crackers or almond flour to make the base suitable for gluten-sensitive friends.
- Fruit Infusion: Toss in some dried fruits like cranberries or cherries for a fruity burst of flavor.
- Minty Fresh: Add a few drops of peppermint extract to the chocolate layer for a refreshing minty flavor.
Serving Suggestions for S’mores Bars
- Pair with a scoop of vanilla ice cream for a delightful contrast in temperature and texture.
- Serve alongside fresh fruit, like strawberries or raspberries, for a refreshing balance.
- Drizzle with chocolate or caramel sauce for an extra indulgent touch.
- Present on a colorful platter to make your dessert table pop!
FAQs about S’mores Bars
As I’ve shared my love for these S’mores Bars, I often get questions from fellow home cooks. Here are some of the most common queries I’ve encountered:
Can I make S’mores Bars ahead of time?
Absolutely! These bars are perfect for making ahead. Just prepare them, refrigerate, and they’ll be ready to serve when you need them. They can last up to a week in the fridge!
What can I substitute for graham cracker crumbs?
If you’re out of graham crackers, you can use crushed digestive biscuits or even vanilla wafers. They’ll still give you that sweet, crunchy base!
Can I freeze S’mores Bars?
Yes, you can freeze these bars! Just wrap them tightly in plastic wrap and store them in an airtight container. They’ll keep well for up to three months. Thaw them in the fridge before serving.
How do I store leftover S’mores Bars?
Store any leftovers in an airtight container in the refrigerator. This keeps them fresh and prevents them from drying out. Trust me, they won’t last long!
Can I use different types of chocolate?
Definitely! Feel free to mix and match chocolate types. Dark chocolate, milk chocolate, or even white chocolate can all work beautifully in these S’mores Bars. Get creative!
Final Thoughts
Making S’mores Bars is more than just a recipe; it’s a delightful experience that brings joy to both the cook and the eaters. The simplicity of this no-bake dessert allows you to create something special without the stress of complicated steps. Each bite is a nostalgic reminder of summer nights spent around the campfire, making it perfect for family gatherings or a cozy night in. I love how these bars can spark smiles and create sweet memories. So, gather your loved ones, whip up a batch, and enjoy the deliciousness together. Trust me, you’ll be glad you did!
Print
S’mores Bars: Discover the Ultimate No-Bake Recipe!
- Total Time: 2 hours 15 minutes
- Yield: 16 bars 1x
- Diet: Vegetarian
Description
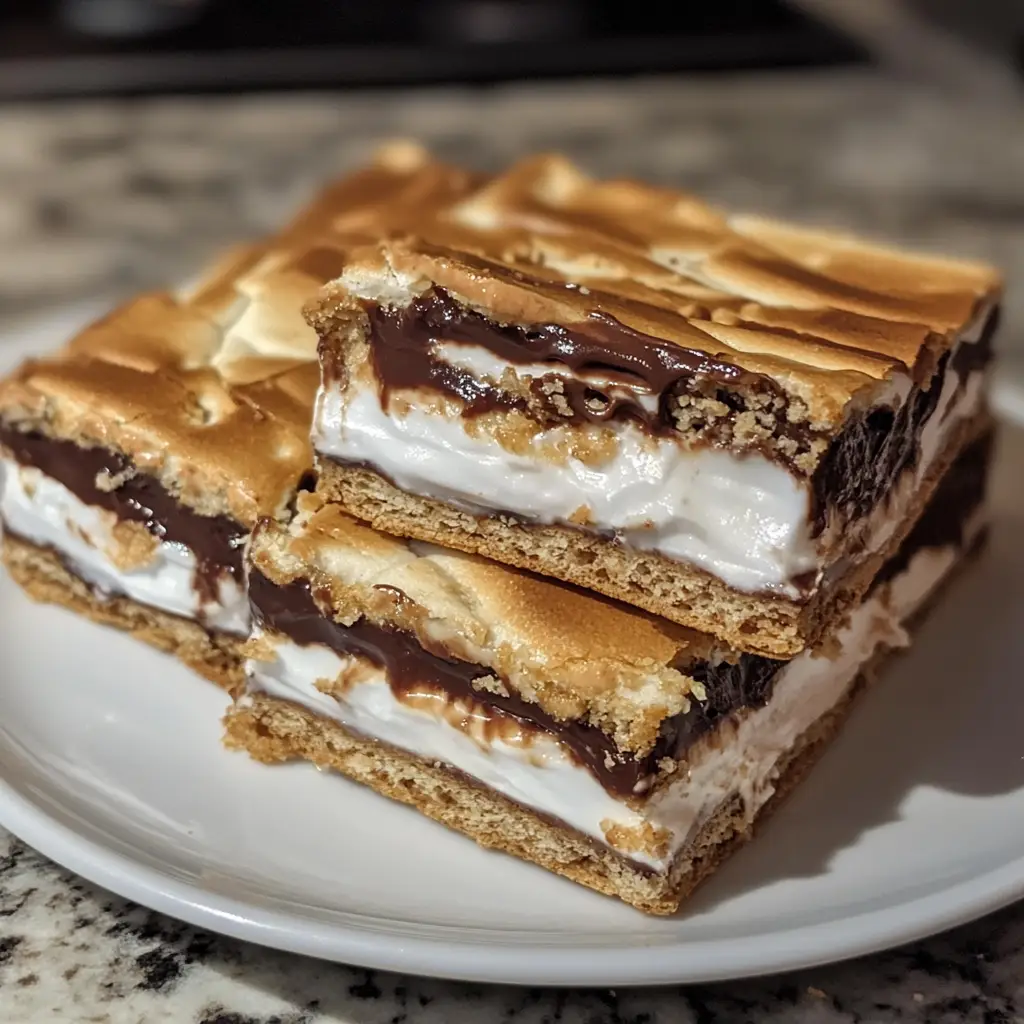
S’mores Bars are a delicious no-bake dessert that combines the classic flavors of s’mores in a convenient bar form.
Ingredients
- 1 cup graham cracker crumbs
- 1/2 cup unsweetened cocoa powder
- 1/2 cup sugar
- 1/2 cup unsalted butter, melted
- 2 cups mini marshmallows
- 1 cup chocolate chips
Instructions
- In a mixing bowl, combine graham cracker crumbs, cocoa powder, sugar, and melted butter until well mixed.
- Press the mixture into the bottom of a greased 9×9 inch baking dish.
- Evenly spread mini marshmallows over the crust.
- Sprinkle chocolate chips on top of the marshmallows.
- Refrigerate for at least 2 hours to set.
- Cut into bars and serve chilled.
Notes
- For a richer flavor, use dark chocolate chips.
- Store leftovers in an airtight container in the refrigerator.
- Feel free to add nuts or other toppings for extra texture.
- Prep Time: 15 minutes
- Cook Time: 0 minutes
- Category: Dessert
- Method: No-Bake
- Cuisine: American
Nutrition
- Serving Size: 1 bar
- Calories: 150
- Sugar: 10g
- Sodium: 50mg
- Fat: 7g
- Saturated Fat: 4g
- Unsaturated Fat: 2g
- Trans Fat: 0g
- Carbohydrates: 20g
- Fiber: 1g
- Protein: 2g
- Cholesterol: 15mg
Keywords: S'mores Bars, No-Bake Dessert, Easy Recipe


