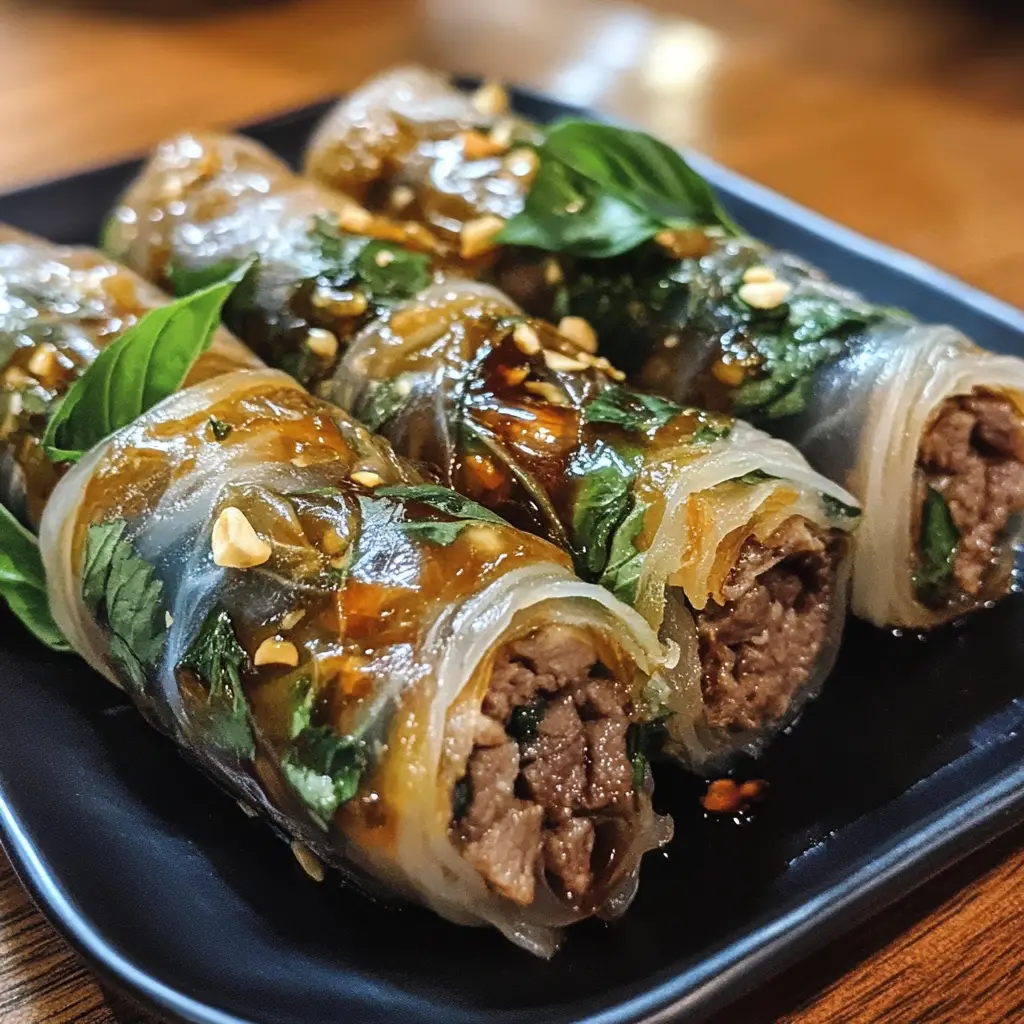
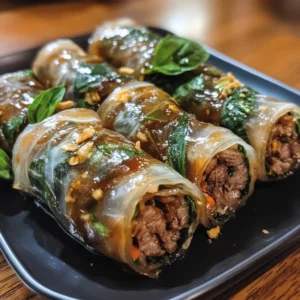
Introduction to Thai Basil Beef Rolls
As a busy mom, I know how challenging it can be to whip up something delicious and satisfying after a long day. That’s where these Thai Basil Beef Rolls come in! They’re not just a treat for the taste buds; they’re a quick solution for those hectic evenings when you want to impress your family without spending hours in the kitchen. The combination of tender beef, aromatic basil, and a crispy exterior makes these rolls a delightful bite that everyone will love. Trust me, once you try them, they’ll become a staple in your home!
Why You’ll Love This Thai Basil Beef Rolls
These Thai Basil Beef Rolls are a game-changer for busy nights. They come together in just 25 minutes, making them perfect for those evenings when time is tight. The flavors are vibrant and fresh, thanks to the fragrant basil and savory beef. Plus, they’re versatile enough to serve as an appetizer or a main dish, ensuring everyone at the table leaves satisfied. You’ll love how easy they are to make and how quickly they disappear!
Ingredients for Thai Basil Beef Rolls
Gathering the right ingredients is key to making these Thai Basil Beef Rolls a success. Here’s what you’ll need:
- Ground beef: This is the star of the show! Choose lean ground beef for a healthier option.
- Fresh Thai basil leaves: Their aromatic flavor is what makes these rolls truly special. If you can’t find Thai basil, regular basil will work in a pinch.
- Garlic: Minced garlic adds a wonderful depth of flavor. Fresh is best, but you can use pre-minced if you’re short on time.
- Soy sauce: This brings a savory umami taste to the beef. Opt for low-sodium soy sauce if you’re watching your salt intake.
- Fish sauce: A staple in Thai cooking, it adds a unique flavor. If you’re not a fan, you can skip it, but it does enhance the dish.
- Sugar: Just a touch balances the savory flavors. You can use brown sugar for a richer taste.
- Rice paper wrappers: These are what hold everything together. Look for them in the Asian section of your grocery store.
- Vegetable oil: For frying, choose a neutral oil like canola or peanut oil for the best results.
Feel free to get creative! You can add other vegetables like shredded carrots or thinly sliced cucumbers for extra crunch. The exact quantities of these ingredients are listed at the bottom of the article for your convenience, ready for printing!

How to Make Thai Basil Beef Rolls
Now that you have all your ingredients ready, let’s dive into making these delicious Thai Basil Beef Rolls! Follow these simple steps, and you’ll have a plateful of crispy, flavorful rolls in no time.
Step 1: Sauté the Garlic
Start by heating a splash of vegetable oil in a skillet over medium heat. Once the oil is shimmering, toss in the minced garlic. Sauté it for about 30 seconds, just until it becomes fragrant. Be careful not to let it burn; burnt garlic can ruin the flavor!
Step 2: Cook the Beef
Next, add the ground beef to the skillet. Use a spatula to break it apart as it cooks. Stir it occasionally until it’s browned all over. This should take about 5-7 minutes. The beef should be cooked through and no longer pink. The aroma will be heavenly!
Step 3: Add Sauces and Sugar
Once the beef is browned, it’s time to add flavor! Stir in the soy sauce, fish sauce, and sugar. Mix everything well, allowing the sauces to coat the beef evenly. Let it cook for another minute or two, so the flavors meld together beautifully.
Step 4: Fold in Basil
Remove the skillet from the heat and fold in the fresh Thai basil leaves. The residual heat will wilt the basil just enough to release its aromatic oils. This step is crucial, as it infuses the beef with that signature Thai flavor!
Step 5: Prepare Rice Paper Wrappers
Now, let’s get the rice paper wrappers ready. Fill a shallow dish with warm water. Soak each wrapper for about 10-15 seconds, or until they’re soft but not too mushy. Lay them flat on a clean surface, ready for assembly.
Step 6: Assemble the Rolls
Take a spoonful of the beef mixture and place it in the center of each rice paper wrapper. Fold the sides in, then roll it up tightly from the bottom. Make sure to tuck in the sides as you go to keep everything secure. It’s like wrapping a little present!
Step 7: Fry the Rolls
Heat a generous amount of vegetable oil in a frying pan over medium-high heat. Once the oil is hot, carefully add the rolls, a few at a time. Fry them until they’re golden brown and crispy, about 3-4 minutes per side. Keep an eye on them; they can go from golden to burnt quickly!
Step 8: Serve Hot
Once fried, transfer the rolls to a paper towel-lined plate to drain any excess oil. Serve them hot with your favorite dipping sauce, like sweet chili or peanut sauce. Trust me, these Thai Basil Beef Rolls will disappear in no time!
Tips for Success
- Don’t over-soak the rice paper wrappers; they should be pliable but not falling apart.
- Keep the filling cool before rolling to prevent the wrappers from tearing.
- Experiment with different dipping sauces to find your favorite flavor combination.
- For extra crunch, add thinly sliced vegetables like bell peppers or cucumbers.
- Make a double batch and freeze some for a quick meal later!
Equipment Needed
- Skillet: A non-stick skillet works best, but any frying pan will do.
- Spatula: Use a wooden or silicone spatula to avoid scratching your pan.
- Shallow dish: For soaking rice paper, a pie dish or large plate works perfectly.
- Paper towels: Essential for draining excess oil after frying.
Variations
- Vegetarian Option: Substitute ground beef with crumbled tofu or tempeh for a plant-based twist.
- Spicy Kick: Add chopped chili peppers or a dash of sriracha to the beef mixture for some heat.
- Herb Infusion: Mix in other fresh herbs like cilantro or mint along with the basil for a unique flavor profile.
- Gluten-Free: Ensure your soy sauce is gluten-free, or use tamari as a substitute.
- Crunchy Add-ins: Incorporate shredded carrots, bean sprouts, or bell peppers into the filling for added texture.
Serving Suggestions
- Pair these Thai Basil Beef Rolls with a refreshing cucumber salad for a light side.
- Serve with sweet chili sauce or peanut sauce for dipping to enhance the flavors.
- For drinks, try a chilled Thai iced tea or a light beer to complement the meal.
- Garnish with lime wedges and extra basil for a beautiful presentation.
FAQs about Thai Basil Beef Rolls
Can I make Thai Basil Beef Rolls ahead of time?
Absolutely! You can prepare the filling in advance and store it in the fridge. Just assemble the rolls when you’re ready to cook. This makes for a quick meal on busy nights!
What dipping sauces pair well with these rolls?
Sweet chili sauce is a classic choice, but peanut sauce or hoisin sauce also work wonderfully. Feel free to experiment with your favorites!
Can I use other meats instead of beef?
Yes! Ground chicken, turkey, or even shrimp can be delicious alternatives. Just adjust the cooking time as needed to ensure everything is cooked through.
How do I store leftovers?
Store any leftover rolls in an airtight container in the fridge for up to two days. Reheat them in the oven for a few minutes to regain their crispiness.
Are Thai Basil Beef Rolls gluten-free?
They can be! Just make sure to use gluten-free soy sauce or tamari. The rice paper wrappers are naturally gluten-free, making this dish a great option for those with dietary restrictions.
Final Thoughts
Making Thai Basil Beef Rolls is more than just cooking; it’s about creating a joyful experience for you and your loved ones. The aroma of fresh basil mingling with savory beef fills your kitchen, inviting everyone to gather around the table. These rolls are not only delicious but also a fun way to involve the family in the cooking process. Whether you’re serving them as an appetizer or a main dish, they’re sure to impress. So, roll up your sleeves, dive into this culinary adventure, and enjoy the smiles that come with every crispy bite!
Print
Thai Basil Beef Rolls: A Delicious Recipe You Must Try!
- Total Time: 25 minutes
- Yield: 4 servings 1x
- Diet: Gluten Free
Description
Thai Basil Beef Rolls are a flavorful and aromatic dish that combines tender beef with fresh basil and a variety of spices, all wrapped in rice paper for a delightful bite.
Ingredients
- 1 lb ground beef
- 1 cup fresh Thai basil leaves
- 2 cloves garlic, minced
- 1 tablespoon soy sauce
- 1 tablespoon fish sauce
- 1 teaspoon sugar
- 8–10 rice paper wrappers
- Vegetable oil for frying
Instructions
- In a skillet, heat a little oil over medium heat and sauté the minced garlic until fragrant.
- Add the ground beef and cook until browned.
- Stir in the soy sauce, fish sauce, and sugar, mixing well.
- Remove from heat and fold in the fresh Thai basil leaves.
- Soak rice paper wrappers in warm water until soft, then lay them flat on a clean surface.
- Place a spoonful of the beef mixture on each wrapper and roll tightly, folding in the sides as you go.
- Heat oil in a frying pan and fry the rolls until golden brown and crispy.
- Serve hot with your favorite dipping sauce.
Notes
- Make sure not to over-soak the rice paper wrappers to prevent tearing.
- Feel free to add other vegetables like carrots or cucumbers for extra crunch.
- These rolls can be served as an appetizer or a main dish.
- Prep Time: 15 minutes
- Cook Time: 10 minutes
- Category: Appetizer
- Method: Frying
- Cuisine: Thai
Nutrition
- Serving Size: 1 roll
- Calories: 250
- Sugar: 1g
- Sodium: 400mg
- Fat: 15g
- Saturated Fat: 5g
- Unsaturated Fat: 8g
- Trans Fat: 0g
- Carbohydrates: 20g
- Fiber: 1g
- Protein: 12g
- Cholesterol: 40mg
Keywords: Thai Basil Beef Rolls, Thai recipe, beef rolls, appetizer


