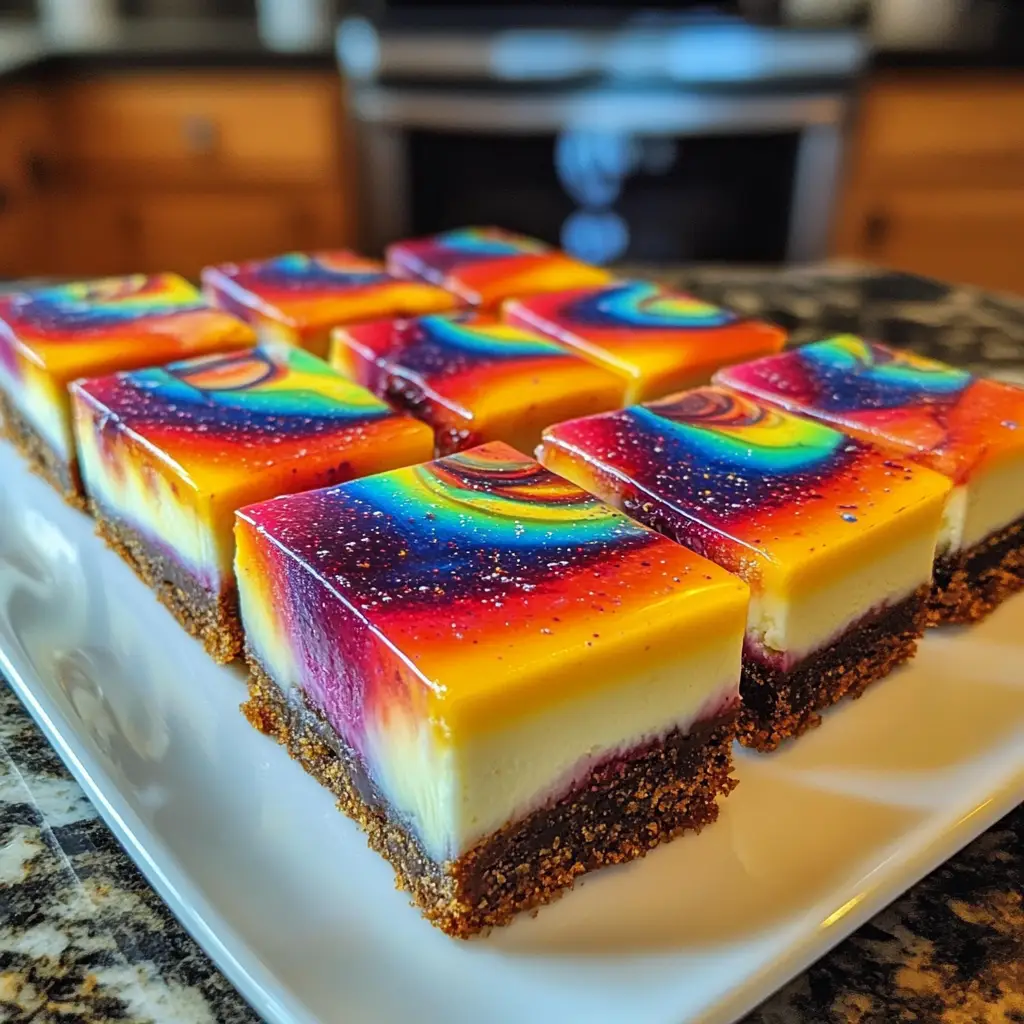
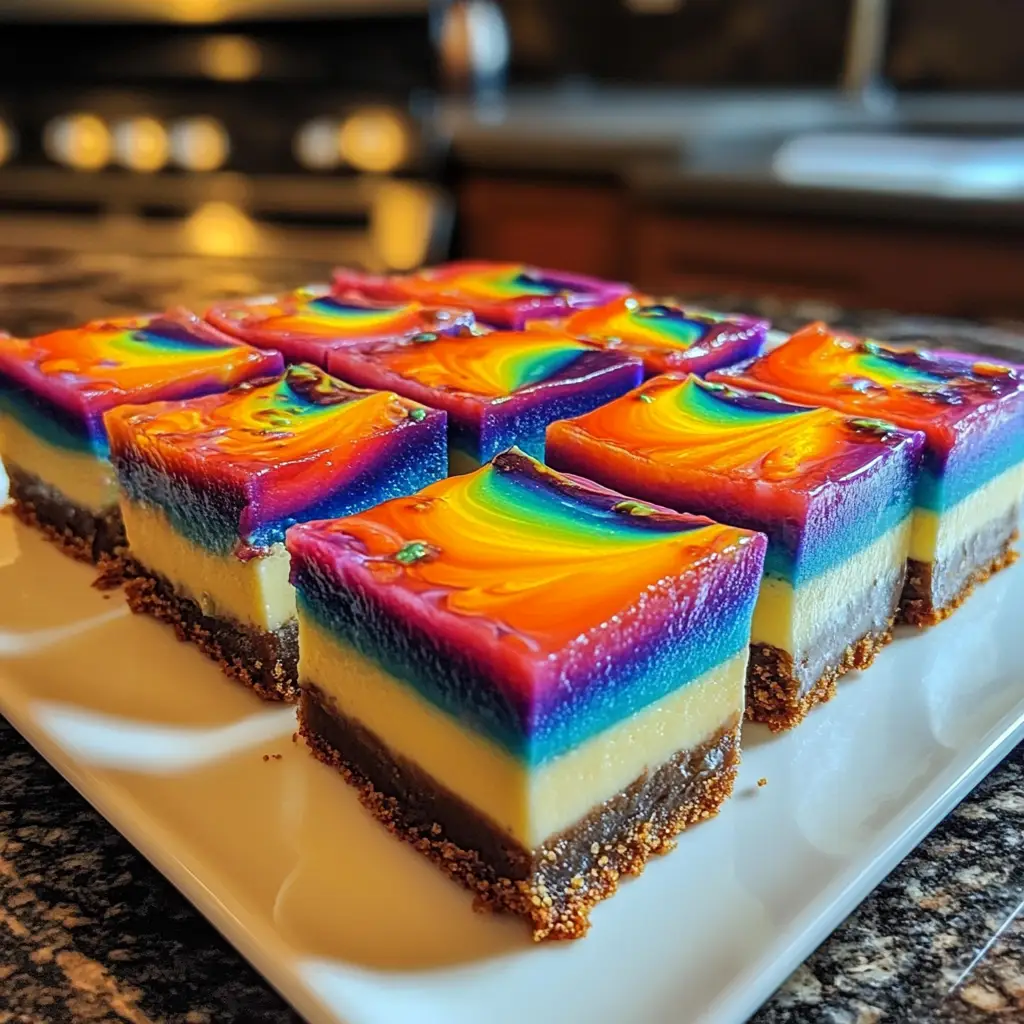
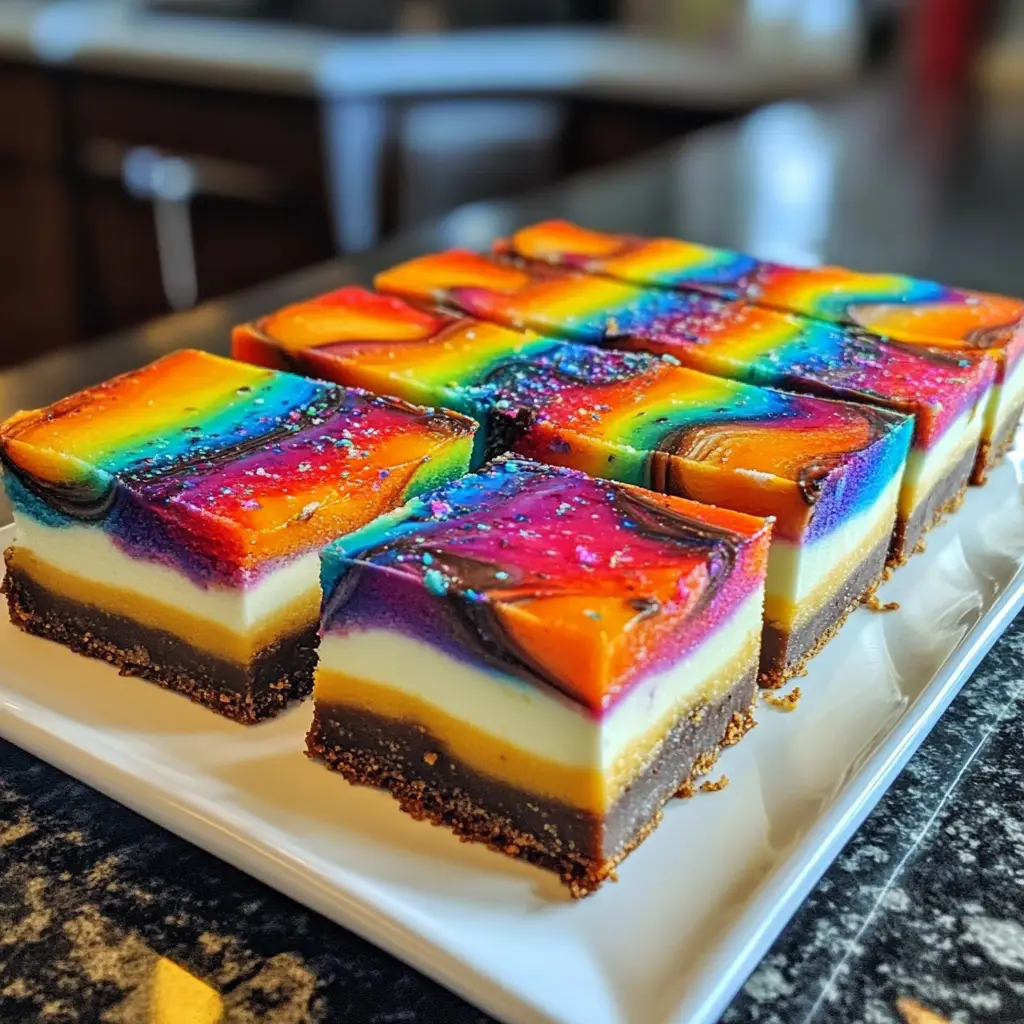
Introduction to Tie-Dye Ombre Cheesecake Bars
Hey there, fellow dessert lovers! If you’re looking for a show-stopping treat that’s as easy to make as it is beautiful, let me introduce you to my Tie-Dye Ombre Cheesecake Bars. These bars are not just a feast for the eyes; they’re a delicious solution for busy days when you want to impress your family or friends. With vibrant colors and creamy goodness, they’re perfect for any occasion, from birthday parties to cozy family dinners. Trust me, once you serve these, you’ll be the star of the kitchen!
Why You’ll Love This Tie-Dye Ombre Cheesecake Bars
These Tie-Dye Ombre Cheesecake Bars are a delightful blend of flavor and fun! They’re incredibly easy to whip up, making them perfect for busy moms like us. The vibrant colors will captivate your loved ones, while the creamy texture will have them coming back for seconds. Plus, they can be made ahead of time, so you can enjoy more moments with your family instead of being stuck in the kitchen!
Ingredients for Tie-Dye Ombre Cheesecake Bars
Let’s gather our colorful ingredients for these delightful Tie-Dye Ombre Cheesecake Bars! Each component plays a vital role in creating that creamy, dreamy texture and vibrant look.
- Graham cracker crumbs: These form the buttery crust that holds everything together. You can use store-bought or crush your own for a fresher taste.
- Unsalted butter: Melted butter adds richness to the crust. Using unsalted allows you to control the saltiness of the bars.
- Granulated sugar: This sweetens the cheesecake filling, balancing the tanginess of the cream cheese.
- Cream cheese: The star of the show! Softened cream cheese gives the bars their rich, creamy texture. Make sure it’s at room temperature for easy mixing.
- Large eggs: Eggs help bind the filling and create that luscious, smooth consistency. Adding them one at a time ensures even mixing.
- Vanilla extract: A splash of vanilla enhances the flavor, making each bite even more delightful.
- Sour cream: This adds a subtle tang and creaminess to the filling, elevating the overall taste.
- Food coloring: The fun part! Use various colors to create that stunning ombre effect. Gel colors work best for vibrant hues.
For exact measurements, check the bottom of the article where you can find everything listed for easy printing. Now, let’s get ready to create some magic in the kitchen!
How to Make Tie-Dye Ombre Cheesecake Bars
Now that we have our ingredients ready, let’s dive into the fun part—making these Tie-Dye Ombre Cheesecake Bars! Follow these simple steps, and you’ll be on your way to creating a dessert that’s as delightful to eat as it is to look at.
Step 1: Preheat the Oven
First things first, preheat your oven to 325°F (163°C). Preheating is crucial because it ensures even baking. If you skip this step, your cheesecake bars might not set properly, and nobody wants a gooey mess!
Step 2: Prepare the Crust
In a mixing bowl, combine your graham cracker crumbs and melted butter. Stir until everything is well mixed. The mixture should resemble wet sand. Now, press it firmly into the bottom of a greased 9×13 inch baking dish. This step is vital; a well-pressed crust provides a sturdy base for your creamy filling.
Step 3: Make the Cheesecake Filling
In a large mixing bowl, beat the softened cream cheese and granulated sugar together until smooth. This is where the magic begins! Make sure your cream cheese is at room temperature; it blends much easier this way. You want a creamy, lump-free mixture that’s ready to embrace the eggs.
Step 4: Add Eggs and Flavor
Now, it’s time to add the eggs. Crack them in one at a time, mixing well after each addition. This method ensures a silky texture. Next, stir in the vanilla extract and sour cream. These ingredients add depth and richness to your filling, making it irresistible!
Step 5: Color the Batter
Divide the cheesecake batter into separate bowls based on how many colors you want to use. Add food coloring to each bowl, mixing until you achieve your desired shades. This is where you can let your creativity shine! Don’t be afraid to experiment with different color combinations.
Step 6: Create the Ombre Effect
Now comes the fun part! Pour the colored batters into the prepared crust, alternating colors to create that stunning ombre effect. Start with one color, then layer another on top, and continue until all colors are used. Swirl them gently with a knife for a beautiful marbled look if you like!
Step 7: Bake the Bars
Place your baking dish in the preheated oven and bake for 45-50 minutes. Keep an eye on them! The center should be set but still slightly jiggly. A toothpick inserted should come out clean, indicating they’re ready to cool.
Step 8: Cool and Refrigerate
Once baked, remove the bars from the oven and let them cool at room temperature. After they’ve cooled, refrigerate them for at least 4 hours before slicing. This step is essential; it allows the flavors to meld and the bars to firm up, making them easier to cut.
Tips for Success
- Always use room temperature cream cheese for a smooth filling.
- Press the crust firmly to avoid a crumbly base.
- Experiment with different food coloring combinations for unique designs.
- Check for doneness by gently shaking the pan; the center should jiggle slightly.
- Let the bars chill overnight for the best flavor and texture.
Equipment Needed
- 9×13 inch baking dish: A standard size for these bars. You can use a glass or metal dish.
- Mixing bowls: A set of various sizes will help with mixing ingredients.
- Electric mixer: A hand mixer or stand mixer makes blending easier.
- Spatula: Essential for scraping down the sides of the bowl.
- Measuring cups and spoons: For accurate ingredient measurements.
Variations
- Gluten-Free: Substitute graham cracker crumbs with gluten-free cookies or almond flour for a gluten-free crust.
- Fruit Swirls: Add pureed fruit like strawberries or blueberries to the batter for a fruity twist and natural color.
- Chocolate Lovers: Mix in cocoa powder to one of the batter bowls for a chocolate ombre effect.
- Vegan Option: Use vegan cream cheese and replace eggs with flaxseed meal mixed with water for a plant-based version.
- Cheesecake Flavors: Experiment with flavored extracts like almond or lemon to change the taste profile of your bars.
Serving Suggestions for Tie-Dye Ombre Cheesecake Bars
- Pair with fresh berries for a burst of flavor and color.
- Serve with a dollop of whipped cream on top for added creaminess.
- Drizzle with chocolate or caramel sauce for an indulgent touch.
- Enjoy with a cup of coffee or tea for a delightful afternoon treat.
- Present on a colorful platter to showcase the vibrant layers.
FAQs about Tie-Dye Ombre Cheesecake Bars
Can I make Tie-Dye Ombre Cheesecake Bars ahead of time?
Absolutely! These bars are perfect for making ahead. Just prepare them, refrigerate, and slice when you’re ready to serve. They taste even better after chilling overnight!
What can I use instead of cream cheese?
If you’re looking for a lighter option, you can use Greek yogurt or a vegan cream cheese alternative. Just keep in mind that the texture and flavor may vary slightly.
How do I store leftover cheesecake bars?
Store any leftovers in an airtight container in the refrigerator. They’ll stay fresh for up to a week, making them a great treat for snacking throughout the week!
Can I freeze Tie-Dye Ombre Cheesecake Bars?
Yes, you can freeze these bars! Just wrap them tightly in plastic wrap and then in foil. They’ll keep well for up to three months. Thaw in the fridge before serving.
What’s the best way to cut these bars?
For clean cuts, use a sharp knife and wipe it clean between slices. This helps maintain the beautiful layers and ombre effect!
Final Thoughts
Creating these Tie-Dye Ombre Cheesecake Bars is more than just baking; it’s about bringing joy to your kitchen and your loved ones. The vibrant colors and creamy texture make every bite a celebration. Whether it’s a family gathering or a simple weeknight treat, these bars are sure to impress. Plus, the smiles on your family’s faces as they enjoy your creation are priceless. So, roll up your sleeves, unleash your inner artist, and let these delightful bars brighten your day. Trust me, you’ll find that baking can be a joyful escape from the everyday hustle!
Print
Tie-Dye Ombre Cheesecake Bars That Everyone Will Love!
- Total Time: 4 hours 10 minutes
- Yield: 12-16 bars 1x
- Diet: Vegetarian
Description
Delicious and visually stunning Tie-Dye Ombre Cheesecake Bars that are perfect for any occasion.
Ingredients
- 2 cups graham cracker crumbs
- 1/2 cup unsalted butter, melted
- 1 cup granulated sugar
- 4 (8 oz) packages cream cheese, softened
- 4 large eggs
- 1 teaspoon vanilla extract
- 1/4 cup sour cream
- Food coloring (various colors)
Instructions
- Preheat the oven to 325°F (163°C).
- In a bowl, mix graham cracker crumbs and melted butter until combined.
- Press the mixture into the bottom of a greased 9×13 inch baking dish.
- In a large mixing bowl, beat the cream cheese and sugar until smooth.
- Add eggs one at a time, mixing well after each addition.
- Stir in vanilla extract and sour cream until fully incorporated.
- Divide the cheesecake batter into separate bowls for each color you want to use.
- Add food coloring to each bowl and mix until desired colors are achieved.
- Pour the colored batters into the prepared crust, alternating colors to create an ombre effect.
- Bake for 45-50 minutes or until the center is set.
- Allow to cool, then refrigerate for at least 4 hours before slicing.
Notes
- For best results, use room temperature cream cheese.
- Feel free to experiment with different color combinations.
- These bars can be stored in the refrigerator for up to a week.
- Prep Time: 20 minutes
- Cook Time: 50 minutes
- Category: Dessert
- Method: Baking
- Cuisine: American
Nutrition
- Serving Size: 1 bar
- Calories: 250
- Sugar: 18g
- Sodium: 200mg
- Fat: 15g
- Saturated Fat: 9g
- Unsaturated Fat: 4g
- Trans Fat: 0g
- Carbohydrates: 25g
- Fiber: 1g
- Protein: 4g
- Cholesterol: 70mg
Keywords: Tie-Dye, Ombre, Cheesecake, Bars, Dessert


