Tiramisu: Creamy, Decadent Delight You Can’t Resist!
Sensory-Rich Introduction with Immediate Craving
Imagine a dessert that captures the essence of Italy in every bite—a luscious tiramisu that beckons with its rich coffee aroma and velvety mascarpone cream. As you lift a forkful, the delicate layers of ladyfingers soaked in espresso melt in your mouth, creating a symphony of flavors that dance on your palate. This classic Italian treat is not just a dessert; it’s a celebration of life’s sweetest moments. Whether it’s a romantic dinner, a festive gathering, or a simple indulgence after a long day, tiramisu brings warmth and joy to any occasion. Let me share a personal story: the first time I tasted homemade tiramisu at my grandmother’s kitchen, I was captivated by its creamy texture and the way it effortlessly blended the boldness of coffee with the sweetness of cream. It was love at first bite, and now, I want to share that love with you.
Why You’ll Love This Tiramisu
- Texture Contrast: The combination of creamy mascarpone and airy ladyfingers creates a delightful contrast that keeps each bite interesting.
- Flavor Balance: The rich coffee flavor is perfectly balanced with the sweetness of sugar and the bitterness of cocoa, making it a well-rounded dessert.
- Versatility: Tiramisu can be customized with various flavors, such as chocolate or fruit, making it suitable for different tastes and occasions.
- Ease of Preparation: This no-bake dessert requires minimal cooking skills, making it accessible for both novice and experienced bakers.
- Universal Appeal: Loved by many, tiramisu is a crowd-pleaser that can be enjoyed by people of all ages, making it perfect for gatherings.
Essential Tools & Preparation Strategy
- Mixing Bowls: Essential for combining ingredients smoothly; opt for glass or stainless steel for easy cleaning.
- Whisk: Needed for whipping cream and mixing mascarpone; a balloon whisk works best for aeration.
- Spatula: Useful for folding ingredients without deflating the whipped cream; a silicone spatula is ideal for scraping bowls clean.
- 9×9 Inch Dish: Perfect size for layering the tiramisu; alternatively, use individual serving cups for a modern twist.
- Measuring Cups and Spoons: Ensure accurate ingredient quantities; consider using a kitchen scale for precision.
- Electric Mixer: Speeds up the process of whipping cream and mixing ingredients; a hand mixer is sufficient for this recipe.
- Sifter: For dusting cocoa powder evenly on top; a fine-mesh sieve can also work.
- Plastic Wrap: To cover the dish while refrigerating, preventing the dessert from absorbing odors.
Ingredients & Their Roles in This Tiramisu
- Ladyfingers: 24 pieces, serve as the base layer; can be store-bought or homemade.
- Espresso: 1 cup, freshly brewed and cooled; provides the signature coffee flavor.
- Mascarpone Cheese: 1 cup, at room temperature; adds creaminess and richness.
- Heavy Cream: 1 cup; contributes to the light, airy texture when whipped.
- Sugar: 3/4 cup; sweetens the mascarpone mixture.
- Vanilla Extract: 1 teaspoon; enhances the overall flavor profile.
- Cocoa Powder: For dusting; adds a bitter contrast to the sweetness.
- Dark Chocolate Shavings: For garnish (optional); adds visual appeal and extra chocolate flavor.
Step-by-Step Guide to Perfect Tiramisu
- Prepare the Mascarpone Mixture: In a mixing bowl, whisk together the mascarpone cheese, sugar, and vanilla extract until smooth and creamy.
- Whip the Cream: In a separate bowl, whip the heavy cream until stiff peaks form, then gently fold it into the mascarpone mixture to maintain its lightness.
- Soak the Ladyfingers: Dip each ladyfinger into the cooled espresso for about 1-2 seconds, ensuring they are soaked but not soggy.
- Layer the Ladyfingers: Arrange half of the soaked ladyfingers in the bottom of a 9×9 inch dish.
- Add the Mascarpone Layer: Spread half of the mascarpone mixture over the ladyfingers, smoothing it out evenly.
- Repeat the Process: Layer the remaining soaked ladyfingers and top with the remaining mascarpone mixture.
- Chill: Cover and refrigerate for at least 4 hours, preferably overnight, to allow the flavors to meld.
- Serve: Before serving, dust the top with cocoa powder and garnish with dark chocolate shavings if desired.
Chef’s Notes & Pro Tips for Flawless Results
- Make-Ahead Instructions: This dessert can be made up to 2 days in advance and stored in the refrigerator, making it perfect for entertaining.
- Storage: Keep covered in the fridge; it can last up to 3 days.
- Equipment Recommendations: A stand mixer can save time and effort when whipping cream.
- Customization Options: For a non-caffeinated version, substitute espresso with strong brewed decaf coffee. For a lighter version, use low-fat mascarpone cheese.
Avoid These Common Cooking Mistakes
- Soaking Ladyfingers Too Long: This can make them soggy. Dip quickly, just enough to absorb the coffee.
- Not Chilling Long Enough: Tiramisu needs time to set; refrigerate for at least 4 hours.
- Overwhipping the Cream: This can lead to a grainy texture; stop when stiff peaks form.
- Using Warm Espresso: It can melt the mascarpone; ensure it’s cooled before dipping.
- Not Using Quality Ingredients: Cheap mascarpone or coffee can affect flavor; opt for high-quality products.
- Skipping the Cocoa Dusting: This adds a necessary flavor contrast; don’t omit it.
- Not Layering Properly: Ensure even layers for balanced flavor in every bite.
Creative Variations & Customizations
- Chocolate Tiramisu: Add cocoa powder to the mascarpone mixture for a chocolatey twist.
- Fruit-Infused Tiramisu: Layer with fresh berries or fruit puree for a refreshing touch.
- Nutty Tiramisu: Incorporate crushed nuts like hazelnuts or almonds for added texture.
- Vegan Tiramisu: Substitute mascarpone with cashew cream and use coconut cream for whipping.
- Seasonal Tiramisu: Use pumpkin spice in the fall or peppermint extract during the holidays for a festive flair.
Perfect Pairings: What to Serve With Tiramisu
- Espresso: A classic pairing that enhances the coffee flavor of the tiramisu.
- Dessert Wine: Serve alongside a glass of Vin Santo to complement the richness.
- Fresh Berries: Their tartness provides a refreshing contrast to the creamy dessert.
- Vanilla Gelato: An indulgent treat that pairs beautifully with the tiramisu.
- Chocolate Liqueur: For a decadent dessert experience, serve with a shot of chocolate liqueur.
- Whipped Cream: Adds extra creaminess and a light touch.
- Almond Biscotti: Offers a crunchy texture that contrasts with the softness of tiramisu.
- Fruit Tart: Create a delightful dessert platter by pairing with a fruit tart.
Storage & Meal Prep Instructions
- Refrigeration: Store in the fridge for up to 3 days, covered with plastic wrap to prevent drying out.
- Freezing: Tiramisu can be frozen for up to 1 month; thaw in the refrigerator before serving.
- Reheating: This dessert is best served chilled; do not heat.
Nutrition Facts & Health Insights
| Nutrient | Amount per Serving (1 slice) |
|---|---|
| Calories | 350 |
| Sugar | 25 grams |
| Sodium | 150 milligrams |
| Fat | 22 grams |
| Saturated Fat | 12 grams |
| Unsaturated Fat | 8 grams |
| Trans Fat | 0 grams |
| Carbohydrates | 30 grams |
| Fiber | 1 gram |
| Protein | 5 grams |
| Cholesterol | 80 milligrams |
Health Insights: Tiramisu contains beneficial ingredients like coffee, which is rich in antioxidants, and mascarpone, which provides calcium and protein.
Frequently Asked Questions
- Can I use decaf coffee instead of espresso? Yes, for a non-caffeinated version, substitute espresso with strong brewed decaf coffee.
- How long should I chill the tiramisu? Refrigerate for at least 4 hours, but overnight is best for flavor development.
- Can I make tiramisu in advance? Yes, it can be made up to 2 days in advance and stored in the refrigerator.
- What can I use instead of mascarpone? Cream cheese or a vegan alternative like cashew cream can be used.
- How do I prevent the ladyfingers from getting soggy? Dip them quickly in espresso, ensuring they absorb just enough liquid.
- Can I freeze tiramisu? Yes, it can be frozen for up to 1 month; thaw in the refrigerator before serving.
- What if I overwhip the cream? If the cream becomes grainy, gently fold in a bit of unwhipped cream to smooth it out.
- Is tiramisu suitable for vegetarians? Yes, this recipe is vegetarian-friendly.
Final Inspiration & Kitchen Confidence
As you embark on your tiramisu-making journey, remember that cooking is not just about following a recipe; it’s about creating memories and sharing love through food. Celebrate your achievements in the kitchen, and don’t be afraid to experiment with flavors and techniques. With this guide, you have all the tools and knowledge to create a stunning tiramisu that will impress your family and friends. So roll up your sleeves, embrace your inner chef, and indulge in the creamy, decadent delight of homemade tiramisu!
Print
Tiramisu: Creamy, Decadent Delight You Can’t Resist!
- Total Time: 4 hours 30 minutes
- Yield: 8 servings
- Diet: Vegetarian
Description
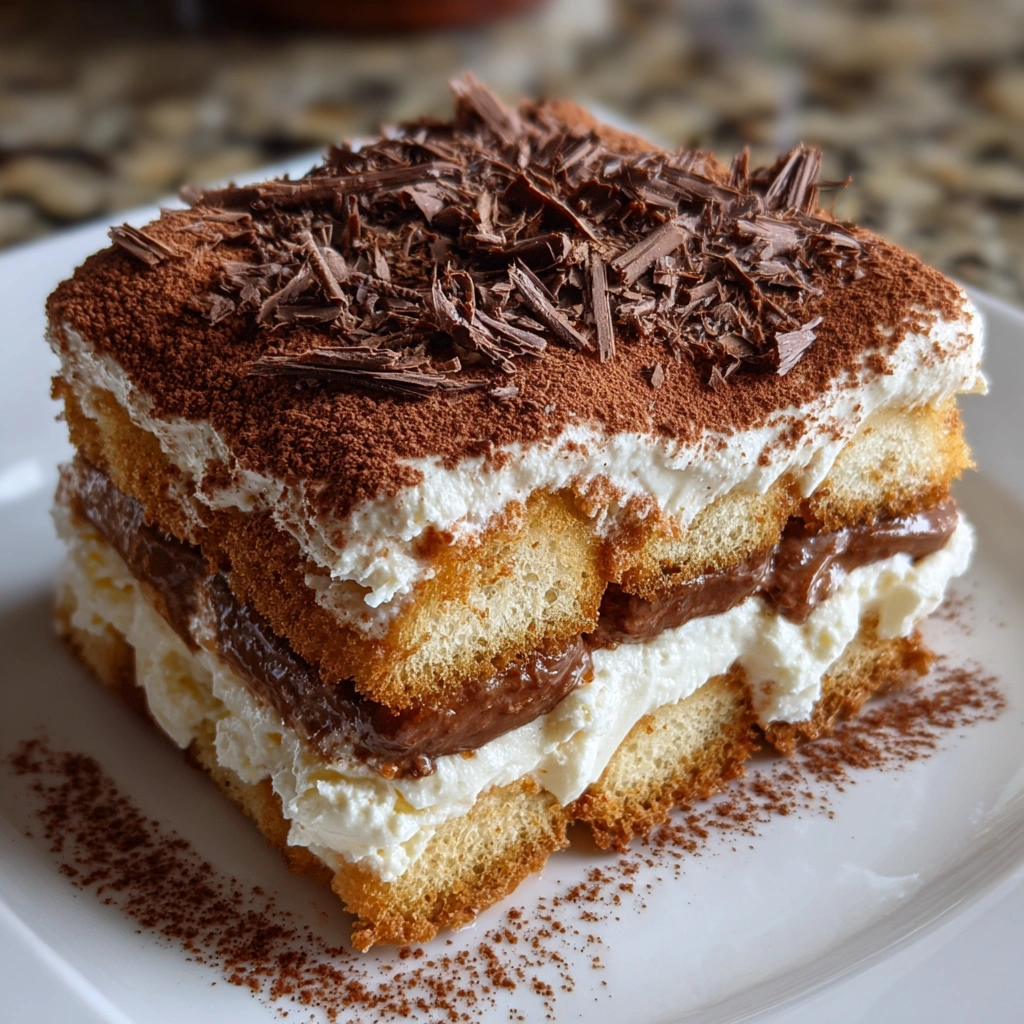
Tiramisu is a luscious Italian dessert that combines the rich flavors of coffee and cocoa with a velvety mascarpone cream. Each bite melts in your mouth, offering a delightful contrast between the creamy texture and the light, airy ladyfingers soaked in espresso.
Ingredients
- Ladyfingers: 24 pieces, store-bought or homemade
- Espresso: 1 cup, freshly brewed and cooled
- Mascarpone cheese: 1 cup, at room temperature
- Heavy cream: 1 cup
- Sugar: 3/4 cup
- Vanilla extract: 1 teaspoon
- Cocoa powder: for dusting
- Dark chocolate shavings: for garnish (optional)
Instructions
- In a mixing bowl, whisk together the mascarpone cheese, sugar, and vanilla extract until smooth and creamy.
- In a separate bowl, whip the heavy cream until stiff peaks form, then gently fold it into the mascarpone mixture.
- Dip each ladyfinger into the cooled espresso for about 1-2 seconds, ensuring they are soaked but not soggy.
- Layer half of the soaked ladyfingers in the bottom of a 9×9 inch dish.
- Spread half of the mascarpone mixture over the ladyfingers, smoothing it out evenly.
- Repeat the process with the remaining ladyfingers and mascarpone mixture.
- Cover and refrigerate for at least 4 hours, preferably overnight, to allow the flavors to meld.
- Before serving, dust the top with cocoa powder and garnish with dark chocolate shavings if desired.
Notes
- This dessert can be made up to 2 days in advance and stored in the refrigerator.
- For a non-caffeinated version, substitute espresso with strong brewed decaf coffee.
- For a lighter version, you can use low-fat mascarpone cheese.
- Prep Time: 30 minutes
- Cook Time: 0 minutes
- Category: desserts
- Method: no-bake
- Cuisine: Italian
Nutrition
- Serving Size: 1 slice (approximately 1/8 of the dish)
- Calories: 350
- Sugar: 25 grams
- Sodium: 150 milligrams
- Fat: 22 grams
- Saturated Fat: 12 grams
- Unsaturated Fat: 8 grams
- Trans Fat: 0 grams
- Carbohydrates: 30 grams
- Fiber: 1 gram
- Protein: 5 grams
- Cholesterol: 80 milligrams
Keywords: Tiramisu, Italian dessert, coffee dessert, mascarpone, no-bake dessert, creamy dessert, chocolate dessert, classic tiramisu, easy tiramisu recipe, dessert recipes, layered dessert, indulgent dessert, homemade tiramisu, coffee-flavored dessert, rich dessert


