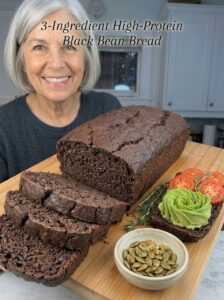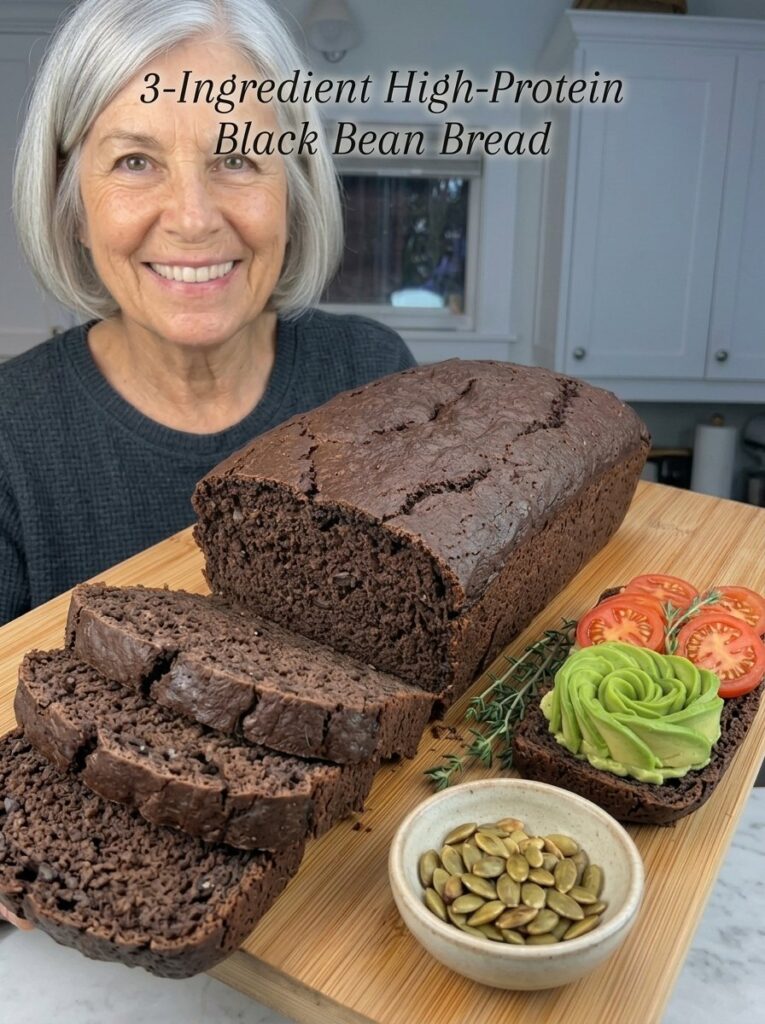
3-Ingredient High-Protein Black Bean Bread: The Easiest Homemade Bread You’ll Ever Make
If you’ve been searching for a way to enjoy fresh, homemade bread without wrestling with yeast, kneading, proofing times, or a long grocery list, this 3-Ingredient High-Protein Black Bean Bread is about to become your new favorite kitchen staple. It’s soft, hearty, naturally gluten-free, and packed with plant-based protein — all from just three pantry staples you probably already have on hand.
This isn’t your typical bean bread recipe either. Instead of relying on flour, sugar, or yeast, this loaf gets its structure and rise entirely from blended black beans, eggs, and baking powder. The result is a dense yet tender loaf with a subtly savory flavor that pairs beautifully with both sweet and savory toppings. Whether you’re looking for a healthy breakfast option, a protein-packed snack, or a simple bread to serve alongside soups and salads, this black bean bread checks every box.
Below, you’ll find everything you need to know to make this recipe a success — from ingredient tips and step-by-step instructions to serving ideas, storage guidance, and answers to common questions.
Why You’ll Love This High-Protein Black Bean Bread
There’s a reason black bean bread has become such a popular recipe among people looking for healthier, higher-protein alternatives to traditional bread. Here’s what makes this version stand out:
It’s incredibly simple. With only three ingredients — black beans, eggs, and baking powder — there’s no need to measure out flour, activate yeast, or wait hours for dough to rise. This is about as close to foolproof as homemade bread gets.
It’s naturally high in protein. Thanks to the combination of black beans and eggs, each slice delivers a satisfying dose of plant-based and animal-based protein, making this bread a smart choice for anyone trying to increase their protein intake without relying on processed protein powders or specialty products.
It’s naturally gluten-free. Because there’s no wheat flour involved, this bread is naturally suitable for anyone avoiding gluten, without needing specialty gluten-free flour blends.
It’s endlessly versatile. Slice it for toast, use it as a sandwich base, serve it alongside soup, or enjoy it as a savory snack. Its neutral, slightly earthy flavor makes it a blank canvas for both sweet and savory toppings.
It’s budget-friendly. Canned or home-cooked black beans, eggs, and baking powder are inexpensive staples, making this one of the most affordable homemade bread recipes you can make.
Ingredients You’ll Need
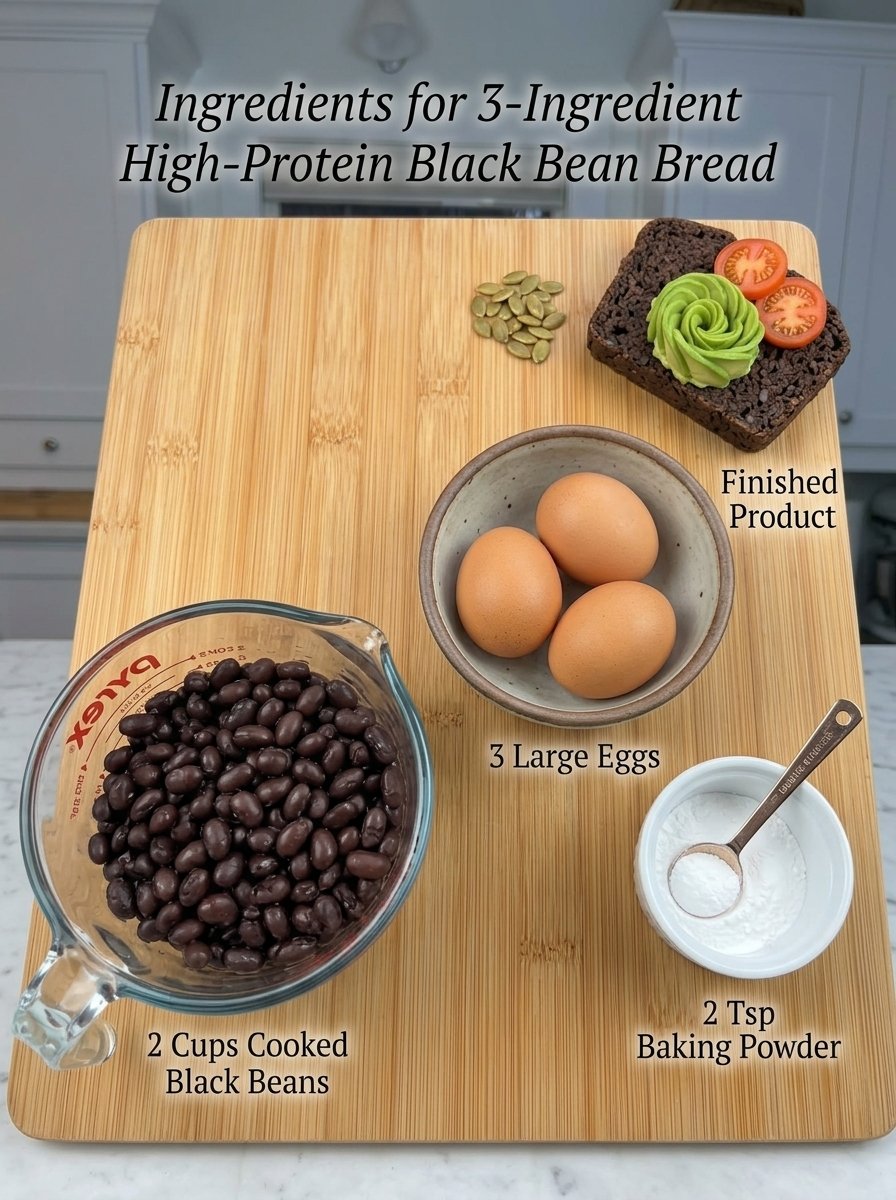
One of the best parts of this recipe is how short the ingredient list is. You only need:
- 2 cups (340 g) cooked black beans, drained and rinsed
- 3 large eggs
- 2 teaspoons baking powder
That’s it. No flour, no sugar, no oil, and no yeast. The black beans provide the bulk and structure of the loaf, the eggs act as a binder while adding richness and protein, and the baking powder provides the lift that gives the bread its soft, bread-like texture.
A Note on Choosing Your Black Beans
You can use either canned black beans or beans you’ve cooked from dried at home. Canned black beans are the most convenient option and work wonderfully in this recipe — just be sure to drain and rinse them thoroughly before use. Rinsing removes excess sodium and the starchy canning liquid, which can otherwise make your batter overly wet.
If you prefer using dried beans, cook them until fully tender, then let them cool completely before blending. Freshly cooked beans tend to hold a bit more moisture than canned, so draining them well is especially important for the best texture.
Tips for the Best Black Bean Bread
A few small details can make a big difference in how this bread turns out. Keep these tips in mind as you prepare your loaf:
- Blend until completely smooth. For the best texture, blend the beans until they’re totally creamy with no visible chunks. Any remaining bean pieces will show up as dense spots in the finished loaf, so take the extra minute or two to get the batter silky and uniform.
- Drain your beans thoroughly. Excess liquid is the number one cause of a soggy or overly soft loaf. Let your beans sit in a colander for several minutes after rinsing, and gently shake off any extra water before adding them to the blender.
- Use room-temperature eggs. Cold eggs can cause the batter to blend unevenly. Letting your eggs sit at room temperature for about 20–30 minutes before you start makes for a smoother, more consistent batter.
- Scrape down the sides of your blender or food processor. Stopping to scrape down the sides once or twice during blending ensures every bit of bean gets fully incorporated into a creamy batter.
- Let the loaf cool completely before slicing. This step is easy to skip when you’re eager to try a slice, but patience pays off here. As the bread cools, the structure firms up, making it much easier to slice cleanly without crumbling.
How to Make 3-Ingredient High-Protein Black Bean Bread
This recipe comes together in five simple steps. No proofing, no kneading — just blend, bake, and slice.
Step 1: Prepare the Black Beans
Start by preparing your black beans properly, since this step has the biggest impact on your final texture.
If you’re using canned black beans, drain them in a colander and rinse thoroughly under cool running water to remove excess sodium and starch. Let them sit in the colander for a few minutes so any extra liquid can drain away.
If you’re using black beans you cooked yourself, make sure they’re fully tender and have cooled to room temperature before moving on to the next step. Using warm beans can affect how the batter blends and bakes.
Step 2: Blend the Ingredients
Preheat your oven to 350°F (175°C) so it’s fully heated by the time your batter is ready.
Add the drained black beans, eggs, and baking powder directly into a high-speed blender or food processor. Blend on high, stopping occasionally to scrape down the sides, until the mixture is completely smooth and creamy. You’re looking for a thick, uniform batter with absolutely no visible bean pieces remaining — this typically takes one to two minutes of blending, depending on your equipment.
Step 3: Prepare the Loaf Pan
While your oven finishes preheating, prepare an 8 × 4-inch loaf pan by lightly greasing it or lining it with parchment paper. Parchment paper makes removing the loaf after baking especially easy and mess-free.
Pour the blended batter into the prepared pan, then use a spatula to gently smooth the top. This helps the loaf bake evenly and gives it a neat, finished appearance once it’s out of the oven.
Step 4: Bake the Bread
Place the loaf pan in your preheated oven and bake for approximately 40–50 minutes. You’ll know it’s ready when the top turns lightly golden and the center feels firm to the touch.
To check for doneness, insert a toothpick into the center of the loaf — it should come out mostly clean, without wet batter clinging to it. If you notice the top browning too quickly before the inside is fully baked, loosely tent the loaf with foil for the remainder of the baking time to prevent over-browning.
Step 5: Cool and Slice
Once baked, remove the loaf from the oven and let it rest in the pan for about 10 minutes. This brief resting period allows the structure to set slightly, making it easier to transfer.
Carefully move the loaf to a wire rack and let it cool completely before slicing — this is a crucial step for achieving clean, sturdy slices rather than a crumbly loaf. Once fully cooled, use a sharp serrated knife to slice the bread evenly.
Nutritional Benefits of Black Bean Bread
Black beans and eggs make an excellent nutritional pairing, and together they turn this simple loaf into a genuinely nourishing food.
Black beans are well known as a plant-based source of protein and fiber, and they also contribute iron, magnesium, and folate to the mix. Fiber in particular plays an important role in supporting digestion and helping you feel fuller for longer, which makes this bread a satisfying option whether you’re enjoying it at breakfast or as an afternoon snack.
Eggs add complete, high-quality protein along with healthy fats and essential nutrients like choline and vitamin B12. Combined with the beans, they help make each slice of this bread notably more protein-rich than a typical slice of wheat-based bread, without needing any added protein powders or supplements.
Because the recipe skips added sugar, oil, and refined flour, it’s also a naturally wholesome option for anyone focused on eating more whole-food, minimally processed meals.
Delicious Ways to Serve Black Bean Bread
Part of what makes this bread so enjoyable is how versatile it is. Here are some of the best ways to serve it:
- Classic avocado toast: Top a slice with mashed avocado, a sprinkle of salt, pepper, and red pepper flakes for a satisfying breakfast or snack.
- Protein-packed breakfast: Pair a slice with a fried or scrambled egg and a dollop of cottage cheese for an extra protein boost.
- Savory sandwiches: Use two slices to build a hearty sandwich filled with vegetables, cheese, deli meat, or grilled chicken.
- Open-faced toast: Layer on fresh tomatoes, cucumbers, or roasted vegetables along with hummus or a savory spread for a light lunch.
- Alongside soups and salads: Serve warm slices next to a bowl of soup or a fresh salad for a filling, balanced meal.
- Simple savory snack: Enjoy a lightly toasted slice on its own, or with a spread of hummus or nut butter, whenever hunger strikes between meals.
Because the bread has a mild, slightly earthy flavor rather than a sweet one, it leans naturally toward savory pairings, though it can also work with lightly sweet toppings like a drizzle of honey if you prefer.
How to Store Black Bean Bread
Proper storage helps this bread stay fresh and keeps its texture intact for days after baking.
Refrigerator storage: Once the loaf has cooled completely, store it in an airtight container or wrap it tightly in plastic wrap or foil. Stored this way in the refrigerator, it will stay fresh for about 4–5 days.
Freezer storage: For longer storage, slice the cooled loaf into individual pieces and place them in a freezer-safe bag or container. Frozen slices will keep well for up to 2–3 months, making this a great recipe to batch-make for easy future breakfasts or snacks.
Reheating: When you’re ready to enjoy a frozen slice, simply thaw it and warm it in a toaster, toaster oven, or skillet until heated through. This helps restore the bread’s texture and makes it taste freshly baked.
Recipe Card
Prep Time: About 10 minutes
Cooking Time: Approximately 40–50 minutes
Total Time: About 50–60 minutes
Yield: 1 loaf, approximately 10–12 slices
Ingredients
- 2 cups (340 g) cooked black beans, drained and rinsed
- 3 large eggs
- 2 teaspoons baking powder
Instructions
- Prepare the black beans by draining and rinsing thoroughly (if canned) or cooling completely (if home-cooked).
- Preheat the oven to 350°F (175°C). Blend the black beans, eggs, and baking powder until smooth and creamy.
- Pour the batter into a greased or parchment-lined 8 × 4-inch loaf pan and smooth the top.
- Bake for 40–50 minutes, until golden on top and a toothpick inserted in the center comes out mostly clean.
- Cool in the pan for 10 minutes, then transfer to a wire rack to cool completely before slicing.
Frequently Asked Questions
Can I use a different type of bean instead of black beans?
While this recipe is specifically developed for black beans, other neutral-flavored beans like white beans or pinto beans could potentially work with similar results, though the flavor and color of the final loaf will differ.
Why is my black bean bread too dense or gummy?
This usually happens when the beans weren’t drained thoroughly enough before blending, leaving excess moisture in the batter. Be sure to drain and let your beans sit for a few minutes before blending to remove as much liquid as possible.
Can I add extra flavorings to this recipe?
Yes. While the base recipe keeps things simple with just three ingredients, you can experiment with add-ins like garlic powder, onion powder, herbs, or a pinch of salt to customize the flavor to your taste.
Is this bread suitable for a gluten-free diet?
Yes, since the recipe contains no wheat flour, it’s naturally gluten-free, making it a good option for those avoiding gluten.
Can I make this recipe without a blender?
A blender or food processor is strongly recommended, since it’s essential for achieving a smooth, creamy batter free of bean chunks. Mashing the beans by hand likely won’t achieve the same smooth texture.
How do I know when the bread is fully baked?
The top should be lightly golden and the center firm to the touch. A toothpick inserted into the center should come out mostly clean, without wet batter clinging to it.
Final Thoughts
This 3-Ingredient High-Protein Black Bean Bread proves that homemade bread doesn’t have to be complicated to be delicious. With just black beans, eggs, and baking powder, you can create a soft, hearty, protein-packed loaf that’s perfect for breakfast, snacks, sandwiches, and beyond — all without yeast, kneading, or a long ingredient list. Whether you’re looking for a gluten-free bread alternative, a higher-protein option, or simply an easy homemade recipe to add to your rotation, this black bean bread is a simple, satisfying choice worth adding to your regular meal prep.
Print
3-Ingredient High-Protein Black Bean Bread
Ingredients
One of the best parts of this recipe is how short the ingredient list is. You only need:
- 2 cups (340 g) cooked black beans, drained and rinsed
- 3 large eggs
- 2 teaspoons baking powder
That’s it. No flour, no sugar, no oil, and no yeast. The black beans provide the bulk and structure of the loaf, the eggs act as a binder while adding richness and protein, and the baking powder provides the lift that gives the bread its soft, bread-like texture.
A Note on Choosing Your Black Beans
You can use either canned black beans or beans you’ve cooked from dried at home. Canned black beans are the most convenient option and work wonderfully in this recipe — just be sure to drain and rinse them thoroughly before use. Rinsing removes excess sodium and the starchy canning liquid, which can otherwise make your batter overly wet.
If you prefer using dried beans, cook them until fully tender, then let them cool completely before blending. Freshly cooked beans tend to hold a bit more moisture than canned, so draining them well is especially important for the best texture.
Instructions
This recipe comes together in five simple steps. No proofing, no kneading — just blend, bake, and slice.
Start by preparing your black beans properly, since this step has the biggest impact on your final texture.
If you’re using canned black beans, drain them in a colander and rinse thoroughly under cool running water to remove excess sodium and starch. Let them sit in the colander for a few minutes so any extra liquid can drain away.
If you’re using black beans you cooked yourself, make sure they’re fully tender and have cooled to room temperature before moving on to the next step. Using warm beans can affect how the batter blends and bakes.
Preheat your oven to 350°F (175°C) so it’s fully heated by the time your batter is ready.
Add the drained black beans, eggs, and baking powder directly into a high-speed blender or food processor. Blend on high, stopping occasionally to scrape down the sides, until the mixture is completely smooth and creamy. You’re looking for a thick, uniform batter with absolutely no visible bean pieces remaining — this typically takes one to two minutes of blending, depending on your equipment.
While your oven finishes preheating, prepare an 8 × 4-inch loaf pan by lightly greasing it or lining it with parchment paper. Parchment paper makes removing the loaf after baking especially easy and mess-free.
Pour the blended batter into the prepared pan, then use a spatula to gently smooth the top. This helps the loaf bake evenly and gives it a neat, finished appearance once it’s out of the oven.
Place the loaf pan in your preheated oven and bake for approximately 40–50 minutes. You’ll know it’s ready when the top turns lightly golden and the center feels firm to the touch.
To check for doneness, insert a toothpick into the center of the loaf — it should come out mostly clean, without wet batter clinging to it. If you notice the top browning too quickly before the inside is fully baked, loosely tent the loaf with foil for the remainder of the baking time to prevent over-browning.
Once baked, remove the loaf from the oven and let it rest in the pan for about 10 minutes. This brief resting period allows the structure to set slightly, making it easier to transfer.
Carefully move the loaf to a wire rack and let it cool completely before slicing — this is a crucial step for achieving clean, sturdy slices rather than a crumbly loaf. Once fully cooled, use a sharp serrated knife to slice the bread evenly.