Ingredients
The beauty of this recipe is its short ingredient list. Here is exactly what you need:
- 1 can (15 oz / 425 g) black beans, drained and thoroughly rinsed
- 3 large eggs
- 1 teaspoon baking powder
That is the entire recipe. You will also want a little oil or parchment paper to prepare your loaf pan, but those are kitchen tools rather than recipe ingredients.
Why Each Ingredient Matters
Black beans form the body of the bread. They contribute fiber, plant-based protein, and a deep, earthy color. Once blended until smooth, they create a thick batter that bakes into a tender crumb. Rinsing them well removes much of the canning liquid, which helps the flavor taste cleaner and the batter bake up less wet.
Eggs are the binder. They hold the blended beans together, add structure and moisture, and contribute extra protein. Without eggs, the batter would not set into a loaf you can slice.
Baking powder is the leavening agent. A single teaspoon gives the loaf a bit of lift and helps create a softer, more open crumb than you would get without it. Make sure your baking powder is fresh; old baking powder loses its power and can leave the loaf flatter and denser.
Instructions
Preheat your oven to 350°F (175°C). Open the can of black beans, drain them in a colander, and rinse them thoroughly under cool running water. Then let them drain well. This step matters more than it seems: excess moisture can make the bread too dense or wet, and it can prevent the center from setting properly. Give the colander a good shake, or pat the beans gently with a clean kitchen towel if they still look very wet.
Add the drained beans, eggs, and baking powder to a blender or food processor. Blend until the mixture is completely smooth, pausing to scrape down the sides as needed. The finished batter should be thick but pourable, with no large pieces of bean remaining. A smoother batter produces a more even texture and a more bread-like crumb.
If your blender struggles because the mixture is thick, stop and stir with a spatula, then continue blending. Do not add water or milk; extra liquid will make the loaf too wet.
Lightly grease an 8 × 4-inch loaf pan or line it with parchment paper, leaving a little overhang on the sides to use as handles later. Pour in the batter and spread it evenly with a spatula. Gently tap the pan on the counter a couple of times to release any large air bubbles.
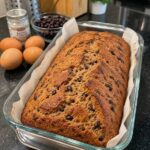
Place the pan in the preheated oven and bake for about 35–45 minutes. The loaf is ready when the center feels firm and set and a toothpick inserted into the middle comes out mostly clean. The top should look golden brown and slightly crackled, with the dark beans visible throughout the crumb. If the center still looks wet, bake for a few more minutes and check again.
Oven temperatures and pan sizes vary, so rely on the visual and toothpick cues rather than the clock alone. A wider, shallower pan will bake faster than a narrow, deep one.
Remove the pan from the oven and let the loaf rest in the pan for 10–15 minutes. Then carefully lift it out and transfer it to a wire rack to cool completely. This waiting period is important. The bread will be very moist and soft while warm, and cooling lets it firm up so it slices cleanly.
Once the loaf has cooled, slice it with a sharp knife. Serve the slices as they are, or toast them lightly for a firmer, slightly crisp texture that holds toppings well.