3-Ingredient High-Protein Navy Bean Sandwich Bread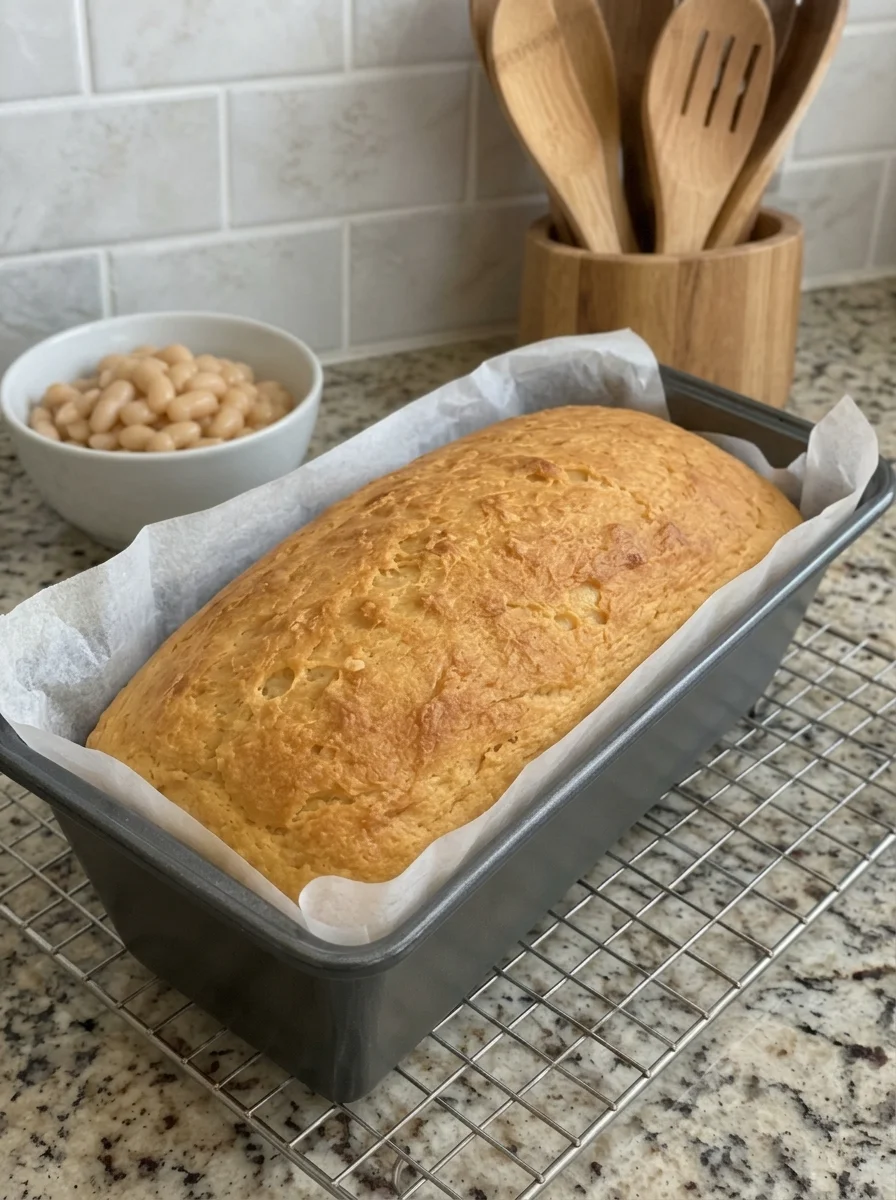
If you have ever stared at a loaf of store-bought bread and wished for something simpler, this 3-ingredient high-protein navy bean sandwich bread is the answer. It uses just three things you probably already have: cooked navy beans, eggs, and baking powder. There is no flour, no yeast, no kneading, and no waiting for dough to rise. You blend, pour, and bake.
The result is a soft, tender, slightly golden loaf that slices cleanly and holds together for sandwiches, breakfast toast, and savory snacks. It is naturally gluten-free, packed with plant-based protein and fiber, and surprisingly neutral in flavor, so it works with sweet and savory toppings alike.
In this complete guide you will find the full recipe, step-by-step instructions, expert tips, nutrition details, flavor variations, troubleshooting help, serving ideas, storage and freezing advice, and answers to the most common questions. Whether you are eating more protein, avoiding gluten, or just want a bread that takes five minutes of hands-on work, this recipe is worth a place in your weekly routine.
Why You Will Love This Navy Bean Bread
Most “healthy” breads trade convenience for nutrition, or taste for texture. This loaf avoids that trade-off. Here is what makes it stand out from other gluten-free and low-carb bread recipes.
- Only three ingredients. Navy beans, eggs, and baking powder are all you need. Fewer ingredients mean a shorter shopping list, lower cost, and less that can go wrong.
- High in protein. Beans and eggs are both excellent protein sources, so a slice keeps you full far longer than a slice of refined white bread.
- Naturally gluten-free. There is no wheat, barley, or rye. If you are cooking for someone with gluten sensitivity, check that your canned beans and baking powder are labeled gluten-free.
- No yeast and no rising time. The baking powder gives lift in the oven, so you can go from pantry to loaf in under an hour.
- Blender-easy. There is no kneading, folding, or proofing. If you can press a button, you can make this bread.
- Budget-friendly. Canned or home-cooked navy beans are among the cheapest protein foods you can buy, and eggs are a pantry staple.
- Versatile. The mild, creamy flavor of navy beans disappears into the background, which makes the bread a blank canvas for toppings, spreads, and seasonings.
This bread is also a smart answer to a common problem: you want a sandwich base, but you do not want a heavy, sugary, or ultra-processed loaf. With a short ingredient list you can read and understand at a glance, you always know exactly what is in your food.
Ingredients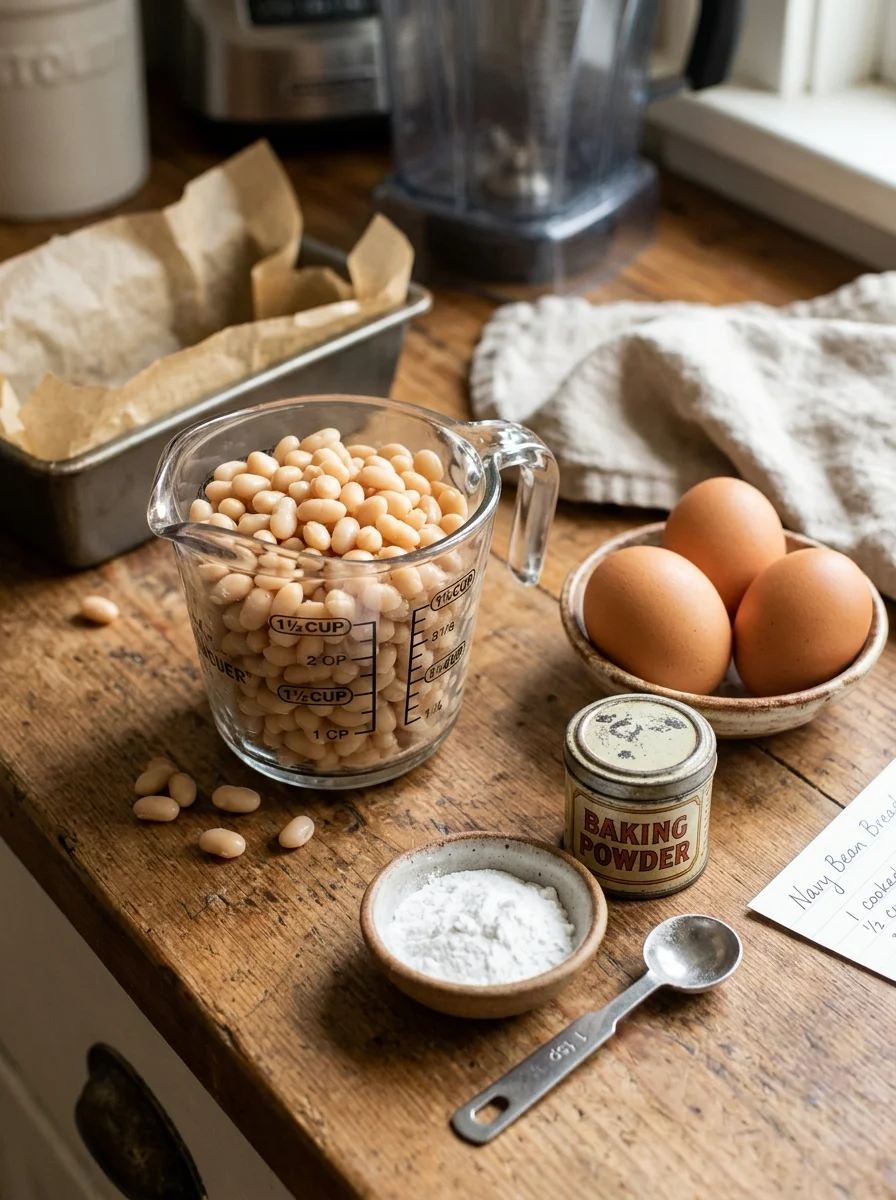
This recipe makes one small loaf. Prep takes about 10 minutes and baking takes 35 to 45 minutes.
- 1½ cups (255 g) cooked navy beans, drained and rinsed
- 3 large eggs
- 1 teaspoon baking powder
Notes on Each Ingredient
Navy beans. Navy beans, also called haricot beans or pea beans, are small, white, and mild. Their creamy interior blends into a smooth, almost batter-like purée, which is why they work so well here. Canned beans are the fastest option. If you cook dried beans at home, cook them until completely tender, then drain them very well. Great Northern or cannellini beans can stand in if needed, though the texture may be slightly different.
Eggs. The eggs are the structure of this bread. They bind the purée, add protein, and set into a firm crumb as they bake. Use large eggs at room temperature if you can, since they blend more evenly into the beans.
Baking powder. One teaspoon creates enough lift to keep the loaf from turning dense and custardy. Make sure your baking powder is fresh. Old or expired baking powder is the most common reason for a flat loaf.
Equipment You Will Need
- A blender or high-speed food processor
- A small loaf pan (about 8 x 4 inches or smaller)
- Parchment paper
- A wire cooling rack
- A serrated knife for slicing
How to Make Navy Bean Sandwich Bread (Step by Step)
- Prepare the oven. Preheat your oven to 350°F (180°C). Line a small loaf pan with parchment paper, leaving a little overhang on the long sides so you can lift the loaf out easily later.
- Prepare the beans. Drain the cooked navy beans in a colander and rinse them thoroughly under cold water. Shake off the excess water and let them sit for a minute or two. Dry beans make a firmer bread.
- Blend the ingredients. Add the navy beans, eggs, and baking powder to a blender. Blend until completely smooth, pausing to scrape down the sides once or twice. No visible bean pieces should remain.
- Transfer to the pan. Pour the mixture into the prepared loaf pan. Tap the pan gently on the counter to release air bubbles, then smooth the top with a spatula.
- Bake. Bake for 35 to 45 minutes, until the center is firm to the touch and the top is lightly golden. A toothpick inserted in the middle should come out clean.
- Cool in the pan. Let the loaf rest in the pan for 15 minutes. Then lift it out by the parchment and move it to a wire rack.
- Slice. Allow the bread to cool completely before slicing. Cutting too early can make the center seem gummy, while a fully cooled loaf slices cleanly and has the best texture.
Quick Recipe Summary
- Prep time: about 10 minutes
- Baking temperature: 350°F (180°C)
- Baking time: 35 to 45 minutes
- Cooling time: 15 minutes in the pan, then until fully cool
- Yield: 1 small loaf
- Diet: gluten-free, high-protein, no added sugar
Tips for the Best Navy Bean Bread
A recipe this simple depends on a few small details. These tips make the difference between a good loaf and a great one.
Drain the Beans Very Well
Excess moisture is the number one enemy of this recipe. If the beans carry extra liquid into the blender, the batter becomes too wet and the loaf can bake up soggy in the middle. After rinsing, let the beans drain in a colander for a few minutes, or pat them lightly with a clean towel.
Blend Until Completely Smooth
A fine, silky batter gives a fine, even crumb. Leftover bean fragments create a coarse, uneven texture. A high-speed blender gives the best results, but a food processor works if you run it longer and scrape down the sides.
Do Not Open the Oven Early
Avoid opening the oven door during the first 30 minutes. A sudden drop in temperature can cause the loaf to sink in the center before the structure has set.
Let It Cool Completely
This step takes patience, but it matters. As the bread cools, the steam inside redistributes and the crumb firms up. Slice too early and you will get a damp, sticky texture.
Toast Your Slices
For sandwiches, toast the slices first. Toasting dries the surface, adds a gentle crunch, and gives the bread extra strength so it holds fillings without bending or tearing. It also brings out a more bread-like flavor.
Use the Right Pan Size
A small loaf pan gives the bread enough height to look like a real sandwich slice. A pan that is too large spreads the batter thin, which shortens the baking time and produces a flatter, denser loaf. If you only have a standard pan, line it with parchment and fold the paper to make the space narrower.
Nutrition and Health Benefits of Navy Bean Bread
This loaf is more than a gluten-free novelty. Each ingredient brings real nutritional value, and the combination makes a bread that is filling and nutrient-dense.
Plant-Based Protein and Fiber
Navy beans are a classic legume, and legumes are known for delivering both protein and dietary fiber in the same food. Eggs add complete protein with all the essential amino acids. Together they give you a bread that supports muscle maintenance, steady energy, and lasting fullness. Fiber also supports digestive health and helps slow the rise in blood sugar after a meal.
Lower in Refined Carbohydrates
Traditional sandwich bread is built on refined wheat flour. This recipe replaces it with a whole food. Because beans digest slowly, many people find a bean-based bread more satisfying than a white-flour slice. It is not a zero-carb food, but it is a gentler, more nutrient-dense option for people who want to cut back on refined grains.
Minerals and Micronutrients
Beans naturally contain minerals such as iron, magnesium, potassium, and folate. Eggs contribute choline, vitamin B12, and vitamin D in small amounts. A slice of this bread therefore does more than carry your toppings; it adds to your daily intake of several useful nutrients.
A Clean Ingredient Label
Commercial breads often contain emulsifiers, preservatives, added sugars, and dough conditioners. This recipe has none of them. When you make the loaf yourself, you control the salt, the ingredients, and the quality.
Who This Bread Suits
- People eating more protein for fitness or weight management
- Anyone avoiding gluten (check labels to confirm your ingredients are gluten-free)
- Those following a lower-refined-carbohydrate way of eating
- Families who want a simple, whole-food sandwich base
- Anyone short on time who still wants homemade bread
A Note on Dietary Needs
This bread contains eggs, so it is not suitable for people with an egg allergy or those following a vegan diet. If you manage a medical condition, such as diabetes or a food allergy, talk with your doctor or a registered dietitian about how this bread fits your plan. Exact nutrition values vary with the brand of beans and the size of your slices, so use a nutrition calculator if you need precise numbers.
Navy Bean Bread Variations and Flavor Ideas
The base recipe is intentionally plain, so it takes well to additions. Start with small amounts, since extra moisture or bulk can change the texture. Stir any add-ins into the blended batter just before pouring it into the pan.
Savory Add-Ins
- Garlic and herb: a pinch of garlic powder with dried oregano, thyme, or Italian seasoning
- Cheesy: 2 to 3 tablespoons of finely grated Parmesan or sharp cheddar
- Everything seasoning: sprinkle the top before baking for a bagel-style crust
- Rosemary and black pepper: a classic pairing for a rustic loaf
- Sun-dried tomato: a spoonful of finely chopped, well-drained tomatoes
- Onion powder and paprika: a simple way to add warmth and color
Seed and Texture Toppings
Sprinkle sesame seeds, sunflower seeds, pumpkin seeds, or poppy seeds over the top of the batter before baking. They add crunch and make the loaf look like a bakery bread.
Slightly Sweet Options
For a breakfast-style loaf, add a small pinch of cinnamon. Because the bread has no added sugar, it pairs naturally with nut butter, sliced banana, or a thin spread of fruit preserves.
Bean Swaps
You can try other mild white beans such as Great Northern beans or cannellini beans. Chickpeas also work, though they have a stronger flavor and may give a slightly denser result. Whichever bean you use, make sure it is fully cooked and well drained.
Salt
The base recipe contains no added salt. If you prefer a seasoned loaf, add a small pinch of fine salt to the blender. Many canned beans are already salted, so taste your blended batter carefully before adding more.
Troubleshooting: Common Problems and Fixes
Even a three-ingredient recipe can misbehave. Use this table to find the cause and fix for the most common issues.
- Soggy or wet center: the beans were not drained well, or the loaf was underbaked. Drain and pat the beans dry, and bake a few minutes longer until the center is firm.
- Loaf sinks in the middle: the oven was opened too early, or the baking powder was old. Keep the door closed for 30 minutes and use fresh baking powder.
- Dense, flat loaf: the pan was too wide, or the batter was not blended smooth. Use a smaller pan and blend longer.
- Strong egg taste: the loaf was slightly overbaked. Add herbs, garlic, or cheese, and toast the slices before serving.
- Bread falls apart when sliced: it was cut while still warm. Cool completely and use a serrated knife.
- Gummy texture: it was not cooled enough or was underbaked. Let it rest on a wire rack until fully cool.
- Sticks to the pan: there was no parchment paper. Line the pan fully with parchment.
Why Is My Bread Slightly Eggy?
Because eggs make up a large part of the structure, a mild egg flavor is normal. Seasonings such as garlic powder, herbs, or cheese balance it well. Toasting also mellows the taste noticeably.
Why Does My Loaf Look Different From the Picture?
Oven temperatures vary, and so do pan sizes and bean brands. Watch for the visual cues instead of relying only on the clock: a lightly golden top, a firm center, and edges that just begin to pull away from the pan.
Can I Use a Food Processor Instead of a Blender?
Yes. Process the beans and eggs for a full two to three minutes, stopping to scrape down the bowl. The goal is a completely smooth batter with no bean pieces.
How to Serve Navy Bean Bread: Sandwich and Toast Ideas
This bread is a flexible base for breakfast, lunch, snacks, and light dinners. Toast it for the firmest texture, especially if you plan to pile on fillings.
Breakfast Toast Ideas
- Avocado toast: mashed avocado, lemon juice, chili flakes, and a pinch of salt
- Scrambled eggs: soft scrambled eggs and chives on a warm slice
- Cottage cheese: creamy cottage cheese with sliced tomato and black pepper
- Cream cheese: a thin spread with smoked salmon or cucumber
- Nut butter: almond or peanut butter with banana slices
Sandwich Ideas
- Turkey sandwich: sliced turkey, lettuce, tomato, and mustard
- Chicken salad: a scoop of chicken salad with crisp greens
- Egg salad: creamy egg salad with paprika
- Veggie and hummus: hummus, cucumber, shredded carrot, and sprouts
- Tuna melt: toast, tuna salad, and melted cheese under the broiler
Open-Faced Sandwiches
Because the slices are best handled gently, open-faced sandwiches are a perfect fit. Top a toasted slice with hummus, roasted vegetables, and a drizzle of olive oil. Or try ricotta, sliced figs, and a pinch of black pepper for a lighter snack.
Savory Snacks and Sides
- Cut a toasted slice into strips and dip them in soup, hummus, or a yogurt-herb dip
- Serve slices alongside a bowl of tomato soup or a hearty vegetable stew
- Use cubes of toasted bread as croutons for salads
- Make a quick garlic toast with olive oil, garlic, and a sprinkle of Parmesan
Meal Prep Tip
Bake a loaf at the start of the week, slice it once cool, and store the slices in the fridge. Toast one or two each morning for a fast, protein-rich start to your day.
How to Store, Freeze, and Reheat Navy Bean Bread
Because this bread has no preservatives, proper storage matters. Follow these guidelines to keep every slice fresh.
Refrigerator
Store the cooled loaf, or the cooled slices, in an airtight container in the refrigerator for up to 4 to 5 days. Placing a sheet of parchment between slices stops them from sticking together. Do not leave the bread at room temperature for long, since it is a moist, egg-based loaf.
Freezer
Freezing is the best option if you will not finish the loaf in a few days. Slice the cooled bread, place pieces of parchment between the slices, and seal them in a freezer bag with the air pressed out. Frozen slices keep well for up to 2 months.
Reheating
- From frozen: drop a slice straight into the toaster and toast until warm and crisp at the edges. No thawing is needed.
- From the fridge: toast for one to two minutes, or warm in a skillet over medium heat.
- In the oven: heat slices at 350°F (180°C) for 5 to 8 minutes.
The bread is at its best when toasted, so reheating doubles as the final step before you build your sandwich.
Storage Quick Reference
- Refrigerator: airtight container, 4 to 5 days
- Freezer: freezer bag with parchment between slices, up to 2 months
- Reheat: toaster, skillet, or oven, straight from frozen
Frequently Asked Questions
Is navy bean bread really gluten-free?
The three ingredients are naturally gluten-free. If you need to avoid gluten strictly, check that your canned beans and baking powder are labeled gluten-free, since cross-contact can happen during processing.
Can I make this bread without eggs?
The eggs provide the structure, so this recipe is not designed for substitutions. Egg replacers such as flax eggs usually do not set firmly enough in a batter this wet. If you need an egg-free bread, look for a recipe developed specifically for that purpose.
Can I use dried beans instead of canned?
Yes. Cook dried navy beans until completely soft, then drain them very well and let them cool. About 1½ cups of cooked beans (255 g) is the amount you need. Cooked beans that are still warm or wet can change the batter, so cool and drain them first.
Do I need to soak or peel the beans?
No peeling is needed. A strong blender breaks the skins down into the batter. If you use dried beans, soak and cook them until they are fully tender, which also makes them easier to blend.
Does the bread taste like beans?
Most people find the flavor mild and slightly savory. Navy beans are among the mildest beans, and the eggs and baking powder round out the taste. Toasting and seasoning help even more.
Why is my bread slightly wet in the center?
The usual causes are insufficiently drained beans, underbaking, or slicing before the loaf has cooled. Bake until the center is firm, then cool completely.
Can I double the recipe?
Yes, but use a larger pan and expect a longer baking time. Check for doneness with a toothpick, and cover the top loosely with foil if it browns too fast.
Can I bake it as muffins or rolls?
You can pour the batter into a lined muffin tin and bake for a shorter time, roughly 20 to 25 minutes, until set. Muffin-sized portions are handy for meal prep, but the texture will be more tender and less bread-like than the loaf.
Can I use it for sandwiches?
Absolutely. The slices hold together best when completely cool and lightly toasted. For wet fillings, toast both sides and add the filling just before eating.
How long does it last?
Store it in an airtight container in the refrigerator for 4 to 5 days, or freeze slices for up to 2 months.
Is this bread keto?
Beans contain carbohydrates, so this bread is not a strict keto food. It is lower in refined carbohydrates than wheat bread, but if you track carbs closely, calculate the numbers for your specific ingredients.
Final Thoughts: A Simple Bread Worth Making
This 3-ingredient navy bean sandwich bread proves that good bread does not need flour, yeast, or hours of work. With creamy navy beans, three eggs, and a teaspoon of baking powder, you get a soft, protein-rich, gluten-free loaf that slices well, toasts beautifully, and suits almost any topping.
Remember the keys to success: drain the beans well, blend until completely smooth, keep the oven closed for the first 30 minutes, and let the loaf cool completely before slicing. Toast your slices for sandwiches, and store extras in the fridge or freezer so you always have a quick, nourishing base on hand.
Once you have the basic loaf down, experiment with herbs, cheese, seeds, and spices to make it your own. Try it tomorrow morning with avocado or scrambled eggs, and see how easily a pantry staple turns into your new favorite bread.
SEO Details
- Focus keyword: navy bean bread
- Suggested title tag: 3-Ingredient High-Protein Navy Bean Sandwich Bread (Gluten-Free)
- Suggested meta description: Make soft, gluten-free navy bean sandwich bread with just 3 ingredients: beans, eggs, and baking powder. High in protein, easy to blend, ready in under an hour.
- Suggested URL slug: /3-ingredient-navy-bean-sandwich-bread
- Secondary keywords: high-protein bread, gluten-free bean bread, 3-ingredient bread recipe, flourless bread, no-yeast bread, healthy sandwich bread
- Suggested image alt text: Sliced 3-ingredient navy bean sandwich bread on a wire rackPrint
3-Ingredient High-Protein Navy Bean Sandwich Bread
Ingredients
ScaleThis recipe makes one small loaf. Prep takes about 10 minutes and baking takes 35 to 45 minutes.
- 1½ cups (255 g) cooked navy beans, drained and rinsed
- 3 large eggs
- 1 teaspoon baking powder
Notes on Each Ingredient
Navy beans. Navy beans, also called haricot beans or pea beans, are small, white, and mild. Their creamy interior blends into a smooth, almost batter-like purée, which is why they work so well here. Canned beans are the fastest option. If you cook dried beans at home, cook them until completely tender, then drain them very well. Great Northern or cannellini beans can stand in if needed, though the texture may be slightly different.
Eggs. The eggs are the structure of this bread. They bind the purée, add protein, and set into a firm crumb as they bake. Use large eggs at room temperature if you can, since they blend more evenly into the beans.
Baking powder. One teaspoon creates enough lift to keep the loaf from turning dense and custardy. Make sure your baking powder is fresh. Old or expired baking powder is the most common reason for a flat loaf.
Equipment You Will Need
- A blender or high-speed food processor
- A small loaf pan (about 8 x 4 inches or smaller)
- Parchment paper
- A wire cooling rack
- A serrated knife for slicing
Instructions
- Prepare the oven. Preheat your oven to 350°F (180°C). Line a small loaf pan with parchment paper, leaving a little overhang on the long sides so you can lift the loaf out easily later.
- Prepare the beans. Drain the cooked navy beans in a colander and rinse them thoroughly under cold water. Shake off the excess water and let them sit for a minute or two. Dry beans make a firmer bread.
- Blend the ingredients. Add the navy beans, eggs, and baking powder to a blender. Blend until completely smooth, pausing to scrape down the sides once or twice. No visible bean pieces should remain.
- Transfer to the pan. Pour the mixture into the prepared loaf pan. Tap the pan gently on the counter to release air bubbles, then smooth the top with a spatula.
- Bake. Bake for 35 to 45 minutes, until the center is firm to the touch and the top is lightly golden. A toothpick inserted in the middle should come out clean.
- Cool in the pan. Let the loaf rest in the pan for 15 minutes. Then lift it out by the parchment and move it to a wire rack.
- Slice. Allow the bread to cool completely before slicing. Cutting too early can make the center seem gummy, while a fully cooled loaf slices cleanly and has the best texture.
Quick Recipe Summary
- Prep time: about 10 minutes
- Baking temperature: 350°F (180°C)
- Baking time: 35 to 45 minutes
- Cooling time: 15 minutes in the pan, then until fully cool
- Yield: 1 small loaf
- Diet: gluten-free, high-protein, no added sugar