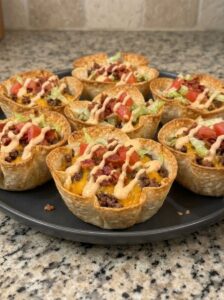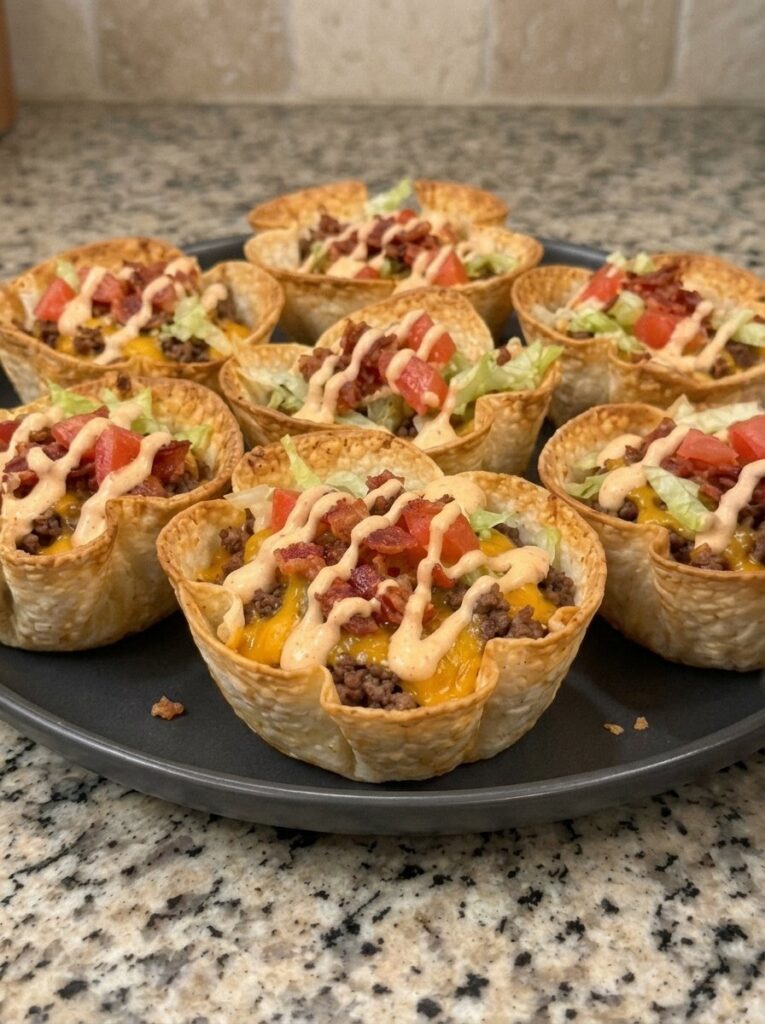
Crispy Garlic Cheddar Bacon Cheeseburger Tortilla Cups: The Appetizer Everyone Will Ask You to Make Again
If you have ever wished you could hold an entire cheeseburger in one hand without a single drip, these crispy garlic cheddar bacon cheeseburger tortilla cups are your answer. Each golden, crunchy shell is brushed with garlic butter, baked in a muffin pan, and filled with seasoned ground beef, smoky bacon, and a generous layer of melted sharp cheddar. Then comes the finishing touch: cool shredded lettuce, juicy diced tomatoes, tangy dill pickles, and a creamy homemade burger sauce drizzled over the top.
They look impressive, they taste like a classic bacon cheeseburger, and they come together with simple ingredients you can find at any grocery store. Whether you are planning game-day snacks, a birthday party, a potluck, or just a fun family dinner, these cheeseburger tortilla cups deliver every bite of burger-joint flavor in a crispy, handheld form.
In this guide you will find the complete recipe, step-by-step instructions, pro tips for the crispiest shells, easy variations, make-ahead and storage advice, and answers to the questions readers ask most.
Why You Will Love This Cheeseburger Tortilla Cups Recipe
There are plenty of appetizers out there, but these bacon cheeseburger cups earn a permanent spot in your rotation for several reasons:
- Big burger flavor in a handheld bite. You get beef, bacon, cheddar, pickles, tomato, lettuce, and special sauce all together, just like a loaded cheeseburger.
- Incredibly crispy. Pre-baking the garlic-butter tortilla shells before filling them keeps the bottoms crunchy instead of soggy.
- No buns, no mess. The tortilla cup holds everything in place, so there is no dripping and no need for a fork.
- Perfect for crowds. One muffin pan makes 12 cups, and the recipe doubles easily for big gatherings.
- Customizable. Swap the toppings, change the cheese, or use ground turkey. The method stays the same.
- Family friendly. Kids love the burger flavors, and adults love the crunchy, savory bacon and garlic.
- Simple ingredients. Tortillas, ground beef, bacon, cheddar, and pantry staples are all you need.
What Are Cheeseburger Tortilla Cups?
Cheeseburger tortilla cups are a muffin-tin appetizer made by pressing flour tortilla pieces into a muffin pan to form edible bowls. The tortillas are baked until crisp, filled with a cheeseburger-style beef mixture, topped with cheese, and baked again until bubbly. Fresh burger toppings and a creamy sauce are added at the end.
Think of them as a cross between a taco cup, a loaded nacho, and a classic cheeseburger. The crunchy tortilla shell replaces the bun, which gives each bite more texture and makes the cups easy to eat at a standing party.
Ingredients for Garlic Cheddar Bacon Cheeseburger Tortilla Cups
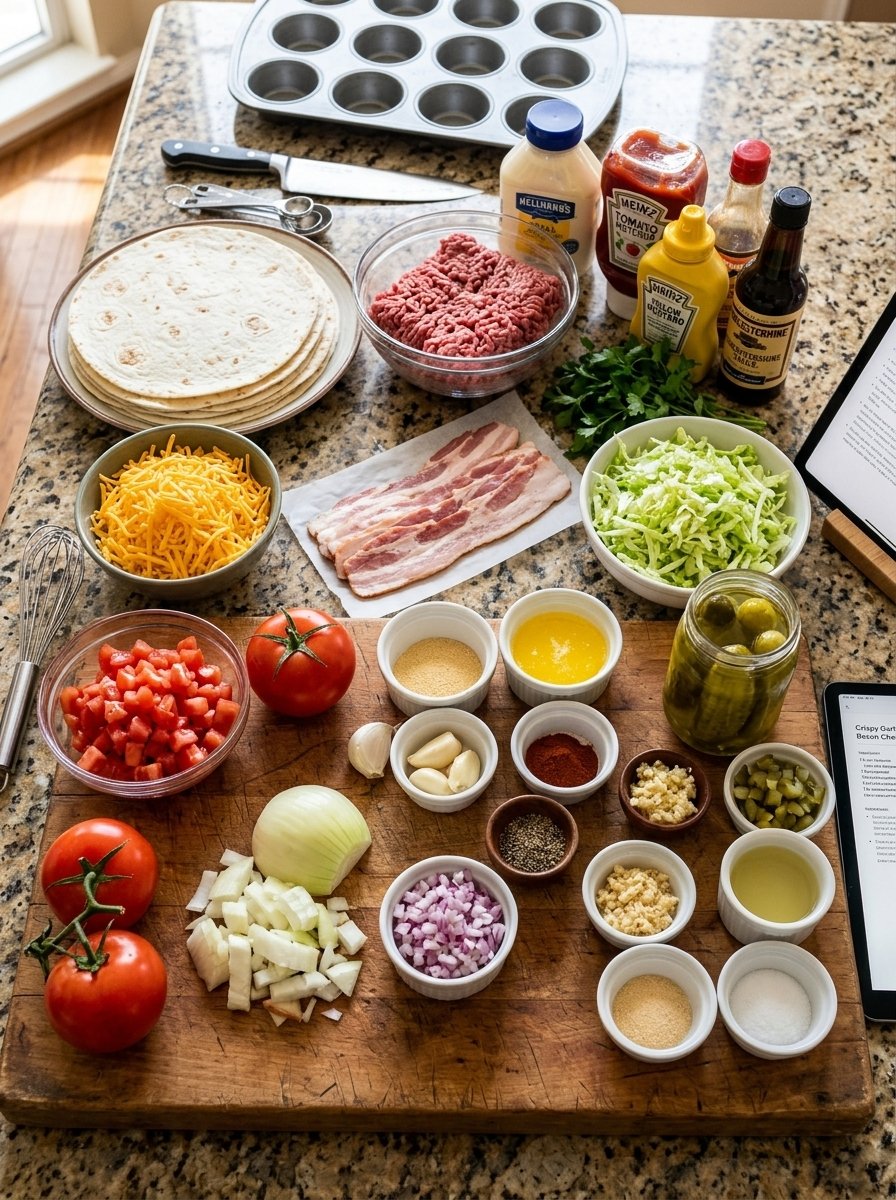
This recipe is easiest to manage when you think of it in four parts: the tortilla shells, the beef and bacon filling, the fresh toppings, and the burger sauce.
For the Garlic Butter Tortilla Cups
- 6 medium flour tortillas (8-inch)
- 2 tablespoons unsalted butter, melted
- ½ teaspoon garlic powder
- ¼ teaspoon smoked paprika
- ¼ teaspoon black pepper
- Nonstick cooking spray
For the Cheeseburger Filling
- 1 lb (450 g) lean ground beef
- 6 slices bacon, cooked until crispy and chopped
- ½ small yellow onion, finely diced
- 2 garlic cloves, minced
- 1 tablespoon Worcestershire sauce
- 1 teaspoon yellow mustard
- 1 teaspoon smoked paprika
- ½ teaspoon onion powder
- ½ teaspoon garlic powder
- ½ teaspoon salt, or to taste
- ¼ teaspoon black pepper
- 1½ cups (170 g) shredded sharp cheddar cheese
For the Fresh Toppings
- 1 cup finely shredded iceberg lettuce
- ½ cup diced fresh tomatoes
- 2 tablespoons finely diced red onion (optional)
- 2 tablespoons chopped dill pickles
- 2 tablespoons chopped fresh parsley (optional)
For the Creamy Burger Sauce
- ½ cup mayonnaise
- 2 tablespoons ketchup
- 1 tablespoon yellow mustard
- 1 tablespoon finely chopped dill pickles or pickle relish
- 1 teaspoon pickle juice
- ½ teaspoon garlic powder
- ¼ teaspoon smoked paprika
- ¼ teaspoon black pepper
Step-by-Step Instructions
Prep time: 20 minutes | Cook time: 30 minutes | Total time: about 50 minutes | Servings: 12 tortilla cups
Step 1: Preheat the Oven and Prepare the Muffin Pan
Preheat your oven to 375°F (190°C). Lightly coat a 12-cup muffin pan with nonstick cooking spray, making sure to grease the bottoms and sides of every cup. This prevents sticking and helps the shells release cleanly later.
Step 2: Make the Garlic Butter
In a small bowl, stir together the melted butter, garlic powder, smoked paprika, and black pepper until evenly mixed. Set it aside. This simple seasoned butter is what gives the tortilla cups their golden color and savory garlic flavor.
Step 3: Shape the Tortilla Cups
Cut each flour tortilla in half to create 12 semicircles. Lightly brush both sides of each piece with the garlic butter. Gently press one semicircle into each muffin cup, folding and overlapping the edges to create sturdy little shells. The ruffled edges are what give the finished cups their pretty, rustic look.
Step 4: Pre-Bake the Tortilla Shells
Bake the cups for 8 to 10 minutes, until lightly golden and beginning to crisp. Remove them from the oven and set them aside while you prepare the filling. This pre-bake is the secret to a crunchy base that stays crisp even after the filling goes in.
Step 5: Cook the Bacon
Heat a large skillet over medium heat. Add the bacon and cook until crispy and golden, turning as needed. Transfer the slices to a paper towel-lined plate to drain, then chop into small pieces. Reserve a little bacon for the final topping.
Step 6: Cook the Ground Beef and Onion
In the same skillet, add the ground beef and diced onion. Cook over medium-high heat for 6 to 8 minutes, breaking the beef into small crumbles with a wooden spoon, until browned and fully cooked. Drain any excess grease if necessary.
Step 7: Season the Cheeseburger Filling
Add the minced garlic and cook for about 30 seconds, until fragrant. Stir in the Worcestershire sauce, yellow mustard, smoked paprika, onion powder, garlic powder, salt, and black pepper. Mix thoroughly and cook for another 2 to 3 minutes, until the beef is flavorful and evenly coated.
Step 8: Stir in the Crispy Bacon
Stir most of the chopped bacon into the seasoned beef, saving the remaining pieces for garnish. Remove the skillet from the heat.
Step 9: Fill the Tortilla Cups
Divide the warm beef and bacon mixture evenly among the pre-baked tortilla shells. Fill each cup generously, but avoid overflowing so the cheese has room to melt without spilling over the sides.
Step 10: Add the Cheddar Cheese
Sprinkle the shredded sharp cheddar over the beef in each cup, covering the filling evenly.
Step 11: Bake Until Cheesy
Return the muffin pan to the oven and bake for 5 to 8 minutes, until the cheese is completely melted and bubbly and the tortilla edges are beautifully golden and crispy.
Step 12: Whip Up the Creamy Burger Sauce
While the cups bake, whisk together the mayonnaise, ketchup, mustard, chopped pickles, pickle juice, garlic powder, smoked paprika, and black pepper until smooth and creamy. Transfer it to a squeeze bottle or piping bag for easy drizzling.
Step 13: Add the Fresh Toppings
Remove the cups from the oven and let them cool for 2 to 3 minutes. Carefully lift them out of the pan with a small spoon or spatula. Top each cup with shredded lettuce, diced tomatoes, red onion if you like, chopped pickles, and the reserved crispy bacon.
Step 14: Drizzle with Burger Sauce and Serve
Drizzle the burger sauce generously over each cup and sprinkle with fresh parsley for a pop of color. Arrange on a platter and serve right away, while the shells are crunchy, the beef is warm, and the cheddar is perfectly melted.
Pro Tips for the Crispiest Cheeseburger Tortilla Cups
A few small details make the difference between good tortilla cups and unforgettable ones.
1. Never skip the pre-bake. Filling raw tortillas with a wet beef mixture leads to soft, floppy bottoms. Baking the shells first sets their structure and creates a barrier against moisture.
2. Brush both sides with garlic butter. Coating the inside and outside gives you even browning and a richer flavor. Use a light hand so the tortillas crisp rather than turning greasy.
3. Drain the beef well. Excess grease can seep into the shells. If your beef is not very lean, spoon off the fat before adding the seasonings.
4. Chop the bacon small. Small pieces distribute evenly through the beef and sit neatly on top. Crispy bacon is key, since chewy bacon will not give the same crunch.
5. Use freshly shredded cheese. Block cheddar that you shred yourself melts smoother and tastes sharper than pre-shredded cheese, which contains anti-caking starch.
6. Add cold toppings last. Lettuce, tomato, and pickles should go on after baking so they stay fresh and crisp. Adding them earlier will wilt them.
7. Let the cups rest for a few minutes. Cooling for 2 to 3 minutes helps the cheese set and makes the cups much easier to lift out of the pan without breaking.
8. Use a squeeze bottle for the sauce. It gives you those neat zigzag drizzles you see on restaurant-style appetizers and makes the cups look photo-ready.
Easy Variations to Try
Once you have mastered the base recipe, it is easy to switch things up.
- Ground turkey or chicken cheeseburger cups: Use lean ground turkey or chicken in place of beef for a lighter option. Add a little extra seasoning since poultry is milder.
- Double cheeseburger cups: Mix a handful of shredded cheddar directly into the warm beef before filling for extra gooeyness.
- Pepper jack kick: Swap the cheddar for pepper jack or add diced jalapeños to the beef for a spicy twist.
- Mushroom Swiss version: Sauté mushrooms with the onion and top with Swiss cheese instead of cheddar.
- Breakfast cups: Skip the lettuce and tomato, top the baked cups with a small fried quail egg, and finish with the burger sauce.
- Whole wheat or low-carb tortillas: Use your favorite tortillas, but check that they are pliable enough to press into the pan without cracking. Warm them for 10 seconds in the microwave first.
- Different sauces: Try a smoky BBQ drizzle, ranch, or a spicy sriracha mayo instead of classic burger sauce.
- Veggie-forward: Replace the beef with seasoned plant-based crumbles and skip the bacon or use a meatless bacon alternative.
What to Serve with Cheeseburger Tortilla Cups
These cups are filling on their own, but they pair beautifully with other easy party foods and sides:
- Crispy oven-baked french fries or sweet potato fries
- A crunchy coleslaw or a simple garden salad
- Fresh veggie sticks with ranch dip
- Corn on the cob or street corn salad
- Deviled eggs or a loaded potato salad
- Chips with salsa and guacamole
- Cold drinks like lemonade, iced tea, or root beer floats for dessert
For a full game-day spread, serve them alongside wings, sliders, and a veggie platter so every guest finds something to love.
Make-Ahead, Storage, and Reheating Tips
Because there are several components, these tortilla cups are a great candidate for prepping in advance.
Make-Ahead Instructions
- Tortilla shells: Bake the shells up to 1 day ahead and store them in an airtight container at room temperature. Re-crisp in the oven for 3 to 4 minutes before filling.
- Beef and bacon filling: Cook the filling up to 2 days ahead and refrigerate it in an airtight container. Reheat on the stove or in the microwave before assembling.
- Burger sauce: The sauce tastes even better after resting, so make it up to 3 days in advance and keep it chilled.
- Toppings: Chop the lettuce, tomatoes, and pickles the day of serving for the best texture.
Storing Leftovers
Place leftover assembled cups in an airtight container in the refrigerator for up to 2 days. The shells will soften over time, so for best results store the shells, filling, and toppings separately when possible.
Reheating
Reheat cups in a 350°F (175°C) oven or air fryer for 5 to 8 minutes, until the shells are crisp again and the cheese is melted. Avoid the microwave, which will make the tortillas chewy. Add fresh lettuce, tomatoes, and sauce after reheating.
Freezing
You can freeze the cooked beef and bacon filling for up to 3 months. Thaw overnight in the refrigerator before using. Fully assembled cups with fresh toppings do not freeze well, so freeze only the filling.
Can You Make Cheeseburger Tortilla Cups in an Air Fryer?
Yes, with a small adjustment. A standard muffin pan will not fit in most air fryers, but you can use silicone muffin liners or small oven-safe ramekins. Press the buttered tortillas into the cups, air fry at 350°F (175°C) for 4 to 5 minutes to pre-crisp, fill, top with cheese, and air fry for another 2 to 4 minutes until melted. Work in batches and keep an eye on the edges, since air fryers brown quickly.
Nutrition and Lightening It Up
These cups are a hearty, indulgent appetizer, with bacon, cheddar, and burger sauce providing most of the richness. If you want to lighten them up, try these simple swaps:
- Use extra-lean ground beef, turkey, or chicken.
- Replace half the mayonnaise in the sauce with plain Greek yogurt.
- Use turkey bacon or reduce the bacon slightly.
- Choose reduced-fat sharp cheddar.
- Brush the tortillas with olive oil spray instead of butter.
Because each cup is small, portion control is built in. Two or three cups with a side salad make a satisfying light dinner.
Frequently Asked Questions
How do I keep tortilla cups from getting soggy?
Pre-bake the shells until lightly golden, drain the beef thoroughly, and add the fresh toppings and sauce right before serving. Serving the cups immediately also helps preserve the crunch.
What size muffin pan do I need?
A standard 12-cup muffin pan works perfectly. Each cup holds half of an 8-inch tortilla and about 2 to 3 tablespoons of filling.
Can I use corn tortillas instead of flour?
Flour tortillas are best because they are soft and flexible. Corn tortillas tend to crack when pressed into the pan, though warming them first or lightly steaming them can help.
Can I make these cheeseburger cups without bacon?
Absolutely. Simply omit the bacon or replace it with turkey bacon, bacon bits, or extra seasoned beef. You can also add a little extra smoked paprika to keep that smoky flavor.
What is the best cheese for cheeseburger tortilla cups?
Sharp cheddar gives a bold, classic cheeseburger flavor and melts beautifully. American cheese is extra creamy, while a Colby Jack blend adds a milder, gooey texture.
Can I make these ahead for a party?
Yes. Prepare the shells, filling, and sauce ahead of time, then assemble and give the filled cups a final bake just before guests arrive. Add the fresh toppings and sauce at the last minute.
How many tortilla cups does this recipe make?
The recipe makes 12 tortilla cups, which serves about 4 to 6 people as a main course or 8 to 12 as an appetizer.
What can I use instead of Worcestershire sauce?
A splash of soy sauce mixed with a pinch of sugar and a few drops of vinegar can mimic the savory depth of Worcestershire. Steak sauce also works in a pinch.
Can I use store-bought burger sauce?
Yes. If you are short on time, use a store-bought burger or special sauce. Homemade only takes a couple of minutes, though, and lets you control the tang and sweetness.
Why do you cut the tortillas in half?
A full 8-inch tortilla is too large for a standard muffin cup. Halving each one creates a smaller piece that folds into a neat, sturdy cup, and it gives you 12 cups from just 6 tortillas.
When to Serve These Cheeseburger Tortilla Cups
These little bites suit nearly any occasion:
- Game day and watch parties: They are easy to grab, easy to eat, and disappear fast.
- Birthday parties and kids’ events: Familiar burger flavors make them a hit with younger guests.
- Potlucks and family gatherings: They travel well when the toppings are packed separately.
- Summer cookouts: Serve them when you want burger flavor without firing up the grill.
- Weeknight dinners: Make a double batch and call it dinner with a side salad.
- Holiday appetizer tables: Their golden, ruffled look makes them a festive addition to any spread.
Final Thoughts: Your New Go-To Burger Appetizer
These crispy garlic cheddar bacon cheeseburger tortilla cups prove that simple ingredients can create something truly crave-worthy. The garlic-butter tortilla shell is golden and crunchy, the beef is juicy and well seasoned, the bacon adds a smoky crackle, and the sharp cheddar melts into every corner. Fresh lettuce, tomato, and pickles bring that classic cheeseburger freshness, and the creamy burger sauce ties everything together.
Best of all, the recipe is flexible, make-ahead friendly, and sure to impress guests of every age. Give it a try for your next gathering, and do not be surprised when someone asks for the recipe before the platter is empty.
If you loved this recipe, save it to your favorite Pinterest board, share it with a friend who loves easy appetizers, and leave a comment below to let us know how yours turned out and which variation you tried!
Print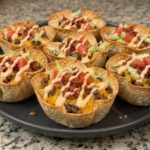
Crispy Garlic Cheddar Bacon Cheeseburger Tortilla Cups
Ingredients
This recipe is easiest to manage when you think of it in four parts: the tortilla shells, the beef and bacon filling, the fresh toppings, and the burger sauce.
For the Garlic Butter Tortilla Cups
- 6 medium flour tortillas (8-inch)
- 2 tablespoons unsalted butter, melted
- ½ teaspoon garlic powder
- ¼ teaspoon smoked paprika
- ¼ teaspoon black pepper
- Nonstick cooking spray
For the Cheeseburger Filling
- 1 lb (450 g) lean ground beef
- 6 slices bacon, cooked until crispy and chopped
- ½ small yellow onion, finely diced
- 2 garlic cloves, minced
- 1 tablespoon Worcestershire sauce
- 1 teaspoon yellow mustard
- 1 teaspoon smoked paprika
- ½ teaspoon onion powder
- ½ teaspoon garlic powder
- ½ teaspoon salt, or to taste
- ¼ teaspoon black pepper
- 1½ cups (170 g) shredded sharp cheddar cheese
For the Fresh Toppings
- 1 cup finely shredded iceberg lettuce
- ½ cup diced fresh tomatoes
- 2 tablespoons finely diced red onion (optional)
- 2 tablespoons chopped dill pickles
- 2 tablespoons chopped fresh parsley (optional)
For the Creamy Burger Sauce
- ½ cup mayonnaise
- 2 tablespoons ketchup
- 1 tablespoon yellow mustard
- 1 tablespoon finely chopped dill pickles or pickle relish
- 1 teaspoon pickle juice
- ½ teaspoon garlic powder
- ¼ teaspoon smoked paprika
- ¼ teaspoon black pepper
Instructions
Prep time: 20 minutes | Cook time: 30 minutes | Total time: about 50 minutes | Servings: 12 tortilla cups
Step 1: Preheat the Oven and Prepare the Muffin Pan
Preheat your oven to 375°F (190°C). Lightly coat a 12-cup muffin pan with nonstick cooking spray, making sure to grease the bottoms and sides of every cup. This prevents sticking and helps the shells release cleanly later.
Step 2: Make the Garlic Butter
In a small bowl, stir together the melted butter, garlic powder, smoked paprika, and black pepper until evenly mixed. Set it aside. This simple seasoned butter is what gives the tortilla cups their golden color and savory garlic flavor.
Step 3: Shape the Tortilla Cups
Cut each flour tortilla in half to create 12 semicircles. Lightly brush both sides of each piece with the garlic butter. Gently press one semicircle into each muffin cup, folding and overlapping the edges to create sturdy little shells. The ruffled edges are what give the finished cups their pretty, rustic look.
Step 4: Pre-Bake the Tortilla Shells
Bake the cups for 8 to 10 minutes, until lightly golden and beginning to crisp. Remove them from the oven and set them aside while you prepare the filling. This pre-bake is the secret to a crunchy base that stays crisp even after the filling goes in.
Step 5: Cook the Bacon
Heat a large skillet over medium heat. Add the bacon and cook until crispy and golden, turning as needed. Transfer the slices to a paper towel-lined plate to drain, then chop into small pieces. Reserve a little bacon for the final topping.
Step 6: Cook the Ground Beef and Onion
In the same skillet, add the ground beef and diced onion. Cook over medium-high heat for 6 to 8 minutes, breaking the beef into small crumbles with a wooden spoon, until browned and fully cooked. Drain any excess grease if necessary.
Step 7: Season the Cheeseburger Filling
Add the minced garlic and cook for about 30 seconds, until fragrant. Stir in the Worcestershire sauce, yellow mustard, smoked paprika, onion powder, garlic powder, salt, and black pepper. Mix thoroughly and cook for another 2 to 3 minutes, until the beef is flavorful and evenly coated.
Step 8: Stir in the Crispy Bacon
Stir most of the chopped bacon into the seasoned beef, saving the remaining pieces for garnish. Remove the skillet from the heat.
Step 9: Fill the Tortilla Cups
Divide the warm beef and bacon mixture evenly among the pre-baked tortilla shells. Fill each cup generously, but avoid overflowing so the cheese has room to melt without spilling over the sides.
Step 10: Add the Cheddar Cheese
Sprinkle the shredded sharp cheddar over the beef in each cup, covering the filling evenly.
Step 11: Bake Until Cheesy
Return the muffin pan to the oven and bake for 5 to 8 minutes, until the cheese is completely melted and bubbly and the tortilla edges are beautifully golden and crispy.
Step 12: Whip Up the Creamy Burger Sauce
While the cups bake, whisk together the mayonnaise, ketchup, mustard, chopped pickles, pickle juice, garlic powder, smoked paprika, and black pepper until smooth and creamy. Transfer it to a squeeze bottle or piping bag for easy drizzling.
Step 13: Add the Fresh Toppings
Remove the cups from the oven and let them cool for 2 to 3 minutes. Carefully lift them out of the pan with a small spoon or spatula. Top each cup with shredded lettuce, diced tomatoes, red onion if you like, chopped pickles, and the reserved crispy bacon.
Step 14: Drizzle with Burger Sauce and Serve
Drizzle the burger sauce generously over each cup and sprinkle with fresh parsley for a pop of color. Arrange on a platter and serve right away, while the shells are crunchy, the beef is warm, and the cheddar is perfectly melted.