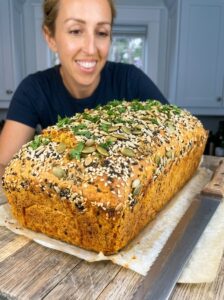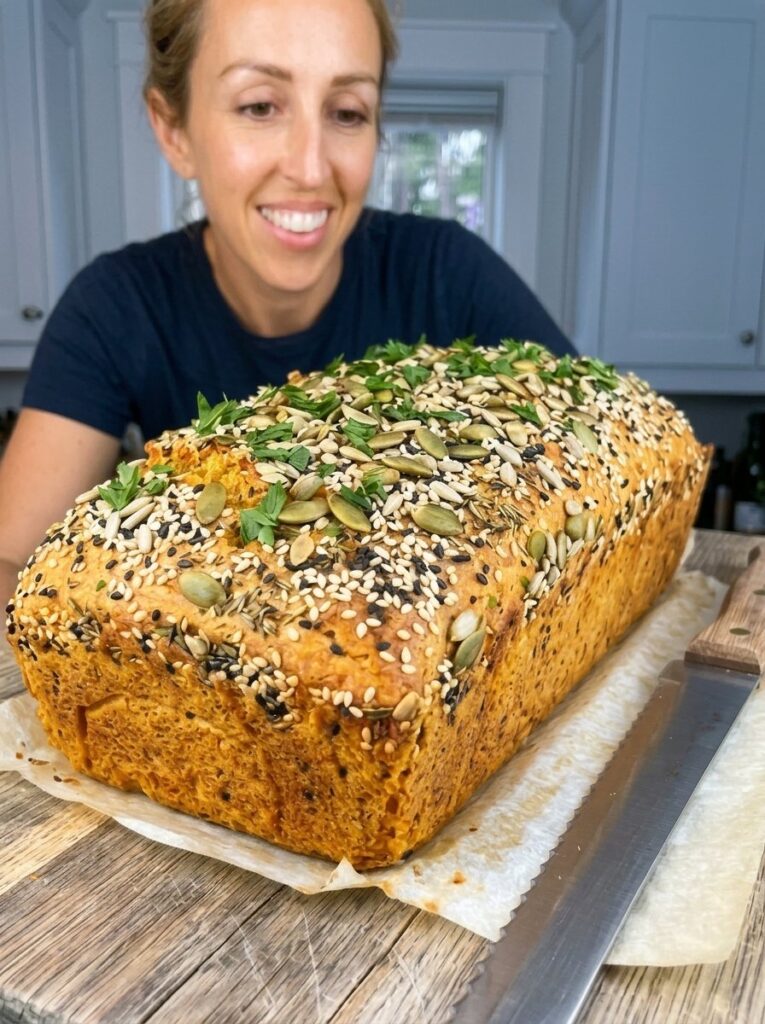
If you have ever wanted fresh homemade bread without waiting for dough to rise, wrestling with yeast, or kneading for ten minutes, this easy blender chickpea bread is the recipe for you. It is a hearty, savory loaf with a beautifully golden crust, a soft and moist interior, and a crunchy mixed-seed topping that makes every slice look as good as it tastes. Everything goes into a blender, the batter goes into a loaf pan, and the oven does the rest.
This chickpea bread is built on protein-rich canned chickpeas, eggs, and thick Greek yogurt, with olive oil for a tender crumb and garlic and onion powder for gentle savory flavor. Because it is naturally yeast-free, there is no proofing, no rising time, and no waiting around. You blend, pour, sprinkle, and bake. Whether you toast it for breakfast, stack it into sandwiches, top it with avocado, or serve it next to a bowl of soup, this loaf earns its place on the table.
In this guide you will find the full ingredient list with notes, step-by-step instructions, troubleshooting advice, variation ideas, serving suggestions, storage and freezing instructions, and answers to the most common questions about making chickpea bread at home.
What Is Chickpea Bread?
Chickpea bread is a quick-bread-style loaf made from blended chickpeas instead of a traditional wheat-flour dough. The chickpeas are blended with eggs, yogurt, and oil into a smooth, creamy batter. Baking powder and a splash of apple cider vinegar help the loaf puff up in the oven, so no yeast is needed.
The result is not identical to a bakery sourdough or a fluffy sandwich loaf, and it is not trying to be. It has a tender, moist, slightly dense crumb with a savory, satisfying flavor, a firm golden crust, and a crisp seed crust on top. Think of it as somewhere between a savory quick bread and a hearty seeded loaf. It slices neatly once cooled, toasts beautifully, and holds up well to spreads and toppings.
Why You Will Love This Easy Chickpea Bread Recipe
- No yeast, kneading, or rising. The batter comes together in a blender in a couple of minutes, which makes this one of the simplest homemade bread recipes you can make.
- Simple pantry ingredients. Canned chickpeas, eggs, Greek yogurt, olive oil, baking powder, and a few seasonings are all you need for the loaf itself.
- Protein-rich and hearty. Chickpeas, eggs, and Greek yogurt give this loaf a satisfying, filling quality that works for breakfast, lunch, or a snack.
- Beautiful seed topping. A generous mix of pumpkin, sunflower, sesame, poppy, and flax seeds creates a crunchy, bakery-style crust with great texture contrast.
- Versatile. Use it for toast, sandwiches, avocado toast, hummus toast, or as a side for soups and salads.
- Great for meal prep. Slice it, freeze it with parchment between the slices, and toast what you need all week.
Ingredients for Blender Chickpea Bread
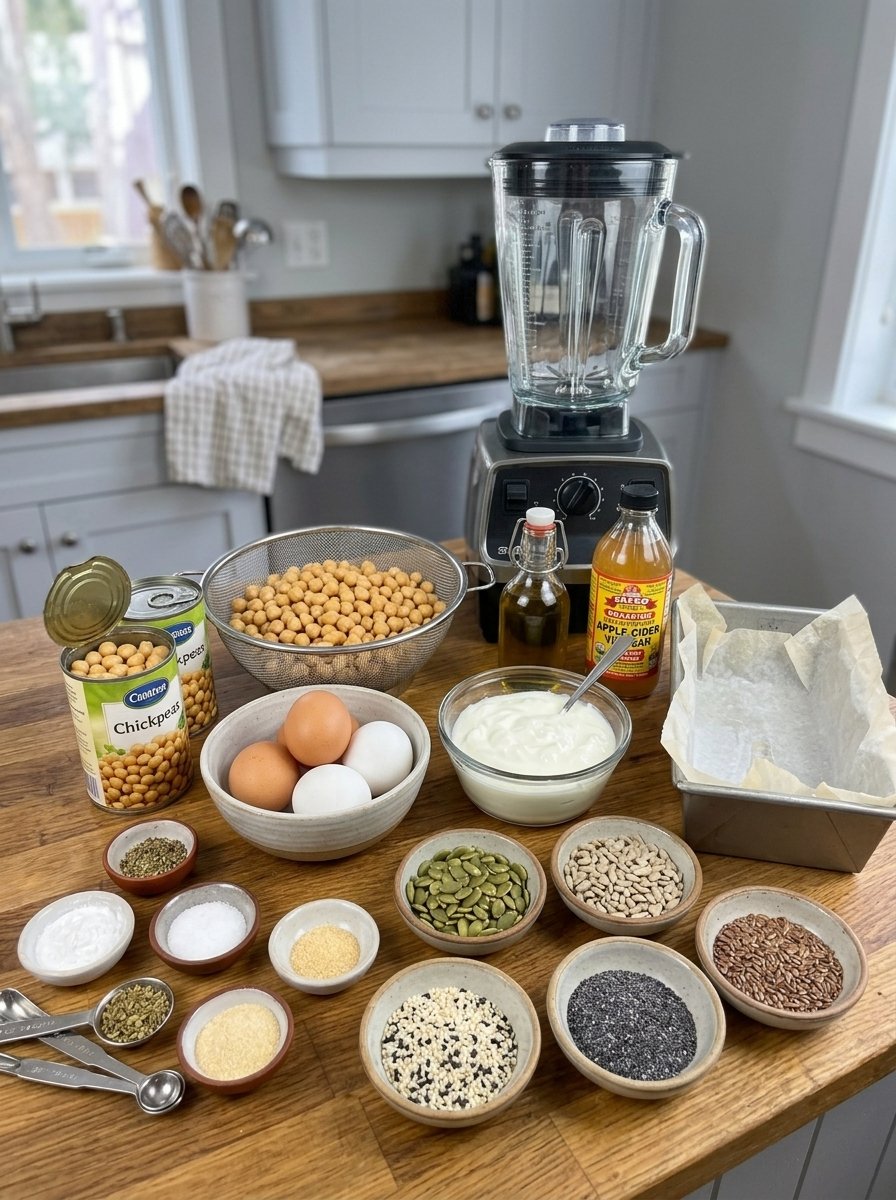
Here is everything you need to make one 9 × 5-inch loaf, along with a few notes on why each ingredient matters.
For the Bread
- 2 cans (15 oz / 425 g each) chickpeas, drained and thoroughly rinsed
- 4 large eggs, at room temperature
- ½ cup (120 g) plain Greek yogurt, preferably thick and unsweetened
- 2 tablespoons (30 ml) olive oil
- 2 teaspoons baking powder
- 1 teaspoon salt
- ½ teaspoon garlic powder
- ½ teaspoon onion powder
- 1 tablespoon apple cider vinegar
For the Seed Topping
- 2 tablespoons pumpkin seeds
- 2 tablespoons sunflower seeds
- 1 tablespoon sesame seeds
- 1 tablespoon poppy seeds
- 1 teaspoon flaxseeds
- 1 teaspoon dried oregano (optional)
Ingredient Notes
Chickpeas. These are the base of the loaf, so rinse them well and let them drain completely. Excess water thins the batter and can leave the center of the bread overly moist. Shake the colander a few times, or pat the chickpeas gently with a clean towel.
Eggs. Eggs provide structure, richness, and lift. Room-temperature eggs blend more evenly into the chickpeas and yogurt, so take them out of the refrigerator a little while before you start.
Greek yogurt. Thick, unsweetened Greek yogurt adds moisture and a soft, tender crumb. Full-fat or 2% works especially well. Avoid runny yogurt, because it can change the consistency of the batter.
Olive oil. Olive oil keeps the crumb tender and adds a savory depth. You will also use a little to brush or spray the parchment paper.
Baking powder and apple cider vinegar. Together they provide the leavening that replaces yeast. Baking powder does the main lifting, and the vinegar supports the rise and balances the flavor of the chickpeas.
Garlic and onion powder. These two seasonings give the loaf a mild, savory, bread-like flavor without adding any moisture.
The seed mix. The combination of pumpkin, sunflower, sesame, poppy, and flax seeds gives the loaf its signature crunchy crust. Dried oregano is optional but adds a lovely herbal note and a bit of color across the top.
Equipment You Will Need
- A high-speed blender or food processor
- A 9 × 5-inch loaf pan
- Parchment paper
- A rubber spatula
- A small bowl for the seed mix
- A toothpick or skewer for testing doneness
- A wire cooling rack
- A sharp serrated knife for slicing
How to Make Easy Blender Chickpea Bread, Step by Step
Step 1: Prepare the Oven and Loaf Pan
Preheat your oven to 350°F (175°C). Line a 9 × 5-inch loaf pan with parchment paper, leaving some overhang on the long sides so you can lift the loaf out easily later. Lightly brush or spray the parchment with olive oil to prevent sticking.
Step 2: Drain and Rinse the Chickpeas
Empty both cans into a colander, drain away the liquid, and rinse the chickpeas thoroughly under cold running water. Let them drain completely before blending. Removing excess moisture helps the loaf bake evenly and develop a firmer, more bread-like texture.
Step 3: Blend the Main Ingredients
Add the drained chickpeas, eggs, Greek yogurt, and olive oil to a high-speed blender or food processor. Blend for 1 to 2 minutes, stopping to scrape down the sides as needed, until the mixture is as smooth and creamy as possible. If your blender is small, work in batches and combine the mixture afterward.
Smoothness matters here. Leftover chickpea skins and lumps can affect the finished texture, so be patient and keep scraping until the batter looks creamy.
Step 4: Add the Seasonings and Leavening
Add the baking powder, salt, garlic powder, onion powder, and apple cider vinegar. Blend briefly, just until everything is evenly incorporated. Avoid prolonged blending at this stage so the baking powder keeps its leavening power.
Step 5: Prepare the Seed Topping
In a small bowl, combine the pumpkin seeds, sunflower seeds, sesame seeds, poppy seeds, flaxseeds, and optional dried oregano. Stir until evenly mixed and set aside.
Step 6: Transfer the Batter to the Pan
Pour the chickpea batter into the prepared loaf pan. Use a spatula to spread it evenly into the corners and smooth the surface. The batter will be thick but pourable.
Step 7: Add the Mixed Seeds
Sprinkle the seed mixture evenly over the entire surface of the batter. Gently press the seeds down with the back of a spoon so they stick to the batter without sinking too deeply. This small step helps the topping stay put when you slice the cooled bread.
Step 8: Bake Until Golden and Firm
Place the loaf pan on the center rack of the preheated oven. Bake for 55 to 65 minutes, until the top is golden, the loaf feels firm, and a toothpick inserted into the center comes out without wet batter.
If the seeds brown too quickly, loosely cover the top with aluminum foil during the final 15 minutes. If the center is still wet, continue baking in 5-minute increments until it is done.
Step 9: Cool the Bread
Remove the pan from the oven and let the loaf rest in the pan for 15 minutes. Carefully lift it out using the parchment overhang and transfer it to a wire rack. Allow it to cool completely, at least 1 hour, before slicing so the interior has time to set.
Step 10: Slice and Serve
Use a sharp serrated knife to cut the cooled loaf into even slices. Serve as it is, or lightly toast the slices for a firmer texture. Enjoy with butter, cream cheese, mashed avocado, hummus, or your favorite sandwich fillings.
Tips for the Best Chickpea Bread
- Drain the chickpeas well. After rinsing, give them time to drain. Too much water makes the batter loose and the center overly moist.
- Choose thick Greek yogurt. Full-fat or 2% plain Greek yogurt keeps the batter at the right consistency.
- Blend until completely smooth. Scrape down the sides of the blender and keep going until the batter is creamy.
- Do not overmix after adding the baking powder. Blend just long enough to distribute it evenly so the loaf keeps its lift.
- Press the seeds gently into the batter. This helps the topping adhere instead of falling off when you slice.
- Watch the topping. If the seeds darken before the center is baked, cover the loaf loosely with foil.
- Let it cool completely. The chickpea-based crumb needs time to set. Slicing while warm can make the center seem gummy or crumbly. This is the tip people most often skip, and it makes the biggest difference.
Troubleshooting Common Problems
The center is still wet after an hour. Ovens vary, and a very moist batter can need extra time. Keep baking in 5-minute increments and test again with a toothpick. Next time, drain the chickpeas more thoroughly.
The bread seems gummy. The most likely cause is slicing too early. Let the loaf cool for the full hour on a wire rack. Toasting the slices also firms up the texture nicely.
The loaf did not rise much. Check that your baking powder is fresh, and avoid blending for too long once it has been added. Remember that this is a dense, hearty loaf, not a light, airy sandwich bread.
The seeds fell off. Press them gently into the batter before baking, and use a sharp serrated knife with a light sawing motion when slicing.
The top is browning too fast. Tent the loaf loosely with aluminum foil, especially during the final 15 minutes of baking.
The texture is lumpy. Blend longer in the first stage and scrape the sides of the blender. If your blender is small, work in batches.
Variations to Try
Once you have the base recipe down, there are plenty of easy ways to adapt it. These are suggestions to experiment with, so keep an eye on the batter consistency and baking time if you make changes.
- Herb-forward loaf. Increase the dried oregano in the seed topping, or sprinkle a little extra over the top before baking for a more herbal, Mediterranean feel.
- Different seeds. Use the seed combination you already have at home. The topping is flexible, and the mix of sizes and colors is what gives the loaf its crunch.
- Savory add-ins. Stirring a small amount of finely chopped herbs into the batter can add freshness, but keep the batter thick so it does not become too wet.
- Mini loaves or rolls. Smaller shapes bake faster, so start checking earlier than the 55-minute mark.
What to Serve With Chickpea Bread
This loaf is as versatile as it is easy. Here are some of our favorite ways to enjoy it.
- Classic breakfast toast. Toast a slice and spread it with salted butter or cream cheese.
- Avocado toast. Add mashed avocado, black pepper, and a squeeze of fresh lemon juice.
- Hearty sandwiches. Layer with cheese, tomatoes, lettuce, cucumber, and your favorite fillings.
- With eggs. Serve toasted slices alongside scrambled or fried eggs for a satisfying breakfast.
- Soup companion. Pair it with creamy vegetable soup, tomato soup, or lentil soup.
- Hummus toast. Spread with hummus and finish with a drizzle of olive oil and a pinch of paprika.
- Fresh salad. Serve alongside a crisp green salad for a simple lunch.
How to Store Chickpea Bread
Because this loaf contains eggs and yogurt and has a moist interior, storage matters.
- Room temperature: Refrigerate the bread within 2 hours of baking, once it has cooled.
- Refrigerator: Store the completely cooled bread in an airtight container for up to 4 to 5 days.
- Freezer: Slice the loaf and place small pieces of parchment paper between the slices. Transfer to a freezer-safe bag or container and freeze for up to 2 months.
- Thawing: Thaw individual slices in the refrigerator or briefly at room temperature before reheating.
- Reheating: Toast refrigerated or thawed slices directly in a toaster, or warm them in a lightly oiled skillet until heated through.
Freezing slices individually is the best meal-prep trick for this recipe. You can pull out exactly what you need and have warm, crisp toast in minutes.
Dietary Notes
This bread is yeast-free, contains no wheat flour, and is made with protein-rich ingredients. It does contain eggs and dairy (Greek yogurt), so it is not vegan or dairy-free. The seeds mean it is not suitable for anyone avoiding sesame or other seeds. If you are cooking for someone with a gluten-related condition or any allergy, check the labels on your canned chickpeas, baking powder, and seasonings to confirm they fit their needs. If you plan to make substitutions, keep in mind that eggs and yogurt contribute structure and moisture, so results may differ from the original recipe.
Recipe Details at a Glance
| Detail | Information |
|---|---|
| Prep time | 15 minutes |
| Bake time | 55–65 minutes |
| Cooling time | 1 hour 15 minutes |
| Total time | About 2 hours 20 minutes to 2 hours 35 minutes |
| Yield | 1 loaf |
| Servings | About 10–12 slices |
| Pan size | 9 × 5-inch loaf pan |
| Oven temperature | 350°F (175°C) |
| Course | Breakfast, snack, or side dish |
| Cuisine | American-inspired |
| Method | Blender, no yeast, no kneading |
| Difficulty | Easy |
| Texture | Soft, moist, hearty interior with a crunchy mixed-seed topping |
Frequently Asked Questions
Can I make chickpea bread without yeast?
Yes. This recipe is completely yeast-free. Baking powder and apple cider vinegar provide the leavening, so there is no proofing or rising time.
Do I need a high-speed blender?
A high-speed blender or food processor gives the smoothest batter. If your blender is small, blend in batches and combine the mixture afterward. The key is getting the batter as creamy as possible.
Why is my chickpea bread gummy in the middle?
The usual causes are slicing before the loaf has cooled completely, not draining the chickpeas well enough, or underbaking. Cool the loaf for at least 1 hour, and bake in 5-minute increments if a toothpick still shows wet batter.
How do I know when the bread is done?
The top should be golden, the loaf should feel firm, and a toothpick inserted into the center should come out without wet batter. Total baking time is typically 55 to 65 minutes.
Why do I need to cool the bread before slicing?
The chickpea-based crumb needs time to set. Slicing while warm can make the center seem gummy or crumbly, so wait at least 1 hour.
Can I freeze chickpea bread?
Yes. Slice the loaf, place small pieces of parchment between the slices, and freeze in a freezer-safe bag or container for up to 2 months. Toast slices straight from the freezer or thaw them first.
How long does chickpea bread last?
Stored in an airtight container in the refrigerator, the cooled loaf keeps for up to 4 to 5 days. Refrigerate it within 2 hours of baking.
Is this bread good for sandwiches?
Absolutely. Slice it evenly with a serrated knife and toast it lightly for a firmer texture that holds up well to fillings like cheese, tomatoes, lettuce, and cucumber.
Can I leave out the seed topping?
You can, but the seeds are a big part of the loaf’s crunch and appearance. If you only have a few of the seeds on hand, use what you have.
Is chickpea bread healthy?
It is made from whole-food ingredients like chickpeas, eggs, yogurt, and seeds, and it is protein-rich and hearty. Nutrition varies depending on slice size and any changes you make, so check with a registered dietitian if you have specific dietary goals.
Final Thoughts
This easy blender chickpea bread proves that homemade bread does not have to be complicated. With no yeast, no kneading, and no rising time, it is one of the most approachable loaves you can bake, and the golden, seed-covered crust makes it look like it came from a bakery. Blend the batter until silky, press the seeds on top, bake until golden and firm, and be patient while it cools. Your reward is a hearty, savory, protein-rich loaf that is perfect for toast, sandwiches, and soup nights.
Print
Easy Blender Chickpea Bread
- Total Time: 2 hours 25 minutes to 2 hours 35 minutes
- Yield: 1 loaf (10–12 slices) 1x
Ingredients
Here is everything you need to make one 9 × 5-inch loaf, along with a few notes on why each ingredient matters.
For the Bread
- 2 cans (15 oz / 425 g each) chickpeas, drained and thoroughly rinsed
- 4 large eggs, at room temperature
- ½ cup (120 g) plain Greek yogurt, preferably thick and unsweetened
- 2 tablespoons (30 ml) olive oil
- 2 teaspoons baking powder
- 1 teaspoon salt
- ½ teaspoon garlic powder
- ½ teaspoon onion powder
- 1 tablespoon apple cider vinegar
Instructions
Preheat your oven to 350°F (175°C). Line a 9 × 5-inch loaf pan with parchment paper, leaving some overhang on the long sides so you can lift the loaf out easily later. Lightly brush or spray the parchment with olive oil to prevent sticking.
Step 2: Drain and Rinse the Chickpeas
Empty both cans into a colander, drain away the liquid, and rinse the chickpeas thoroughly under cold running water. Let them drain completely before blending. Removing excess moisture helps the loaf bake evenly and develop a firmer, more bread-like texture.
Step 3: Blend the Main Ingredients
Add the drained chickpeas, eggs, Greek yogurt, and olive oil to a high-speed blender or food processor. Blend for 1 to 2 minutes, stopping to scrape down the sides as needed, until the mixture is as smooth and creamy as possible. If your blender is small, work in batches and combine the mixture afterward.
Smoothness matters here. Leftover chickpea skins and lumps can affect the finished texture, so be patient and keep scraping until the batter looks creamy.
Step 4: Add the Seasonings and Leavening
Add the baking powder, salt, garlic powder, onion powder, and apple cider vinegar. Blend briefly, just until everything is evenly incorporated. Avoid prolonged blending at this stage so the baking powder keeps its leavening power.
Step 5: Prepare the Seed Topping
In a small bowl, combine the pumpkin seeds, sunflower seeds, sesame seeds, poppy seeds, flaxseeds, and optional dried oregano. Stir until evenly mixed and set aside.
Step 6: Transfer the Batter to the Pan
Pour the chickpea batter into the prepared loaf pan. Use a spatula to spread it evenly into the corners and smooth the surface. The batter will be thick but pourable.
Step 7: Add the Mixed Seeds
Sprinkle the seed mixture evenly over the entire surface of the batter. Gently press the seeds down with the back of a spoon so they stick to the batter without sinking too deeply. This small step helps the topping stay put when you slice the cooled bread.
Step 8: Bake Until Golden and Firm
Place the loaf pan on the center rack of the preheated oven. Bake for 55 to 65 minutes, until the top is golden, the loaf feels firm, and a toothpick inserted into the center comes out without wet batter.
If the seeds brown too quickly, loosely cover the top with aluminum foil during the final 15 minutes. If the center is still wet, continue baking in 5-minute increments until it is done.
Step 9: Cool the Bread
Remove the pan from the oven and let the loaf rest in the pan for 15 minutes. Carefully lift it out using the parchment overhang and transfer it to a wire rack. Allow it to cool completely, at least 1 hour, before slicing so the interior has time to set.
Step 10: Slice and Serve
Use a sharp serrated knife to cut the cooled loaf into even slices. Serve as it is, or lightly toast the slices for a firmer texture. Enjoy with butter, cream cheese, mashed avocado, hummus, or your favorite sandwich fillings.
- Prep Time: 15 minutes
- Cook Time: 55–65 minutes