Ingredients
Here is everything you need to make one large French loaf, yielding roughly 10 to 12 slices:
- 3 cups (375 g) bread flour
- 1 cup (240 ml) lukewarm water
- 2¼ teaspoons (7 g) instant yeast
- 1 teaspoon sugar
- 1 teaspoon salt
- 1 tablespoon olive oil (optional)
A Closer Look at Each Ingredient
Bread flour. Bread flour has a higher protein content than all-purpose flour, usually around 12 to 14 percent. More protein means more gluten, and more gluten means a stronger, stretchier dough that traps gas well. This is what gives French bread its signature chew and its airy structure. All-purpose flour can work in a pinch, but the crumb will be a little softer and less chewy, and you may need slightly less water.
Lukewarm water. Water should feel comfortably warm to the touch, not hot. Water that is too hot can damage or kill yeast, while water that is too cold will slow it down dramatically. If you can hold your finger in it comfortably, it is about right.
Instant yeast. Instant yeast can be mixed straight into the water or flour without separate proofing. It is reliable and fast, which makes it ideal for an easy recipe. If you only have active dry yeast, you can substitute it in the same amount, though the first rise may take a little longer.
Sugar. Just one teaspoon is all it takes. The sugar feeds the yeast early on and encourages a golden crust.
Salt. Salt is essential for flavor. It also strengthens gluten and regulates yeast activity. Do not skip it, or your bread will taste flat.
Olive oil (optional). A tablespoon of olive oil makes the crumb slightly softer and richer. Leave it out for a leaner, more traditional loaf.
Instructions
In a large mixing bowl, combine the lukewarm water, instant yeast, and sugar. Stir briefly to distribute the yeast. Add the bread flour and salt, and if you are using olive oil, pour it in now.
Mix with a wooden spoon until a rough dough forms and no dry flour remains. At this stage, the dough should feel soft and slightly tacky. If it seems very dry, add water one teaspoon at a time. If it is extremely sticky, let it rest for a few minutes before adding any extra flour, since flour absorbs water as it sits and the dough often becomes easier to handle on its own.
Transfer the dough to a lightly floured work surface. Knead for about 8 to 10 minutes, stretching and folding the dough over itself until it turns smooth and elastic. If you prefer to use a stand mixer, knead with the dough hook on low to medium speed for roughly 6 to 8 minutes.
The finished dough should feel stretchy and hold together well. A simple way to check is the windowpane test: pinch off a small piece and gently stretch it. If it thins out into a translucent membrane without tearing right away, the gluten is well developed. Try not to add too much extra flour while kneading, because that can lead to a dense loaf.
Shape the dough into a smooth ball and place it in a lightly greased bowl. Cover with a clean kitchen towel or plastic wrap. Let it rise in a warm, draft-free spot for about 60 to 90 minutes, or until it has roughly doubled in size.
The dough should look airy and feel lighter when you gently touch it. If your kitchen is cool, give it more time. Rising is about the dough, not the clock, so trust what you see and feel.
Turn the risen dough onto a lightly floured surface and gently press it into a rectangle to release any very large air pockets. Fold the top edge toward the center and press gently to seal. Fold the bottom edge upward, then roll the dough into a long loaf, sealing the seam with your fingertips.
Gently roll the loaf with your hands to create an even shape with slightly tapered ends. Aim for a length of about 30 to 35 cm (12 to 14 inches). Place the loaf seam-side down on a parchment-lined baking tray, cover it loosely, and let it rest for 25 to 40 minutes, until it looks slightly puffy.
Preheat your oven to 230°C (450°F). If you own a baking stone or a heavy baking tray, place it inside while the oven heats so it becomes very hot. A hot surface gives the loaf a strong burst of energy at the start of baking, known as oven spring.
For a crispier crust, prepare a separate sturdy metal tray to hold water for steam, if your oven setup allows it safely. Never pour water onto glass cookware or directly onto the oven’s heating elements, as this can cause cracking or damage.
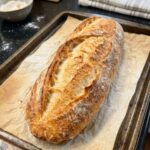
Once the loaf has become slightly puffy, uncover it and dust the surface lightly with flour if you like. Using a sharp bread lame or razor, make one long, shallow slash along the top of the loaf. This controlled cut lets the bread expand where you want it to, and it gives the loaf that attractive bakery-style finish.
Carefully transfer the loaf to the hot baking surface. Introduce steam using a safe oven-steam method, then bake at 230°C (450°F) for about 15 minutes. Carefully remove the steam tray if you used one, reduce the temperature to 210°C (410°F), and continue baking for another 10 to 15 minutes, until the crust is deep golden brown and crisp.
To check for doneness, tap the bottom of the loaf. It should sound hollow. If you have a kitchen thermometer, the center should read about 96 to 99°C (205 to 210°F).
Transfer the bread to a wire rack and let it cool for at least 45 to 60 minutes before slicing. This waiting period is important. As the loaf cools, the crust turns crisp and the interior finishes setting, which prevents a gummy texture. Use a serrated bread knife to cut clean slices without crushing the loaf, then serve warm or at room temperature.