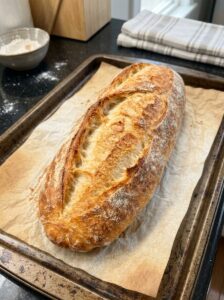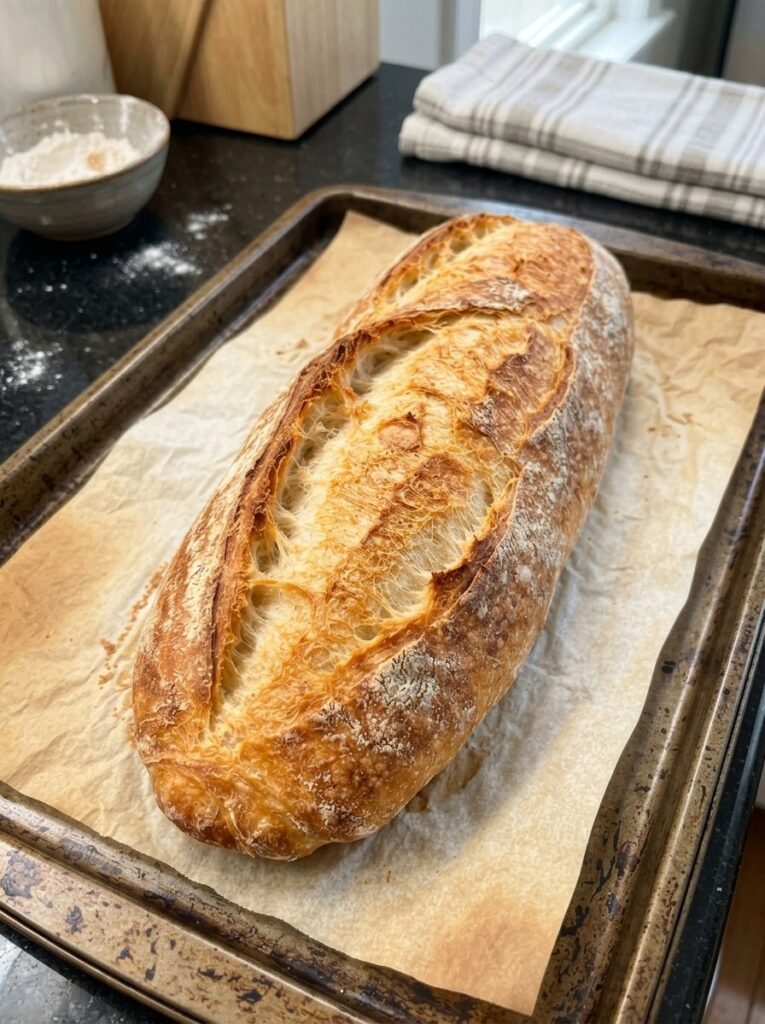
There is something almost magical about pulling a golden, crackling loaf of French bread out of your own oven. The aroma fills the kitchen, the crust sings as it cools, and the first slice reveals a soft, airy crumb with that satisfying chew you usually only get from a real bakery. The best part? You do not need fancy equipment, years of experience, or a long list of ingredients to make it happen.
This easy homemade French loaf bread uses just a handful of pantry staples: bread flour, water, instant yeast, a little sugar, salt, and an optional splash of olive oil. With about 20 minutes of hands-on work and a little patience, you will have a beautiful loaf that is perfect for sandwiches, dunking into soup, turning into garlic bread, or simply enjoying warm with butter.
In this complete guide, you will find the full ingredient list, detailed step-by-step instructions, expert tips for a crisp crust and fluffy interior, troubleshooting advice, serving ideas, storage and freezing tips, and answers to the most common questions about making French bread at home.
Why You Will Love This French Loaf Recipe
Before we get into the details, here is why this recipe deserves a permanent spot in your baking rotation:
- Only simple ingredients. Everything you need is probably already in your kitchen. No starter, no preferment, no overnight fermentation required.
- Beginner friendly. The dough is mixed with a wooden spoon, so there is no need for special gadgets. A stand mixer is welcome but optional.
- Bakery-style results. A hot oven, a little steam, and a quick slash across the top give you that classic crisp, thin crust and chewy crumb.
- Incredibly versatile. One loaf can become a sandwich base, a soup companion, bruschetta, garlic bread, or breakfast toast.
- Ready in about three hours. Most of that time is hands-off rising and cooling, so you can get on with your day while the dough does the work.
- Freezer friendly. Bake once and enjoy the bread for weeks.
What Is French Bread, Exactly?
Traditional French bread, such as the famous baguette, is defined by its minimalism. At its core, it is made from flour, water, yeast, and salt. There is no butter, no milk, and typically no sugar. The magic comes from technique: proper kneading, patient rising, high heat, and steam during the first part of baking.
This homemade French loaf follows the same philosophy but is adapted for home kitchens. A small amount of sugar gives the yeast a quick boost and helps the crust brown beautifully, while an optional tablespoon of olive oil adds a touch of softness to the crumb. The result is a loaf that is French-style: crisp outside, tender and chewy inside, with a mild, comforting flavor that goes with just about anything.
Ingredients for Easy Homemade French Bread
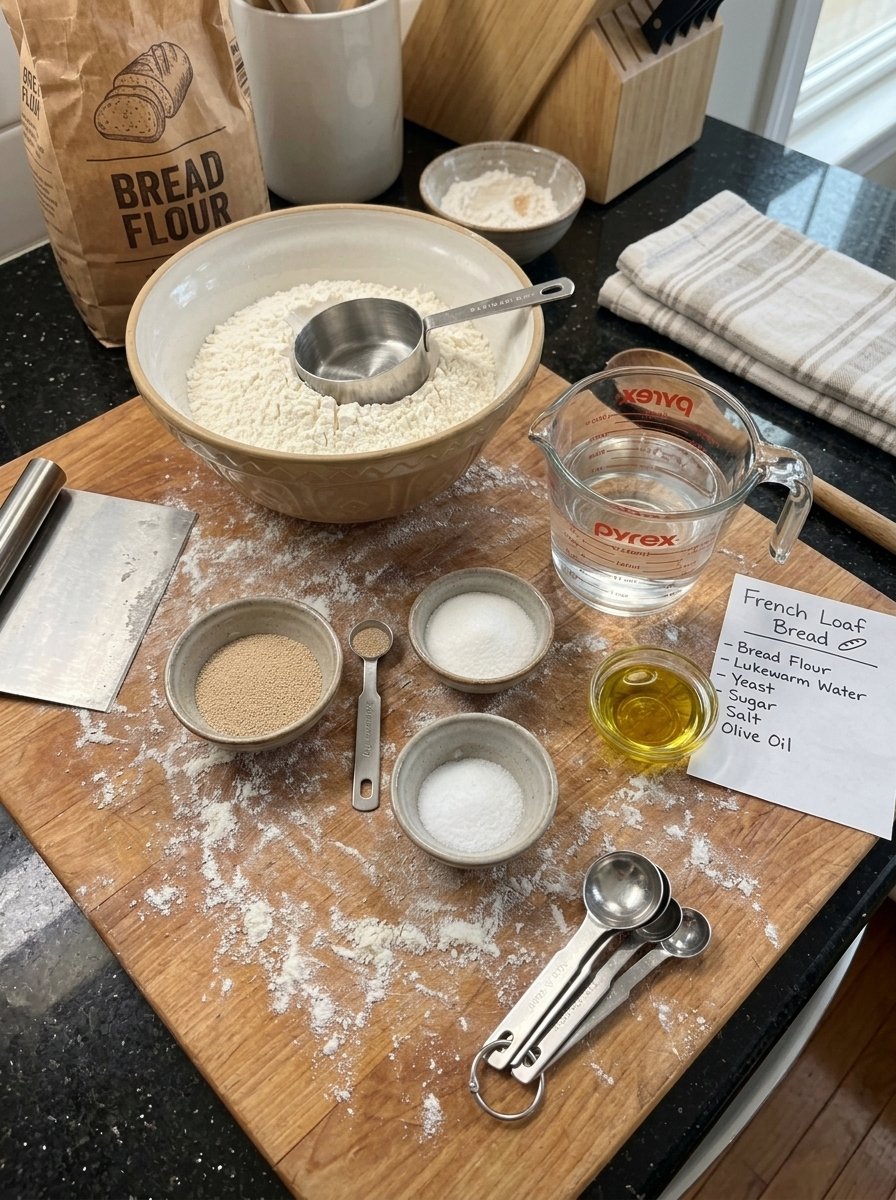
Here is everything you need to make one large French loaf, yielding roughly 10 to 12 slices:
- 3 cups (375 g) bread flour
- 1 cup (240 ml) lukewarm water
- 2¼ teaspoons (7 g) instant yeast
- 1 teaspoon sugar
- 1 teaspoon salt
- 1 tablespoon olive oil (optional)
A Closer Look at Each Ingredient
Bread flour. Bread flour has a higher protein content than all-purpose flour, usually around 12 to 14 percent. More protein means more gluten, and more gluten means a stronger, stretchier dough that traps gas well. This is what gives French bread its signature chew and its airy structure. All-purpose flour can work in a pinch, but the crumb will be a little softer and less chewy, and you may need slightly less water.
Lukewarm water. Water should feel comfortably warm to the touch, not hot. Water that is too hot can damage or kill yeast, while water that is too cold will slow it down dramatically. If you can hold your finger in it comfortably, it is about right.
Instant yeast. Instant yeast can be mixed straight into the water or flour without separate proofing. It is reliable and fast, which makes it ideal for an easy recipe. If you only have active dry yeast, you can substitute it in the same amount, though the first rise may take a little longer.
Sugar. Just one teaspoon is all it takes. The sugar feeds the yeast early on and encourages a golden crust.
Salt. Salt is essential for flavor. It also strengthens gluten and regulates yeast activity. Do not skip it, or your bread will taste flat.
Olive oil (optional). A tablespoon of olive oil makes the crumb slightly softer and richer. Leave it out for a leaner, more traditional loaf.
Equipment You Will Need
You do not need professional gear to bake great bread. Here is what helps:
- A large mixing bowl and a wooden spoon
- A kitchen scale (highly recommended for accurate flour measurement)
- A clean kitchen towel or plastic wrap
- A baking tray lined with parchment paper
- A sharp knife, razor blade, or bread lame for scoring
- A sturdy metal tray for creating steam
- A wire cooling rack
- A serrated bread knife
- An instant-read thermometer (optional, but helpful)
- A stand mixer with a dough hook (optional)
How to Make Easy Homemade French Loaf Bread: Step by Step
Step 1: Prepare the Dough
In a large mixing bowl, combine the lukewarm water, instant yeast, and sugar. Stir briefly to distribute the yeast. Add the bread flour and salt, and if you are using olive oil, pour it in now.
Mix with a wooden spoon until a rough dough forms and no dry flour remains. At this stage, the dough should feel soft and slightly tacky. If it seems very dry, add water one teaspoon at a time. If it is extremely sticky, let it rest for a few minutes before adding any extra flour, since flour absorbs water as it sits and the dough often becomes easier to handle on its own.
Step 2: Knead Until Smooth and Elastic
Transfer the dough to a lightly floured work surface. Knead for about 8 to 10 minutes, stretching and folding the dough over itself until it turns smooth and elastic. If you prefer to use a stand mixer, knead with the dough hook on low to medium speed for roughly 6 to 8 minutes.
The finished dough should feel stretchy and hold together well. A simple way to check is the windowpane test: pinch off a small piece and gently stretch it. If it thins out into a translucent membrane without tearing right away, the gluten is well developed. Try not to add too much extra flour while kneading, because that can lead to a dense loaf.
Step 3: Let the Dough Rise
Shape the dough into a smooth ball and place it in a lightly greased bowl. Cover with a clean kitchen towel or plastic wrap. Let it rise in a warm, draft-free spot for about 60 to 90 minutes, or until it has roughly doubled in size.
The dough should look airy and feel lighter when you gently touch it. If your kitchen is cool, give it more time. Rising is about the dough, not the clock, so trust what you see and feel.
Step 4: Shape the French Loaf
Turn the risen dough onto a lightly floured surface and gently press it into a rectangle to release any very large air pockets. Fold the top edge toward the center and press gently to seal. Fold the bottom edge upward, then roll the dough into a long loaf, sealing the seam with your fingertips.
Gently roll the loaf with your hands to create an even shape with slightly tapered ends. Aim for a length of about 30 to 35 cm (12 to 14 inches). Place the loaf seam-side down on a parchment-lined baking tray, cover it loosely, and let it rest for 25 to 40 minutes, until it looks slightly puffy.
Step 5: Preheat the Oven
Preheat your oven to 230°C (450°F). If you own a baking stone or a heavy baking tray, place it inside while the oven heats so it becomes very hot. A hot surface gives the loaf a strong burst of energy at the start of baking, known as oven spring.
For a crispier crust, prepare a separate sturdy metal tray to hold water for steam, if your oven setup allows it safely. Never pour water onto glass cookware or directly onto the oven’s heating elements, as this can cause cracking or damage.
Step 6: Score the Loaf
Once the loaf has become slightly puffy, uncover it and dust the surface lightly with flour if you like. Using a sharp bread lame or razor, make one long, shallow slash along the top of the loaf. This controlled cut lets the bread expand where you want it to, and it gives the loaf that attractive bakery-style finish.
Step 7: Bake Until Golden
Carefully transfer the loaf to the hot baking surface. Introduce steam using a safe oven-steam method, then bake at 230°C (450°F) for about 15 minutes. Carefully remove the steam tray if you used one, reduce the temperature to 210°C (410°F), and continue baking for another 10 to 15 minutes, until the crust is deep golden brown and crisp.
To check for doneness, tap the bottom of the loaf. It should sound hollow. If you have a kitchen thermometer, the center should read about 96 to 99°C (205 to 210°F).
Step 8: Cool and Slice
Transfer the bread to a wire rack and let it cool for at least 45 to 60 minutes before slicing. This waiting period is important. As the loaf cools, the crust turns crisp and the interior finishes setting, which prevents a gummy texture. Use a serrated bread knife to cut clean slices without crushing the loaf, then serve warm or at room temperature.
Recipe Details at a Glance
- Prep time: 20 minutes
- First rise: 60 to 90 minutes
- Second rise: 25 to 40 minutes
- Bake time: 25 to 30 minutes
- Cooling time: 45 to 60 minutes
- Total time: approximately 2 hours 55 minutes to 3 hours 40 minutes
- Yield: 1 French loaf, about 10 to 12 slices
- Difficulty: Easy to intermediate
- Method: Oven-baked yeast bread
- Texture: Crisp, golden crust with a soft, airy, chewy center
- Flavor: Mild, comforting, and freshly baked
Expert Tips for the Best French Bread
Small details make a big difference in bread baking. Keep these tips in mind for consistently great results.
1. Weigh Your Flour
The single most common cause of dense bread is too much flour. A cup of flour can weigh anywhere from 120 to 150 grams depending on how you scoop it. Using a scale and measuring 375 g keeps your dough balanced, soft, and easy to work with.
2. Use Lukewarm Water, Not Hot
Yeast is a living organism. Comfortably warm water wakes it up gently, while water that is too hot can kill it before it ever gets started. When in doubt, go slightly cooler and allow a little more rising time.
3. Knead Until Elastic
Proper kneading develops the gluten network that gives French bread its shape and chew. Do not stop early. Eight to ten minutes by hand may feel long, but it is what separates a tall, airy loaf from a flat one.
4. Give the Dough Enough Time to Rise
Rising times vary based on the temperature of your kitchen. A warm room speeds things up, while a cold one slows them down. Wait until the dough is noticeably puffy and about doubled before shaping. Rushing this step is a common reason for heavy, tight crumb.
5. Create Steam for a Crisp Crust
Steam during the first part of baking keeps the surface of the loaf moist and flexible, which lets the bread expand fully before the crust sets. It also helps develop that thin, crackly exterior. Use a safe method, such as a separate metal tray of hot water on a lower rack, and avoid pouring water onto glass or heating elements.
6. Score with Confidence
A single long, shallow slash gives the loaf a path to expand. Use a very sharp blade and a quick, decisive motion. Dull knives drag and deflate the dough.
7. Be Patient and Let It Cool
Cutting into hot bread is tempting, but slicing too early can leave the inside gummy because the crumb has not finished setting. Wait at least 45 to 60 minutes for the best texture.
Troubleshooting Common French Bread Problems
My bread is dense. This is usually caused by too much flour, insufficient kneading, or not enough rising time. Weigh your flour, knead until the dough passes the windowpane test, and let it rise until it has doubled.
The crust is pale or soft. Your oven may not be hot enough, or there may not have been enough steam at the start. Make sure the oven is fully preheated, bake on a preheated stone or heavy tray, and bake until the crust is a deep golden color.
The crust is too hard. Too much steam for too long can create a thick, tough crust. Remove the steam tray after about 15 minutes as directed, and cool the bread uncovered on a wire rack.
The loaf spread out flat. The dough may have over-risen during the second rise, or it may have been too wet. Shape the loaf with firm tension and bake it as soon as it looks slightly puffy.
The bread did not rise. Check that your yeast is fresh and that your water was not too hot or too cold. A cool kitchen can also slow things down, so allow extra time or find a warmer spot.
The inside is gummy. The loaf was likely sliced too soon or underbaked. Check that the center reaches 96 to 99°C (205 to 210°F) and allow a full cooling period.
Easy Variations to Try
Once you have mastered the basic loaf, it is easy to customize it:
- Garlic herb loaf: Knead in a teaspoon of garlic powder and a teaspoon of dried Italian herbs for a fragrant, savory bread.
- Cheesy French bread: Fold in a handful of shredded cheese during shaping for pockets of melted flavor.
- Seeded crust: Brush the loaf lightly with water before baking and sprinkle with sesame, poppy, or sunflower seeds.
- Smaller loaves or rolls: Divide the dough into smaller portions for sandwich rolls or mini baguettes, and shorten the baking time accordingly.
- Whole wheat blend: Replace up to a quarter of the bread flour with whole wheat flour for a nuttier flavor. You may need a splash more water.
Serving Ideas for Homemade French Bread
This versatile loaf fits into almost any meal. Here are some of our favorite ways to enjoy it:
- Classic French bread: Serve thick slices with salted butter or a drizzle of olive oil.
- Garlic bread: Spread with garlic butter, sprinkle with parsley, and toast until golden and fragrant.
- Soup companion: Pair with tomato soup, creamy mushroom soup, or a hearty vegetable stew for dipping.
- Fresh sandwiches: Fill with cheese, roasted vegetables, deli meats, or your favorite sandwich ingredients.
- Bruschetta: Toast slices and top with chopped tomatoes, fresh basil, olive oil, and a pinch of salt.
- Breakfast toast: Enjoy toasted slices with butter, honey, or jam.
Day-old bread is wonderful too. Turn it into croutons, breadcrumbs, French toast, or a rustic bread salad so nothing goes to waste.
How to Store French Bread
Bread made without preservatives is at its best on the day it is baked, but with a few simple steps you can keep it enjoyable for longer.
- Room temperature: Store the completely cooled loaf in a paper bag or bread box for up to 2 days. This preserves the crisp crust.
- Softer loaf: Store in an airtight bag for up to 3 days. Keep in mind that the crust will soften.
- Freezing: Wrap the cooled loaf tightly, or slice it first, and freeze for up to 3 months. Slicing before freezing lets you take out only what you need.
- Reheating: Refresh the loaf in a 180°C (350°F) oven for 5 to 8 minutes to restore some of the crispness.
- Avoid the refrigerator: Chilling bread can make it go stale faster.
Frequently Asked Questions
Can I make French bread without bread flour?
Yes. All-purpose flour works, although the loaf will have a slightly softer, less chewy crumb. You may need to reduce the water by a tablespoon or two, since all-purpose flour absorbs less liquid.
Can I use active dry yeast instead of instant yeast?
Yes. Use the same amount, and expect the first rise to take a bit longer. If you prefer, dissolve the active dry yeast in the lukewarm water with the sugar for about 5 to 10 minutes until foamy before adding the flour.
Do I have to knead the dough by hand?
No. A stand mixer with a dough hook handles the job in about 6 to 8 minutes on low to medium speed. Hand kneading takes about 8 to 10 minutes and works just as well.
Is the olive oil necessary?
No, it is optional. Without it, the loaf will be a bit leaner and closer to traditional French bread. With it, the crumb is slightly softer and richer.
How do I get a crispy crust without a Dutch oven?
Bake on a preheated stone or heavy baking tray, and use a sturdy metal tray of hot water on a lower rack to create steam during the first 15 minutes. Remove the steam tray before lowering the temperature and finishing the bake.
How do I know when the bread is done?
Look for a deep golden crust and listen for a hollow sound when you tap the bottom. For precision, use a thermometer: the center should reach 96 to 99°C (205 to 210°F).
Can I make the dough ahead of time?
Yes. After kneading, you can let the dough rise slowly in the refrigerator for several hours or overnight. Bring it back to room temperature, then shape, rest, and bake as directed. The slower rise often deepens the flavor.
Why does my French bread get stale so quickly?
Homemade bread has no preservatives, so it naturally stales faster than store-bought loaves. Store it in a paper bag for crust, an airtight bag for softness, and freeze anything you will not eat within two or three days.
How many slices does one loaf make?
One loaf yields about 10 to 12 slices, depending on how thick you cut them.
Final Thoughts
Homemade French bread does not have to be intimidating. With just bread flour, water, yeast, sugar, salt, and a little olive oil, you can create a loaf that rivals your local bakery: crackling, golden, soft, and wonderfully chewy. Focus on the fundamentals, which are accurate measuring, proper kneading, patient rising, a hot oven, and a bit of steam, and you will be rewarded every time.
Once you have baked your first loaf, you will find yourself reaching for this recipe again and again, whether for a cozy soup night, a weekend sandwich lunch, or a warm, buttery slice straight from the cooling rack. Happy baking!
Print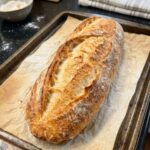
Easy Homemade French Loaf Bread
Ingredients
Here is everything you need to make one large French loaf, yielding roughly 10 to 12 slices:
- 3 cups (375 g) bread flour
- 1 cup (240 ml) lukewarm water
- 2¼ teaspoons (7 g) instant yeast
- 1 teaspoon sugar
- 1 teaspoon salt
- 1 tablespoon olive oil (optional)
A Closer Look at Each Ingredient
Bread flour. Bread flour has a higher protein content than all-purpose flour, usually around 12 to 14 percent. More protein means more gluten, and more gluten means a stronger, stretchier dough that traps gas well. This is what gives French bread its signature chew and its airy structure. All-purpose flour can work in a pinch, but the crumb will be a little softer and less chewy, and you may need slightly less water.
Lukewarm water. Water should feel comfortably warm to the touch, not hot. Water that is too hot can damage or kill yeast, while water that is too cold will slow it down dramatically. If you can hold your finger in it comfortably, it is about right.
Instant yeast. Instant yeast can be mixed straight into the water or flour without separate proofing. It is reliable and fast, which makes it ideal for an easy recipe. If you only have active dry yeast, you can substitute it in the same amount, though the first rise may take a little longer.
Sugar. Just one teaspoon is all it takes. The sugar feeds the yeast early on and encourages a golden crust.
Salt. Salt is essential for flavor. It also strengthens gluten and regulates yeast activity. Do not skip it, or your bread will taste flat.
Olive oil (optional). A tablespoon of olive oil makes the crumb slightly softer and richer. Leave it out for a leaner, more traditional loaf.
Instructions
In a large mixing bowl, combine the lukewarm water, instant yeast, and sugar. Stir briefly to distribute the yeast. Add the bread flour and salt, and if you are using olive oil, pour it in now.
Mix with a wooden spoon until a rough dough forms and no dry flour remains. At this stage, the dough should feel soft and slightly tacky. If it seems very dry, add water one teaspoon at a time. If it is extremely sticky, let it rest for a few minutes before adding any extra flour, since flour absorbs water as it sits and the dough often becomes easier to handle on its own.
Transfer the dough to a lightly floured work surface. Knead for about 8 to 10 minutes, stretching and folding the dough over itself until it turns smooth and elastic. If you prefer to use a stand mixer, knead with the dough hook on low to medium speed for roughly 6 to 8 minutes.
The finished dough should feel stretchy and hold together well. A simple way to check is the windowpane test: pinch off a small piece and gently stretch it. If it thins out into a translucent membrane without tearing right away, the gluten is well developed. Try not to add too much extra flour while kneading, because that can lead to a dense loaf.
Shape the dough into a smooth ball and place it in a lightly greased bowl. Cover with a clean kitchen towel or plastic wrap. Let it rise in a warm, draft-free spot for about 60 to 90 minutes, or until it has roughly doubled in size.
The dough should look airy and feel lighter when you gently touch it. If your kitchen is cool, give it more time. Rising is about the dough, not the clock, so trust what you see and feel.
Turn the risen dough onto a lightly floured surface and gently press it into a rectangle to release any very large air pockets. Fold the top edge toward the center and press gently to seal. Fold the bottom edge upward, then roll the dough into a long loaf, sealing the seam with your fingertips.
Gently roll the loaf with your hands to create an even shape with slightly tapered ends. Aim for a length of about 30 to 35 cm (12 to 14 inches). Place the loaf seam-side down on a parchment-lined baking tray, cover it loosely, and let it rest for 25 to 40 minutes, until it looks slightly puffy.
Preheat your oven to 230°C (450°F). If you own a baking stone or a heavy baking tray, place it inside while the oven heats so it becomes very hot. A hot surface gives the loaf a strong burst of energy at the start of baking, known as oven spring.
For a crispier crust, prepare a separate sturdy metal tray to hold water for steam, if your oven setup allows it safely. Never pour water onto glass cookware or directly onto the oven’s heating elements, as this can cause cracking or damage.
Once the loaf has become slightly puffy, uncover it and dust the surface lightly with flour if you like. Using a sharp bread lame or razor, make one long, shallow slash along the top of the loaf. This controlled cut lets the bread expand where you want it to, and it gives the loaf that attractive bakery-style finish.
Carefully transfer the loaf to the hot baking surface. Introduce steam using a safe oven-steam method, then bake at 230°C (450°F) for about 15 minutes. Carefully remove the steam tray if you used one, reduce the temperature to 210°C (410°F), and continue baking for another 10 to 15 minutes, until the crust is deep golden brown and crisp.
To check for doneness, tap the bottom of the loaf. It should sound hollow. If you have a kitchen thermometer, the center should read about 96 to 99°C (205 to 210°F).
Transfer the bread to a wire rack and let it cool for at least 45 to 60 minutes before slicing. This waiting period is important. As the loaf cools, the crust turns crisp and the interior finishes setting, which prevents a gummy texture. Use a serrated bread knife to cut clean slices without crushing the loaf, then serve warm or at room temperature.