Ingredients
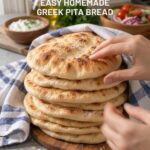
This recipe makes 8 Greek pita breads.
- 3 cups (375 g) all-purpose flour or bread flour
- 1 cup (240 ml) warm water
- 2¼ teaspoons (7 g) instant yeast
- 1 tablespoon olive oil
- 1 teaspoon honey or sugar
- 1 teaspoon salt
- Extra flour, for rolling
- Olive oil, for brushing (optional)
Ingredient Notes and Substitutions
Flour. All-purpose flour gives you a soft, tender pita, while bread flour has a higher protein content and produces a chewier, slightly more elastic result. Both work well, so use whichever you have on hand.
Water. The water should feel comfortably warm to the touch, not hot. Water that is too hot can damage the yeast and prevent your dough from rising properly. Think of a pleasantly warm bath rather than a hot one.
Yeast. This recipe uses instant yeast, which is reliable and fast. If you only have active dry yeast, the same amount will work. Give it the full five minutes in the warm water and honey so you can see it turn foamy before you continue.
Honey or sugar. A small amount of sweetener gives the yeast something to feed on and adds a subtle depth of flavor. It will not make the bread taste sweet.
Olive oil. Olive oil makes the dough more supple and adds that unmistakable Mediterranean flavor. Use extra virgin olive oil if you want a more pronounced taste.
Salt. Salt is essential for flavor and also helps regulate the yeast. Do not skip it.
Instructions
In a large mixing bowl, combine the warm water, instant yeast and honey or sugar. Stir gently and let the mixture sit for about 5 minutes, until it begins to look slightly foamy. This tells you the yeast is alive and ready to work. If you are using instant yeast, you can also mix it directly into the flour, but activating it first is a helpful safety check, especially if your yeast has been in the pantry for a while.
Add the flour, olive oil and salt to the bowl. Mix with a wooden spoon until a rough dough forms and all the ingredients come together. If the dough feels too dry or crumbly, add a little more water, one teaspoon at a time, until it comes together without becoming sticky.
Transfer the dough to a lightly floured surface and knead for about 6 to 8 minutes, until it becomes smooth, elastic and soft. You can also knead it in a stand mixer fitted with a dough hook. The finished dough should feel supple and slightly tacky without sticking heavily to your hands.
Resist the urge to add lots of extra flour. A slightly tacky dough is the secret to tender, chewy pita. Too much flour will give you dense, dry bread that cracks when folded.
Place the dough in a lightly greased bowl and turn it once to coat the surface with oil. Cover with a clean kitchen towel or plastic wrap and let it rise in a warm place for about 60 to 90 minutes, or until doubled in size. A turned-off oven with the light on, or a spot near a warm (not hot) appliance, works nicely if your kitchen is cool.
Gently press the dough to release the excess air. Divide it into 8 equal pieces and shape each piece into a smooth ball. Cover the dough balls with a towel and let them rest for 10 to 15 minutes. This short rest relaxes the gluten, which makes the dough much easier to roll without it springing back.
Lightly flour your work surface and roll each dough ball into a round about 6 to 7 inches (15 to 18 cm) wide and approximately ¼ inch (6 mm) thick. Keep the rounds evenly thick from edge to edge so they cook consistently and puff properly. Cover the rolled-out rounds while you work to prevent the dough from drying out.
Place a heavy skillet or cast-iron pan over medium-high heat and allow it to become thoroughly hot before you start cooking. You do not need to add oil, although you can lightly brush the pan if your skillet tends to stick. A properly preheated pan is one of the most important factors in getting a good puff.
Place one pita in the hot skillet and cook for about 1 to 2 minutes, until bubbles begin to form and the underside develops golden-brown spots. Flip and cook the other side for another 1 to 2 minutes. Flip once more briefly if needed, allowing the pita to puff up. If the bread browns too quickly or stays pale, adjust the heat up or down accordingly.
Repeat with the remaining dough rounds.
Transfer each cooked pita to a clean kitchen towel and cover it while you cook the rest. The trapped warmth and steam keep the bread soft and flexible. If you like, lightly brush the warm pitas with olive oil for extra flavor and shine.
Serve your homemade Greek pita bread while it is warm, either whole or cut into wedges. Fill it with gyros, grilled chicken, vegetables or falafel, or tear it into pieces and serve with hummus, tzatziki and your favorite Mediterranean dips.