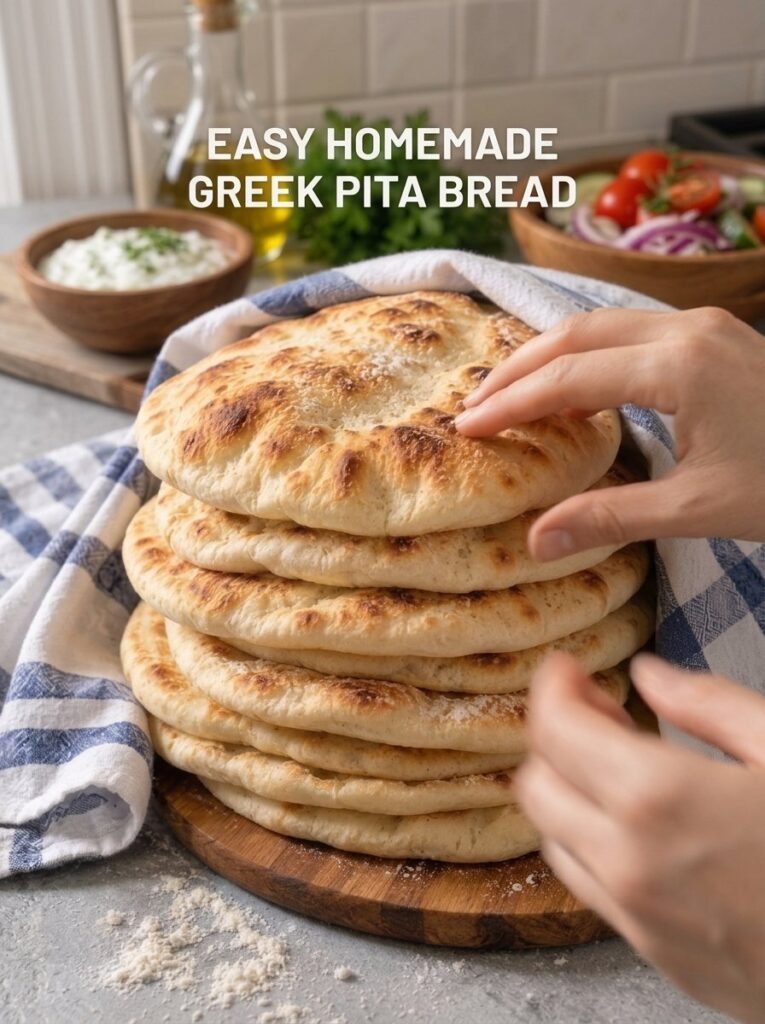
There is something deeply satisfying about tearing into a warm, freshly cooked pita and watching the steam rise from its soft, pillowy center. Store-bought pita simply cannot compete. It is often dry, stiff and prone to cracking the moment you try to fold it around a filling. Homemade Greek pita bread, on the other hand, is tender, chewy, lightly golden and wonderfully flexible, and it takes only a handful of everyday ingredients and a hot skillet to make.
In this complete guide, you will learn exactly how to make easy homemade Greek pita bread from scratch, including the full ingredient list, a detailed step-by-step method, expert tips for getting those signature puffed-up pockets, troubleshooting advice, creative variations, serving ideas, storage and freezing instructions, and answers to the most common questions. Whether you are a beginner baker or a seasoned home cook, this recipe is designed to be foolproof.
Why You Will Love This Greek Pita Bread Recipe
Before we get to the dough, here is why this pita bread recipe deserves a permanent place in your kitchen:
- No oven required. These pitas cook in a heavy skillet or cast-iron pan on the stovetop, so you do not need any fancy baking equipment.
- Simple, affordable ingredients. Flour, water, yeast, olive oil, honey (or sugar) and salt are all you need. You probably have everything in your pantry right now.
- Soft and chewy texture. A slightly tacky dough and a properly hot pan give you pitas that are tender on the inside with beautiful golden spots on the outside.
- Incredibly versatile. Use them for gyros, falafel wraps, sandwiches, flatbread pizzas, or simply as a vehicle for hummus and tzatziki.
- Freezer friendly. Make a full batch of eight and freeze the extras for quick weeknight meals.
- Beginner approved. The dough is forgiving, the steps are straightforward, and the results are impressive every time.
What Is Greek Pita Bread?
Pita is a round, soft flatbread that is a staple across Greece and the wider Mediterranean and Middle East. Greek-style pita is typically thicker, softer and more pillowy than the thin pocket pita you may find in some supermarkets. It is the classic wrapper for souvlaki and gyros, and it is just as good served warm on the side of a meze platter with dips, olives and fresh vegetables.
Traditional pita is a yeasted bread. As the rolled-out dough hits a very hot surface, the moisture inside quickly turns to steam. That steam inflates the bread and, in many cases, creates the famous hollow pocket in the middle. Even when a pita does not puff completely, it will still be soft, bubbly and delicious.
Ingredients for Easy Homemade Greek Pita Bread
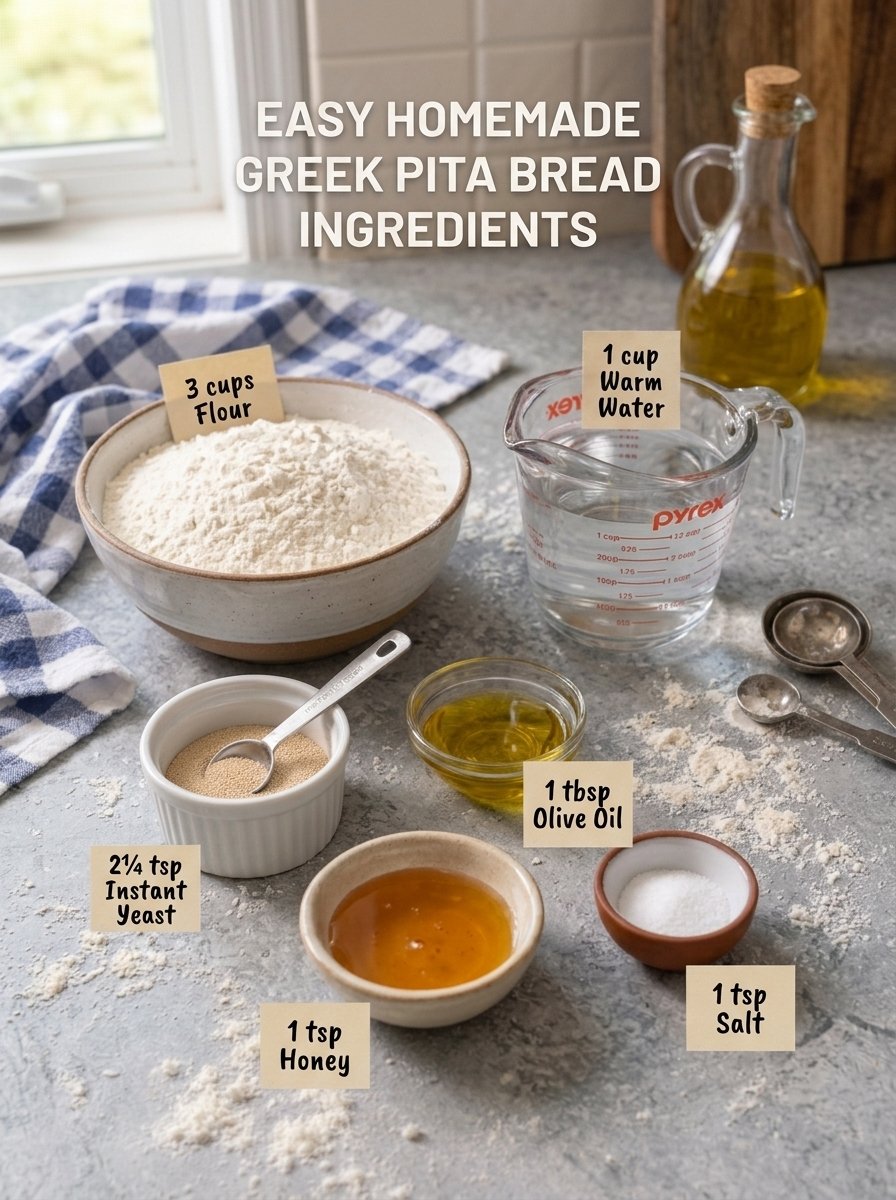
This recipe makes 8 Greek pita breads.
- 3 cups (375 g) all-purpose flour or bread flour
- 1 cup (240 ml) warm water
- 2¼ teaspoons (7 g) instant yeast
- 1 tablespoon olive oil
- 1 teaspoon honey or sugar
- 1 teaspoon salt
- Extra flour, for rolling
- Olive oil, for brushing (optional)
Ingredient Notes and Substitutions
Flour. All-purpose flour gives you a soft, tender pita, while bread flour has a higher protein content and produces a chewier, slightly more elastic result. Both work well, so use whichever you have on hand.
Water. The water should feel comfortably warm to the touch, not hot. Water that is too hot can damage the yeast and prevent your dough from rising properly. Think of a pleasantly warm bath rather than a hot one.
Yeast. This recipe uses instant yeast, which is reliable and fast. If you only have active dry yeast, the same amount will work. Give it the full five minutes in the warm water and honey so you can see it turn foamy before you continue.
Honey or sugar. A small amount of sweetener gives the yeast something to feed on and adds a subtle depth of flavor. It will not make the bread taste sweet.
Olive oil. Olive oil makes the dough more supple and adds that unmistakable Mediterranean flavor. Use extra virgin olive oil if you want a more pronounced taste.
Salt. Salt is essential for flavor and also helps regulate the yeast. Do not skip it.
Equipment You Will Need
One of the best things about this recipe is how little equipment it requires:
- A large mixing bowl
- A wooden spoon (or a stand mixer with a dough hook)
- A rolling pin
- A heavy skillet or cast-iron pan
- A clean kitchen towel
- A lightly floured work surface
How to Make Greek Pita Bread: Step-by-Step Instructions
Step 1: Activate the Yeast
In a large mixing bowl, combine the warm water, instant yeast and honey or sugar. Stir gently and let the mixture sit for about 5 minutes, until it begins to look slightly foamy. This tells you the yeast is alive and ready to work. If you are using instant yeast, you can also mix it directly into the flour, but activating it first is a helpful safety check, especially if your yeast has been in the pantry for a while.
Step 2: Mix the Dough
Add the flour, olive oil and salt to the bowl. Mix with a wooden spoon until a rough dough forms and all the ingredients come together. If the dough feels too dry or crumbly, add a little more water, one teaspoon at a time, until it comes together without becoming sticky.
Step 3: Knead Until Smooth
Transfer the dough to a lightly floured surface and knead for about 6 to 8 minutes, until it becomes smooth, elastic and soft. You can also knead it in a stand mixer fitted with a dough hook. The finished dough should feel supple and slightly tacky without sticking heavily to your hands.
Resist the urge to add lots of extra flour. A slightly tacky dough is the secret to tender, chewy pita. Too much flour will give you dense, dry bread that cracks when folded.
Step 4: Let the Dough Rise
Place the dough in a lightly greased bowl and turn it once to coat the surface with oil. Cover with a clean kitchen towel or plastic wrap and let it rise in a warm place for about 60 to 90 minutes, or until doubled in size. A turned-off oven with the light on, or a spot near a warm (not hot) appliance, works nicely if your kitchen is cool.
Step 5: Divide the Dough
Gently press the dough to release the excess air. Divide it into 8 equal pieces and shape each piece into a smooth ball. Cover the dough balls with a towel and let them rest for 10 to 15 minutes. This short rest relaxes the gluten, which makes the dough much easier to roll without it springing back.
Step 6: Roll Out the Pitas
Lightly flour your work surface and roll each dough ball into a round about 6 to 7 inches (15 to 18 cm) wide and approximately ¼ inch (6 mm) thick. Keep the rounds evenly thick from edge to edge so they cook consistently and puff properly. Cover the rolled-out rounds while you work to prevent the dough from drying out.
Step 7: Heat the Skillet
Place a heavy skillet or cast-iron pan over medium-high heat and allow it to become thoroughly hot before you start cooking. You do not need to add oil, although you can lightly brush the pan if your skillet tends to stick. A properly preheated pan is one of the most important factors in getting a good puff.
Step 8: Cook Until Puffy and Golden
Place one pita in the hot skillet and cook for about 1 to 2 minutes, until bubbles begin to form and the underside develops golden-brown spots. Flip and cook the other side for another 1 to 2 minutes. Flip once more briefly if needed, allowing the pita to puff up. If the bread browns too quickly or stays pale, adjust the heat up or down accordingly.
Repeat with the remaining dough rounds.
Step 9: Keep the Pitas Soft
Transfer each cooked pita to a clean kitchen towel and cover it while you cook the rest. The trapped warmth and steam keep the bread soft and flexible. If you like, lightly brush the warm pitas with olive oil for extra flavor and shine.
Step 10: Serve Warm and Enjoy
Serve your homemade Greek pita bread while it is warm, either whole or cut into wedges. Fill it with gyros, grilled chicken, vegetables or falafel, or tear it into pieces and serve with hummus, tzatziki and your favorite Mediterranean dips.
Recipe Details at a Glance
- Prep time: 20 minutes
- First rise: 60 to 90 minutes
- Resting time: 10 to 15 minutes
- Cooking time: 20 to 25 minutes
- Total time: Approximately 2 hours to 2 hours 30 minutes
- Yield: 8 Greek pita breads
- Cooking method: Stovetop skillet
- Texture: Soft, chewy, flexible and lightly golden
- Difficulty: Easy
Tips for the Best Greek Pita Bread
These small details make a big difference between average pita and truly great pita.
1. Use warm water, not hot. The water should feel comfortably warm so the yeast can wake up and do its job. Hot water can kill yeast, and cold water will slow it down dramatically.
2. Keep the dough soft. A slightly tacky dough produces tender, chewy bread. Avoid the temptation to keep adding flour during kneading and rolling. Use just enough to prevent sticking.
3. Give the dough time to rise. A proper rise makes pitas light and flexible. If your kitchen is cool, allow extra time rather than rushing the process.
4. Roll evenly. Thick and thin patches cook at different speeds, and uneven rounds are less likely to puff. Rotate the dough as you roll to keep the thickness consistent.
5. Heat the skillet properly. A hot pan helps the bread puff and develop those beautiful golden spots. Be patient and let the skillet heat up fully before the first pita goes in.
6. Keep cooked pitas covered. Wrap them in a clean kitchen towel right after cooking. The trapped steam softens the crust and keeps the bread pliable.
7. Do not overcrowd the pan. Cook one pita at a time so the pan stays hot and you have room to flip easily.
Troubleshooting: Why Didn’t My Pita Puff Up?
Even experienced bakers occasionally end up with flat pitas. Here are the most common causes and how to fix them.
The skillet was not hot enough. This is the number one reason pita fails to puff. The dough needs a blast of high heat so the moisture inside turns to steam quickly. Preheat your pan thoroughly and try again.
The dough was rolled too thin or too thick. Rounds that are too thin dry out before they can inflate, while rounds that are too thick may not cook through quickly enough to puff. Aim for roughly ¼ inch (6 mm).
The dough was uneven. If one side is thinner than the other, the steam escapes instead of building up inside. Roll with even pressure.
The dough was too dry. Too much flour makes the dough stiff and less able to expand. Keep it soft and slightly tacky.
The yeast was not active. If the yeast mixture never turned foamy, it may be old or the water may have been too hot or too cold. Start again with fresh yeast and comfortably warm water.
The dough did not rise enough. If the dough did not double in size, give it more time in a warm spot.
The dough dried out. Always cover the dough balls and rolled rounds with a towel while you work.
Remember that a pita that does not form a perfect pocket is still delicious. Soft, bubbly flatbread is wonderful for wraps, dipping and flatbread pizzas.
Variations to Try
Once you have mastered the classic recipe, experiment with these easy variations:
- Whole wheat Greek pita: Replace up to half of the flour with whole wheat flour for a nuttier flavor and heartier texture. You may need a splash more water.
- Garlic and herb pita: Knead a teaspoon of dried oregano and a little garlic powder into the dough, or brush the finished pitas with garlic-infused olive oil.
- Olive oil and oregano pita: Brush the warm pitas with olive oil and sprinkle with dried oregano for a simple, fragrant finish.
- Seeded pita: Press sesame seeds or nigella seeds gently into the rolled-out rounds before cooking.
- Mini pitas: Divide the dough into 12 or 16 smaller pieces for appetizer-sized pitas that are perfect for dips and party platters.
What to Serve With Homemade Greek Pita Bread
Pita is one of the most flexible breads you can make. Here are some of the best ways to enjoy it:
- Greek chicken gyros: Fill with seasoned chicken, tomatoes, cucumber, red onion and creamy tzatziki.
- Falafel wraps: Add crispy falafel, shredded lettuce, cucumber and tahini sauce.
- Hummus and pita: Cut into wedges and serve with hummus, olives and fresh vegetables for an easy appetizer.
- Mediterranean sandwiches: Stuff with grilled vegetables, feta cheese and leafy greens.
- Easy flatbread pizzas: Top with tomato sauce, mozzarella and your favorite toppings, then warm until the cheese melts.
- Herby pita wedges: Brush with olive oil, sprinkle with dried oregano, and serve alongside soups or salads.
You can also pair pita with classic Greek dips and sides such as tzatziki, melitzanosalata (roasted eggplant dip), taramasalata, a Greek salad, or a platter of grilled meats and roasted vegetables. For a complete Mediterranean-inspired feast, set out several dips, a bowl of olives, feta and fresh tomatoes and let everyone build their own plate.
How to Store Homemade Pita Bread
Proper storage keeps your pitas soft and fresh.
- Room temperature: Allow the pitas to cool completely, then store them in an airtight bag or container for up to 3 days.
- Refrigerator: Store in an airtight container for up to 5 days, although refrigeration may make them slightly firmer.
- Freezer: Separate the cooled pitas with parchment paper and freeze in a freezer-safe bag for up to 3 months.
- Reheating: Warm in a dry skillet for 20 to 30 seconds per side, or wrap in a slightly damp paper towel and microwave briefly until soft.
- For the best texture: Keep the pitas covered with a clean towel while serving so they remain warm and flexible.
Make-Ahead Tips
If you are planning a dinner party or a busy week, you can make the pitas a day ahead and reheat them just before serving. You can also freeze the cooled pitas in batches, then pull out only what you need. Reheated in a dry skillet, they taste remarkably close to freshly made.
Frequently Asked Questions
Can I make Greek pita bread without an oven?
Yes. This recipe is cooked entirely on the stovetop in a heavy skillet or cast-iron pan, so no oven is needed.
Can I use all-purpose flour instead of bread flour?
Absolutely. All-purpose flour makes a soft, tender pita. Bread flour gives a slightly chewier texture. Either works well in this recipe.
Why is my pita bread hard or dry?
Hard pita is usually caused by too much flour in the dough, rolling the rounds too thin, overcooking, or not covering the pitas after cooking. Keep the dough slightly tacky, cook each side for just 1 to 2 minutes, and wrap the finished pitas in a clean towel right away.
Do I have to use honey or sugar?
The small amount of honey or sugar helps feed the yeast and adds a little flavor. It is not strictly required with instant yeast, but it is recommended, and it will not make the bread taste sweet.
Can I make the dough ahead of time?
Yes. After kneading, you can let the dough rise as directed, then divide, roll and cook. If your schedule is tight, cooked pitas keep well and reheat easily, which is often the most convenient make-ahead method.
How thick should I roll the dough?
Roll each ball into a round about 6 to 7 inches (15 to 18 cm) wide and roughly ¼ inch (6 mm) thick, keeping the thickness as even as possible.
Can I freeze homemade pita bread?
Yes. Cool the pitas completely, separate them with parchment paper, and freeze in a freezer-safe bag for up to 3 months. Reheat in a dry skillet or briefly in the microwave wrapped in a damp paper towel.
What is the difference between Greek pita and Middle Eastern pita?
Greek pita is generally thicker, softer and more pillowy, and is traditionally used to wrap gyros and souvlaki. Middle Eastern pita is often thinner and baked at very high heat so it forms a distinct hollow pocket. This recipe makes a soft, flexible Greek-style pita that works for both wrapping and dipping.
Can I make this recipe vegan?
The recipe is easily made vegan by using sugar instead of honey. The remaining ingredients are already plant-based.
How do I know when the pita is done?
Look for bubbles forming on the surface and golden-brown spots on the underside. Each side usually takes 1 to 2 minutes in a properly heated skillet. The pita should feel soft and flexible, not crisp.
Final Thoughts
Homemade Greek pita bread is one of those recipes that feels almost magical. With just flour, water, yeast, olive oil, honey and salt, you can create warm, pillowy flatbreads that outshine anything from a plastic bag at the supermarket. The process is simple, the equipment is minimal, and the payoff is huge: soft, chewy, lightly golden pitas that are ready for gyros, dips, sandwiches or simply a drizzle of olive oil and a sprinkle of oregano.
Remember the key points: use comfortably warm water, keep the dough slightly tacky, let it rise until doubled, roll evenly, get your skillet properly hot, and wrap the finished pitas in a towel. Follow those steps and you will be rewarded with fresh pita bread that makes any meal feel like a Mediterranean feast.
Print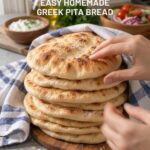
Easy Homemade Greek Pita Bread
Ingredients
This recipe makes 8 Greek pita breads.
- 3 cups (375 g) all-purpose flour or bread flour
- 1 cup (240 ml) warm water
- 2¼ teaspoons (7 g) instant yeast
- 1 tablespoon olive oil
- 1 teaspoon honey or sugar
- 1 teaspoon salt
- Extra flour, for rolling
- Olive oil, for brushing (optional)
Ingredient Notes and Substitutions
Flour. All-purpose flour gives you a soft, tender pita, while bread flour has a higher protein content and produces a chewier, slightly more elastic result. Both work well, so use whichever you have on hand.
Water. The water should feel comfortably warm to the touch, not hot. Water that is too hot can damage the yeast and prevent your dough from rising properly. Think of a pleasantly warm bath rather than a hot one.
Yeast. This recipe uses instant yeast, which is reliable and fast. If you only have active dry yeast, the same amount will work. Give it the full five minutes in the warm water and honey so you can see it turn foamy before you continue.
Honey or sugar. A small amount of sweetener gives the yeast something to feed on and adds a subtle depth of flavor. It will not make the bread taste sweet.
Olive oil. Olive oil makes the dough more supple and adds that unmistakable Mediterranean flavor. Use extra virgin olive oil if you want a more pronounced taste.
Salt. Salt is essential for flavor and also helps regulate the yeast. Do not skip it.
Instructions
In a large mixing bowl, combine the warm water, instant yeast and honey or sugar. Stir gently and let the mixture sit for about 5 minutes, until it begins to look slightly foamy. This tells you the yeast is alive and ready to work. If you are using instant yeast, you can also mix it directly into the flour, but activating it first is a helpful safety check, especially if your yeast has been in the pantry for a while.
Add the flour, olive oil and salt to the bowl. Mix with a wooden spoon until a rough dough forms and all the ingredients come together. If the dough feels too dry or crumbly, add a little more water, one teaspoon at a time, until it comes together without becoming sticky.
Transfer the dough to a lightly floured surface and knead for about 6 to 8 minutes, until it becomes smooth, elastic and soft. You can also knead it in a stand mixer fitted with a dough hook. The finished dough should feel supple and slightly tacky without sticking heavily to your hands.
Resist the urge to add lots of extra flour. A slightly tacky dough is the secret to tender, chewy pita. Too much flour will give you dense, dry bread that cracks when folded.
Place the dough in a lightly greased bowl and turn it once to coat the surface with oil. Cover with a clean kitchen towel or plastic wrap and let it rise in a warm place for about 60 to 90 minutes, or until doubled in size. A turned-off oven with the light on, or a spot near a warm (not hot) appliance, works nicely if your kitchen is cool.
Gently press the dough to release the excess air. Divide it into 8 equal pieces and shape each piece into a smooth ball. Cover the dough balls with a towel and let them rest for 10 to 15 minutes. This short rest relaxes the gluten, which makes the dough much easier to roll without it springing back.
Lightly flour your work surface and roll each dough ball into a round about 6 to 7 inches (15 to 18 cm) wide and approximately ¼ inch (6 mm) thick. Keep the rounds evenly thick from edge to edge so they cook consistently and puff properly. Cover the rolled-out rounds while you work to prevent the dough from drying out.
Place a heavy skillet or cast-iron pan over medium-high heat and allow it to become thoroughly hot before you start cooking. You do not need to add oil, although you can lightly brush the pan if your skillet tends to stick. A properly preheated pan is one of the most important factors in getting a good puff.
Place one pita in the hot skillet and cook for about 1 to 2 minutes, until bubbles begin to form and the underside develops golden-brown spots. Flip and cook the other side for another 1 to 2 minutes. Flip once more briefly if needed, allowing the pita to puff up. If the bread browns too quickly or stays pale, adjust the heat up or down accordingly.
Repeat with the remaining dough rounds.
Transfer each cooked pita to a clean kitchen towel and cover it while you cook the rest. The trapped warmth and steam keep the bread soft and flexible. If you like, lightly brush the warm pitas with olive oil for extra flavor and shine.
Serve your homemade Greek pita bread while it is warm, either whole or cut into wedges. Fill it with gyros, grilled chicken, vegetables or falafel, or tear it into pieces and serve with hummus, tzatziki and your favorite Mediterranean dips.