Sourdough Mini Baguettes: Crispy Crust, Soft & Chewy Center (Beginner-Friendly Recipe)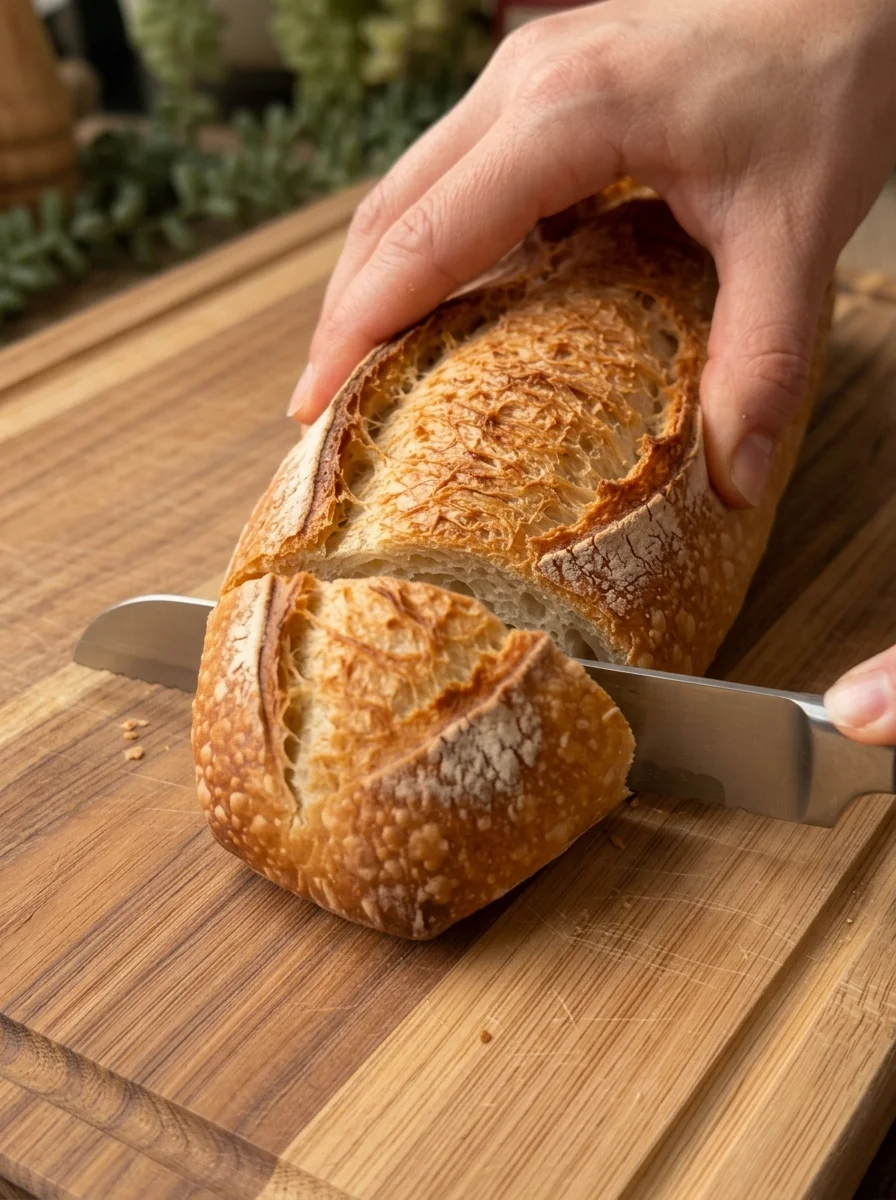
SEO title: Sourdough Mini Baguettes Recipe: Crispy Crust & Chewy Center
Meta description: Learn how to make homemade sourdough mini baguettes with a crisp golden crust and soft, chewy crumb. Step-by-step recipe, tips, variations, storage, and FAQ for beginners.
Focus keyword: sourdough mini baguettes
Secondary keywords: sourdough baguette recipe, homemade sourdough baguettes, mini baguettes, beginner sourdough bread, crusty sourdough bread, how to score baguettes, sourdough with active starter, overnight sourdough baguettes
There is nothing quite like homemade sourdough baguettes fresh from the oven. The crust crackles as it cools, the interior is soft and chewy, and the gentle tang of naturally fermented dough makes every bite feel special. These sourdough mini baguettes bring all of that into a smaller, more manageable size that is perfect for home ovens and home bakers.
The recipe uses only four ingredients: bread flour, water, salt, and active sourdough starter. There is no commercial yeast and no complicated equipment. What the dough does need is patience, a well-developed structure, gentle shaping, proper fermentation, and steam during baking. Get those right, and you will be rewarded with a batch of golden little loaves that look beautiful on a cheese board and taste even better.
In this guide you will find the full recipe, step-by-step instructions, an explanation of how each ingredient and technique works, scoring and steam tips, troubleshooting advice, creative variations, serving ideas, storage and freezing instructions, estimated nutrition, and answers to the questions bakers ask most often about sourdough baguettes.
Why You’ll Love These Sourdough Mini Baguettes
Baguettes have a reputation for being difficult, but the mini format makes them much friendlier. Here is why this recipe is worth baking.
- Crisp, golden crust. Early steam and a hot oven help the loaves expand and develop a thin, crackly crust.
- Soft and chewy interior. A well-fermented, gently handled dough produces an open, tender crumb with satisfying chew.
- Naturally tangy flavor. Sourdough fermentation develops deeper, more complex flavor than a quick yeast bread.
- Beginner friendly. The method uses simple stretch-and-folds rather than heavy kneading, and the shorter loaves are easier to shape and fit in a standard oven.
- Flexible schedule. You can bake the same day or use an optional overnight cold ferment to build flavor and make baking day easier.
- Versatile. Serve them with butter, olive oil, soup, cheese, or turn them into sandwiches and bruschetta.
Recipe Overview
- Preparation time: 30 minutes
- Bulk fermentation: 4 to 6 hours, depending on temperature and starter activity
- Cold fermentation: 8 to 16 hours, optional but recommended
- Final proof: 30 to 60 minutes
- Baking time: 20 to 25 minutes
- Yield: 4 mini baguettes
- Total time: Approximately 6 to 8 hours of active-day preparation, plus optional overnight refrigeration
- Difficulty: Moderate, beginner friendly
Ingredients for Sourdough Mini Baguettes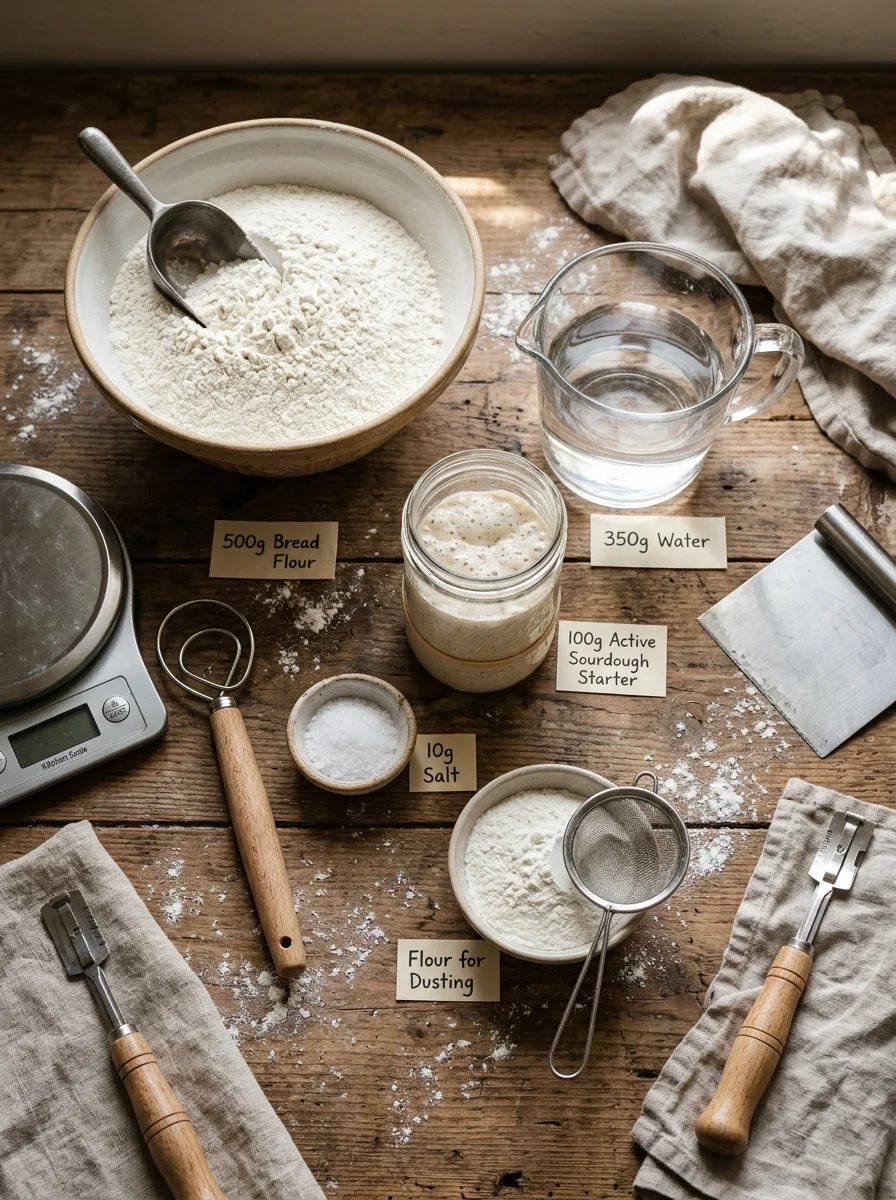
- 500 g bread flour
- 350 g water, room temperature (70% hydration)
- 100 g active sourdough starter (100% hydration)
- 10 g salt
- Rice flour or bread flour, for dusting
- Extra water for creating steam in the oven, if using a suitable steam-safe setup
Important: Use a lively, recently fed starter that shows bubbles and has risen noticeably after feeding. The fermentation time will depend on your starter’s strength and your kitchen temperature.
A Closer Look at the Key Ingredients
Bread flour. Bread flour has a higher protein content than all-purpose flour, which means it forms more gluten. That gluten network gives baguettes their structure and chew, and it helps the dough trap the gas produced during fermentation.
Water. At 350 g of water to 500 g of flour, this dough is at 70% hydration, a comfortable level for beginners that still produces a soft, open crumb. The dough will feel sticky at first but becomes smoother as it ferments and is folded.
Active sourdough starter. The starter provides both the leavening and the flavor. A starter at 100% hydration contains equal weights of flour and water. It should be recently fed, bubbly, and visibly risen. A sluggish starter will make the dough ferment slowly and can lead to dense loaves.
Salt. Salt flavors the bread, strengthens the dough, and controls the speed of fermentation. At 10 g for 500 g of flour, it gives well-seasoned bread without overpowering the sourdough tang.
Rice flour or bread flour for dusting. Rice flour is especially good for dusting because it does not absorb moisture as readily as wheat flour, which helps prevent sticking on towels and couches.
How to Make Sourdough Mini Baguettes: Step by Step
Step 1: Mix the Dough
In a large mixing bowl, combine the water and active sourdough starter. Stir until the starter is mostly dispersed.
Add the bread flour and mix with your hands or a sturdy spoon until no dry flour remains.
Cover the bowl and let the dough rest for 30 minutes. This rest helps the flour absorb the water and makes the dough easier to handle.
Step 2: Add the Salt
Sprinkle the salt over the dough.
Wet your hands slightly and squeeze, fold, and pinch the dough until the salt is evenly incorporated.
The dough will feel sticky at first, but it should become smoother as fermentation progresses.
Step 3: Develop the Dough with Stretch-and-Folds
During the first 2 hours of bulk fermentation, perform 3 to 4 sets of stretch-and-folds at approximately 30-minute intervals.
For each set:
- Gently lift one edge of the dough.
- Stretch it upward without tearing it.
- Fold it over the center.
- Rotate the bowl and repeat on all four sides.
Cover the dough between sets.
By the end, the dough should feel more elastic, hold its shape better, and show signs of trapped air. Stretch-and-folds build strength gradually and gently, which preserves the air bubbles that give baguettes their open, tender crumb.
Step 4: Bulk Ferment
Cover the bowl and leave the dough at a moderate room temperature until it becomes noticeably puffy, smoother, and aerated.
This may take approximately 4 to 6 hours from mixing in a moderately warm kitchen, but cooler temperatures or a slower starter can extend the process.
Rather than relying only on the clock, look for an increase in volume of roughly 40 to 60 percent, bubbles along the sides, and a dough that jiggles slightly when the bowl is moved.
Avoid waiting until the dough has completely doubled if it already looks very airy and fragile. Overfermented dough is slack, hard to shape, and can bake into flat, pale loaves.
Step 5: Divide the Dough
Lightly flour your work surface and gently turn out the dough.
Divide it into 4 equal portions, approximately 240 g each.
Pre-shape each portion into a short log by folding the edges toward the center and gently rolling it into shape.
Cover the pieces with a clean towel and let them rest for 15 to 20 minutes. This relaxes the gluten and makes final shaping easier.
Step 6: Shape the Mini Baguettes
Working with one piece at a time:
- Gently flatten the dough into a small rectangle.
- Fold the top third down toward the center and press lightly to seal.
- Fold the bottom third up over it and seal again.
- Fold the dough lengthwise in half and pinch the seam closed.
- Roll gently from the center outward to create a tapered baguette shape.
Aim for mini baguettes approximately 25 to 30 cm long, depending on the size of your baking tray.
Keep the surface taut without squeezing out all the air. If the dough resists rolling, let it rest for a few minutes before continuing.
Step 7: Final Proof
Place the shaped baguettes seam-side down on a lightly floured couche, clean kitchen towel, or parchment-lined baguette tray.
If using a towel, create folds between the loaves to help them maintain their shape.
Cover loosely and let the baguettes proof for approximately 30 to 60 minutes, until slightly puffy.
To test readiness, gently press the dough with a fingertip. It should spring back slowly rather than immediately snapping back or remaining deeply indented.
For a more pronounced sourdough flavor, you can refrigerate the shaped baguettes overnight instead. Bake them directly from the refrigerator, adjusting the timing if needed.
Step 8: Preheat the Oven
Preheat your oven to 240°C (465°F) for at least 30 minutes.
If using a baking stone or steel, allow it to heat thoroughly.
For a crisp crust, steam during the first part of baking helps the baguettes expand before the crust sets. Use a steam method appropriate for your oven. Never pour water onto oven glass, an exposed heating element, or a hot baking stone unless the manufacturer explicitly allows it.
Step 9: Score the Baguettes
Transfer the baguettes to parchment paper or a suitable baking surface.
Using a sharp bread lame or razor, make 3 to 5 shallow, slightly overlapping diagonal slashes along each loaf.
Hold the blade at a shallow angle rather than cutting straight down. This encourages the classic baguette ear and allows the bread to expand during baking.
Work confidently and avoid pressing down on the dough.
Step 10: Bake Until Golden and Crisp
Bake the baguettes at 240°C (465°F) for approximately 10 minutes with steam, if using a suitable steam setup.
Carefully vent or remove the steam source according to your oven’s instructions, then continue baking for another 10 to 15 minutes until the crust is deep golden brown.
The total baking time is usually 20 to 25 minutes, depending on loaf size and oven performance.
For an extra-crisp crust, turn off the oven and leave the baguettes inside for 3 to 5 minutes with the door slightly ajar, provided this is safe for your oven.
Step 11: Cool Before Slicing
Transfer the baguettes to a wire rack.
Allow them to cool for at least 30 minutes before cutting. This gives the interior time to finish setting and helps preserve the soft, chewy crumb.
Listen for the gentle crackling of the crust as the bread cools. It is one of the simple pleasures of fresh homemade sourdough.
Why Steam Matters for a Crisp Crust
If there is one technique that separates bakery-style baguettes from ordinary homemade bread, it is steam. In the first minutes of baking, a humid oven keeps the surface of the dough soft and flexible. That allows the loaf to keep expanding, which is called oven spring, before the crust hardens. Steam also helps gelatinize the starches on the surface, which later turns into a thin, glossy, crackly crust.
Home bakers have several ways to create steam, and the safest method is the one recommended for your specific oven. Some bakers use a preheated pan on a lower rack, others bake in a covered vessel, and others use a dedicated steam setup. Whatever you choose, follow your oven manufacturer’s guidance. Never pour water onto oven glass, an exposed heating element, or a hot baking stone unless the manufacturer explicitly allows it, because sudden temperature changes can crack glass or damage the oven.
Secrets to Perfect Mini Baguettes
- Use an active starter. A strong starter gives the dough better fermentation and flavor.
- Watch the dough, not just the clock. Temperature and starter activity can dramatically change fermentation time.
- Build strength gradually. Stretch-and-folds help create a dough that holds its shape.
- Shape with a light touch. Preserve some of the air developed during fermentation.
- Do not skip scoring. Proper cuts help the baguettes expand in a controlled way.
- Create steam safely. Early steam helps produce a thinner, crispier crust and better expansion.
- Bake until deeply golden. Pale baguettes often have a softer crust and less developed flavor.
- Cool completely before slicing. Cutting too early can make the crumb gummy.
Troubleshooting Common Baguette Problems
The dough is too sticky to handle. A 70% hydration dough is naturally tacky. Use wet hands during mixing and folding, and a light dusting of flour for shaping. Resist the urge to add a lot of extra flour, which can make the crumb dense.
The baguettes spread flat instead of rising. This usually means the dough was overfermented, underdeveloped, or shaped too loosely. Watch for a 40 to 60 percent increase in volume rather than a full doubling, and keep the surface of each loaf taut when shaping.
The crust is pale or soft. Bake until the crust is deep golden brown, make sure the oven is fully preheated, and use steam safely during the first part of baking.
The crumb is dense. The starter may have been sluggish, or the dough may not have fermented long enough. Make sure the starter is recently fed and bubbly, and give the dough extra time in a cool kitchen.
The scoring did not open. Use a very sharp blade, hold it at a shallow angle, and cut confidently. A dough that is overproofed or too dry on the surface may also resist opening.
The loaves stuck to the towel. Dust the couche or towel generously with rice flour, which does not absorb moisture as readily as wheat flour.
The flavor is too mild. Use the optional overnight cold fermentation, which develops deeper sourdough flavor and gives you a more flexible baking schedule.
Delicious Variations
Sesame Mini Baguettes
Mist the shaped baguettes lightly with water and sprinkle sesame seeds over the surface before baking. Press gently so the seeds adhere.
Garlic Herb Baguettes
Mix 1 teaspoon of dried rosemary or thyme into the dough during the initial mixing. After baking, brush lightly with garlic-infused olive oil.
Whole-Wheat Sourdough Baguettes
Replace 100 g of the bread flour with whole-wheat flour. The flavor will be nuttier, and you may need to adjust the water slightly.
Cheese Mini Baguettes
Fold 60 to 80 g of grated cheese into the dough during an early stretch-and-fold. Keep the pieces small to help the dough hold together.
Seeded Rustic Baguettes
Sprinkle the shaped loaves with poppy seeds, sesame seeds, or a mixture of sunflower and pumpkin seeds before baking.
Extra-Tangy Baguettes
Use the optional overnight cold fermentation to develop a deeper sourdough flavor and make baking day easier.
How to Serve Mini Sourdough Baguettes
These mini baguettes are delicious in many ways:
- Serve warm with butter or extra-virgin olive oil.
- Make small sandwiches with cheese, chicken, tuna, or roasted vegetables.
- Pair with soup, stew, or a fresh salad.
- Slice and serve with hummus, tapenade, or soft cheese.
- Toast slices and top with tomatoes, garlic, and olive oil for bruschetta.
- Use slightly stale baguettes for croutons or homemade breadcrumbs.
The small size makes them ideal for individual portions at dinner parties, picnics, and cheese boards. Because the crust is at its best soon after baking, serve them the day they are made whenever you can.
Storage and Freezing
- Room temperature: Store cooled baguettes in a paper bag or bread box for up to 1 to 2 days. A sealed plastic bag retains softness but softens the crust.
- Re-crisping: Warm in a 180°C (350°F) oven for approximately 5 to 8 minutes.
- Freezing: Freeze completely cooled baguettes in an airtight freezer bag for up to 3 months for best quality.
- Reheating from frozen: Bake at 180°C (350°F) until warmed through and the crust becomes crisp again.
Avoid refrigerating the baguettes, as refrigeration can make bread stale faster.
Nutrition Information
Approximate nutrition per mini baguette, assuming four equal loaves:
- Calories: 500 to 550 kcal
- Protein: 15 to 18 g
- Carbohydrates: 100 to 110 g
- Fat: 2 to 4 g
- Fiber: 3 to 5 g
These values are estimates and will vary with the flour used and the final loaf size. One mini baguette can provide several servings, depending on how you plan to eat it.
Frequently Asked Questions
Can I make these baguettes without a baking stone?
Yes. A parchment-lined baking tray works, though a preheated stone or steel retains heat and can improve oven spring and crust color.
How do I know if my starter is active enough?
It should be recently fed, show bubbles, and have risen noticeably after feeding. A sluggish starter will lead to slow fermentation and denser loaves.
Do I have to use the overnight cold fermentation?
No, it is optional but recommended. Cold fermentation develops a deeper, tangier flavor and makes baking day more flexible. You can bake the shaped baguettes directly from the refrigerator, adjusting the timing if needed.
Can I use all-purpose flour instead of bread flour?
Bread flour is recommended because its higher protein content gives better structure and chew. All-purpose flour can work, but the dough may be softer and the crumb slightly less chewy, so you may want to reduce the water a little.
What if I do not have a couche?
A clean, well-floured kitchen towel works well. Create folds between the loaves to help them keep their shape, or use a parchment-lined baguette tray.
How do I score the baguettes properly?
Use a sharp bread lame or razor and make 3 to 5 shallow, slightly overlapping diagonal slashes. Hold the blade at a shallow angle rather than cutting straight down, and avoid pressing on the dough.
How can I create steam safely?
Use a steam method appropriate for your oven. Never pour water onto oven glass, an exposed heating element, or a hot baking stone unless the manufacturer explicitly allows it.
Why did my baguettes come out pale?
Pale baguettes are usually underbaked. Bake until the crust is deep golden brown, and make sure your oven was fully preheated.
Can I freeze sourdough mini baguettes?
Yes. Freeze completely cooled baguettes in an airtight freezer bag for up to 3 months, then reheat from frozen in a 180°C (350°F) oven until warmed through and crisp.
Why shouldn’t I refrigerate baked baguettes?
Refrigeration can make bread stale faster. Store baked baguettes in a paper bag or bread box for a day or two, or freeze them for longer storage.
Final Thoughts
These sourdough mini baguettes bring together everything we love about artisan bread: a crackly crust, a chewy interior, beautiful scoring, and the unmistakable flavor of naturally fermented dough. They take patience, but the process is rewarding, and the loaves are versatile enough for breakfast, lunch, dinner, or sharing with friends.
Golden, rustic, crisp on the outside, and soft and chewy inside, your homemade mini baguettes are ready to enjoy.
Bake a batch this weekend, try the overnight cold ferment for extra flavor, and see how much better a baguette tastes when you made it yourself.
Print
Sourdough Mini Baguettes – Crispy Crust & Soft, Chewy Center
Ingredients
- 500 g bread flour
- 350 g water, room temperature (70% hydration)
- 100 g active sourdough starter (100% hydration)
- 10 g salt
- Rice flour or bread flour, for dusting
- Extra water for creating steam in the oven, if using a suitable steam-safe setup
Important: Use a lively, recently fed starter that shows bubbles and has risen noticeably after feeding. The fermentation time will depend on your starter’s strength and your kitchen temperature.
A Closer Look at the Key Ingredients
Bread flour. Bread flour has a higher protein content than all-purpose flour, which means it forms more gluten. That gluten network gives baguettes their structure and chew, and it helps the dough trap the gas produced during fermentation.
Water. At 350 g of water to 500 g of flour, this dough is at 70% hydration, a comfortable level for beginners that still produces a soft, open crumb. The dough will feel sticky at first but becomes smoother as it ferments and is folded.
Active sourdough starter. The starter provides both the leavening and the flavor. A starter at 100% hydration contains equal weights of flour and water. It should be recently fed, bubbly, and visibly risen. A sluggish starter will make the dough ferment slowly and can lead to dense loaves.
Salt. Salt flavors the bread, strengthens the dough, and controls the speed of fermentation. At 10 g for 500 g of flour, it gives well-seasoned bread without overpowering the sourdough tang.
Rice flour or bread flour for dusting. Rice flour is especially good for dusting because it does not absorb moisture as readily as wheat flour, which helps prevent sticking on towels and couches.
Instructions
Step 1: Mix the Dough
In a large mixing bowl, combine the water and active sourdough starter. Stir until the starter is mostly dispersed.
Add the bread flour and mix with your hands or a sturdy spoon until no dry flour remains.
Cover the bowl and let the dough rest for 30 minutes. This rest helps the flour absorb the water and makes the dough easier to handle.
Step 2: Add the Salt
Sprinkle the salt over the dough.
Wet your hands slightly and squeeze, fold, and pinch the dough until the salt is evenly incorporated.
The dough will feel sticky at first, but it should become smoother as fermentation progresses.
Step 3: Develop the Dough with Stretch-and-Folds
During the first 2 hours of bulk fermentation, perform 3 to 4 sets of stretch-and-folds at approximately 30-minute intervals.
For each set:
- Gently lift one edge of the dough.
- Stretch it upward without tearing it.
- Fold it over the center.
- Rotate the bowl and repeat on all four sides.
Cover the dough between sets.
By the end, the dough should feel more elastic, hold its shape better, and show signs of trapped air. Stretch-and-folds build strength gradually and gently, which preserves the air bubbles that give baguettes their open, tender crumb.
Step 4: Bulk Ferment
Cover the bowl and leave the dough at a moderate room temperature until it becomes noticeably puffy, smoother, and aerated.
This may take approximately 4 to 6 hours from mixing in a moderately warm kitchen, but cooler temperatures or a slower starter can extend the process.
Rather than relying only on the clock, look for an increase in volume of roughly 40 to 60 percent, bubbles along the sides, and a dough that jiggles slightly when the bowl is moved.
Avoid waiting until the dough has completely doubled if it already looks very airy and fragile. Overfermented dough is slack, hard to shape, and can bake into flat, pale loaves.
Step 5: Divide the Dough
Lightly flour your work surface and gently turn out the dough.
Divide it into 4 equal portions, approximately 240 g each.
Pre-shape each portion into a short log by folding the edges toward the center and gently rolling it into shape.
Cover the pieces with a clean towel and let them rest for 15 to 20 minutes. This relaxes the gluten and makes final shaping easier.
Step 6: Shape the Mini Baguettes
Working with one piece at a time:
- Gently flatten the dough into a small rectangle.
- Fold the top third down toward the center and press lightly to seal.
- Fold the bottom third up over it and seal again.
- Fold the dough lengthwise in half and pinch the seam closed.
- Roll gently from the center outward to create a tapered baguette shape.
Aim for mini baguettes approximately 25 to 30 cm long, depending on the size of your baking tray.
Keep the surface taut without squeezing out all the air. If the dough resists rolling, let it rest for a few minutes before continuing.
Step 7: Final Proof
Place the shaped baguettes seam-side down on a lightly floured couche, clean kitchen towel, or parchment-lined baguette tray.
If using a towel, create folds between the loaves to help them maintain their shape.
Cover loosely and let the baguettes proof for approximately 30 to 60 minutes, until slightly puffy.
To test readiness, gently press the dough with a fingertip. It should spring back slowly rather than immediately snapping back or remaining deeply indented.
For a more pronounced sourdough flavor, you can refrigerate the shaped baguettes overnight instead. Bake them directly from the refrigerator, adjusting the timing if needed.
Step 8: Preheat the Oven
Preheat your oven to 240°C (465°F) for at least 30 minutes.
If using a baking stone or steel, allow it to heat thoroughly.
For a crisp crust, steam during the first part of baking helps the baguettes expand before the crust sets. Use a steam method appropriate for your oven. Never pour water onto oven glass, an exposed heating element, or a hot baking stone unless the manufacturer explicitly allows it.
Step 9: Score the Baguettes
Transfer the baguettes to parchment paper or a suitable baking surface.
Using a sharp bread lame or razor, make 3 to 5 shallow, slightly overlapping diagonal slashes along each loaf.
Hold the blade at a shallow angle rather than cutting straight down. This encourages the classic baguette ear and allows the bread to expand during baking.
Work confidently and avoid pressing down on the dough.
Step 10: Bake Until Golden and Crisp
Bake the baguettes at 240°C (465°F) for approximately 10 minutes with steam, if using a suitable steam setup.
Carefully vent or remove the steam source according to your oven’s instructions, then continue baking for another 10 to 15 minutes until the crust is deep golden brown.
The total baking time is usually 20 to 25 minutes, depending on loaf size and oven performance.
For an extra-crisp crust, turn off the oven and leave the baguettes inside for 3 to 5 minutes with the door slightly ajar, provided this is safe for your oven.
Step 11: Cool Before Slicing
Transfer the baguettes to a wire rack.
Allow them to cool for at least 30 minutes before cutting. This gives the interior time to finish setting and helps preserve the soft, chewy crumb.
Listen for the gentle crackling of the crust as the bread cools. It is one of the simple pleasures of fresh homemade sourdough.