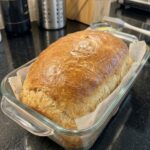
Ingredients
Here’s everything you need for one loaf, about 10 to 12 slices:
- 3 cups (375 g) all-purpose flour or bread flour
- 1 cup (240 ml) buttermilk, lukewarm
- 2¼ tsp (7 g) instant yeast
- 2 tbsp (25 g) granulated sugar or honey
- 1 tsp (6 g) salt
- 3 tbsp (42 g) unsalted butter, melted and slightly cooled
- 1 large egg, room temperature (optional, for a richer loaf)
- 1–2 tbsp melted butter, for brushing the top after baking (optional)
A Closer Look at the Ingredients
Flour. All-purpose flour and bread flour both work. All-purpose gives a slightly softer, more tender slice. Bread flour has more protein, so it can give a bit more structure and chew. Either way, measure carefully. Too much flour is the most common reason homemade bread turns out dry and dense. If you have a kitchen scale, weigh the flour (375 g). If you’re using measuring cups, spoon the flour into the cup and level it off instead of scooping straight from the bag.
Buttermilk. It should be lukewarm, meaning slightly warm to the touch but never hot. Excessive heat can damage the yeast and prevent the bread from rising properly. If your buttermilk is cold from the fridge, warm it gently until it feels just slightly warm.
Instant yeast. Instant yeast is the easiest choice for this recipe because it can be mixed straight into the liquid or even the flour. The recipe calls for 2¼ teaspoons, which is the amount in a standard packet.
Sugar or honey. A small amount of sweetener feeds the yeast and adds a touch of flavor. Granulated sugar keeps things neutral, while honey adds a subtle warmth.
Salt. Salt balances the flavor and helps the bread taste like bread instead of sweet dough. Don’t skip it.
Melted butter. Butter gives the loaf its rich flavor and tender crumb. Let it cool slightly before adding it. Very hot butter can affect the yeast and the dough’s texture.
Egg (optional). Adding an egg creates a slightly richer, more tender loaf. If you leave it out, the bread is still delicious.
Instructions
Pour the lukewarm buttermilk into a large mixing bowl. Add the instant yeast and sugar, then stir gently to combine. Let the mixture sit for about 3 to 5 minutes. Instant yeast can be mixed directly with the flour, so this rest is optional, but it helps distribute the ingredients evenly.
Add the melted butter and the optional egg, then whisk until the mixture is well combined.
Add the flour and salt to the buttermilk mixture. Using a sturdy spoon or spatula, stir until all the flour is incorporated and no dry patches remain. The dough will be soft, sticky, and somewhat shaggy.
There’s no need to knead. Simply mix until everything is evenly combined. If the dough seems sticky, resist the temptation to add too much extra flour, because moisture is what helps create a tender loaf.
Cover the bowl with plastic wrap or a clean kitchen towel. Place it in a warm, draft-free spot and let the dough rise for about 60 to 90 minutes, or until it has noticeably increased in size and looks puffy.
The exact time depends on your kitchen temperature and the activity of your yeast. A cooler room may need extra time, so judge by how the dough looks rather than by the clock alone.
Lightly grease a 9 × 5-inch loaf pan with butter or cooking spray. If you like, line the pan with parchment paper, leaving a little overhang on the sides to make lifting the bread out easier. Make sure the bottom and corners are well coated so the loaf doesn’t stick.
Once the dough has risen, gently stir it with a lightly greased spatula to release some of the larger air pockets. Transfer it to the prepared pan and spread it evenly into the corners. Smooth the top with lightly greased fingers or the back of a spoon. The dough should fill the pan loosely, leaving room for the second rise.
Cover the pan loosely with a clean kitchen towel or plastic wrap. Let the dough rise for another 30 to 45 minutes, or until it looks puffy and has risen close to the top of the pan.
While it rises, preheat your oven to 350°F (175°C). Avoid letting the dough overproof. If it rises too much, the loaf may collapse during baking or develop a weaker structure.
Place the loaf pan on the center rack of the preheated oven. Bake for about 30 to 40 minutes, until the top is golden brown and the loaf is cooked through.
If the top browns too quickly, loosely cover it with aluminum foil for the final part of baking. The loaf should feel set, and the center should not look wet or doughy. If you’re using a kitchen thermometer, the internal temperature should be around 190–200°F (88–93°C) when fully baked.
Remove the bread from the oven and let it rest in the pan for 5 to 10 minutes. If you like, brush the warm top with melted butter for a softer crust and richer flavor. Then carefully remove the loaf from the pan and transfer it to a wire rack.
Allow the bread to cool for at least 45 to 60 minutes before slicing. This is the hardest step, but it matters. Use a sharp serrated knife to cut even slices. The inside should be soft and fluffy, with a delicate buttermilk tang and a buttery aroma.