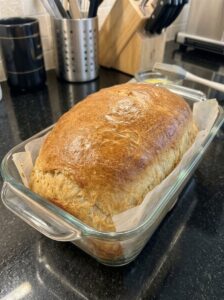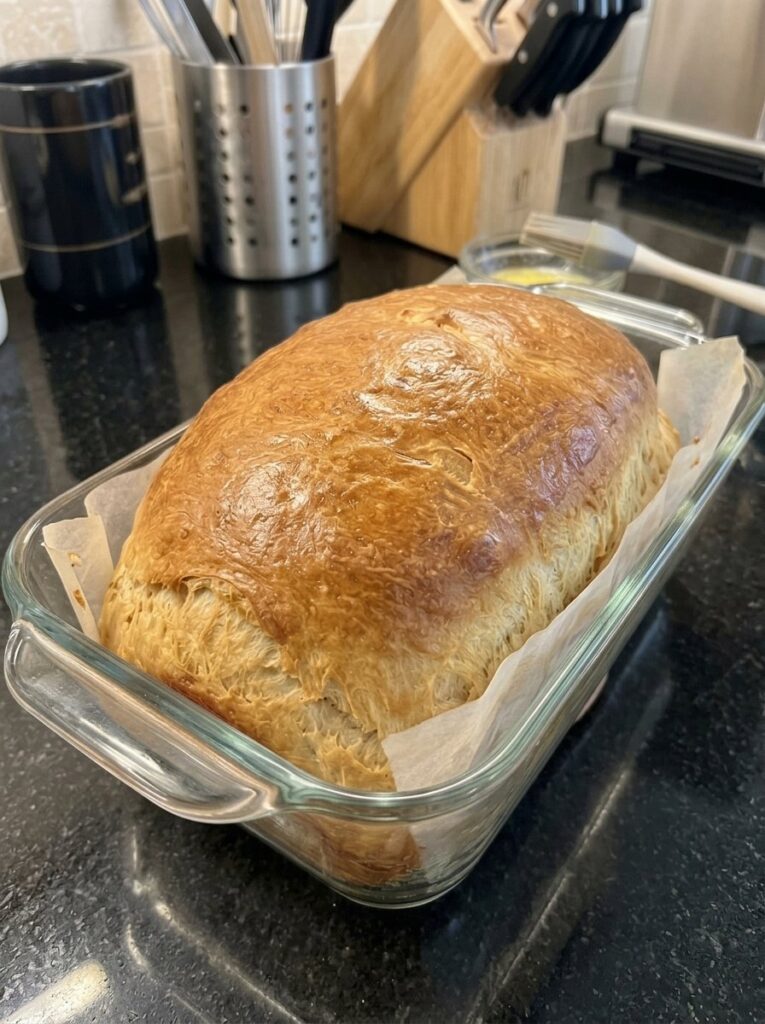
Easy No-Knead Buttermilk Sandwich Bread: Soft, Tender and Made Without Kneading
Nothing beats the taste of fresh, homemade sandwich bread, especially when you can make it without kneading. This no-knead buttermilk sandwich bread bakes up soft and tender, with a delicate tang from the buttermilk and a rich, buttery flavor in every slice. You don’t need a stand mixer, a bread machine, or any experience. All you need is a bowl, a spoon, and a little patience while the dough rises.
If you’ve ever been intimidated by yeast bread, this recipe is for you. Whether you’re making peanut butter sandwiches for school lunches, thick slices of toast for breakfast, or the meltiest grilled cheese of your life, this loaf delivers.
In this guide, you’ll find the full recipe, an explanation of why each ingredient matters, step-by-step instructions, troubleshooting help, serving ideas, storage tips, and answers to the most common questions about no-knead bread.
Why You’ll Love This No-Knead Buttermilk Bread
Plenty of homemade bread recipes exist, but this one stands out for several reasons:
- No kneading required. You stir the dough together with a spoon or spatula. There’s no dough hook, no floured countertop, and no sore arms.
- Soft, fluffy texture. The buttermilk and melted butter create a tender crumb that’s perfect for sandwiches and toast.
- A gentle tang. Buttermilk adds a subtle tangy flavor that makes the bread taste richer and more interesting than a plain white loaf.
- Beginner friendly. The dough is forgiving, and the instructions are simple.
- Pantry-friendly ingredients. Flour, buttermilk, yeast, sugar, salt, and butter are the core of the recipe, and the egg is optional.
- Versatile. It works for breakfast, lunch, dinner, and snacks.
- Freezer friendly. Slice the loaf, freeze it, and toast a slice whenever you want fresh-tasting bread.
What Is No-Knead Bread?
Traditional bread dough is kneaded to develop gluten, the protein network that gives bread its structure and chew. No-knead bread takes a different approach. By using a wetter, stickier dough and giving it time to rise, the flour absorbs the liquid and the dough develops structure with very little effort from you.
For this recipe, the result is a soft, sandwich-style loaf rather than a rustic, chewy artisan bread. The dough is mixed in one bowl, risen once in the bowl, then transferred to a loaf pan for a second rise before baking. That’s the whole process.
Why Buttermilk Makes Better Sandwich Bread
Buttermilk is one of the best ingredients for tender homemade bread. It contributes in a few ways:
- Flavor. It adds a mild tang that balances the richness of the butter.
- Tenderness. The acidity helps produce a softer, more delicate crumb.
- Moisture. Buttermilk keeps the dough hydrated, which matters in a no-knead recipe where the dough is intentionally soft and sticky.
The result is a loaf that tastes bakery-fresh, with a flavor that’s slightly more complex than bread made with plain water or regular milk.
Ingredients for No-Knead Buttermilk Sandwich Bread
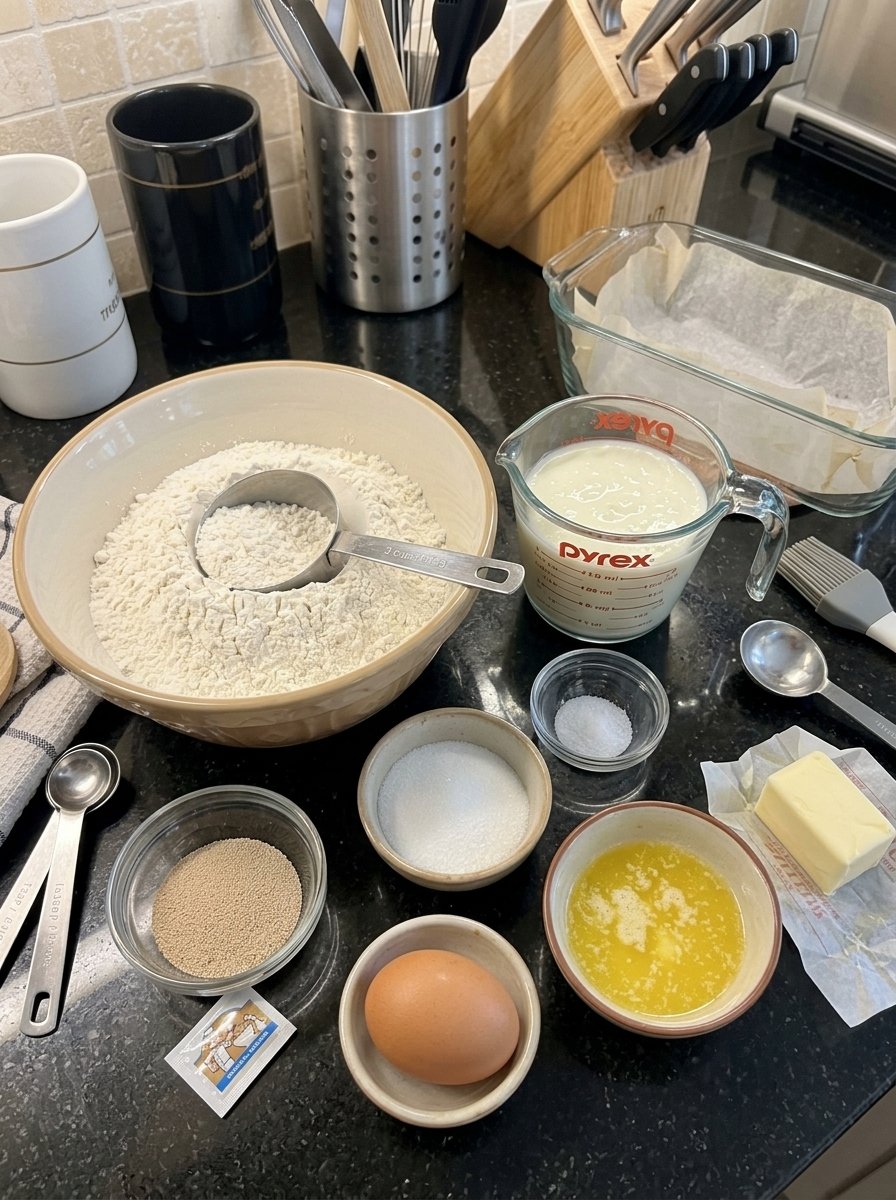
Here’s everything you need for one loaf, about 10 to 12 slices:
- 3 cups (375 g) all-purpose flour or bread flour
- 1 cup (240 ml) buttermilk, lukewarm
- 2¼ tsp (7 g) instant yeast
- 2 tbsp (25 g) granulated sugar or honey
- 1 tsp (6 g) salt
- 3 tbsp (42 g) unsalted butter, melted and slightly cooled
- 1 large egg, room temperature (optional, for a richer loaf)
- 1–2 tbsp melted butter, for brushing the top after baking (optional)
A Closer Look at the Ingredients
Flour. All-purpose flour and bread flour both work. All-purpose gives a slightly softer, more tender slice. Bread flour has more protein, so it can give a bit more structure and chew. Either way, measure carefully. Too much flour is the most common reason homemade bread turns out dry and dense. If you have a kitchen scale, weigh the flour (375 g). If you’re using measuring cups, spoon the flour into the cup and level it off instead of scooping straight from the bag.
Buttermilk. It should be lukewarm, meaning slightly warm to the touch but never hot. Excessive heat can damage the yeast and prevent the bread from rising properly. If your buttermilk is cold from the fridge, warm it gently until it feels just slightly warm.
Instant yeast. Instant yeast is the easiest choice for this recipe because it can be mixed straight into the liquid or even the flour. The recipe calls for 2¼ teaspoons, which is the amount in a standard packet.
Sugar or honey. A small amount of sweetener feeds the yeast and adds a touch of flavor. Granulated sugar keeps things neutral, while honey adds a subtle warmth.
Salt. Salt balances the flavor and helps the bread taste like bread instead of sweet dough. Don’t skip it.
Melted butter. Butter gives the loaf its rich flavor and tender crumb. Let it cool slightly before adding it. Very hot butter can affect the yeast and the dough’s texture.
Egg (optional). Adding an egg creates a slightly richer, more tender loaf. If you leave it out, the bread is still delicious.
Tips for the Best Buttermilk Sandwich Bread
A few small habits make a big difference:
- Use lukewarm buttermilk. Warm enough to wake up the yeast, never hot enough to harm it.
- Measure the flour carefully. Weigh it if you can, or spoon and level.
- Keep the dough soft. No-knead dough should be sticky and moist. Don’t add lots of extra flour just because the dough feels softer than traditional kneaded dough.
- Let the butter cool slightly. Hot butter can hurt the yeast.
- Allow enough rising time. The dough should look noticeably larger and puffy before baking. Rising time depends on your kitchen temperature.
- Choose the right pan. A 9 × 5-inch loaf pan gives the bread room to rise.
- Brush with butter after baking. It creates a soft, flavorful crust and a beautiful finish.
- Let the bread cool before slicing. Cutting too soon can compress the soft interior and make the slices gummy.
How to Make No-Knead Buttermilk Sandwich Bread (Step by Step)
Step 1: Prepare the Buttermilk Mixture
Pour the lukewarm buttermilk into a large mixing bowl. Add the instant yeast and sugar, then stir gently to combine. Let the mixture sit for about 3 to 5 minutes. Instant yeast can be mixed directly with the flour, so this rest is optional, but it helps distribute the ingredients evenly.
Add the melted butter and the optional egg, then whisk until the mixture is well combined.
Step 2: Add the Dry Ingredients
Add the flour and salt to the buttermilk mixture. Using a sturdy spoon or spatula, stir until all the flour is incorporated and no dry patches remain. The dough will be soft, sticky, and somewhat shaggy.
There’s no need to knead. Simply mix until everything is evenly combined. If the dough seems sticky, resist the temptation to add too much extra flour, because moisture is what helps create a tender loaf.
Step 3: Let the Dough Rise
Cover the bowl with plastic wrap or a clean kitchen towel. Place it in a warm, draft-free spot and let the dough rise for about 60 to 90 minutes, or until it has noticeably increased in size and looks puffy.
The exact time depends on your kitchen temperature and the activity of your yeast. A cooler room may need extra time, so judge by how the dough looks rather than by the clock alone.
Step 4: Prepare the Loaf Pan
Lightly grease a 9 × 5-inch loaf pan with butter or cooking spray. If you like, line the pan with parchment paper, leaving a little overhang on the sides to make lifting the bread out easier. Make sure the bottom and corners are well coated so the loaf doesn’t stick.
Step 5: Transfer the Dough to the Pan
Once the dough has risen, gently stir it with a lightly greased spatula to release some of the larger air pockets. Transfer it to the prepared pan and spread it evenly into the corners. Smooth the top with lightly greased fingers or the back of a spoon. The dough should fill the pan loosely, leaving room for the second rise.
Step 6: Allow the Second Rise
Cover the pan loosely with a clean kitchen towel or plastic wrap. Let the dough rise for another 30 to 45 minutes, or until it looks puffy and has risen close to the top of the pan.
While it rises, preheat your oven to 350°F (175°C). Avoid letting the dough overproof. If it rises too much, the loaf may collapse during baking or develop a weaker structure.
Step 7: Bake Until Golden
Place the loaf pan on the center rack of the preheated oven. Bake for about 30 to 40 minutes, until the top is golden brown and the loaf is cooked through.
If the top browns too quickly, loosely cover it with aluminum foil for the final part of baking. The loaf should feel set, and the center should not look wet or doughy. If you’re using a kitchen thermometer, the internal temperature should be around 190–200°F (88–93°C) when fully baked.
Step 8: Brush with Butter
Remove the bread from the oven and let it rest in the pan for 5 to 10 minutes. If you like, brush the warm top with melted butter for a softer crust and richer flavor. Then carefully remove the loaf from the pan and transfer it to a wire rack.
Step 9: Cool, Slice, and Enjoy
Allow the bread to cool for at least 45 to 60 minutes before slicing. This is the hardest step, but it matters. Use a sharp serrated knife to cut even slices. The inside should be soft and fluffy, with a delicate buttermilk tang and a buttery aroma.
Recipe Timing at a Glance
- Prep time: About 15 minutes
- First rise: 60–90 minutes
- Second rise: 30–45 minutes
- Baking time: 30–40 minutes
- Cooling time: 45–60 minutes
- Total time: About 3 hours to 4 hours 10 minutes
- Yield: 1 loaf, approximately 10–12 slices
Most of that time is hands-off. You’ll spend only a few active minutes mixing and shaping, and the rest is waiting while the yeast does the work.
Troubleshooting: Common No-Knead Bread Problems
Even simple recipes can go sideways. Here’s how to fix the most common issues.
My dough didn’t rise.
The most likely causes are yeast that is old or inactive, buttermilk that was too hot or too cold, or a room that is too cool. Make sure your yeast is fresh and your buttermilk is only lukewarm. If your kitchen is chilly, give the dough extra time in a warm, draft-free spot.
My bread is dense.
Too much flour is the usual culprit. Weigh your flour or use the spoon-and-level method. Also make sure the dough has risen enough before baking. It should look noticeably larger and puffy.
The dough is too sticky to handle.
That’s normal. No-knead dough is meant to be soft, sticky, and shaggy. Use a spatula and lightly greased fingers instead of adding more flour, which can make the loaf dry.
The loaf collapsed or looks sunken.
This can happen when the dough overproofs during the second rise. Keep an eye on it and bake once it’s puffy and close to the top of the pan, rather than letting it rise far past that point.
The top browned too fast.
Loosely cover the loaf with aluminum foil during the final part of baking. Ovens vary, so you may need to adjust.
The slices are gummy.
You probably cut the bread too soon. Let it cool for at least 45 to 60 minutes so the interior can set.
The crust is damp.
Never seal the bread in a bag or container while it’s still warm. Trapped steam softens the crust and makes it damp.
Easy Variations and Substitutions
This recipe is simple, but it’s also flexible.
- Honey instead of sugar. Swap the granulated sugar for honey for a slightly different flavor.
- Add the egg. For a richer, more tender loaf, include the optional egg.
- Bread flour. Use bread flour instead of all-purpose for a bit more structure.
- Buttery top. Brush the baked loaf with melted butter while it’s still warm for an extra-soft crust.
- Buttermilk substitute. If you don’t have buttermilk, you can make a stand-in by stirring a tablespoon of lemon juice or white vinegar into a cup of milk and letting it sit for a few minutes. Real buttermilk gives the best flavor, but this works in a pinch.
If you try other add-ins like herbs, cheese, or seeds, start small so you don’t change the dough’s moisture balance too much.
What to Serve with Buttermilk Sandwich Bread
This loaf is a true all-rounder. Try it in any of these ways:
- Classic buttered toast: Toast a slice and spread with butter while it’s warm.
- Peanut butter sandwiches: Pair with peanut butter, banana, or your favorite jam.
- Grilled cheese: Use thick slices with cheddar, mozzarella, or any melting cheese you love.
- Breakfast toast: Serve with eggs, avocado, or cream cheese.
- Sweet treats: Spread with honey, cinnamon butter, or fruit preserves.
- Lunch sandwiches: Fill with turkey, chicken, cheese, lettuce, and tomato.
- Fresh from the loaf: Once it’s cool enough to cut, enjoy a slice with a generous spread of butter.
How to Store Homemade Sandwich Bread
Homemade bread has no preservatives, so storage matters.
- Room temperature: Once the loaf is completely cooled, store it in an airtight container or bread bag for up to 3 days.
- Refrigerator: Refrigeration can make homemade bread go stale more quickly, so room-temperature storage is better if you’ll eat it within a few days.
- Freezer: Slice the cooled loaf and freeze the slices in a sealed, freezer-safe bag for up to 2 to 3 months. Place parchment paper between slices if needed.
- Reheating: Toast slices straight from the freezer, or warm them in a 300°F (150°C) oven for about 5 to 8 minutes.
- Keep it fresh: Never seal the bread while it’s still warm, because trapped steam can make the crust damp.
Slicing before freezing is a great habit. You can pull out exactly what you need and have fresh-tasting bread any day of the week.
Frequently Asked Questions
Can I really make sandwich bread without kneading?
Yes. This dough relies on a soft, moist consistency and rising time instead of kneading. You simply stir the ingredients together until no dry flour remains.
Can I use all-purpose flour instead of bread flour?
Absolutely. Both work in this recipe. All-purpose flour gives a tender loaf, while bread flour offers slightly more structure.
Do I need to proof the yeast first?
With instant yeast, you don’t have to. It can be mixed straight into the flour. The brief 3 to 5 minute rest in the buttermilk in this recipe is optional, but it helps distribute the ingredients evenly.
Why does the dough look so sticky?
No-knead dough is meant to be sticky and shaggy. The extra moisture is what creates a tender loaf. Avoid adding lots of extra flour.
How do I know when the dough has risen enough?
Look at the dough instead of relying on the clock. It should be noticeably larger and puffy. For the second rise, it should have risen close to the top of the pan.
How do I know when the bread is done baking?
The top should be golden brown, the loaf should feel set, and the center shouldn’t look wet or doughy. With a thermometer, look for an internal temperature of about 190–200°F (88–93°C).
What size loaf pan should I use?
A 9 × 5-inch loaf pan works well and gives the bread room to rise.
Can I leave out the egg?
Yes. The egg is optional and makes the loaf slightly richer. The bread is still soft and delicious without it.
How long does the bread stay fresh?
Stored in an airtight container or bread bag at room temperature, it keeps for up to 3 days. For longer storage, slice and freeze it for 2 to 3 months.
Why should I wait for the bread to cool before slicing?
Slicing too early can compress the soft interior and make the slices gummy. Waiting 45 to 60 minutes lets the crumb set properly.
Final Thoughts
Homemade bread doesn’t need to be complicated. With a bowl, a spoon, and a few simple ingredients, you can bake a soft, buttery loaf with a gentle buttermilk tang that’s ready for toast, sandwiches, and everything in between. This easy no-knead buttermilk sandwich bread proves that great bread comes from good ingredients, a little time, and a few careful habits: measure the flour well, keep the dough soft, don’t let it overproof, and let the loaf cool before slicing.
Print
Easy No-Knead Buttermilk Sandwich Bread
Ingredients
Here’s everything you need for one loaf, about 10 to 12 slices:
- 3 cups (375 g) all-purpose flour or bread flour
- 1 cup (240 ml) buttermilk, lukewarm
- 2¼ tsp (7 g) instant yeast
- 2 tbsp (25 g) granulated sugar or honey
- 1 tsp (6 g) salt
- 3 tbsp (42 g) unsalted butter, melted and slightly cooled
- 1 large egg, room temperature (optional, for a richer loaf)
- 1–2 tbsp melted butter, for brushing the top after baking (optional)
A Closer Look at the Ingredients
Flour. All-purpose flour and bread flour both work. All-purpose gives a slightly softer, more tender slice. Bread flour has more protein, so it can give a bit more structure and chew. Either way, measure carefully. Too much flour is the most common reason homemade bread turns out dry and dense. If you have a kitchen scale, weigh the flour (375 g). If you’re using measuring cups, spoon the flour into the cup and level it off instead of scooping straight from the bag.
Buttermilk. It should be lukewarm, meaning slightly warm to the touch but never hot. Excessive heat can damage the yeast and prevent the bread from rising properly. If your buttermilk is cold from the fridge, warm it gently until it feels just slightly warm.
Instant yeast. Instant yeast is the easiest choice for this recipe because it can be mixed straight into the liquid or even the flour. The recipe calls for 2¼ teaspoons, which is the amount in a standard packet.
Sugar or honey. A small amount of sweetener feeds the yeast and adds a touch of flavor. Granulated sugar keeps things neutral, while honey adds a subtle warmth.
Salt. Salt balances the flavor and helps the bread taste like bread instead of sweet dough. Don’t skip it.
Melted butter. Butter gives the loaf its rich flavor and tender crumb. Let it cool slightly before adding it. Very hot butter can affect the yeast and the dough’s texture.
Egg (optional). Adding an egg creates a slightly richer, more tender loaf. If you leave it out, the bread is still delicious.
Instructions
Pour the lukewarm buttermilk into a large mixing bowl. Add the instant yeast and sugar, then stir gently to combine. Let the mixture sit for about 3 to 5 minutes. Instant yeast can be mixed directly with the flour, so this rest is optional, but it helps distribute the ingredients evenly.
Add the melted butter and the optional egg, then whisk until the mixture is well combined.
Add the flour and salt to the buttermilk mixture. Using a sturdy spoon or spatula, stir until all the flour is incorporated and no dry patches remain. The dough will be soft, sticky, and somewhat shaggy.
There’s no need to knead. Simply mix until everything is evenly combined. If the dough seems sticky, resist the temptation to add too much extra flour, because moisture is what helps create a tender loaf.
Cover the bowl with plastic wrap or a clean kitchen towel. Place it in a warm, draft-free spot and let the dough rise for about 60 to 90 minutes, or until it has noticeably increased in size and looks puffy.
The exact time depends on your kitchen temperature and the activity of your yeast. A cooler room may need extra time, so judge by how the dough looks rather than by the clock alone.
Lightly grease a 9 × 5-inch loaf pan with butter or cooking spray. If you like, line the pan with parchment paper, leaving a little overhang on the sides to make lifting the bread out easier. Make sure the bottom and corners are well coated so the loaf doesn’t stick.
Once the dough has risen, gently stir it with a lightly greased spatula to release some of the larger air pockets. Transfer it to the prepared pan and spread it evenly into the corners. Smooth the top with lightly greased fingers or the back of a spoon. The dough should fill the pan loosely, leaving room for the second rise.
Cover the pan loosely with a clean kitchen towel or plastic wrap. Let the dough rise for another 30 to 45 minutes, or until it looks puffy and has risen close to the top of the pan.
While it rises, preheat your oven to 350°F (175°C). Avoid letting the dough overproof. If it rises too much, the loaf may collapse during baking or develop a weaker structure.
Place the loaf pan on the center rack of the preheated oven. Bake for about 30 to 40 minutes, until the top is golden brown and the loaf is cooked through.
If the top browns too quickly, loosely cover it with aluminum foil for the final part of baking. The loaf should feel set, and the center should not look wet or doughy. If you’re using a kitchen thermometer, the internal temperature should be around 190–200°F (88–93°C) when fully baked.
Remove the bread from the oven and let it rest in the pan for 5 to 10 minutes. If you like, brush the warm top with melted butter for a softer crust and richer flavor. Then carefully remove the loaf from the pan and transfer it to a wire rack.
Allow the bread to cool for at least 45 to 60 minutes before slicing. This is the hardest step, but it matters. Use a sharp serrated knife to cut even slices. The inside should be soft and fluffy, with a delicate buttermilk tang and a buttery aroma.