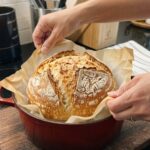
Ingredients
The ingredient list is short, so each item matters. Here is what you need and why it is there.
- 3 cups (375 g) all-purpose flour. All-purpose flour is the structure of the loaf. It has enough protein to form a chewy crumb while staying tender enough for sandwich slices. Weighing the flour with a kitchen scale is the most reliable way to get consistent results.
- 1½ cups (360 ml) lukewarm water. This is a high-hydration dough, which is why the crumb turns out soft and airy. The water should feel barely warm to the touch, not hot. Hot water can damage the yeast.
- 1 teaspoon (3 g) instant yeast. A small amount of yeast is enough because the rise is long. Instant yeast can be stirred straight into the water without proofing.
- 1½ teaspoons (9 g) salt. Salt seasons the bread, strengthens the dough and helps control fermentation. Do not skip it, or the loaf will taste flat.
Equipment You Will Need
The tools are simple, but a few of them make a real difference.
- A large mixing bowl and a wooden spoon or spatula
- Plastic wrap or a lid to cover the bowl
- A dough scraper (helpful but optional)
- Parchment paper
- A Dutch oven with a lid, preferably 5 to 6 quarts
- A sharp bread lame or razor blade for scoring
- A wire cooling rack
- A serrated bread knife
- An instant-read thermometer (optional but useful for checking doneness)
Instructions
Pour the lukewarm water into a large bowl and add the instant yeast. Stir briefly so the yeast spreads through the water. Add the flour and salt, then mix with a wooden spoon or spatula until every bit of flour is absorbed and you have a rough, sticky dough.
There is no need to knead. Just check that there are no dry pockets of flour hiding at the bottom of the bowl. Cover the bowl tightly with plastic wrap or a lid so the surface does not dry out.
For the best flavor, place the covered bowl in the refrigerator for 8 to 12 hours. During this time the dough slowly ferments, develops flavor and fills with bubbles. By morning it should look airy, with bubbles visible across the surface.
If you want bread on the same day, let the dough rise at room temperature for about 1½ to 3 hours instead, until it is noticeably expanded and bubbly. The loaf will still be good, but the overnight version has deeper flavor and a more interesting crumb.
Lightly flour your work surface and gently turn the dough out of the bowl. With floured hands or a dough scraper, fold the edges toward the center several times until you have a rough ball. Flip the dough seam-side down and gently drag it toward you to tighten the surface.
Be gentle. You want to keep the air bubbles that formed during fermentation, so avoid heavy pressing or kneading. Place the dough seam-side down on a sheet of parchment paper, cover it loosely with a clean kitchen towel and let it rest for 30 to 60 minutes, until slightly puffy.
Place the Dutch oven, with its lid on, in the oven and preheat to 230°C (450°F). Give it about 30 minutes to heat thoroughly. A very hot pot is what gives the loaf quick oven spring and a crisp crust.
Safety matters here. Use sturdy oven mitts when handling the hot pot, and trim the parchment paper so it does not hang out near the heating elements.
Once the dough has rested, dust the top lightly with flour for a rustic look. Using a sharp bread lame or razor, make one confident slash across the top, about 1 to 1.5 cm deep. A single long slash works well, or you can try a simple decorative pattern.
Scoring is not just for looks. It gives the loaf a planned place to expand, which helps it keep an attractive shape instead of bursting open at random.
Carefully remove the hot Dutch oven from the oven and take off the lid. Use the parchment paper as a sling to lower the dough into the pot. Put the lid back on and bake for 30 minutes at 230°C (450°F).
The lid traps steam released by the dough. That steam keeps the crust flexible during the first stage of baking, so the loaf can expand fully before the crust sets.
Remove the lid and bake for another 10 to 15 minutes, until the crust is deeply golden brown with crisp edges and rustic cracks. For a more reliable doneness check, the center of the loaf should reach 96 to 99°C (205 to 210°F).
If you prefer a lighter crust, start checking a few minutes early. For a darker, crunchier crust, leave the loaf in a little longer, but keep an eye on the color.
Lift the loaf out of the Dutch oven using the parchment paper and set it on a wire rack. Let it cool for at least 1 hour before slicing. This step is hard, but it matters. The interior is still setting as it cools, and cutting too early can leave the crumb gummy and compressed.
When the loaf has cooled, slice it with a serrated bread knife and enjoy it with butter, soup or your favorite sandwich fillings.