Easy no-knead rustic sandwich bread is the loaf that convinces people they can bake. You stir four ingredients together, walk away overnight, and wake up to dough that has done almost all the work by itself. A few hours later, you pull a golden, crackly loaf out of a Dutch oven with a soft, chewy, airy center that slices cleanly for sandwiches and toasts beautifully for breakfast.
This recipe needs no mixer, no kneading and no special skills. If you can stir with a spoon and set a timer, you can make it. In this guide you will find the full recipe, the reasoning behind each step, troubleshooting help, flavor variations, storage advice and answers to the questions bakers ask most often about no-knead bread.
Why You Will Love This No-Knead Bread Recipe
Homemade bread has a reputation for being difficult. This loaf breaks that reputation for several reasons.
- It needs only four ingredients. All-purpose flour, lukewarm water, instant yeast and salt are all you need. There is nothing to hunt down and nothing expensive.
- There is no kneading. Time does the work that your hands would normally do. Gluten develops slowly during the long rise, which gives the bread structure without any effort.
- The flavor is better than fast bread. An 8 to 12 hour rest in the refrigerator lets the dough develop a mild, rounded, slightly tangy flavor that quick breads cannot match.
- The crust is spectacular. Baking inside a preheated Dutch oven traps steam, which produces a crisp, golden, crackly crust that looks like it came from a bakery.
- It is versatile. The same loaf works for sandwiches, grilled cheese, toast, soup dunking, garlic bread and meal prep.
- It fits a busy schedule. Active time is only about 15 minutes. The rest is waiting, which means you can mix the dough in the evening and bake the next day.
Ingredients for Easy No-Knead Rustic Sandwich Bread
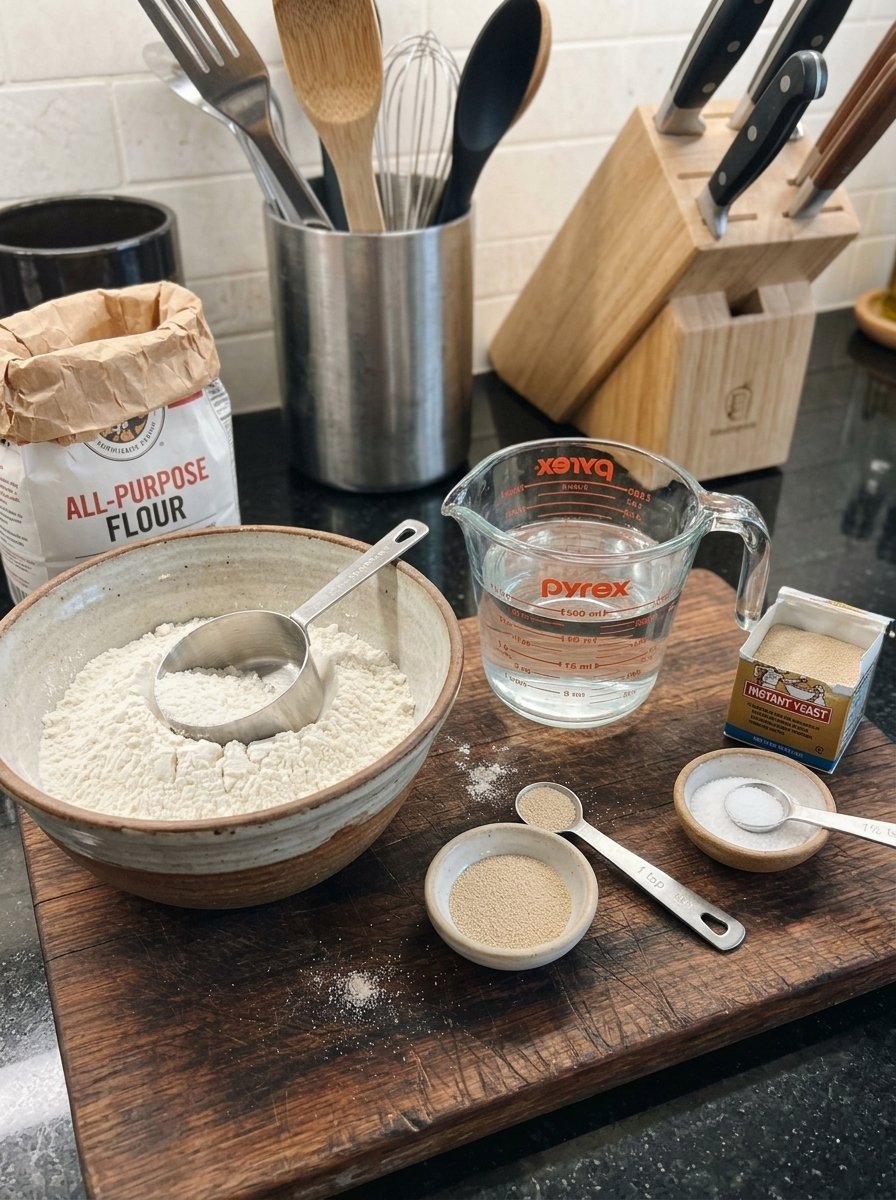
The ingredient list is short, so each item matters. Here is what you need and why it is there.
- 3 cups (375 g) all-purpose flour. All-purpose flour is the structure of the loaf. It has enough protein to form a chewy crumb while staying tender enough for sandwich slices. Weighing the flour with a kitchen scale is the most reliable way to get consistent results.
- 1½ cups (360 ml) lukewarm water. This is a high-hydration dough, which is why the crumb turns out soft and airy. The water should feel barely warm to the touch, not hot. Hot water can damage the yeast.
- 1 teaspoon (3 g) instant yeast. A small amount of yeast is enough because the rise is long. Instant yeast can be stirred straight into the water without proofing.
- 1½ teaspoons (9 g) salt. Salt seasons the bread, strengthens the dough and helps control fermentation. Do not skip it, or the loaf will taste flat.
Equipment You Will Need
The tools are simple, but a few of them make a real difference.
- A large mixing bowl and a wooden spoon or spatula
- Plastic wrap or a lid to cover the bowl
- A dough scraper (helpful but optional)
- Parchment paper
- A Dutch oven with a lid, preferably 5 to 6 quarts
- A sharp bread lame or razor blade for scoring
- A wire cooling rack
- A serrated bread knife
- An instant-read thermometer (optional but useful for checking doneness)
How to Make No-Knead Rustic Sandwich Bread, Step by Step
Step 1: Mix the Dough
Pour the lukewarm water into a large bowl and add the instant yeast. Stir briefly so the yeast spreads through the water. Add the flour and salt, then mix with a wooden spoon or spatula until every bit of flour is absorbed and you have a rough, sticky dough.
There is no need to knead. Just check that there are no dry pockets of flour hiding at the bottom of the bowl. Cover the bowl tightly with plastic wrap or a lid so the surface does not dry out.
Step 2: Let the Dough Rise Overnight
For the best flavor, place the covered bowl in the refrigerator for 8 to 12 hours. During this time the dough slowly ferments, develops flavor and fills with bubbles. By morning it should look airy, with bubbles visible across the surface.
If you want bread on the same day, let the dough rise at room temperature for about 1½ to 3 hours instead, until it is noticeably expanded and bubbly. The loaf will still be good, but the overnight version has deeper flavor and a more interesting crumb.
Step 3: Shape the Rustic Loaf
Lightly flour your work surface and gently turn the dough out of the bowl. With floured hands or a dough scraper, fold the edges toward the center several times until you have a rough ball. Flip the dough seam-side down and gently drag it toward you to tighten the surface.
Be gentle. You want to keep the air bubbles that formed during fermentation, so avoid heavy pressing or kneading. Place the dough seam-side down on a sheet of parchment paper, cover it loosely with a clean kitchen towel and let it rest for 30 to 60 minutes, until slightly puffy.
Step 4: Preheat the Dutch Oven
Place the Dutch oven, with its lid on, in the oven and preheat to 230°C (450°F). Give it about 30 minutes to heat thoroughly. A very hot pot is what gives the loaf quick oven spring and a crisp crust.
Safety matters here. Use sturdy oven mitts when handling the hot pot, and trim the parchment paper so it does not hang out near the heating elements.
Step 5: Score the Bread
Once the dough has rested, dust the top lightly with flour for a rustic look. Using a sharp bread lame or razor, make one confident slash across the top, about 1 to 1.5 cm deep. A single long slash works well, or you can try a simple decorative pattern.
Scoring is not just for looks. It gives the loaf a planned place to expand, which helps it keep an attractive shape instead of bursting open at random.
Step 6: Bake Covered
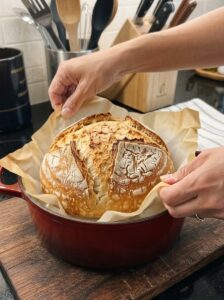
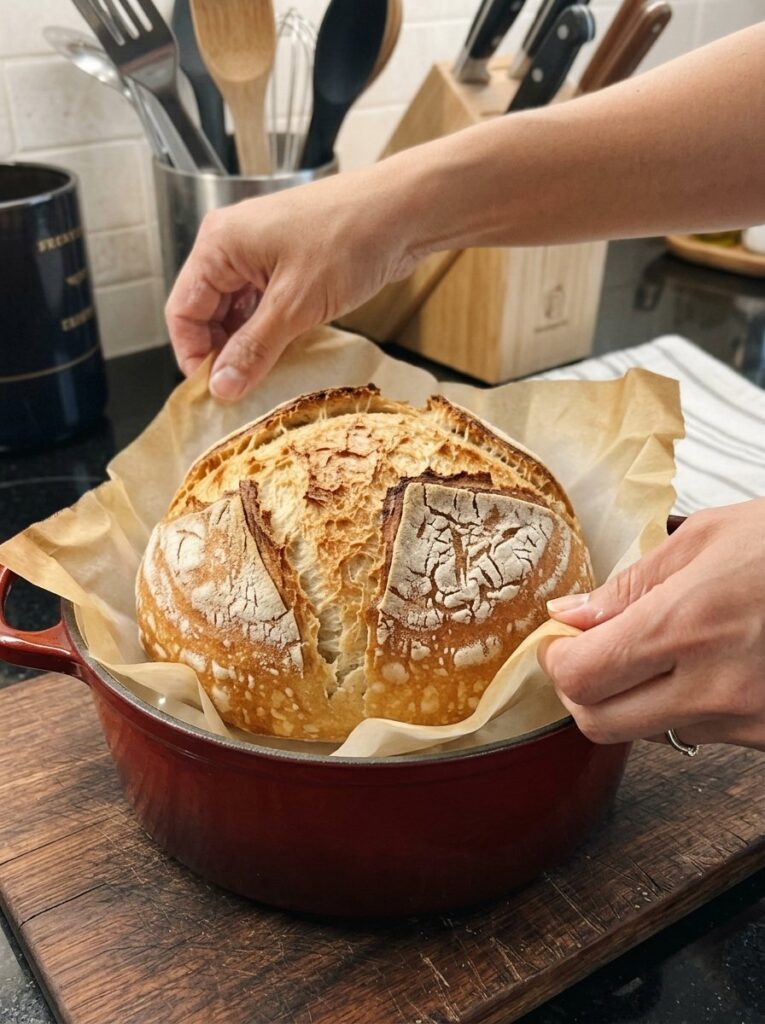
Carefully remove the hot Dutch oven from the oven and take off the lid. Use the parchment paper as a sling to lower the dough into the pot. Put the lid back on and bake for 30 minutes at 230°C (450°F).
The lid traps steam released by the dough. That steam keeps the crust flexible during the first stage of baking, so the loaf can expand fully before the crust sets.
Step 7: Bake Uncovered Until Golden
Remove the lid and bake for another 10 to 15 minutes, until the crust is deeply golden brown with crisp edges and rustic cracks. For a more reliable doneness check, the center of the loaf should reach 96 to 99°C (205 to 210°F).
If you prefer a lighter crust, start checking a few minutes early. For a darker, crunchier crust, leave the loaf in a little longer, but keep an eye on the color.
Step 8: Cool Before Slicing
Lift the loaf out of the Dutch oven using the parchment paper and set it on a wire rack. Let it cool for at least 1 hour before slicing. This step is hard, but it matters. The interior is still setting as it cools, and cutting too early can leave the crumb gummy and compressed.
When the loaf has cooled, slice it with a serrated bread knife and enjoy it with butter, soup or your favorite sandwich fillings.
Tips for the Best No-Knead Sandwich Bread
These small habits separate a good loaf from a great one.
- Use a Dutch oven. The covered pot traps steam around the dough, which creates the golden, crackly crust.
- Let the dough rise slowly. The overnight rest in the refrigerator develops flavor and a lovely rustic texture.
- Keep the dough slightly sticky. The wetter dough is what produces a soft, airy interior. Resist the urge to add lots of extra flour.
- Handle the dough gently. Fold it instead of kneading it so the bubbles built up during fermentation stay in the loaf.
- Preheat the pot thoroughly. A hot Dutch oven helps the loaf rise quickly and form its crust.
- Use parchment paper. It makes it much easier and safer to lower the dough into the hot pot.
- Cool the loaf completely. Patience lets the crumb set and keeps the slices from squashing under the knife.
Troubleshooting Common No-Knead Bread Problems
Even simple recipes can go sideways. Here are the most common issues and what to do about them.
The dough did not rise much. The most likely causes are water that was too hot or too cold, or a very cold kitchen. Use lukewarm water and give the dough a little more time. If you are making a same-day loaf, a slightly warmer spot in the kitchen helps.
The dough is too sticky to shape. Sticky is normal for this recipe. Use floured hands and a dough scraper, and work quickly and gently. Add flour to the surface rather than to the dough itself.
The loaf came out dense. Dense bread usually means the dough did not ferment long enough, or it was handled too roughly during shaping. Allow the full rise and fold the dough gently so the air stays in.
The crust is too pale. Make sure the Dutch oven is fully preheated and that you bake uncovered for the full 10 to 15 minutes. Leave the loaf in a few minutes longer if you want a darker crust.
The crust is too dark. Start checking the loaf earlier during the uncovered stage, and use the thermometer. The center should reach 96 to 99°C (205 to 210°F).
The slices are gummy. The loaf was probably cut before it cooled. Wait at least one hour and use a serrated knife with a gentle sawing motion.
Easy Variations to Try
Once you have mastered the basic loaf, it makes a great canvas for new flavors. Add extras gently during mixing, and keep the amounts modest so the dough still rises well.
- Herb and garlic loaf: Stir dried rosemary, thyme or garlic powder into the flour.
- Cheese loaf: Fold shredded cheddar or Parmesan into the dough during mixing.
- Seeded top: After dusting with flour, press sesame, poppy or sunflower seeds lightly onto the surface before scoring.
- Olive loaf: Mix in chopped olives for a Mediterranean twist.
The core recipe in this article is the tested version, so treat these as experiments and adjust to your taste.
Serving Ideas
This bread is flexible enough to appear at every meal.
- Fresh from the oven: Serve thick slices with butter or olive oil.
- Everyday sandwiches: Fill with cheese, turkey, chicken, lettuce and tomato.
- Golden breakfast toast: Toast slices and top with butter, jam, honey or avocado.
- Grilled cheese: Layer with cheddar or mozzarella and toast until crisp and melty.
- Soup companion: Serve alongside tomato soup, creamy mushroom soup or hearty vegetable stew.
- Rustic garlic bread: Brush slices with garlic butter and toast until fragrant.
- Brunch platter: Pair with eggs, cheese, fresh fruit and avocado.
How to Store Homemade Bread
Because this bread has no preservatives, storage makes a big difference to how long it stays good.
- Room temperature: Keep the completely cooled loaf in a bread bag or bread box for up to 2 days to protect the crust.
- Softer crust: Store it in an airtight container for up to 3 days. The crust will soften.
- Freezing: Slice the cooled bread, wrap it well and freeze for up to 3 months.
- Reheating: Refresh a whole loaf in a 180°C (350°F) oven for 5 to 8 minutes.
- Avoid the refrigerator: Refrigeration can make bread go stale faster.
- Meal prep: Freeze individual slices so you can toast only what you need.
Recipe at a Glance
| Detail | Information |
|---|---|
| Prep time | 15 minutes |
| Overnight rise | 8 to 12 hours |
| Final rest | 30 to 60 minutes |
| Dutch oven preheating | 30 minutes |
| Bake time | 40 to 45 minutes |
| Cooling time | At least 1 hour |
| Total time | About 11 to 15 hours, including fermentation and cooling |
| Yield | 1 loaf, about 10 to 12 slices |
| Difficulty | Easy |
| Method | No-knead, Dutch oven baking |
Frequently Asked Questions
Do I really not need to knead this bread?
Correct. The long fermentation lets gluten form on its own, so stirring until the flour is combined is enough. Folding the dough gently when you shape it adds a little extra structure.
Can I make this bread without a Dutch oven?
A Dutch oven gives the best crust because it traps steam, and this recipe is written for one. Any heavy, oven-safe pot with a tight lid is the closest alternative. Results without a covered pot will differ, with a lighter and less crackly crust.
How long can the dough rest in the refrigerator?
This recipe is tested for an 8 to 12 hour rise in the refrigerator. That window gives good flavor and an airy structure without overdoing it.
Can I make the dough on the same day?
Yes. Let it rise at room temperature for about 1½ to 3 hours, until it has expanded and looks bubbly. The loaf will be good, though the overnight version has more flavor.
Why is my dough so wet?
The dough contains about 1½ cups of water for 3 cups of flour, which makes it intentionally wet. That moisture creates the soft, airy crumb. Handle it with floured hands and a scraper rather than adding more flour to the dough.
How do I know when the bread is done?
Look for a deeply golden crust with crisp edges, and check that the center reaches 96 to 99°C (205 to 210°F) on an instant-read thermometer.
Why do I have to wait an hour before slicing?
The crumb is still setting as the loaf cools. Slicing too soon can make the bread gummy and squash the slices. One hour is the minimum.
Can I freeze this no-knead bread?
Yes. Slice the cooled loaf, wrap it well and freeze for up to 3 months. Toast slices straight from the freezer, or refresh a whole loaf in a 180°C (350°F) oven for 5 to 8 minutes.
Final Thoughts
Easy no-knead rustic sandwich bread proves that great homemade bread does not need fancy equipment or complicated technique. With four pantry ingredients, a bowl, a spoon and a Dutch oven, you get a loaf with a crackly golden crust, a soft chewy center and a mild, rustic flavor that tastes like it came from a bakery. Mix the dough tonight, let the refrigerator do the work, and bake a fresh loaf tomorrow. Once you taste it warm with a little butter, it is likely to become a weekly habit.
Print
Easy No-Knead Rustic Sandwich Bread
Ingredients
The ingredient list is short, so each item matters. Here is what you need and why it is there.
- 3 cups (375 g) all-purpose flour. All-purpose flour is the structure of the loaf. It has enough protein to form a chewy crumb while staying tender enough for sandwich slices. Weighing the flour with a kitchen scale is the most reliable way to get consistent results.
- 1½ cups (360 ml) lukewarm water. This is a high-hydration dough, which is why the crumb turns out soft and airy. The water should feel barely warm to the touch, not hot. Hot water can damage the yeast.
- 1 teaspoon (3 g) instant yeast. A small amount of yeast is enough because the rise is long. Instant yeast can be stirred straight into the water without proofing.
- 1½ teaspoons (9 g) salt. Salt seasons the bread, strengthens the dough and helps control fermentation. Do not skip it, or the loaf will taste flat.
Equipment You Will Need
The tools are simple, but a few of them make a real difference.
- A large mixing bowl and a wooden spoon or spatula
- Plastic wrap or a lid to cover the bowl
- A dough scraper (helpful but optional)
- Parchment paper
- A Dutch oven with a lid, preferably 5 to 6 quarts
- A sharp bread lame or razor blade for scoring
- A wire cooling rack
- A serrated bread knife
- An instant-read thermometer (optional but useful for checking doneness)
Instructions
Pour the lukewarm water into a large bowl and add the instant yeast. Stir briefly so the yeast spreads through the water. Add the flour and salt, then mix with a wooden spoon or spatula until every bit of flour is absorbed and you have a rough, sticky dough.
There is no need to knead. Just check that there are no dry pockets of flour hiding at the bottom of the bowl. Cover the bowl tightly with plastic wrap or a lid so the surface does not dry out.
For the best flavor, place the covered bowl in the refrigerator for 8 to 12 hours. During this time the dough slowly ferments, develops flavor and fills with bubbles. By morning it should look airy, with bubbles visible across the surface.
If you want bread on the same day, let the dough rise at room temperature for about 1½ to 3 hours instead, until it is noticeably expanded and bubbly. The loaf will still be good, but the overnight version has deeper flavor and a more interesting crumb.
Lightly flour your work surface and gently turn the dough out of the bowl. With floured hands or a dough scraper, fold the edges toward the center several times until you have a rough ball. Flip the dough seam-side down and gently drag it toward you to tighten the surface.
Be gentle. You want to keep the air bubbles that formed during fermentation, so avoid heavy pressing or kneading. Place the dough seam-side down on a sheet of parchment paper, cover it loosely with a clean kitchen towel and let it rest for 30 to 60 minutes, until slightly puffy.
Place the Dutch oven, with its lid on, in the oven and preheat to 230°C (450°F). Give it about 30 minutes to heat thoroughly. A very hot pot is what gives the loaf quick oven spring and a crisp crust.
Safety matters here. Use sturdy oven mitts when handling the hot pot, and trim the parchment paper so it does not hang out near the heating elements.
Once the dough has rested, dust the top lightly with flour for a rustic look. Using a sharp bread lame or razor, make one confident slash across the top, about 1 to 1.5 cm deep. A single long slash works well, or you can try a simple decorative pattern.
Scoring is not just for looks. It gives the loaf a planned place to expand, which helps it keep an attractive shape instead of bursting open at random.
Carefully remove the hot Dutch oven from the oven and take off the lid. Use the parchment paper as a sling to lower the dough into the pot. Put the lid back on and bake for 30 minutes at 230°C (450°F).
The lid traps steam released by the dough. That steam keeps the crust flexible during the first stage of baking, so the loaf can expand fully before the crust sets.
Remove the lid and bake for another 10 to 15 minutes, until the crust is deeply golden brown with crisp edges and rustic cracks. For a more reliable doneness check, the center of the loaf should reach 96 to 99°C (205 to 210°F).
If you prefer a lighter crust, start checking a few minutes early. For a darker, crunchier crust, leave the loaf in a little longer, but keep an eye on the color.
Lift the loaf out of the Dutch oven using the parchment paper and set it on a wire rack. Let it cool for at least 1 hour before slicing. This step is hard, but it matters. The interior is still setting as it cools, and cutting too early can leave the crumb gummy and compressed.
When the loaf has cooled, slice it with a serrated bread knife and enjoy it with butter, soup or your favorite sandwich fillings.