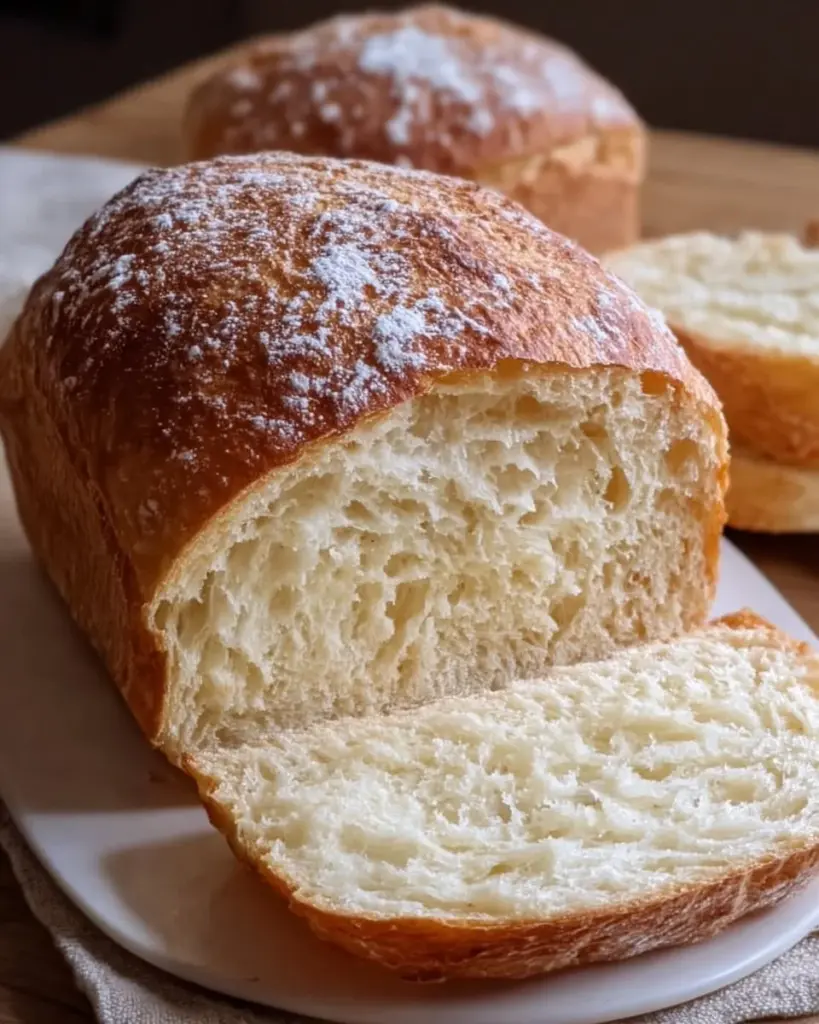
Nestled in the comforting realm of home cooking, nothing evokes the warmth of nostalgia quite like the smell of freshly baked bread wafting through the air. Just picture it: the golden crust crackling under the gentle pressure of your fingers, revealing a soft, airy interior that beckons to be slathered with creamy butter or perhaps a generous dollop of your favorite jam. Each slice holds within it the promise of countless delightful sandwiches, from simple ham and cheese to extravagant avocado and poached egg creations. This is the magic of homemade no-knead sandwich bread—a recipe that not only fills your kitchen with an inviting aroma but also transforms your meals into something extraordinary.
The beauty of this no-knead technique lies in its simplicity; you do not need to toil away at a countertop, your hands dusted with flour. Instead, you enjoy a more graceful method where time does the work for you. This bread requires just a handful of ingredients, yet it yields astonishingly delicious results. As it rises, your dough develops flavor and texture in a way that will make you wonder why you ever opted for store-bought varieties. Imagine tearing off a hunk of warm bread, biting into its soft, chewy crumb, and appreciating the slight tang from the fermentation. That’s the essence of this no-knead masterpiece.
Why You’ll Love This Homemade No-Knead Sandwich Bread
You will fall in love with this homemade no-knead sandwich bread for numerous reasons, each more compelling than the last. First and foremost, it’s a truly accessible recipe; its straightforward process favors even novice bakers, ensuring that everyone can create something utterly scrumptious in their own kitchen. This bread bridges the gap between convenience and flavor, delivering a soft and fluffy loaf that boasts a crusty exterior. With its incredible versatility, it becomes the perfect canvas for a myriad of toppings and fillings, making it suitable for any meal or occasion—from casual brunches to fancy picnics.
Think of all the flavor-packed sandwiches waiting to be crafted! Whatever your favorite combination, this bread adds a beautiful, soft structure that enhances every bite. Beyond sandwiches, imagine using it for delightful toast, alongside bowls of soup, or even as the base for your holiday stuffing. The slow fermentation process enriches the bread with complexity, making it irresistible fresh out of the oven or toasted on your morning plate. Each loaf carries a dedication that says, "This is not just bread; this is made with love."
Preparation Phase & Tools to Use
Before diving into the dough, gather a few essential tools that will streamline your bread-making experience.
- Mixing Bowl: Preferably a large, sturdy bowl allows ample space for ingredients to blend seamlessly.
- Plastic Wrap: This will keep your dough covered to prevent it from drying out as it ferments.
- Dutch Oven: A heavy enamel or cast-iron Dutch oven becomes your best friend for baking. It creates a mini-oven environment, trapping steam and helping form that coveted crust.
- Parchment Paper: This helps with easy transfer of dough to the heated pot and makes cleanup a breeze.
Preparation Tips:
- Measure your ingredients accurately for the best results.
- Utilize warm water, as it begins activating the yeast almost instantaneously.
- Don’t rush the fermentation process; give your dough its time to develop those rich, complex flavors.
Ingredients for Homemade No-Knead Sandwich Bread
- 3 cups all-purpose flour: This forms the base of your bread. You can substitute up to half with whole wheat flour for a nuttier flavor and denser texture.
- 1 1/2 teaspoons salt: Salt not only enhances flavor, but it also regulates yeast activity, helping the bread rise perfectly.
- 1/4 teaspoon instant yeast: Instant yeast enhances the fermentation time, giving you that delightful texture without the wait.
- 1 1/2 cups warm water: Warm water activates the yeast and salts, melding everything together into a wet dough that will transform beautifully.
How to Make Homemade No-Knead Sandwich Bread
- In a large bowl, mix the flour, salt, and instant yeast together until evenly distributed.
- Warm the water (about 110°F or 43°C) and add it to the dry ingredients. Stir gently with a wooden spoon, just until mixed and no dry flour remains.
- Cover the bowl tightly with plastic wrap and let it rest at room temperature for 12 to 18 hours. You’ll know it’s ready when the surface becomes bubbly and it has risen considerably.
- Preheat your oven to 450°F (230°C).
- Place a Dutch oven, with its lid on, in the oven to heat for 30 minutes.
- Lightly flour a clean surface and carefully turn the dough out onto it. Gently shape the dough into a ball using floured hands, then let it rest for 15 minutes.
- Carefully remove the hot Dutch oven from the oven. Using parchment paper, transfer the dough into the pot. Cover with the lid and place it back in the oven.
- Bake for 30 minutes with the lid on, then carefully remove the lid and bake for an additional 15 minutes, or until the crust is golden brown and crispy.
- Once baked, remove the pot from the oven and allow the bread to cool on a wire rack before slicing.
Chef’s Notes & Helpful Tips
- Make-Ahead Tips: You can prepare your dough the night before and let it rise, ensuring a fresh loaf is only a few simple steps away in the morning.
- Cooking Alternatives: If you don’t have a Dutch oven, you can use a similar heavy pot with a lid. Alternatively, baking stones or sheet pans can work, but the crust might not be as crisp.
- Customization Ideas: Experiment with flavors! Add herbs like rosemary or thyme to the dry mix, incorporate sunflower seeds, or even fold in dried fruits for a unique twist.
Common Mistakes to Avoid
Many new bakers face pitfalls along the way. To ensure your loaf is perfect every time, steer clear of these common mistakes:
- Rushing the fermentation time: If your dough hasn’t bubbled up, it simply isn’t ready.
- Using cold water: Ensure your water is warm enough to activate the yeast effectively.
- Overworking the dough: This recipe thrives on minimal handling—trust in the slow fermentation for developing gluten.
What to Serve With Homemade No-Knead Sandwich Bread
The possibilities are endless when it comes to pairing this bread. Here are a few ways to enjoy it:
- Classic Grilled Cheese: The soft bread with gooey cheese creates an irresistible comfort food experience.
- Avocado Toast: Top a slice with ripe avocado, a sprinkle of salt, and a dash of chili flakes for a delicious snack.
- French Toast: Transform your leftover slices into sweet, custardy perfection on a Sunday brunch.
- Cubed for Soup: Serve it alongside your favorite hearty soup, perfect for dipping into nourishing broths.
- Sliced for Sandwiches: From turkey or ham to veggie stacks, this bread shines as a sandwich base.
- Used as Bruschetta: Toast slices lightly, then top them with tomatoes, basil, and a drizzle of balsamic glaze for a fresh appetizer.
- With Creamy Spreads: From chocolate hazelnut spread to a rich goat cheese dip, this bread is happy to play along with decadent toppings.
- As Roulades: Spread fillings like herb butter or pesto and roll them up for bite-sized delights.
Storage & Reheating Instructions
Once you’ve mastered this no-knead bread, store it properly to maintain freshness.
- Fridge: Keep it in a paper bag or wrapped loosely in a kitchen towel. Ideal for up to a week—just remember that it will dry out faster.
- Freezer: Store slices in an airtight container or wrapped tightly in foil for up to three months. Thaw gently and warm in the oven before serving for best results.
- Reheating: Toasting slices brings back its delicious crispiness; alternatively, warm it in a low oven to enjoy the freshly baked flavors.
Estimated Nutrition Information
This recipe yields approximately 12 slices.
- Calories: 140 per slice
- Carbohydrates: 29g
- Protein: 4g
- Fat: 0.5g (without butter or spreads)
- Fiber: 1g
(Note: These values are approximate and depend on specific ingredient brands and methods used.)
FAQs
1. Can I use all whole wheat flour?
Absolutely! However, the texture will be denser, so consider adding a touch more water to achieve a softer crumb.
2. What if my dough isn’t bubbling?
It may need more time; allow it to sit longer at room temperature until you see those lovely bubbles form. If your yeast was old, you might need to start with fresh yeast.
3. Can I add toppings to the dough?
Certainly! Add herbs, cheeses, or even olives folded into the dough after the initial mixing to give it a unique twist.
4. Is instant yeast different from active dry yeast?
Yes, instant yeast is fine granulated and doesn’t require proofing, whereas active dry yeast needs to be dissolved in water before mixing.
5. Why is my crust not crispy?
Ensure your Dutch oven is sufficiently preheated, as steam traps moisture for a crispy crust. If using a sheet pan, place a pan of water on the bottom rack during baking for added steam.
As you finish this delightful recipe, take a moment to appreciate the journey you’re about to embark upon with homemade no-knead sandwich bread. The luscious aroma, the golden crust, and the tender crumb will fill your kitchen with warmth, inviting all to gather around and indulge in delicious moments together. Bake it, slice it, and fill it with your favorite flavors. Let this bread be the heart of your meal, bringing joy not just to your tummy, but to every soul that shares in its goodness. Embrace the experience, and enjoy each beautifully crafted slice!
Print
Homemade No-Knead Sandwich Bread
- Total Time: 12 hours 0 minutes
- Yield: 12 slices 1x
- Diet: Vegetarian
Description
A simple and delicious homemade no-knead bread that results in a soft, fluffy loaf with a crusty exterior, perfect for sandwiches and toasts.
Ingredients
- 3 cups all-purpose flour
- 1 1/2 teaspoons salt
- 1/4 teaspoon instant yeast
- 1 1/2 cups warm water
Instructions
- In a large bowl, mix the flour, salt, and instant yeast together until evenly distributed.
- Warm the water (about 110°F or 43°C) and add it to the dry ingredients. Stir gently with a wooden spoon, just until mixed and no dry flour remains.
- Cover the bowl tightly with plastic wrap and let it rest at room temperature for 12 to 18 hours until bubbly and risen.
- Preheat your oven to 450°F (230°C).
- Place a Dutch oven in the oven to heat for 30 minutes with its lid on.
- Lightly flour a clean surface and turn the dough out onto it. Shape the dough into a ball using floured hands and let it rest for 15 minutes.
- Carefully remove the hot Dutch oven from the oven. Using parchment paper, transfer the dough into the pot. Cover with the lid and place it back in the oven.
- Bake for 30 minutes with the lid on, then remove the lid and bake for an additional 15 minutes until golden brown and crispy.
- Once baked, remove the pot from the oven and allow the bread to cool on a wire rack before slicing.
Notes
Make-ahead tips: Prepare your dough the night before for a fresh loaf in the morning. If you don’t have a Dutch oven, use a heavy pot with a lid or baking stones.
- Prep Time: 15 minutes
- Cook Time: 45 minutes
- Category: Bread
- Method: Baking
- Cuisine: American
Nutrition
- Serving Size: 1 slice
- Calories: 140
- Sugar: 0g
- Sodium: 300mg
- Fat: 0.5g
- Saturated Fat: 0g
- Unsaturated Fat: 0g
- Trans Fat: 0g
- Carbohydrates: 29g
- Fiber: 1g
- Protein: 4g
- Cholesterol: 0mg
Keywords: no-knead bread, sandwich bread, homemade bread, easy bread recipe