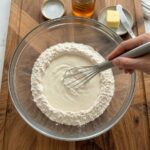
Ingredients
Here’s everything you’ll need to make one classic loaf of soft white sandwich bread:
- 1 cup (240 ml) warm whole milk — the base of the dough, providing moisture, richness, and a tender crumb.
- 2¼ teaspoons (7 g) active dry yeast — this is what makes the bread rise and gives it that light, fluffy texture.
- 2 tablespoons (28 g) granulated sugar — feeds the yeast and adds a subtle sweetness typical of classic white bread.
- 2 tablespoons (28 g) unsalted butter, melted — adds richness and helps create that soft, tender crumb.
- 1 teaspoon salt — balances the sweetness and strengthens the dough’s structure.
- 3 cups (360 g) all-purpose flour — the foundation of the dough; no need for bread flour here.
That’s it — six simple ingredients standing between you and a homemade version of one of the most iconic breads in American kitchens.
Ingredient Notes and Substitutions
- Milk: Whole milk creates the richest, softest texture, but 2% milk works in a pinch. For a dairy-free version, unsweetened plant milk (like oat or soy) can be substituted, though the texture may be slightly less soft.
- Yeast: Active dry yeast is called for here, but instant yeast can be substituted 1:1 — just note that instant yeast doesn’t require proofing in warm milk first, though doing so won’t hurt the recipe.
- Sugar: Granulated sugar is standard, but honey can be used for a slightly different flavor profile (this is a nice pairing if you plan to serve the bread with honey butter).
- Butter: Unsalted butter gives you control over the total salt content. If you only have salted butter, simply reduce the added salt slightly.
- Flour: All-purpose flour is all you need for that classic soft texture. Bread flour will produce a chewier result — great if you prefer that, but not necessary for the Wonder Bread-style texture this recipe is designed to achieve.
Instructions
Add the warm milk, yeast, and sugar to a large mixing bowl. Stir gently and let the mixture sit for 5–10 minutes, until the yeast becomes foamy and bubbly on top. This step is crucial — it confirms your yeast is alive and active, which sets the stage for a properly risen loaf.
Pro Tip: Use warm milk, not hot milk. Milk that’s too hot can kill the yeast and prevent your dough from rising properly. Aim for a temperature similar to a warm bath — around 100–110°F (38–43°C). If you don’t have a thermometer, the milk should feel warm but comfortable to the touch, never hot.
Once your yeast mixture is foamy, add the melted butter and salt. Then gradually add the flour, one cup at a time, mixing until a soft dough begins to form. The dough should be tacky but not overly sticky — if it’s too wet, add flour a tablespoon at a time; if it’s too dry and crumbly, add a splash of milk.
Transfer the dough to a lightly floured surface and knead by hand for approximately 8–10 minutes. Kneading develops the gluten structure in the dough, which is what gives bread its characteristic chew and rise. You’ll know the dough is ready when it becomes smooth, soft, and elastic — it should spring back slightly when you press it with a finger.
If you’ve never kneaded bread dough before, the basic technique is: push the dough away from you with the heel of your hand, fold it back over itself, rotate it a quarter turn, and repeat. It’s a rhythmic process, and many bakers find it genuinely relaxing.
Place the kneaded dough into a lightly greased bowl, turning it once so all sides are coated (this prevents the surface from drying out). Cover the bowl with a clean kitchen towel or plastic wrap and let the dough rise in a warm place for approximately 1 hour, or until it has doubled in size.
Where to let dough rise: An oven with just the light on, a spot near a sunny window, or on top of the refrigerator are all good options for a warm, draft-free environment.
Once doubled, gently punch down the dough to release the excess air that’s built up during fermentation. This step resets the gluten structure and ensures an even crumb in your final loaf.
Shape the dough into a loaf by flattening it into a rectangle, then rolling it up tightly from one short end to the other, tucking the edges underneath to create a smooth, seamless surface on top.
Place the shaped dough into a greased 9×5-inch loaf pan, seam-side down. Cover loosely with a towel or plastic wrap and let it rise again for approximately 30–45 minutes, or until the dough has risen above the edge of the pan. This second rise, called “proofing,” is what gives the finished loaf its light, airy texture.
Preheat your oven to 350°F (175°C). Once the dough has finished its second rise, bake for approximately 25–30 minutes, or until the top is golden brown and the loaf sounds hollow when you gently tap the bottom of it.
Remove the bread from the oven and immediately brush the top with a little melted butter — this creates a soft, flavorful crust that’s signature to classic sandwich bread.
Let the bread cool in the pan for about 10 minutes, then transfer it to a wire rack and let it cool completely before slicing. This step matters more than most people realize: slicing bread too early can cause it to become gummy, since the interior is still setting as it cools.