Homemade Wonder Bread: The Ultimate Soft & Fluffy White Sandwich Bread Recipe
If you’ve ever stood in the bread aisle staring at a bag of soft white sandwich bread wondering what’s actually in it, you’re not alone. This Homemade Wonder Bread recipe gives you all the nostalgic, pillowy-soft texture you love from classic white bread — minus the preservatives, stabilizers, and mystery ingredients. With just six pantry staples, a loaf pan, and your own two hands, you can bake a bakery-quality loaf that beats anything store-bought, and it’s easier than you might think.
Whether you’re making school lunches, building the ultimate grilled cheese, or just craving warm toast with butter and honey, this homemade version of the classic American sandwich bread checks every box. No stand mixer. No bread machine. No prior baking experience needed. Just simple ingredients, a little patience while the dough rises, and a warm, golden loaf waiting for you at the end.
In this guide, you’ll find the complete step-by-step recipe, expert tips for guaranteed success, ingredient substitutions, storage instructions, and answers to the most common questions about making soft white bread at home.
Why You’ll Love This Homemade Wonder Bread Recipe
There’s a reason soft white sandwich bread has been a household staple for generations — it’s endlessly versatile, kid-friendly, and comforting in a way that few other breads can match. Here’s why this particular recipe deserves a permanent spot in your baking rotation:
- Only 6 ingredients — everything you need is likely already in your pantry and fridge.
- No fancy equipment required — this is a hand-kneaded dough, so a stand mixer is optional, not mandatory.
- Beginner-friendly — clear, simple steps make this an ideal first-time bread recipe.
- Incredibly soft texture — that classic “squishable” white bread crumb, just like the store-bought version, but fresher and tastier.
- Versatile — perfect for sandwiches, toast, French toast, grilled cheese, and school lunches.
- No preservatives — you control exactly what goes into your bread.
- Freezer-friendly — bake once, enjoy for weeks.
If you’ve been intimidated by yeast bread in the past, this recipe is the perfect place to start. The dough is forgiving, the process is straightforward, and the payoff — a warm, golden loaf of homemade bread — is incredibly satisfying.
Ingredients for Homemade Wonder Bread
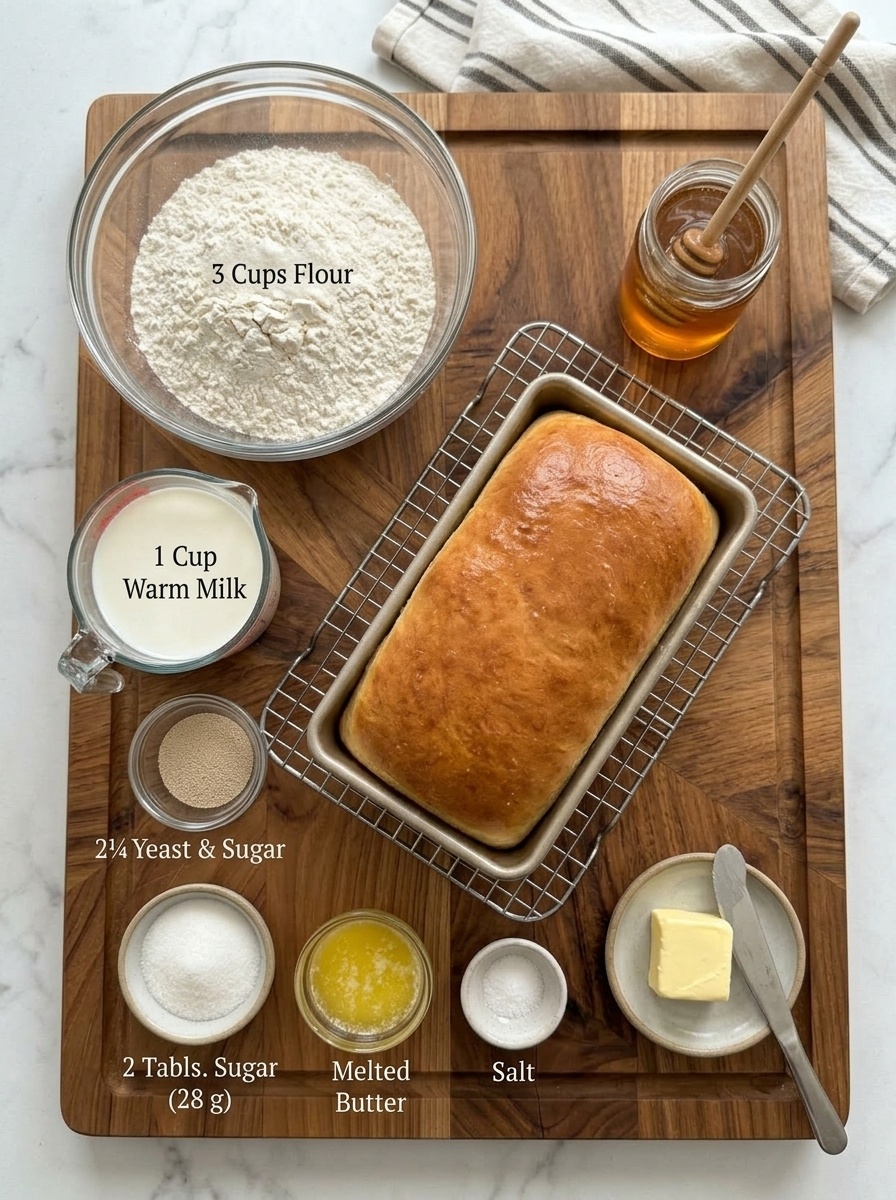
Here’s everything you’ll need to make one classic loaf of soft white sandwich bread:
- 1 cup (240 ml) warm whole milk — the base of the dough, providing moisture, richness, and a tender crumb.
- 2¼ teaspoons (7 g) active dry yeast — this is what makes the bread rise and gives it that light, fluffy texture.
- 2 tablespoons (28 g) granulated sugar — feeds the yeast and adds a subtle sweetness typical of classic white bread.
- 2 tablespoons (28 g) unsalted butter, melted — adds richness and helps create that soft, tender crumb.
- 1 teaspoon salt — balances the sweetness and strengthens the dough’s structure.
- 3 cups (360 g) all-purpose flour — the foundation of the dough; no need for bread flour here.
That’s it — six simple ingredients standing between you and a homemade version of one of the most iconic breads in American kitchens.
Ingredient Notes and Substitutions
- Milk: Whole milk creates the richest, softest texture, but 2% milk works in a pinch. For a dairy-free version, unsweetened plant milk (like oat or soy) can be substituted, though the texture may be slightly less soft.
- Yeast: Active dry yeast is called for here, but instant yeast can be substituted 1:1 — just note that instant yeast doesn’t require proofing in warm milk first, though doing so won’t hurt the recipe.
- Sugar: Granulated sugar is standard, but honey can be used for a slightly different flavor profile (this is a nice pairing if you plan to serve the bread with honey butter).
- Butter: Unsalted butter gives you control over the total salt content. If you only have salted butter, simply reduce the added salt slightly.
- Flour: All-purpose flour is all you need for that classic soft texture. Bread flour will produce a chewier result — great if you prefer that, but not necessary for the Wonder Bread-style texture this recipe is designed to achieve.
How to Make Homemade Wonder Bread: Step-by-Step Instructions
Step 1: Activate the Yeast
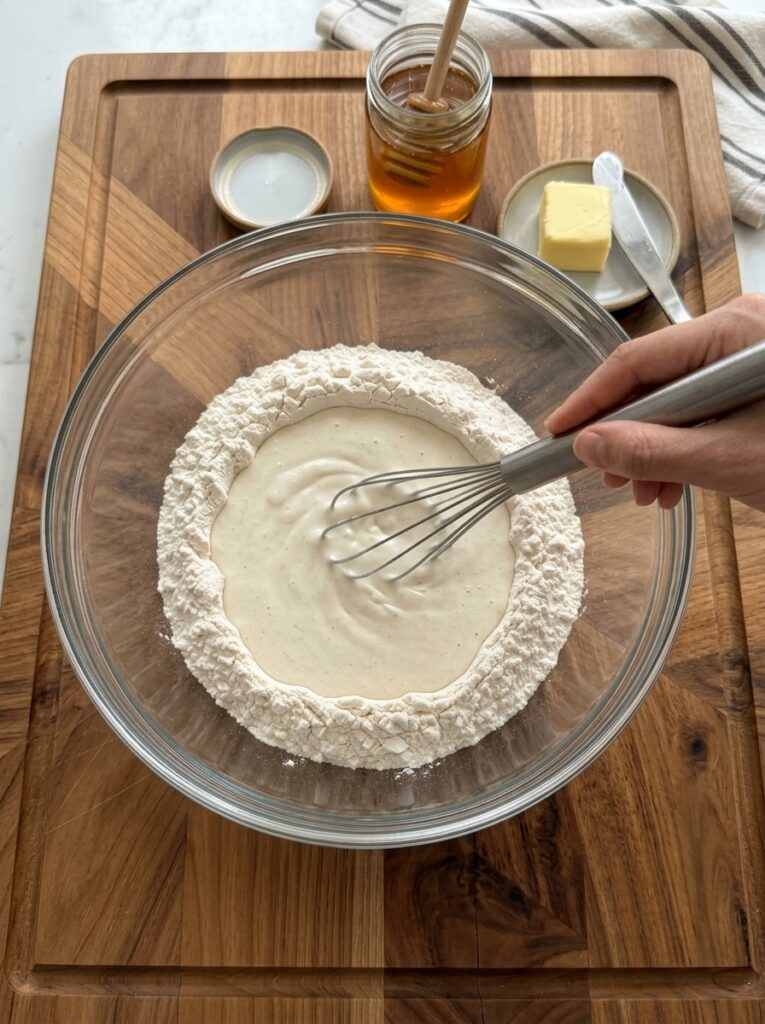
Add the warm milk, yeast, and sugar to a large mixing bowl. Stir gently and let the mixture sit for 5–10 minutes, until the yeast becomes foamy and bubbly on top. This step is crucial — it confirms your yeast is alive and active, which sets the stage for a properly risen loaf.
Pro Tip: Use warm milk, not hot milk. Milk that’s too hot can kill the yeast and prevent your dough from rising properly. Aim for a temperature similar to a warm bath — around 100–110°F (38–43°C). If you don’t have a thermometer, the milk should feel warm but comfortable to the touch, never hot.
Step 2: Mix the Dough
Once your yeast mixture is foamy, add the melted butter and salt. Then gradually add the flour, one cup at a time, mixing until a soft dough begins to form. The dough should be tacky but not overly sticky — if it’s too wet, add flour a tablespoon at a time; if it’s too dry and crumbly, add a splash of milk.
Step 3: Knead the Dough
Transfer the dough to a lightly floured surface and knead by hand for approximately 8–10 minutes. Kneading develops the gluten structure in the dough, which is what gives bread its characteristic chew and rise. You’ll know the dough is ready when it becomes smooth, soft, and elastic — it should spring back slightly when you press it with a finger.
If you’ve never kneaded bread dough before, the basic technique is: push the dough away from you with the heel of your hand, fold it back over itself, rotate it a quarter turn, and repeat. It’s a rhythmic process, and many bakers find it genuinely relaxing.
Step 4: First Rise
Place the kneaded dough into a lightly greased bowl, turning it once so all sides are coated (this prevents the surface from drying out). Cover the bowl with a clean kitchen towel or plastic wrap and let the dough rise in a warm place for approximately 1 hour, or until it has doubled in size.
Where to let dough rise: An oven with just the light on, a spot near a sunny window, or on top of the refrigerator are all good options for a warm, draft-free environment.
Step 5: Punch Down and Shape
Once doubled, gently punch down the dough to release the excess air that’s built up during fermentation. This step resets the gluten structure and ensures an even crumb in your final loaf.
Shape the dough into a loaf by flattening it into a rectangle, then rolling it up tightly from one short end to the other, tucking the edges underneath to create a smooth, seamless surface on top.
Step 6: Second Rise (Proofing)
Place the shaped dough into a greased 9×5-inch loaf pan, seam-side down. Cover loosely with a towel or plastic wrap and let it rise again for approximately 30–45 minutes, or until the dough has risen above the edge of the pan. This second rise, called “proofing,” is what gives the finished loaf its light, airy texture.
Step 7: Bake
Preheat your oven to 350°F (175°C). Once the dough has finished its second rise, bake for approximately 25–30 minutes, or until the top is golden brown and the loaf sounds hollow when you gently tap the bottom of it.
Step 8: Butter the Crust and Cool
Remove the bread from the oven and immediately brush the top with a little melted butter — this creates a soft, flavorful crust that’s signature to classic sandwich bread.
Let the bread cool in the pan for about 10 minutes, then transfer it to a wire rack and let it cool completely before slicing. This step matters more than most people realize: slicing bread too early can cause it to become gummy, since the interior is still setting as it cools.
Tips for Perfect Homemade Wonder Bread Every Time
- Don’t rush the rises. Yeast dough needs time to develop flavor and texture. If your kitchen is cold, the rise may take longer — that’s normal.
- Check your yeast’s freshness. If your yeast doesn’t foam during Step 1, it may be expired. Using dead yeast is the most common reason homemade bread fails to rise.
- Knead thoroughly. Under-kneaded dough leads to a denser loaf. The dough should feel smooth and elastic before moving to the first rise.
- Don’t over-flour. Add flour gradually and stop once the dough is soft and only slightly tacky — too much flour results in a dry, dense loaf.
- Use a thermometer for doneness (optional). For a foolproof test, the internal temperature of fully baked bread should read about 190°F (88°C).
- Let it cool completely before slicing. This is the step most bakers skip — and regret.
Serving Ideas for Your Homemade White Bread
This soft, versatile loaf shines in almost any application you’d use classic sandwich bread for:
- Breakfast toast — sliced and toasted with butter and honey for a simple, comforting morning treat.
- Classic sandwiches — sturdy enough to hold deli meats, spreads, and veggies without falling apart.
- School lunches — soft enough that kids love it, and it holds up well in a lunchbox.
- Grilled cheese — the buttery crust and soft interior make it ideal for a golden, gooey grilled cheese sandwich.
- French toast — its soft crumb soaks up egg custard beautifully, making for rich, tender French toast.
- Breakfast toast bar — top with jam, nut butter, avocado, or a fried egg for endless breakfast variations.
How to Store Homemade Wonder Bread
Proper storage keeps your homemade loaf fresh and soft for as long as possible:
Room Temperature: Store the fully cooled loaf in an airtight container or bread bag at room temperature for up to 3 days. Avoid refrigerating bread, as this actually speeds up staling.
Freezing: For longer storage, slice the bread first, then freeze the slices in a freezer-safe bag for up to 2 months. This makes it easy to pull out individual slices as needed — perfect for quick toast or sandwiches without thawing the whole loaf. To thaw, simply let slices sit at room temperature for a few minutes or pop them directly into the toaster.
Recipe Timing Overview
- Prep Time: About 20 minutes
- Rise Time: About 1½–2 hours
- Cook Time: 25–30 minutes
- Total Time: About 2½–3 hours
- Yield: 1 loaf
While the total time may look long, the vast majority of it is hands-off rising time — your actual active involvement is only about 20–30 minutes total.
Frequently Asked Questions About Homemade Wonder Bread
Can I make this bread without a stand mixer?
Yes — this recipe is specifically designed to be made by hand. Kneading by hand for 8–10 minutes develops the same gluten structure a stand mixer would, no special equipment needed.
Why didn’t my dough rise?
The most common causes are expired yeast, milk that was too hot (which kills the yeast), or a cold environment that slows fermentation. Double-check that your yeast foams during the activation step before proceeding.
Can I use bread flour instead of all-purpose flour?
You can, though the texture will be slightly chewier rather than the classic soft, pillowy texture this recipe is designed to achieve. All-purpose flour is recommended for the most authentic “Wonder Bread” texture.
Can I make this recipe dairy-free?
Yes, substitute the whole milk with an unsweetened plant-based milk, and use a dairy-free butter alternative. The texture may be slightly less rich, but the recipe will still work.
How do I know when the bread is fully baked?
The top should be golden brown, and the loaf should sound hollow when tapped on the bottom. For extra assurance, check that the internal temperature reads about 190°F (88°C).
Can I double this recipe?
Yes, this recipe doubles well. Simply double all ingredient quantities and divide the dough between two greased 9×5-inch loaf pans for baking.
Why is my bread dense instead of fluffy?
This is usually caused by under-kneading, using too much flour, or not allowing enough time for the dough to rise fully during either proofing stage. Be patient with both rises — they’re key to a light, airy crumb.
Is homemade bread healthier than store-bought?
Because you control every ingredient, homemade bread contains no preservatives, dough conditioners, or added stabilizers commonly found in commercial sandwich bread — just the six simple, recognizable ingredients in this recipe.
Final Thoughts on This Homemade Wonder Bread Recipe
Making your own soft white sandwich bread at home is one of those baking projects that feels far more impressive than it actually is. With just six ingredients, no special equipment, and a little patience for the dough to rise, you can create a loaf that rivals — and honestly surpasses — anything from the store shelf. The soft, pillowy crumb, golden buttery crust, and warm just-baked aroma filling your kitchen make this recipe worth the wait every single time.
Once you’ve mastered this base recipe, it opens the door to endless bread-baking confidence — from sandwich loaves to dinner rolls and beyond. So preheat that oven, warm up your milk, and get ready to bake a loaf of homemade Wonder Bread that your whole family will fight over.
Want this turned into a downloadable Word doc or formatted for a blog/website (with meta title and description)?
Print
Homemade Wonder Bread
Ingredients
Here’s everything you’ll need to make one classic loaf of soft white sandwich bread:
- 1 cup (240 ml) warm whole milk — the base of the dough, providing moisture, richness, and a tender crumb.
- 2¼ teaspoons (7 g) active dry yeast — this is what makes the bread rise and gives it that light, fluffy texture.
- 2 tablespoons (28 g) granulated sugar — feeds the yeast and adds a subtle sweetness typical of classic white bread.
- 2 tablespoons (28 g) unsalted butter, melted — adds richness and helps create that soft, tender crumb.
- 1 teaspoon salt — balances the sweetness and strengthens the dough’s structure.
- 3 cups (360 g) all-purpose flour — the foundation of the dough; no need for bread flour here.
That’s it — six simple ingredients standing between you and a homemade version of one of the most iconic breads in American kitchens.
Ingredient Notes and Substitutions
- Milk: Whole milk creates the richest, softest texture, but 2% milk works in a pinch. For a dairy-free version, unsweetened plant milk (like oat or soy) can be substituted, though the texture may be slightly less soft.
- Yeast: Active dry yeast is called for here, but instant yeast can be substituted 1:1 — just note that instant yeast doesn’t require proofing in warm milk first, though doing so won’t hurt the recipe.
- Sugar: Granulated sugar is standard, but honey can be used for a slightly different flavor profile (this is a nice pairing if you plan to serve the bread with honey butter).
- Butter: Unsalted butter gives you control over the total salt content. If you only have salted butter, simply reduce the added salt slightly.
- Flour: All-purpose flour is all you need for that classic soft texture. Bread flour will produce a chewier result — great if you prefer that, but not necessary for the Wonder Bread-style texture this recipe is designed to achieve.
Instructions
Add the warm milk, yeast, and sugar to a large mixing bowl. Stir gently and let the mixture sit for 5–10 minutes, until the yeast becomes foamy and bubbly on top. This step is crucial — it confirms your yeast is alive and active, which sets the stage for a properly risen loaf.
Pro Tip: Use warm milk, not hot milk. Milk that’s too hot can kill the yeast and prevent your dough from rising properly. Aim for a temperature similar to a warm bath — around 100–110°F (38–43°C). If you don’t have a thermometer, the milk should feel warm but comfortable to the touch, never hot.
Once your yeast mixture is foamy, add the melted butter and salt. Then gradually add the flour, one cup at a time, mixing until a soft dough begins to form. The dough should be tacky but not overly sticky — if it’s too wet, add flour a tablespoon at a time; if it’s too dry and crumbly, add a splash of milk.
Transfer the dough to a lightly floured surface and knead by hand for approximately 8–10 minutes. Kneading develops the gluten structure in the dough, which is what gives bread its characteristic chew and rise. You’ll know the dough is ready when it becomes smooth, soft, and elastic — it should spring back slightly when you press it with a finger.
If you’ve never kneaded bread dough before, the basic technique is: push the dough away from you with the heel of your hand, fold it back over itself, rotate it a quarter turn, and repeat. It’s a rhythmic process, and many bakers find it genuinely relaxing.
Place the kneaded dough into a lightly greased bowl, turning it once so all sides are coated (this prevents the surface from drying out). Cover the bowl with a clean kitchen towel or plastic wrap and let the dough rise in a warm place for approximately 1 hour, or until it has doubled in size.
Where to let dough rise: An oven with just the light on, a spot near a sunny window, or on top of the refrigerator are all good options for a warm, draft-free environment.
Once doubled, gently punch down the dough to release the excess air that’s built up during fermentation. This step resets the gluten structure and ensures an even crumb in your final loaf.
Shape the dough into a loaf by flattening it into a rectangle, then rolling it up tightly from one short end to the other, tucking the edges underneath to create a smooth, seamless surface on top.
Place the shaped dough into a greased 9×5-inch loaf pan, seam-side down. Cover loosely with a towel or plastic wrap and let it rise again for approximately 30–45 minutes, or until the dough has risen above the edge of the pan. This second rise, called “proofing,” is what gives the finished loaf its light, airy texture.
Preheat your oven to 350°F (175°C). Once the dough has finished its second rise, bake for approximately 25–30 minutes, or until the top is golden brown and the loaf sounds hollow when you gently tap the bottom of it.
Remove the bread from the oven and immediately brush the top with a little melted butter — this creates a soft, flavorful crust that’s signature to classic sandwich bread.
Let the bread cool in the pan for about 10 minutes, then transfer it to a wire rack and let it cool completely before slicing. This step matters more than most people realize: slicing bread too early can cause it to become gummy, since the interior is still setting as it cools.