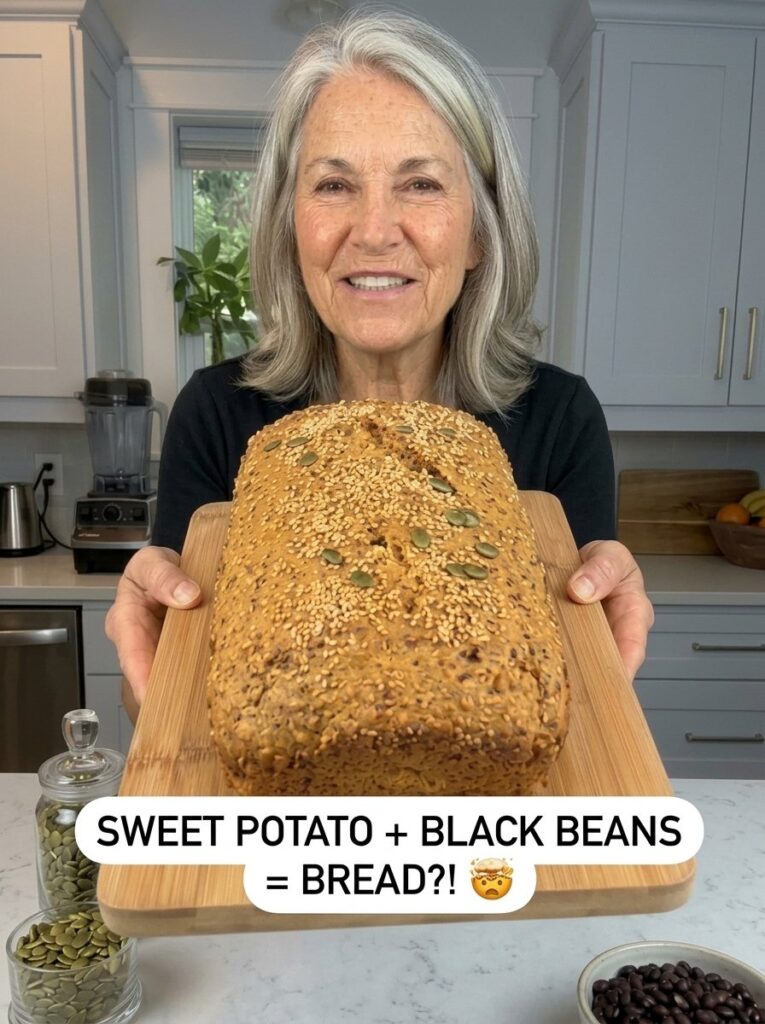
Quinoa Chickpea Bread (Gluten-Free, Flourless & High-Protein)
SEO Title: Quinoa Chickpea Bread Recipe: Easy Gluten-Free Loaf With No Flour
Meta Description: Make hearty, tender quinoa chickpea bread at home with just 7 simple ingredients. Naturally gluten-free, flourless, and perfect for toast, sandwiches, and meal prep.
Primary Keyword: quinoa chickpea bread
Secondary Keywords: gluten-free bread recipe, flourless bread, high-protein bread, healthy homemade bread, chickpea bread
If you have ever searched for a gluten-free bread that doesn’t crumble, taste like cardboard, or rely on a long list of specialty flours, this quinoa chickpea bread is for you. It is hearty, tender, lightly nutty, and made from ingredients you can find at almost any grocery store. There is no wheat flour, no gums, no starches, and no yeast to proof. You soak, blend, pour, and bake.
This guide walks you through everything you need to know: why the recipe works, how to make it step by step, how to avoid common mistakes, how to store it, and how to serve it in ways that go far beyond a plain slice of toast.
What Is Quinoa Chickpea Bread?
Quinoa chickpea bread is a flourless, gluten-free loaf made by blending soaked quinoa and cooked chickpeas with eggs, olive oil, baking powder, and salt into a thick batter. The batter is poured into a loaf pan and baked until golden and firm. Instead of relying on wheat flour for structure, this bread gets its body from the natural starches and proteins in the quinoa and chickpeas, along with the eggs that bind everything together.
The result is a dense-but-tender, sliceable loaf with a soft crumb and a mild, nutty flavor. It behaves like a hearty seed-and-grain bread, which makes it excellent for toasting, sandwiches, and savory toppings.
Why You’ll Love This Gluten-Free Bread Recipe
There are plenty of gluten-free bread recipes online, but this one stands out for several reasons.
1. It uses only seven simple ingredients. Chickpeas, quinoa, water, eggs, olive oil, baking powder, and salt. That’s the whole list. You likely have most of them in your pantry already.
2. It’s naturally gluten-free. The recipe contains no wheat, barley, or rye. If you are cooking for someone with celiac disease or a gluten sensitivity, check that your quinoa, chickpeas, and baking powder are labeled gluten-free, since cross-contamination can occur during processing.
3. It’s flourless. No rice flour, tapioca starch, xanthan gum, or special flour blends. Everything comes from whole foods.
4. It’s protein-rich and satisfying. Chickpeas and quinoa are both well known as plant-based sources of protein, and the eggs add more. A slice keeps you fuller than many store-bought gluten-free breads.
5. It’s yeast-free. There’s no proofing, kneading, or waiting for dough to rise. The only real waiting is the quinoa soak, and that’s hands-off.
6. It’s perfect for meal prep. One loaf yields about 10 to 12 slices, and the bread freezes beautifully, so you can bake once and have bread for weeks.
7. It’s versatile. Sweet toppings aren’t the focus here, but savory ones shine: avocado, hummus, eggs, cottage cheese, roasted vegetables, chicken, and more.
Ingredients You’ll Need
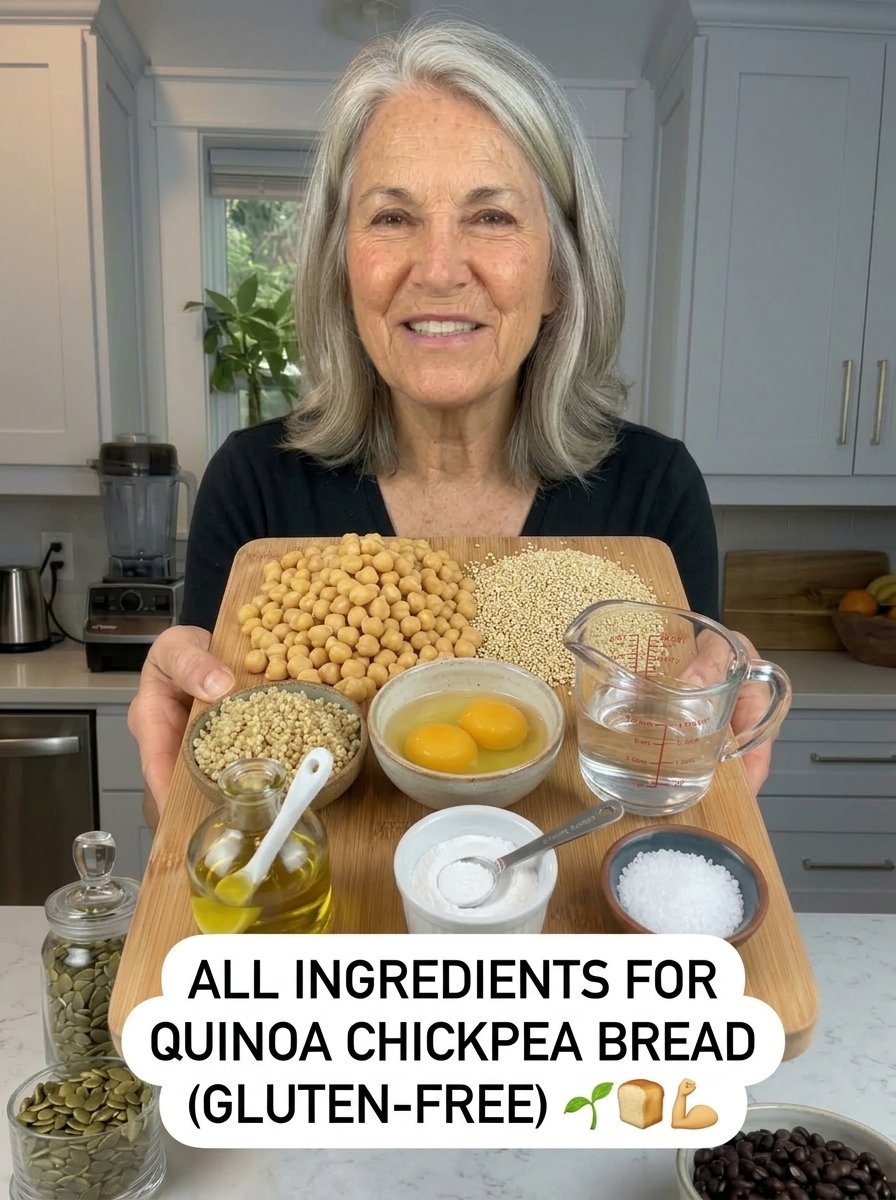
Here is what goes into one loaf:
- 1½ cups (250 g) cooked chickpeas, drained and rinsed
- 1 cup (170 g) uncooked quinoa
- 1½ cups (360 ml) water, plus more for soaking
- 2 large eggs
- 2 tablespoons olive oil
- 1 teaspoon baking powder
- ½ teaspoon salt
A Closer Look at the Key Ingredients
Chickpeas. Chickpeas (also called garbanzo beans) form the base of the bread. Blended, they become creamy and thick, giving the loaf its moist, tender interior. Canned chickpeas are the most convenient option, but freshly cooked chickpeas work just as well as long as they are completely tender and cooled. Whichever you choose, drain them very well so the batter doesn’t turn watery.
Quinoa. Quinoa adds a slightly nutty flavor and a wholesome, seedy texture. When soaked and blended, it helps create structure in the loaf. Always rinse quinoa before using it. Its natural coating can taste bitter, and a good rinse removes it.
Eggs. The eggs act as the binder, holding the batter together and helping the loaf rise and set. They are essential in this recipe, so this version is not vegan.
Olive oil. Olive oil adds moisture and richness and helps the bread bake into a soft crumb rather than a dry one.
Baking powder. This is the leavening agent. It gives the loaf a little lift so it isn’t overly dense.
Salt. Salt brings out the natural flavor of the chickpeas and quinoa. Without it, the bread can taste flat.
Tips for the Best Quinoa Chickpea Bread
A few small habits make a big difference in the final texture.
- Rinse the quinoa thoroughly before soaking. This washes away the bitter coating.
- Drain the chickpeas very well. Extra moisture leads to a gummy batter and a loaf that doesn’t set properly.
- Don’t skip the soak. Soaking softens the quinoa so it blends smoothly, which creates a more tender loaf.
- Blend until as smooth as possible. Any large pieces of chickpea or quinoa will show up as a rough, uneven texture in the finished bread.
- Let the bread cool completely before slicing. The crumb firms up as it cools. Cutting too early gives you a gummy, crumbly slice.
How to Make Quinoa Chickpea Bread: Step by Step
Prep time: About 15 minutes
Soaking time: Approximately 4 to 6 hours
Baking time: Approximately 50 to 60 minutes
Total time: About 5 to 7 hours (mostly hands-off)
Yield: 1 loaf, about 10 to 12 slices
Step 1: Soak the Quinoa
Place the quinoa in a bowl and rinse it thoroughly under cool running water. Cover it with plenty of fresh water and let it soak for about 4 to 6 hours, or overnight. Once it has softened, drain it very well.
Soaking is the key step that separates a smooth, tender loaf from a gritty one. It’s also the easiest part, since you can set it up before bed or before you leave for work.
Step 2: Prepare the Chickpeas
If you’re using canned chickpeas, drain and rinse them under cool water, then let them sit in the strainer for several minutes so the excess water drips away. If you’re using freshly cooked chickpeas, make sure they are completely tender and cooled before adding them to the blender.
Step 3: Blend the Ingredients
Preheat your oven to 350°F (175°C). Add the soaked quinoa, chickpeas, water, eggs, olive oil, baking powder, and salt to a high-speed blender. Blend until the mixture is thick and mostly smooth, pausing occasionally to scrape down the sides.
Keep blending until no large pieces of chickpea or quinoa remain. The batter should be thick, pourable, and even in texture. A high-speed blender gives the best results, but a food processor can work if you process for longer and scrape the bowl often.
Step 4: Prepare the Loaf Pan
Lightly grease an 8 × 4-inch loaf pan or line it with parchment paper. Parchment makes it easier to lift the loaf out and prevents sticking. Pour the batter into the pan and gently smooth the top with a spatula.
Step 5: Bake the Bread
Bake the loaf in the preheated oven for about 50 to 60 minutes, until the top is lightly golden and the center feels firm. Insert a toothpick into the center. It should come out mostly clean when the bread is fully baked.
If the top browns too quickly, loosely cover the loaf with foil during the final part of baking. This protects the crust while the inside finishes cooking.
Step 6: Cool and Slice
Remove the bread from the oven and let it cool in the pan for 10 to 15 minutes. Carefully transfer it to a wire rack and let it cool completely. Once cool, use a sharp serrated knife to cut it into even slices.
Patience here pays off. A fully cooled loaf slices cleanly and has the best texture.
Common Mistakes to Avoid
Even simple recipes can go wrong. Here are the most common issues and how to prevent them.
Skipping the soak. Unsoaked quinoa won’t blend as smoothly and can leave the bread gritty. Give it the full 4 to 6 hours.
Not draining the quinoa well. Excess soaking water changes the ratio of liquid in the batter. Drain thoroughly before blending.
Using wet chickpeas. Rinse, then let them drain. A watery batter leads to a dense, gummy center.
Under-blending. If you see flecks of chickpea skin or whole quinoa grains, keep blending. Smoothness is what makes the crumb tender.
Slicing while warm. Warm gluten-free bread is fragile. Cooling completely lets the structure set.
Pulling it out too soon. If your toothpick comes out wet, give the loaf a few more minutes. Ovens vary, so start checking at 50 minutes and go up to 60 or slightly beyond if needed.
Serving Ideas: How to Enjoy Quinoa Chickpea Bread
This bread is savory and hearty, so it pairs best with savory toppings and fillings. Here are some ideas:
Toast it. Toasting brings out the nutty flavor and gives the slices a crisp edge. Top with:
- Mashed avocado and a pinch of salt
- Hummus and sliced cucumber
- A fried or soft-boiled egg
- Cottage cheese with tomatoes and herbs
Build a sandwich. Sturdy enough to hold fillings, the bread works well for hearty gluten-free sandwiches with vegetables, cheese, chicken, or your favorite fillings.
Make open-faced sandwiches. Pile on fresh vegetables and a savory spread for an easy lunch or snack.
Serve it with meals. Warm or toasted slices are excellent alongside soups, salads, roasted vegetables, and other hearty dishes. Use a slice to mop up the last bit of a tomato soup or lentil stew.
Pack it for lunch. Slices hold up well in lunchboxes and make an easy, filling base for a savory snack.
How to Store Quinoa Chickpea Bread
Refrigerator: Store the completely cooled bread in an airtight container or wrapped tightly in the refrigerator for up to 4 to 5 days. Because the loaf is made from whole foods and contains no preservatives, refrigeration keeps it fresh.
Freezer: For longer storage, slice the loaf and place the slices in a freezer-safe bag or container. They keep for 2 to 3 months. Slicing before freezing is a huge time-saver, since you can pull out exactly as many slices as you need.
Reheating: Thaw individual slices, then warm them in a toaster, oven, or skillet. Toasting restores a pleasantly firm exterior and warms the crumb through.
Why Quinoa and Chickpeas Work So Well Together
Both ingredients have a long history as pantry staples, and they complement each other in flavor and texture.
Chickpeas provide creaminess and body. When blended, they turn into a smooth, thick base that holds moisture. Quinoa provides a light nuttiness and a slightly seedy texture that reminds you of a multigrain loaf. Together, they create a crumb that’s tender without being fragile, and the flavor is mild enough to pair with almost any topping.
Nutritionally, chickpeas and quinoa are both popular in plant-based and gluten-free cooking, valued for their protein and fiber. Combined with eggs, this bread offers a more filling option than many refined gluten-free breads made from starches alone. Nutrition varies by ingredients and slice size, so if you track macros closely, calculate them using your specific products.
Who Is This Bread For?
- People avoiding gluten. Naturally gluten-free ingredients make this an easy option, provided you verify labels.
- Anyone who wants a high-protein bread. The combination of legumes, quinoa, and eggs makes for a filling slice.
- Busy meal preppers. Bake once, slice, freeze, and enjoy all month.
- People who want fewer processed ingredients. With just seven whole-food ingredients, there are no gums, starches, or artificial additives.
- Those looking for a dairy-free bread. The recipe contains no dairy, so it fits dairy-free diets as written.
Frequently Asked Questions
Is quinoa chickpea bread really gluten-free?
Yes, the ingredients are naturally gluten-free. If you need to avoid gluten strictly, choose products labeled gluten-free, especially for the quinoa, canned chickpeas, and baking powder, to avoid cross-contamination.
Can I make this bread without eggs?
This recipe relies on eggs for structure and binding, so it’s written with them. Egg substitutes may change the texture significantly, and the recipe hasn’t been tested that way here.
Do I have to soak the quinoa?
Soaking is strongly recommended. It softens the quinoa so it blends into a smoother batter and produces a more tender loaf. Aim for 4 to 6 hours or overnight.
Can I use canned chickpeas?
Absolutely. Drain and rinse them well, then let them drain for a few minutes so the batter isn’t too wet. Freshly cooked chickpeas also work if they’re fully tender and cooled.
Do I need a high-speed blender?
A high-speed blender gives the smoothest result, which leads to the best texture. A food processor may work, but you’ll need to blend longer and scrape the sides often to remove any large pieces.
How do I know when the bread is done?
The top should be lightly golden and the center should feel firm. A toothpick inserted in the middle should come out mostly clean. If the top is browning too fast, cover it loosely with foil.
Why is my bread gummy in the middle?
The most common causes are wet chickpeas, insufficiently drained quinoa, under-baking, or slicing before the loaf has cooled completely. Drain everything well, bake until the center is firm, and let the loaf cool fully.
How long does it last?
Refrigerated in an airtight container, it keeps for 4 to 5 days. Frozen slices last 2 to 3 months.
Can I toast it?
Yes, and it’s one of the best ways to enjoy it. Toast slices in a toaster, oven, or skillet for a crisp exterior.
What size pan should I use?
An 8 × 4-inch loaf pan is ideal. Grease it lightly or line it with parchment paper for easy removal.
Final Thoughts
Quinoa chickpea bread proves that gluten-free baking doesn’t need to be complicated. With seven basic ingredients, a blender, and a little planning for the soak, you get a hearty, tender loaf that works for breakfast, lunch, and everything in between. It’s naturally flourless, protein-rich, and freezer-friendly, which makes it as practical as it is wholesome.
Give it a try this week: soak the quinoa tonight, blend and bake tomorrow, and by afternoon you’ll have fresh homemade bread ready for avocado toast, sandwiches, or a warm slice alongside your favorite soup. Once you’ve made it, you may find it becomes a regular in your kitchen.
Print
Quinoa Chickpea Bread (Gluten-Free)
Ingredients
Here is what goes into one loaf:
- 1½ cups (250 g) cooked chickpeas, drained and rinsed
- 1 cup (170 g) uncooked quinoa
- 1½ cups (360 ml) water, plus more for soaking
- 2 large eggs
- 2 tablespoons olive oil
- 1 teaspoon baking powder
- ½ teaspoon salt
A Closer Look at the Key Ingredients
Chickpeas. Chickpeas (also called garbanzo beans) form the base of the bread. Blended, they become creamy and thick, giving the loaf its moist, tender interior. Canned chickpeas are the most convenient option, but freshly cooked chickpeas work just as well as long as they are completely tender and cooled. Whichever you choose, drain them very well so the batter doesn’t turn watery.
Quinoa. Quinoa adds a slightly nutty flavor and a wholesome, seedy texture. When soaked and blended, it helps create structure in the loaf. Always rinse quinoa before using it. Its natural coating can taste bitter, and a good rinse removes it.
Eggs. The eggs act as the binder, holding the batter together and helping the loaf rise and set. They are essential in this recipe, so this version is not vegan.
Olive oil. Olive oil adds moisture and richness and helps the bread bake into a soft crumb rather than a dry one.
Baking powder. This is the leavening agent. It gives the loaf a little lift so it isn’t overly dense.
Salt. Salt brings out the natural flavor of the chickpeas and quinoa. Without it, the bread can taste flat.
Instructions
Prep time: About 15 minutes
Soaking time: Approximately 4 to 6 hours
Baking time: Approximately 50 to 60 minutes
Total time: About 5 to 7 hours (mostly hands-off)
Yield: 1 loaf, about 10 to 12 slices
Place the quinoa in a bowl and rinse it thoroughly under cool running water. Cover it with plenty of fresh water and let it soak for about 4 to 6 hours, or overnight. Once it has softened, drain it very well.
Soaking is the key step that separates a smooth, tender loaf from a gritty one. It’s also the easiest part, since you can set it up before bed or before you leave for work.
If you’re using canned chickpeas, drain and rinse them under cool water, then let them sit in the strainer for several minutes so the excess water drips away. If you’re using freshly cooked chickpeas, make sure they are completely tender and cooled before adding them to the blender.
Preheat your oven to 350°F (175°C). Add the soaked quinoa, chickpeas, water, eggs, olive oil, baking powder, and salt to a high-speed blender. Blend until the mixture is thick and mostly smooth, pausing occasionally to scrape down the sides.
Keep blending until no large pieces of chickpea or quinoa remain. The batter should be thick, pourable, and even in texture. A high-speed blender gives the best results, but a food processor can work if you process for longer and scrape the bowl often.
Lightly grease an 8 × 4-inch loaf pan or line it with parchment paper. Parchment makes it easier to lift the loaf out and prevents sticking. Pour the batter into the pan and gently smooth the top with a spatula.
Bake the loaf in the preheated oven for about 50 to 60 minutes, until the top is lightly golden and the center feels firm. Insert a toothpick into the center. It should come out mostly clean when the bread is fully baked.
If the top browns too quickly, loosely cover the loaf with foil during the final part of baking. This protects the crust while the inside finishes cooking.
Remove the bread from the oven and let it cool in the pan for 10 to 15 minutes. Carefully transfer it to a wire rack and let it cool completely. Once cool, use a sharp serrated knife to cut it into even slices.