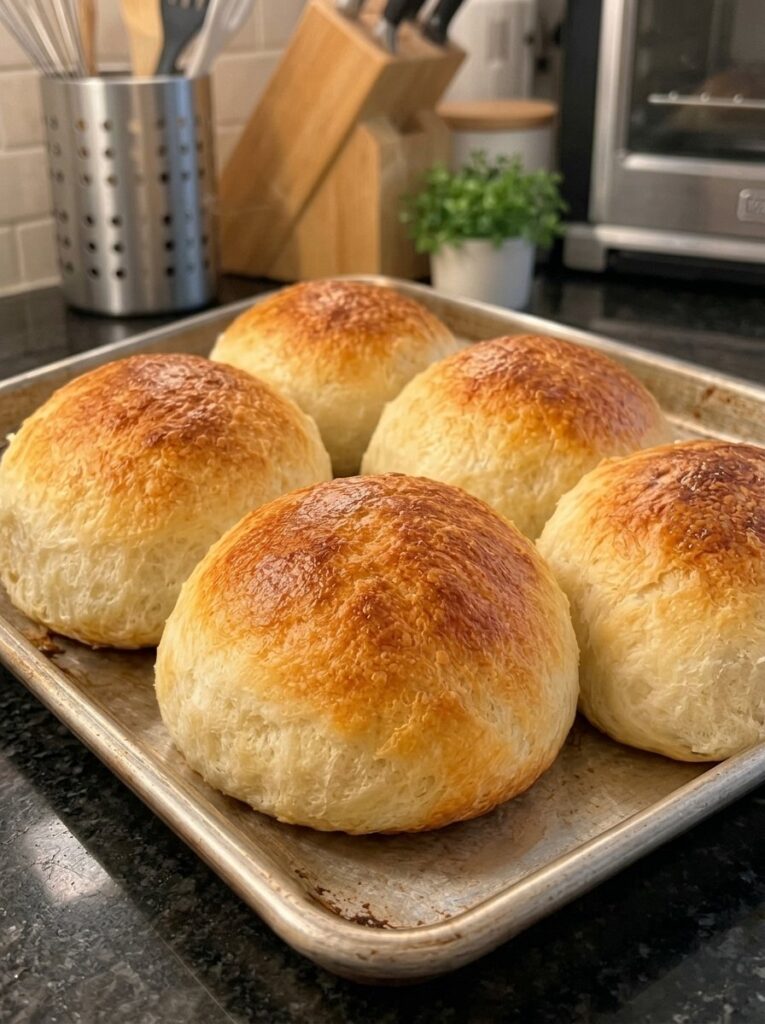
There are days when you want warm, homemade bread on the table but have no interest in waiting for dough to rise. If that sounds familiar, these 3-ingredient fluffy Greek yogurt bread rolls are about to become a staple in your kitchen. They take a very short ingredient list and turn it into six tender, lightly golden rolls with a soft crumb and a gentle tang, all without yeast, kneading, or proofing.
The idea is simple. Thick Greek yogurt brings moisture and a subtle tang, a whole egg binds the dough, and prepared self-rising flour provides both the structure and the leavening. Stir, shape, bake, and you have a basket of quick bread rolls in roughly 40 to 45 minutes from start to finish. Whether you need a side for soup, something to split for mini sandwiches, or a warm roll to slather with butter at breakfast, this recipe delivers with almost no effort.
In this guide you will find the full recipe, a clear explanation of why it works, practical tips for the best texture, ingredient swaps, troubleshooting help, serving ideas, storage instructions, and answers to the questions bakers ask most often.
Why You’ll Love These Greek Yogurt Bread Rolls
Before we get to the recipe, here is why this one earns a permanent spot in your rotation:
- Only three ingredients. Self-rising flour, Greek yogurt, and one large egg. Nothing else is required.
- No yeast. You skip the activation step, the waiting, and the uncertainty that sometimes comes with yeast doughs.
- No kneading and no proofing. The dough is stirred together in one bowl and shaped right away.
- Fast. About 10 minutes of prep, 20 to 25 minutes in the oven, and a short cooling time.
- Soft and tender. Greek yogurt keeps the crumb moist, while the egg gives the rolls a pleasant richness.
- Versatile. They work for breakfast, lunch, dinner, packed lunches, and last-minute guests.
- Beginner friendly. There is very little that can go wrong, which makes them a great first bread recipe.
What Are Greek Yogurt Bread Rolls?
Greek yogurt bread rolls belong to the family of quick breads, meaning they rely on a chemical leavening agent such as baking powder rather than yeast. Self-rising flour is simply all-purpose flour that already has baking powder and salt mixed in. When it meets the moisture in the yogurt and egg, the baking powder activates and creates the lift that gives the rolls their puffed, rounded shape in the oven.
The yogurt is the star. It is thick, slightly acidic, and rich in protein, which makes it excellent for tender baked goods. The acidity reacts gently with the leavening, and the thick texture means you can form a workable dough without adding much extra liquid. This is the same principle behind popular two-ingredient yogurt doughs, with the addition of an egg here to improve binding, color, and softness.
It is worth setting expectations honestly: these are not identical to a classic yeast dinner roll. They are tender and soft, but slightly denser than a long-fermented, pillowy roll. What they offer in exchange is speed and simplicity, and they are delicious in their own right.
Ingredients You’ll Need
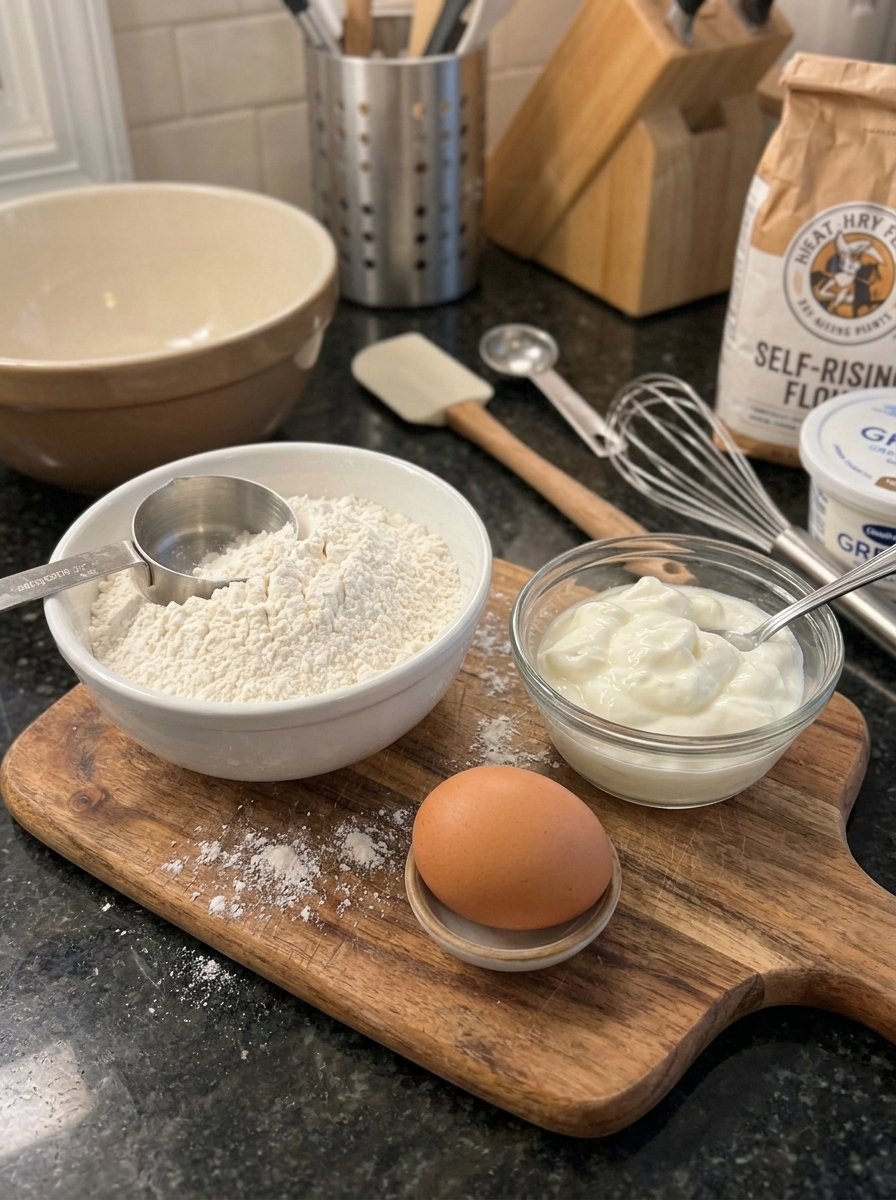
The full ingredient list fits in one sentence, but each component matters.
- 2½ cups prepared self-rising flour, spooned and leveled (300 g), divided: 290 g for the dough and 10 g for dusting
- 1 cup (240 g) plain, thick Greek yogurt
- 1 large egg
About the Self-Rising Flour
Self-rising flour is the backbone of this recipe because it supplies both structure and lift. Because the leavening is already built in, you do not need to measure baking powder or salt separately. Weighing the flour on a kitchen scale is the most reliable way to get consistent results. If you only have measuring cups, spoon the flour into the cup and level it off with a knife rather than scooping directly from the bag, which can pack in too much flour and lead to dry, heavy rolls.
We reserve 10 g of the flour for dusting the work surface and your hands, since the dough is soft and a little tacky.
About the Greek Yogurt
Choose plain, thick Greek yogurt. Full-fat or 2% varieties both work well, and the richer versions tend to give a softer, more tender crumb. Avoid flavored or sweetened yogurt, which can change the taste and the moisture balance. Regular, thinner yogurt is not recommended because it can make the mixture too sticky to shape.
About the Egg
One large egg helps bind the dough, adds richness, and encourages a lightly golden crust. Let it sit out for a few minutes if it is very cold so it blends smoothly with the yogurt.
Equipment
You do not need anything fancy:
- A large mixing bowl
- A whisk and a spatula
- A baking sheet
- Parchment paper
- A wire cooling rack
- A kitchen scale (optional but helpful)
How to Make 3-Ingredient Greek Yogurt Bread Rolls
Step 1: Prepare the Oven and Baking Sheet
Preheat your oven to 375°F (190°C). Line a baking sheet with parchment paper so the rolls release easily and cleanup is effortless.
Step 2: Mix the Wet Ingredients
In a large mixing bowl, whisk together the Greek yogurt and the egg until the mixture is smooth and creamy. Take a moment here to make sure there are no streaks of egg white, since an even base leads to an even dough.
Step 3: Add the Self-Rising Flour
Add the 290 g of self-rising flour to the yogurt mixture. Stir with a spatula until a soft, slightly sticky dough forms and no dry flour remains. Stop as soon as everything is combined. Overmixing can toughen the rolls, so a light hand is key.
Step 4: Divide the Dough
Lightly dust your work surface with some of the reserved flour. Transfer the dough onto the surface and gently divide it into 6 equal portions. For uniform rolls, you can weigh the dough and divide the total by six, or simply cut it in half and then into thirds.
Step 5: Shape the Rolls
With lightly floured hands, gently shape each portion into a round ball. Place the rolls on the prepared baking sheet, leaving space between them so they can expand. Lightly smooth the tops if needed. The dough may feel a little tacky, so use the remaining reserved flour sparingly on your hands rather than working extra flour into the dough.
Step 6: Bake Until Golden
Bake for 20 to 25 minutes, or until the rolls are puffed, lightly golden, and cooked through. The bottoms should be lightly browned. Ovens vary, so start checking at 20 minutes.
Step 7: Cool and Serve
Remove the rolls from the oven and transfer them to a wire rack. Let them cool for about 10 minutes before serving. They are at their softest when enjoyed warm.
Recipe Details
- Prep time: 10 minutes
- Bake time: 20 to 25 minutes
- Cooling time: 10 minutes
- Total time: Approximately 40 to 45 minutes
- Servings: 6 rolls
- Oven temperature: 375°F (190°C)
Tips for the Best Fluffy Greek Yogurt Bread Rolls
Small details make a noticeable difference with a recipe this short. Keep these tips in mind.
Use Thick Greek Yogurt
The consistency of the yogurt determines how easy the dough is to handle. Thick Greek yogurt produces a soft but shapeable dough. If your yogurt looks watery, strain it through a fine mesh sieve or cheesecloth for 15 to 30 minutes before using.
Measure the Flour Carefully
Too much flour yields dry, dense rolls, while too little makes a sticky dough that spreads. Weigh the flour if you can. If you use cups, spoon and level instead of packing.
Avoid Overmixing
Stir just until the ingredients come together. Quick breads rely on a gentle touch. The more you mix, the more gluten develops, and the chewier and tougher the rolls become.
Keep Your Hands Lightly Floured
The dough is meant to be a little tacky. Use the reserved flour to coat your hands and surface lightly. Resist the urge to add a lot more, as this will dry out the finished rolls.
Don’t Expect Yeast-Bread Texture
These are quick bread rolls, so they are tender and slightly denser than traditional yeast rolls. Think of the texture as somewhere between a soft biscuit and a dinner roll, with a moist, tender interior.
Bake on the Middle Rack
Placing the baking sheet on the middle rack promotes even browning. If the bottoms darken too quickly, move the tray up a rack or place a second baking sheet underneath for insulation.
Easy Variations and Flavor Ideas
Once you have the base recipe down, it is easy to customize. Keep additions modest so the dough stays soft and easy to shape.
- Egg wash shine: Brush the tops with a beaten egg or a little milk before baking for a deeper golden color.
- Butter finish: Brush warm rolls with melted butter for extra softness and flavor.
- Garlic and herb: After baking, brush with melted butter mixed with minced garlic and chopped parsley.
- Cheesy rolls: Fold a small handful of shredded cheddar or Parmesan into the dough, or sprinkle some on top before baking.
- Everything topping: Sprinkle everything bagel seasoning over the tops for a savory crust.
- Sesame or seeds: Press sesame, poppy, or sunflower seeds onto the tops.
- Herb-flecked: Stir a teaspoon or two of dried herbs, such as rosemary or Italian seasoning, into the dough.
Additions beyond the three core ingredients mean this is no longer a strict three-ingredient recipe, but the base method stays exactly the same.
What If You Don’t Have Self-Rising Flour?
Self-rising flour is the easiest route, but you can make your own. A commonly used homemade substitute is to whisk together 1 cup of all-purpose flour, 1½ teaspoons of baking powder, and ¼ teaspoon of salt for every cup of self-rising flour needed. Mix thoroughly so the leavening is evenly distributed. For best results, weigh and combine the ingredients before adding them to the yogurt mixture, and keep in mind that the texture can vary slightly depending on the brand of flour you use.
Troubleshooting Common Problems
My dough is too sticky to shape.
The yogurt may be thinner than ideal, or the flour may have been under-measured. Dust your hands and the surface lightly and work quickly. Next time, use thicker Greek yogurt or weigh your flour.
My rolls came out dense.
This can happen if the dough was overmixed, if the flour was packed into the cup, or if the self-rising flour was old. Self-rising flour loses potency over time because the baking powder weakens, so check the date on the package.
My rolls did not rise much.
Stale self-rising flour is the usual culprit. Overmixing and placing the rolls too close together can also limit their rise. Leave a little space between each roll.
The tops browned but the centers are doughy.
Your oven may run hot. Lower the temperature slightly, extend the baking time a few minutes, and tent the rolls loosely with foil if the tops are getting too dark.
The rolls taste a bit tangy.
A gentle tang is part of the charm of Greek yogurt. If you prefer a milder flavor, try a full-fat yogurt, which is typically creamier and less sharp, or brush the baked rolls with butter.
Serving Ideas
These versatile rolls fit into nearly any meal.
- For breakfast: Serve warm with butter, cream cheese, or your favorite jam.
- With eggs: Pair with scrambled eggs, omelets, or turn them into breakfast sandwiches.
- With soups and stews: Use them to mop up every last drop of tomato soup, chili, or beef stew.
- With salads: Add a warm roll alongside a fresh salad for a satisfying lunch.
- As mini sandwiches: Slice in half and fill with turkey, cheese, or chicken for quick lunches or party sliders.
- For family dinners: Serve as a simple bread side with roasted chicken and vegetables.
- For lunchboxes: Once cooled, they pack well and hold up nicely with a simple filling.
How to Store Greek Yogurt Bread Rolls
Proper storage keeps the rolls tender and fresh.
- Room temperature: Store completely cooled rolls in an airtight container for up to 1 day.
- Refrigerator: Keep in an airtight container for up to 4 days.
- Freezer: Freeze cooled rolls in a freezer-safe bag for up to 2 months.
- Reheating: Warm in a 300°F (150°C) oven for 5 to 7 minutes, or microwave briefly until soft and warm.
Always let the rolls cool completely before sealing them in a container. Trapped steam creates moisture that can make the crust soggy. If you are freezing a batch, you can wrap the rolls individually so you can reheat only what you need.
Make-Ahead and Meal Prep Tips
Because the dough relies on chemical leavening, it is best baked soon after mixing. Self-rising flour begins to react as soon as it meets the wet ingredients, so letting the dough sit for a long time can reduce the lift. Instead of making the dough ahead, bake the rolls in advance and freeze them. A quick reheat in the oven restores much of their fresh-baked softness, which makes them ideal for busy weeknights and holiday meals.
Why This Recipe Works
Understanding the science helps you bake with confidence.
- Greek yogurt contributes moisture, protein, and acidity. Its thickness means the dough needs no additional liquid, and its acidity helps tenderize the crumb.
- The egg acts as a binder and adds structure and richness. It also supports browning on the crust.
- Self-rising flour provides gluten for structure and baking powder for lift, so the dough puffs in the oven without any proofing time.
- Minimal mixing keeps gluten development low, which keeps the rolls tender rather than chewy.
- A moderate oven temperature of 375°F (190°C) cooks the center through while giving the exterior a light golden finish.
Frequently Asked Questions
Can I make these rolls without yeast?
Yes. This recipe contains no yeast at all. The self-rising flour provides the leavening through baking powder, so there is no proofing or rising time.
Do I need to knead the dough?
No. Simply stir the ingredients until combined. A brief, gentle shaping with floured hands is all that is needed.
Can I use regular yogurt instead of Greek yogurt?
It is not recommended. Regular yogurt contains more liquid, which can make the dough too sticky to shape. If you only have regular yogurt, strain it through cheesecloth or a fine sieve until thick.
Can I use non-fat Greek yogurt?
Yes, but the rolls may be slightly less tender and rich than those made with full-fat or 2% yogurt. Make sure the yogurt is thick and plain.
Can I use all-purpose flour?
Not on its own, because it lacks leavening. Add baking powder and salt to all-purpose flour to make a homemade self-rising substitute, as described above.
Can I double the recipe?
Yes. Double each ingredient and divide the dough into 12 rolls. Bake on two lined baking sheets, or in batches, and check for doneness at the 20-minute mark.
Why are my rolls dense?
The most common causes are overmixing, packing the flour into the measuring cup, or using old self-rising flour. Weigh your flour, mix gently, and check the freshness of your flour.
How do I know when the rolls are done?
They should be puffed, lightly golden on top, and lightly browned on the bottom. They should feel firm and sound slightly hollow when tapped on the base.
Can I freeze the dough?
Baking the rolls first and freezing them is the better option. Because the leavening activates once the dough is mixed, freezing raw dough may reduce the rise.
Are these rolls the same as yeast rolls?
No. They are quick bread rolls, so they are tender and slightly denser than traditional yeast rolls. They are meant to be a fast, convenient alternative.
Can I make them sweet?
Yes. Brush the baked rolls with butter and a light sprinkle of cinnamon sugar, or serve them with honey or jam. Keep any dough additions minimal so the texture stays soft.
Can I make them gluten-free?
This recipe is written for standard self-rising flour. A gluten-free self-rising blend may work, but the texture and hydration will differ, so you may need to adjust the amounts.
Final Thoughts
These 3-ingredient fluffy Greek yogurt bread rolls prove that great homemade bread does not need to be complicated or time-consuming. With just self-rising flour, thick Greek yogurt, and one egg, you can have six tender, lightly golden rolls on the table in under an hour. They are easy enough for beginners, flexible enough for endless variations, and reliable enough to make again and again.
The next time you want warm bread without the wait, reach for this recipe. Serve the rolls fresh from the oven with butter, tuck them alongside a bowl of soup, or fill them for quick mini sandwiches. However you enjoy them, they are a simple, satisfying addition to any meal.
Print
3-Ingredient Fluffy Greek Yogurt Bread Rolls
- Total Time: 40 to 45 minutes
Ingredients
The full ingredient list fits in one sentence, but each component matters.
- 2½ cups prepared self-rising flour, spooned and leveled (300 g), divided: 290 g for the dough and 10 g for dusting
- 1 cup (240 g) plain, thick Greek yogurt
- 1 large egg
About the Self-Rising Flour
Self-rising flour is the backbone of this recipe because it supplies both structure and lift. Because the leavening is already built in, you do not need to measure baking powder or salt separately. Weighing the flour on a kitchen scale is the most reliable way to get consistent results. If you only have measuring cups, spoon the flour into the cup and level it off with a knife rather than scooping directly from the bag, which can pack in too much flour and lead to dry, heavy rolls.
We reserve 10 g of the flour for dusting the work surface and your hands, since the dough is soft and a little tacky.
About the Greek Yogurt
Choose plain, thick Greek yogurt. Full-fat or 2% varieties both work well, and the richer versions tend to give a softer, more tender crumb. Avoid flavored or sweetened yogurt, which can change the taste and the moisture balance. Regular, thinner yogurt is not recommended because it can make the mixture too sticky to shape.
About the Egg
One large egg helps bind the dough, adds richness, and encourages a lightly golden crust. Let it sit out for a few minutes if it is very cold so it blends smoothly with the yogurt.
Equipment
You do not need anything fancy:
- A large mixing bowl
- A whisk and a spatula
- A baking sheet
- Parchment paper
- A wire cooling rack
- A kitchen scale (optional but helpful)
Instructions
Preheat your oven to 375°F (190°C). Line a baking sheet with parchment paper so the rolls release easily and cleanup is effortless.
Step 2: Mix the Wet Ingredients
In a large mixing bowl, whisk together the Greek yogurt and the egg until the mixture is smooth and creamy. Take a moment here to make sure there are no streaks of egg white, since an even base leads to an even dough.
Step 3: Add the Self-Rising Flour
Add the 290 g of self-rising flour to the yogurt mixture. Stir with a spatula until a soft, slightly sticky dough forms and no dry flour remains. Stop as soon as everything is combined. Overmixing can toughen the rolls, so a light hand is key.
Step 4: Divide the Dough
Lightly dust your work surface with some of the reserved flour. Transfer the dough onto the surface and gently divide it into 6 equal portions. For uniform rolls, you can weigh the dough and divide the total by six, or simply cut it in half and then into thirds.
Step 5: Shape the Rolls
With lightly floured hands, gently shape each portion into a round ball. Place the rolls on the prepared baking sheet, leaving space between them so they can expand. Lightly smooth the tops if needed. The dough may feel a little tacky, so use the remaining reserved flour sparingly on your hands rather than working extra flour into the dough.
Step 6: Bake Until Golden
Bake for 20 to 25 minutes, or until the rolls are puffed, lightly golden, and cooked through. The bottoms should be lightly browned. Ovens vary, so start checking at 20 minutes.
Step 7: Cool and Serve
Remove the rolls from the oven and transfer them to a wire rack. Let them cool for about 10 minutes before serving. They are at their softest when enjoyed warm.
- Prep Time: 10 minutes
- Cook Time: 10 minutes