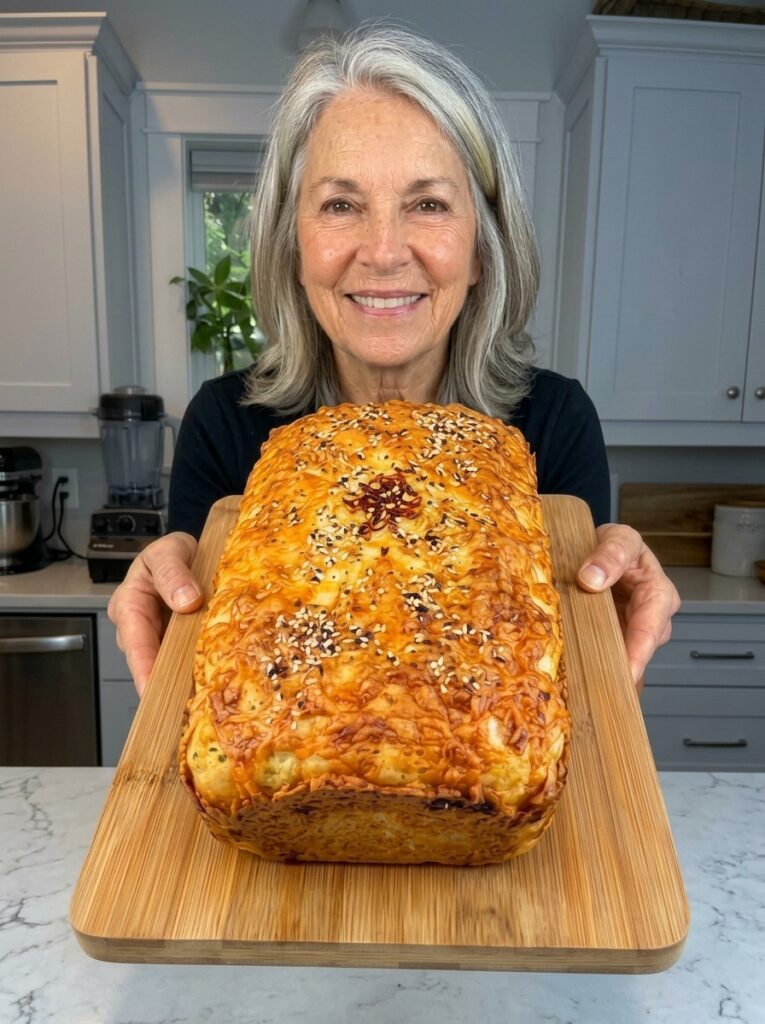
3-Ingredient High-Protein Cannellini Bean Bread: The Easiest Healthy Bread You’ll Ever Make
If you’ve been searching for a way to enjoy fresh, homemade bread without the guilt, the carbs, or the complicated technique, this 3-Ingredient High-Protein Cannellini Bean Bread might just be the recipe you’ve been waiting for. Made with nothing more than cannellini beans, eggs, and baking powder, this loaf delivers a soft, fluffy texture with a serious protein punch — all without a single cup of flour, sugar, or yeast.
Whether you’re following a high-protein diet, cutting back on refined carbohydrates, exploring gluten-free options, or simply looking for a fun and functional way to use up canned beans, this bread checks every box. It’s beginner-friendly, budget-conscious, and versatile enough to work for breakfast, lunch, snacks, or a side to dinner. Below, we’ll walk through everything you need to know: why this bread works, exactly how to make it, tips for perfecting the texture, creative ways to serve it, and how to store it for later.
Why Cannellini Bean Bread Is Taking Over Healthy Kitchens
Bean-based baking has become one of the most talked-about trends in the healthy eating space, and it’s easy to see why. Beans are naturally rich in fiber, plant-based protein, and micronutrients like iron, magnesium, and folate. When blended into a smooth batter and combined with eggs, they transform into something that looks, slices, and tastes remarkably like traditional bread — minus the flour.
Cannellini beans, in particular, are an excellent choice for this kind of recipe. They have a mild, creamy flavor and a smooth texture once blended, which means they don’t overpower the final product with a strong “beany” taste. Instead, they lend body, moisture, and a subtle richness that makes the bread feel hearty and satisfying rather than dense or gummy.
This recipe stands out from other “healthy bread” alternatives because of its sheer simplicity. Many high-protein or low-carb bread recipes call for a long list of specialty ingredients — almond flour, psyllium husk, xanthan gum, protein powder, and more. This one strips everything down to three pantry staples, making it accessible to nearly anyone, regardless of dietary restrictions or how well-stocked their kitchen is.
The Nutritional Appeal: Why This Bread Fits So Many Diets
One of the biggest draws of this cannellini bean bread is how naturally it aligns with several popular eating patterns:
High-protein diets: Between the eggs and the beans, each slice delivers a meaningful protein boost compared to traditional wheat-based bread, which is primarily carbohydrate with minimal protein.
Gluten-free lifestyles: Since there’s no wheat flour involved, this bread is naturally gluten-free, making it a great option for those with gluten sensitivities or celiac disease (always double-check that your baking powder is certified gluten-free if this is a strict requirement).
Lower-carb eating: Compared to a standard flour-based loaf, this bread contains significantly fewer net carbs per slice, since the base ingredient is a fiber-and-protein-rich legume rather than refined starch.
Meal prep and portion control: Because the recipe yields a defined loaf of 10–12 slices, it’s easy to portion out for the week, whether you’re prepping breakfasts, lunches, or snacks in advance.
Budget-friendly eating: Canned or home-cooked cannellini beans and eggs are inexpensive, shelf-stable (in the case of canned beans), and widely available, making this a cost-effective way to add variety to a healthy eating routine.
Ingredients You’ll Need
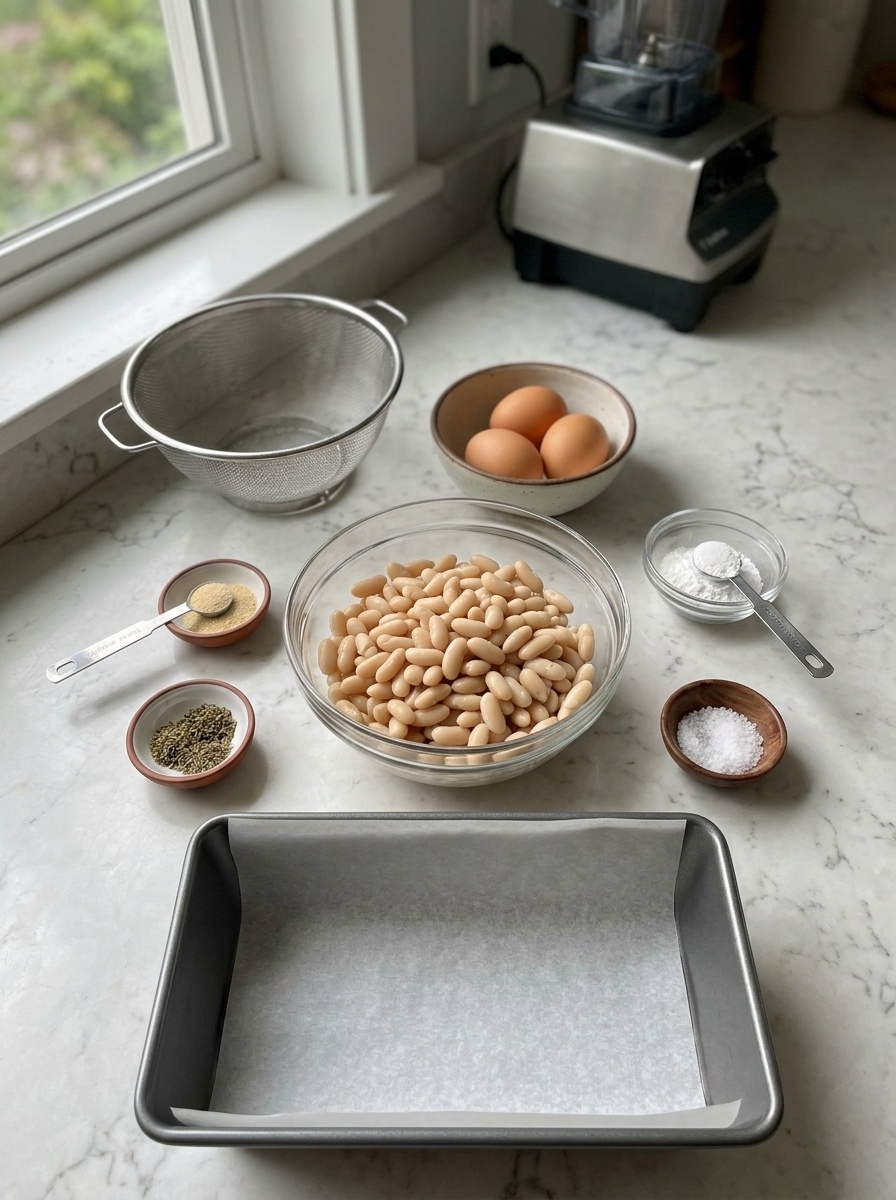
This recipe truly lives up to its name — just three main ingredients form the base of the bread:
- 2 cups (330 g) cooked cannellini beans, drained and rinsed
- 3 large eggs
- 2 teaspoons baking powder
That’s it for the essentials. However, if you want to customize the flavor profile, a few optional add-ins can elevate the bread without compromising its simplicity, such as garlic powder, dried herbs (like rosemary, thyme, or Italian seasoning), or a pinch of salt to enhance the overall savoriness.
Step-by-Step Instructions
Step 1: Prepare the Cannellini Beans
Start by placing your cannellini beans in a colander and draining them thoroughly. Rinse them under cool running water to remove excess sodium and any canning liquid residue, then let them sit for a few minutes so as much water as possible drains away. This step matters more than it might seem — beans that are too wet will introduce excess moisture into the batter, which can prevent the loaf from setting properly during baking. The drier your beans going into the blender, the better your final texture will be.
Step 2: Blend the Ingredients
Add the well-drained beans and the eggs to a high-powered blender. Blend until the mixture is completely smooth and creamy, pausing occasionally to scrape down the sides so no chunks of bean skin or whole beans remain. A high-powered blender is genuinely helpful here, since it breaks down the beans into a uniform, silky batter rather than leaving a grainy or lumpy texture.
Once the base is smooth, add the baking powder and blend just until it’s evenly incorporated. Try not to over-blend at this stage — baking powder activates once it’s mixed into wet ingredients, and excessive mixing can cause it to lose some of its leavening power before the batter even reaches the oven. The finished batter should be thick, smooth, and free of visible bean pieces.
Step 3: Prepare the Loaf Pan
Preheat your oven to 350°F (175°C). While it heats, lightly grease a standard loaf pan, or line it with parchment paper for effortless removal later (this is especially helpful if you plan to slice and store the bread right away). Pour the blended batter into the prepared pan and use a spatula to smooth the top into an even layer.
Step 4: Bake the Bread
Place the loaf pan in your preheated oven and bake for approximately 40–50 minutes. You’ll know it’s ready when the top turns lightly golden and the center feels firm rather than jiggly or wet when gently pressed. Every oven runs slightly differently, so start checking around the 40-minute mark. If the top is browning faster than the inside is cooking, loosely tent the loaf with a piece of foil to prevent burning while the center finishes setting.
Step 5: Cool and Slice
Once baked, remove the loaf from the oven and let it rest in the pan for about 10–15 minutes. This cooling period allows the structure to firm up, making it much easier to remove without falling apart. Carefully transfer the loaf to a wire rack and let it cool completely before slicing.
This final cooling step is one of the most important — and most commonly skipped — parts of the process. Because this bread doesn’t contain gluten-forming flour, it relies on the eggs and baking powder to hold its structure. Slicing too early, while the interior is still warm and soft, can cause the bread to crumble or feel gummy. Letting it cool fully allows the crumb to set properly, giving you clean, sliceable pieces.
Tips for the Best Cannellini Bean Bread
A few small adjustments can make a big difference in how your loaf turns out:
- Drain your beans thoroughly. Excess liquid is the number one cause of a soggy or underbaked center. Take the extra minute to rinse and drain well.
- Invest in a good blend. A high-powered blender will give you a smoother batter and, ultimately, a more consistent, bread-like crumb.
- Don’t overmix after adding baking powder. Mix just until combined to preserve the leavening effect.
- Let it cool fully. Patience here pays off in texture — rushing the cooling process is the most common mistake.
- Season to your taste. A little garlic powder, dried herbs, or salt can transform this from a neutral base into a genuinely flavorful savory bread.
Creative Ways to Serve Cannellini Bean Bread
Part of what makes this bread so appealing is its versatility. Because the base flavor is mild, it pairs well with both sweet and savory toppings, making it suitable for nearly any meal of the day.
For breakfast, try toasting a slice and topping it with mashed avocado and a fried or poached egg — a combination that pairs beautifully with the bread’s already high protein content for a truly filling morning meal. For lunch, use two slices to build a sandwich with turkey, cheese, and fresh vegetables, or keep it lighter with an open-faced version topped with hummus, avocado, or cottage cheese.
This bread also holds up well as a snack on its own. A toasted slice with a drizzle of olive oil and a sprinkle of herbs makes a satisfying between-meal bite, while a warm slice served alongside a bowl of soup or a fresh salad can round out a light dinner beautifully. Because the loaf slices evenly into 10–12 pieces, it’s also an excellent candidate for weekly meal prep — portion it out ahead of time so you always have a quick, protein-rich option on hand.
How to Store Cannellini Bean Bread
Proper storage will help you get the most out of your loaf while keeping it fresh and enjoyable to eat.
Once the bread has cooled completely, store it in an airtight container, or wrap it tightly, and refrigerate it for up to 4–5 days. Because this bread doesn’t contain preservatives like store-bought loaves, refrigeration helps maintain both its texture and freshness.
For longer-term storage, slicing and freezing is your best option. Place the sliced pieces in a freezer-safe bag or container, and if you’d like to prevent the slices from sticking together, place a small piece of parchment paper between each one. When you’re ready to enjoy a slice, simply thaw it and toast until warmed through and lightly crisp — this also helps restore some of the texture that can soften slightly after freezing.
Frequently Asked Questions
Can I use a different type of bean?
While this recipe is specifically designed around cannellini beans for their mild flavor and creamy texture, other white beans like great northern beans may work similarly. Keep in mind that different beans have different moisture content, so results may vary slightly.
Why is my loaf dense or gummy in the middle?
This is almost always a sign that either the beans weren’t drained well enough before blending, or the loaf needed a few more minutes in the oven. Make sure the center feels firm to the touch before removing it, and don’t skip the resting and cooling steps afterward.
Can I make this bread sweet instead of savory?
Yes — while the base recipe is neutral, you can experiment with adding a touch of cinnamon or vanilla extract if you’d like to lean the flavor in a sweeter direction for topping with fruit or nut butter.
Is this bread suitable for freezing the whole loaf?
It’s best to slice the loaf before freezing so you can thaw individual portions as needed, rather than defrosting the entire loaf at once.
Final Thoughts
This 3-Ingredient High-Protein Cannellini Bean Bread proves that healthy, homemade bread doesn’t have to be complicated or require a long grocery list. With just cannellini beans, eggs, and baking powder, you can create a soft, satisfying loaf that fits seamlessly into high-protein, gluten-free, or lower-carb lifestyles. It’s affordable, adaptable, and easy enough for even novice bakers to master on the first try.
Whether you’re toasting a slice for breakfast, building a hearty sandwich for lunch, or serving it warm alongside a bowl of soup, this bread offers a simple way to add more plant-based protein and fiber to your day — all while satisfying that craving for real, homemade bread.
Print
3-Ingredient High-Protein Cannellini Bean Bread
Ingredients
This recipe truly lives up to its name — just three main ingredients form the base of the bread:
- 2 cups (330 g) cooked cannellini beans, drained and rinsed
- 3 large eggs
- 2 teaspoons baking powder
That’s it for the essentials. However, if you want to customize the flavor profile, a few optional add-ins can elevate the bread without compromising its simplicity, such as garlic powder, dried herbs (like rosemary, thyme, or Italian seasoning), or a pinch of salt to enhance the overall savoriness.
Instructions
Start by placing your cannellini beans in a colander and draining them thoroughly. Rinse them under cool running water to remove excess sodium and any canning liquid residue, then let them sit for a few minutes so as much water as possible drains away. This step matters more than it might seem — beans that are too wet will introduce excess moisture into the batter, which can prevent the loaf from setting properly during baking. The drier your beans going into the blender, the better your final texture will be.
Add the well-drained beans and the eggs to a high-powered blender. Blend until the mixture is completely smooth and creamy, pausing occasionally to scrape down the sides so no chunks of bean skin or whole beans remain. A high-powered blender is genuinely helpful here, since it breaks down the beans into a uniform, silky batter rather than leaving a grainy or lumpy texture.
Once the base is smooth, add the baking powder and blend just until it’s evenly incorporated. Try not to over-blend at this stage — baking powder activates once it’s mixed into wet ingredients, and excessive mixing can cause it to lose some of its leavening power before the batter even reaches the oven. The finished batter should be thick, smooth, and free of visible bean pieces.
Preheat your oven to 350°F (175°C). While it heats, lightly grease a standard loaf pan, or line it with parchment paper for effortless removal later (this is especially helpful if you plan to slice and store the bread right away). Pour the blended batter into the prepared pan and use a spatula to smooth the top into an even layer.
Place the loaf pan in your preheated oven and bake for approximately 40–50 minutes. You’ll know it’s ready when the top turns lightly golden and the center feels firm rather than jiggly or wet when gently pressed. Every oven runs slightly differently, so start checking around the 40-minute mark. If the top is browning faster than the inside is cooking, loosely tent the loaf with a piece of foil to prevent burning while the center finishes setting.
Once baked, remove the loaf from the oven and let it rest in the pan for about 10–15 minutes. This cooling period allows the structure to firm up, making it much easier to remove without falling apart. Carefully transfer the loaf to a wire rack and let it cool completely before slicing.
This final cooling step is one of the most important — and most commonly skipped — parts of the process. Because this bread doesn’t contain gluten-forming flour, it relies on the eggs and baking powder to hold its structure. Slicing too early, while the interior is still warm and soft, can cause the bread to crumble or feel gummy. Letting it cool fully allows the crumb to set properly, giving you clean, sliceable pieces.