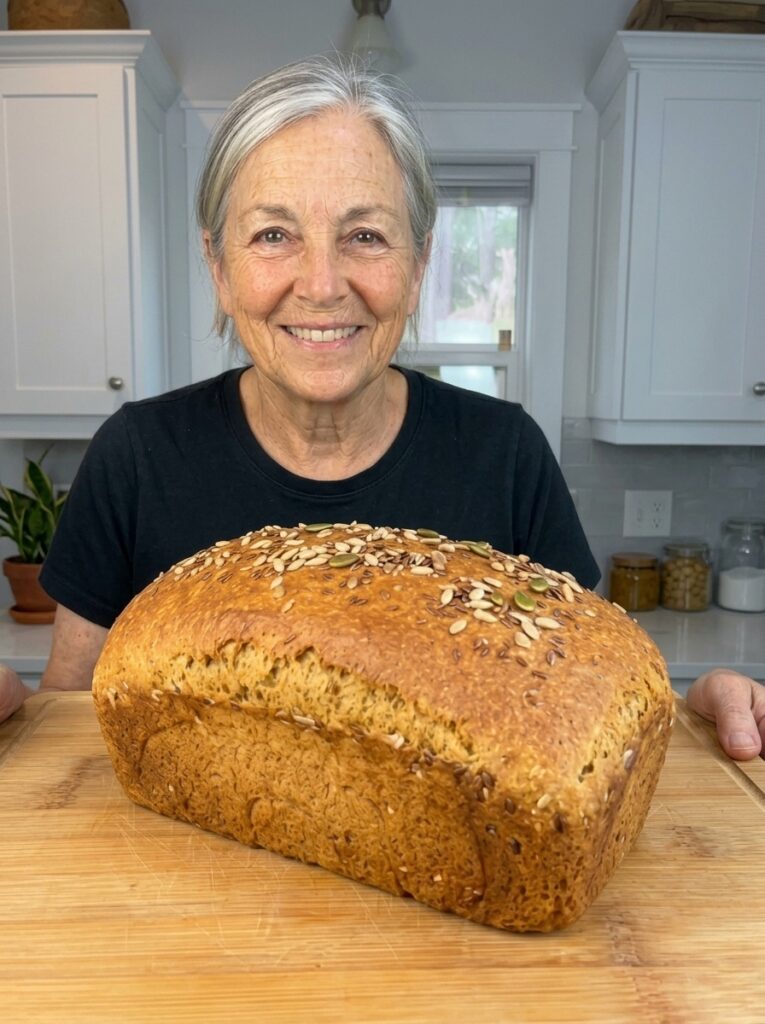
3-Ingredient Oat Flour Bread: The Easiest Homemade Loaf You’ll Ever Make
If you’ve ever wanted to bake your own bread but felt intimidated by yeast, proofing times, and complicated kneading techniques, this recipe is about to change everything. This 3-Ingredient Oat Flour Bread is soft, hearty, and unbelievably simple — made with nothing more than oat flour, eggs, and baking powder. No yeast. No kneading. No waiting hours for dough to rise. Just mix, pour, and bake.
Whether you’re new to baking, looking for a gluten-free-friendly bread option, or simply want a quick homemade loaf without the fuss of traditional bread-making, this recipe delivers. The result is a tender, slightly dense loaf with a naturally nutty oat flavor that pairs beautifully with both sweet and savory toppings. Toast it with butter for breakfast, layer it with avocado and eggs for a satisfying meal, or use it as the base for a simple sandwich — this bread does it all.
In this article, we’ll walk through everything you need to know: the ingredients, step-by-step instructions, expert tips for the best texture, creative serving ideas, proper storage methods, and answers to common questions. By the end, you’ll have everything you need to bake a perfect loaf on your very first try.
Why You’ll Love This 3-Ingredient Oat Flour Bread
There’s something deeply satisfying about pulling a warm, homemade loaf out of the oven — and this recipe makes that experience accessible to absolutely everyone, regardless of baking skill level. Here’s why this bread has become such a popular choice for home bakers:
It’s incredibly simple. With only three ingredients — oat flour, eggs, and baking powder — there’s no need to hunt down specialty items or worry about complicated ratios. Most people already have these staples in their kitchen.
No yeast, no waiting. Traditional bread recipes often require yeast, proofing time, and careful temperature control. This recipe skips all of that. Baking powder does the leavening work instantly, so you can go from mixing bowl to oven in about ten minutes.
No kneading required. Because this isn’t a traditional gluten-based dough, there’s no need to knead. You simply whisk the ingredients together until a thick batter forms, and you’re ready to bake.
Naturally hearty and nutritious. Oat flour brings a wholesome, nutty flavor along with fiber and nutrients that make this bread a more nourishing alternative to many store-bought options. Eggs add protein and help bind the loaf together, giving it structure without needing refined wheat flour.
Versatile for any meal. This bread works just as well for breakfast toast as it does for a hearty sandwich at lunch or a side to accompany dinner. Its mild, nutty flavor makes it a flexible base for both sweet and savory toppings.
Great for meal prep. Because it stores and freezes well, you can bake a loaf ahead of time and enjoy slices throughout the week — perfect for busy mornings when you need a fast, homemade breakfast option.
Ingredients You’ll Need
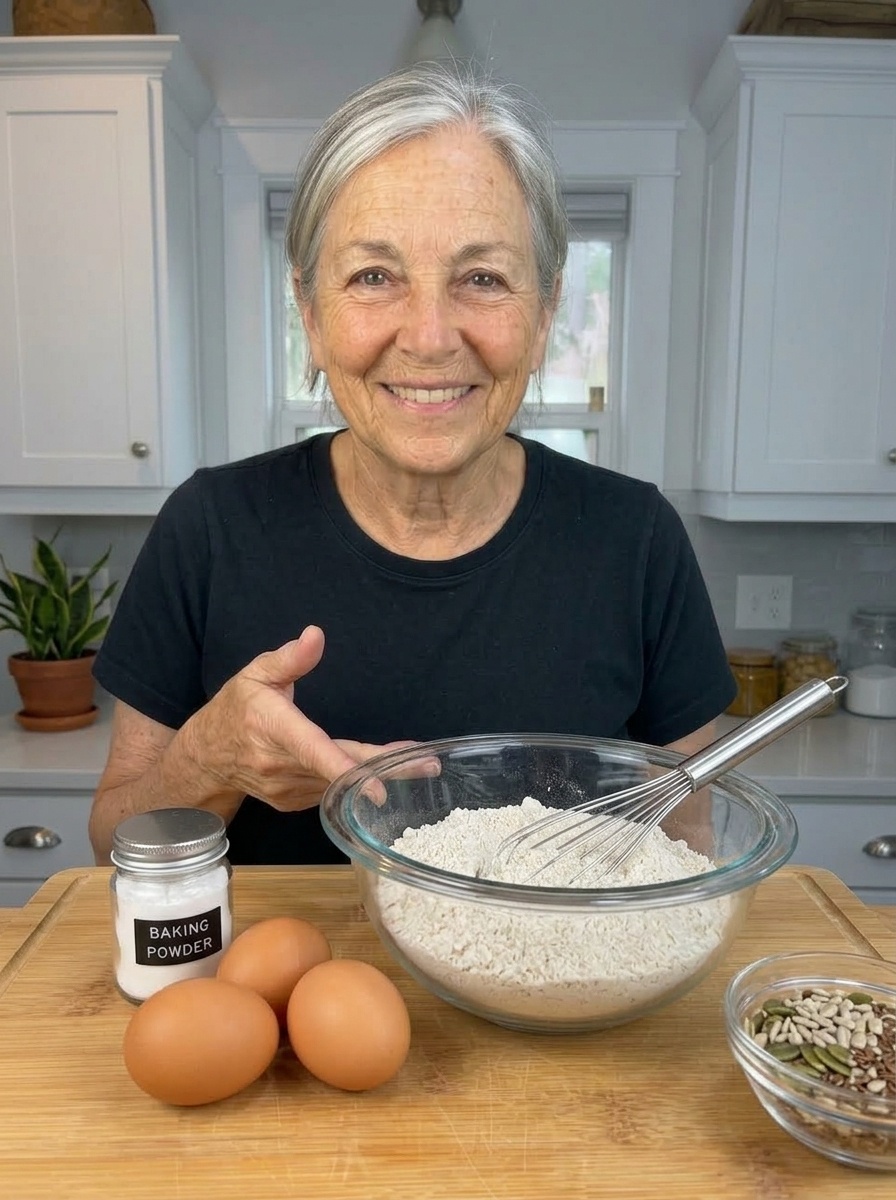
One of the best things about this recipe is how minimal the ingredient list is. Here’s what you’ll need for one loaf:
- 2 cups (200 g) oat flour — This is the base of the bread, providing structure, fiber, and that signature nutty flavor.
- 3 large eggs — Eggs act as the binding agent, replacing the need for gluten development from kneading. They also add moisture, richness, and protein.
- 2 teaspoons baking powder — This is your leavening agent, helping the bread rise and creating a lighter, airier crumb than you’d get without it.
That’s it. Three simple, accessible ingredients that come together to create a genuinely satisfying loaf of bread.
Optional Tips for the Best Oat Flour Bread
While this recipe is simple by design, a few small adjustments can make a noticeable difference in the final texture and flavor of your loaf.
Use finely ground oat flour. A finer, smoother oat flour will yield a more tender crumb. Coarser oat flour can result in a denser, grittier texture, so if you have the option, choose a finely milled variety.
Make your own oat flour if needed. If you don’t have store-bought oat flour on hand, you can easily make your own by blending rolled oats in a high-speed blender or food processor until they reach a fine, flour-like consistency. Be sure to measure the flour after blending, as the volume can shift slightly during the grinding process.
Bring your eggs to room temperature. Cold eggs straight from the refrigerator can make it harder to achieve a smooth, evenly mixed batter. Letting your eggs sit out for about 20–30 minutes before baking helps them incorporate more evenly, resulting in a more consistent texture throughout the loaf.
Don’t overmix once the baking powder is added. Baking powder begins reacting as soon as it comes into contact with wet ingredients. Overmixing at this stage can cause you to lose some of that leavening power before the bread even hits the oven, resulting in a denser loaf. Mix just until the ingredients are combined.
Let the loaf cool completely before slicing. This might be the most important tip of all. Cutting into the bread while it’s still warm can cause the crumb to appear gummy or underbaked, even if it’s fully cooked. Allowing it to cool completely lets the structure set, giving you cleaner slices and a better texture overall.
Try toasting the oat flour first. For a slightly deeper, richer flavor, consider lightly toasting your oat flour in a dry skillet over medium-low heat for a few minutes before using it in the recipe. This brings out a subtle nuttiness that enhances the overall taste of the bread.
How to Make 3-Ingredient Oat Flour Bread
Now let’s get into the step-by-step process. This recipe comes together quickly, and each step is designed to be foolproof, even if you’ve never baked bread before.
Step 1 — Prepare the Batter
Start by preheating your oven to 350°F (175°C). Having your oven fully preheated before you begin mixing ensures the bread bakes evenly from the moment it goes in.
In a large mixing bowl, add the oat flour and baking powder. Whisk these dry ingredients together thoroughly until they’re evenly combined. This step is important because it helps distribute the baking powder evenly throughout the flour, which promotes consistent rising throughout the loaf rather than uneven pockets of air.
Next, crack in the eggs and stir until a thick, smooth batter forms. The mixture should be cohesive and relatively dense — this is normal for oat flour bread, which has a different consistency than traditional wheat-based bread dough.
Mix just until all of the oat flour has been fully incorporated into the batter. Try to avoid overmixing at this stage, as it can affect the texture and rise of the finished loaf.
Step 2 — Prepare the Loaf Pan
While your oven finishes preheating, prepare your loaf pan. Lightly grease a standard loaf pan with butter, oil, or nonstick spray, or line it with parchment paper for even easier removal later. Parchment paper is especially helpful if you want to lift the entire loaf out cleanly without disturbing the sides.
Transfer the batter into your prepared loaf pan, scraping the bowl to get every last bit of the mixture. Use a spatula to smooth the surface evenly, which helps the loaf bake more uniformly and gives you a nicer, more even top once it’s finished.
Step 3 — Bake the Bread
Place the loaf pan in your preheated oven and bake for approximately 35–45 minutes. Baking times can vary slightly depending on your oven and the exact size of your loaf pan, so it’s a good idea to start checking around the 35-minute mark.
You’ll know the bread is ready when the top turns lightly golden and the center feels firm to the touch. For an extra check, insert a toothpick into the middle of the loaf — it should come out mostly clean, without wet batter clinging to it.
If you notice the top of the loaf browning too quickly before the inside has fully baked, loosely tent it with a piece of foil for the remainder of the baking time. This prevents over-browning while allowing the center to continue cooking through.
Step 4 — Cool and Slice
Once baked, remove the bread from the oven and let it cool in the pan for about 10–15 minutes. This resting period allows the loaf to firm up slightly, making it easier to remove without breaking apart.
After the initial cooling period, carefully remove the loaf from the pan and transfer it to a wire rack to continue cooling. Cooling on a wire rack allows air to circulate around the entire loaf, preventing the bottom from becoming soggy from trapped steam.
Let the bread cool completely before slicing — this step really does matter for texture. Cutting into it too early can make the crumb seem dense or gummy, even though it’s fully baked. Once it’s cooled, slice into even pieces and enjoy it fresh, or toast it for an even better texture and flavor.
Serving Ideas for Oat Flour Bread
Part of what makes this bread so enjoyable is how versatile it is. Here are some delicious ways to serve your homemade loaf:
- Classic buttered toast: Toast a slice and spread it with butter for a simple, comforting breakfast that highlights the bread’s natural nutty flavor.
- Avocado and eggs: Top a toasted slice with mashed or sliced avocado and a fried or poached egg for a satisfying, protein-packed meal.
- Simple sandwiches: Use the bread as a base for sandwiches filled with cheese, turkey, fresh vegetables, or any of your favorite fillings.
- Cream cheese and spreads: Serve toasted slices with cream cheese, nut butter, or your favorite jam for a quick and easy snack.
- Alongside soup or salad: Pair a slice with a warm bowl of soup or a fresh salad for a well-rounded, easy lunch.
Because the bread has a mild, slightly nutty flavor, it works well with both sweet and savory toppings, making it a flexible staple to keep on hand throughout the week.
How to Store Oat Flour Bread
Proper storage is key to keeping your homemade bread fresh for as long as possible. Here’s how to store it correctly:
Refrigerator storage: Once the bread has cooled completely, store it in an airtight container or wrap it tightly in plastic wrap or foil. Kept in the refrigerator, it should stay fresh for up to 4–5 days.
Freezer storage: For longer storage, slice the loaf first, then place the individual slices in a freezer-safe bag or airtight container. This makes it easy to grab just one or two slices at a time without having to thaw the entire loaf.
Reheating from frozen: When you’re ready to enjoy a frozen slice, simply thaw it and toast until it’s warmed through and lightly crisp. Toasting not only warms the bread but also helps restore some of the texture that can be lost during freezing.
Recipe Overview
- Prep Time: About 10 minutes
- Cooking Time: Approximately 35–45 minutes
- Total Time: About 45–55 minutes
- Yield: 1 loaf, approximately 10–12 slices
Frequently Asked Questions
Can I use rolled oats instead of oat flour?
Yes. If you don’t have pre-made oat flour, you can blend rolled oats in a blender or food processor until they reach a fine, flour-like consistency. Be sure to measure the resulting flour after blending, since the texture and volume can change during the process.
Is this bread gluten-free?
Oats themselves are naturally gluten-free, but they’re often processed in facilities that also handle wheat, which can lead to cross-contamination. If you need this bread to be strictly gluten-free, look for oat flour that’s specifically labeled “certified gluten-free.”
Why is my bread dense?
A denser texture can result from overmixing the batter once the baking powder is added, using coarsely ground oat flour, or not allowing the loaf to cool fully before slicing. Following the tips above — especially using finely ground flour and avoiding overmixing — can help achieve a lighter texture.
Can I add mix-ins like seeds or herbs?
Absolutely. While the base recipe is intentionally simple, you can fold in extras like chia seeds, sunflower seeds, dried herbs, or a pinch of salt for added flavor and texture. Just be careful not to overmix once you start adding extra ingredients.
Do I need to grease the loaf pan if I use parchment paper?
Not necessarily, but lightly greasing the pan even with parchment paper can help ensure easy removal, especially around the corners of the pan.
Final Thoughts
This 3-Ingredient Oat Flour Bread proves that homemade bread doesn’t have to be complicated or time-consuming. With just oat flour, eggs, and baking powder, you can create a hearty, flavorful loaf without the need for yeast, kneading, or long rising times. It’s a perfect option for beginner bakers, anyone short on time, or those simply looking for a wholesome, easy bread recipe to add to their regular rotation.
From breakfast toast to hearty sandwiches, this versatile loaf fits seamlessly into any meal of the day. Give it a try, and you may just find yourself making it on repeat.
Print
3-Ingredient Oat Flour Bread
Ingredients
One of the best things about this recipe is how minimal the ingredient list is. Here’s what you’ll need for one loaf:
- 2 cups (200 g) oat flour — This is the base of the bread, providing structure, fiber, and that signature nutty flavor.
- 3 large eggs — Eggs act as the binding agent, replacing the need for gluten development from kneading. They also add moisture, richness, and protein.
- 2 teaspoons baking powder — This is your leavening agent, helping the bread rise and creating a lighter, airier crumb than you’d get without it.
That’s it. Three simple, accessible ingredients that come together to create a genuinely satisfying loaf of bread.
Instructions
Now let’s get into the step-by-step process. This recipe comes together quickly, and each step is designed to be foolproof, even if you’ve never baked bread before.
Start by preheating your oven to 350°F (175°C). Having your oven fully preheated before you begin mixing ensures the bread bakes evenly from the moment it goes in.
In a large mixing bowl, add the oat flour and baking powder. Whisk these dry ingredients together thoroughly until they’re evenly combined. This step is important because it helps distribute the baking powder evenly throughout the flour, which promotes consistent rising throughout the loaf rather than uneven pockets of air.
Next, crack in the eggs and stir until a thick, smooth batter forms. The mixture should be cohesive and relatively dense — this is normal for oat flour bread, which has a different consistency than traditional wheat-based bread dough.
Mix just until all of the oat flour has been fully incorporated into the batter. Try to avoid overmixing at this stage, as it can affect the texture and rise of the finished loaf.
While your oven finishes preheating, prepare your loaf pan. Lightly grease a standard loaf pan with butter, oil, or nonstick spray, or line it with parchment paper for even easier removal later. Parchment paper is especially helpful if you want to lift the entire loaf out cleanly without disturbing the sides.
Transfer the batter into your prepared loaf pan, scraping the bowl to get every last bit of the mixture. Use a spatula to smooth the surface evenly, which helps the loaf bake more uniformly and gives you a nicer, more even top once it’s finished.
Place the loaf pan in your preheated oven and bake for approximately 35–45 minutes. Baking times can vary slightly depending on your oven and the exact size of your loaf pan, so it’s a good idea to start checking around the 35-minute mark.
You’ll know the bread is ready when the top turns lightly golden and the center feels firm to the touch. For an extra check, insert a toothpick into the middle of the loaf — it should come out mostly clean, without wet batter clinging to it.
If you notice the top of the loaf browning too quickly before the inside has fully baked, loosely tent it with a piece of foil for the remainder of the baking time. This prevents over-browning while allowing the center to continue cooking through.
Once baked, remove the bread from the oven and let it cool in the pan for about 10–15 minutes. This resting period allows the loaf to firm up slightly, making it easier to remove without breaking apart.
After the initial cooling period, carefully remove the loaf from the pan and transfer it to a wire rack to continue cooling. Cooling on a wire rack allows air to circulate around the entire loaf, preventing the bottom from becoming soggy from trapped steam.
Let the bread cool completely before slicing — this step really does matter for texture. Cutting into it too early can make the crumb seem dense or gummy, even though it’s fully baked. Once it’s cooled, slice into even pieces and enjoy it fresh, or toast it for an even better texture and flavor.