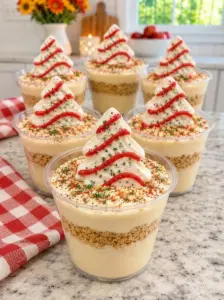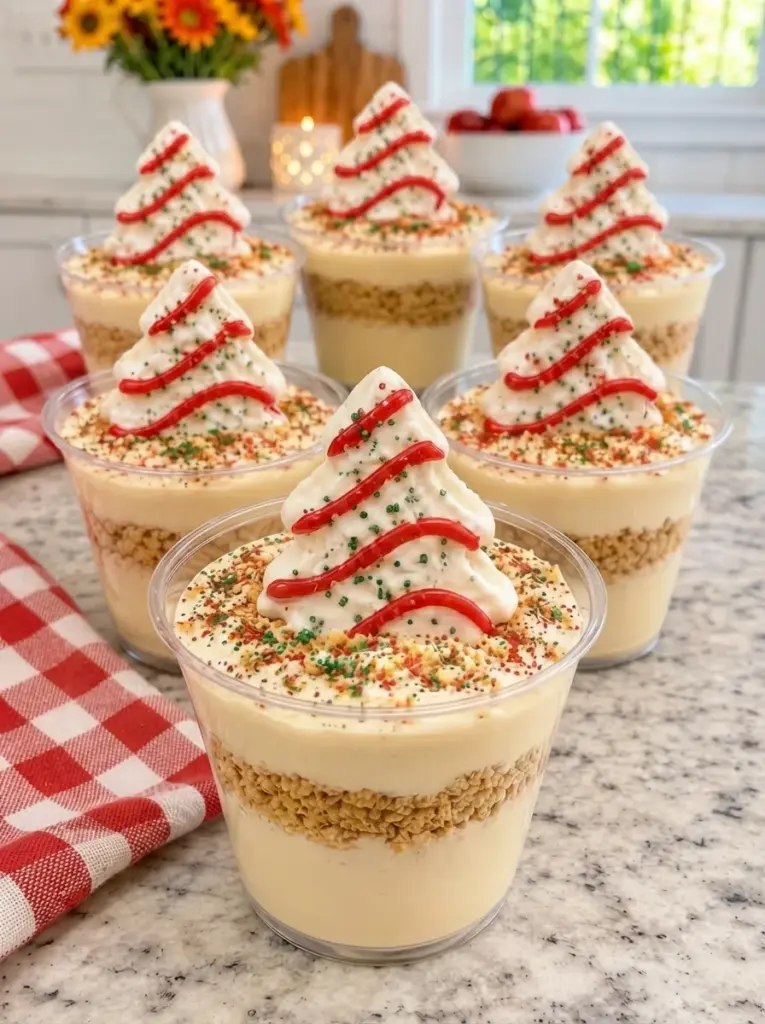
These Christmas Tree Cake Dirt Cups combine creamy vanilla pudding, fluffy whipped topping, crushed chocolate sandwich cookies, and pieces of Little Debbie Christmas Tree Cakes in individual dessert cups. The dark cookie crumbs contrast with the pale pudding, while colorful sprinkles and decorated cake pieces give each serving a festive finish.
The combination is sweet, creamy, and full of texture. Chocolate cookie crumbs provide the familiar “dirt” layers, vanilla pudding keeps the filling smooth, and chopped snack cakes add soft bites of cake and frosting throughout.
There is no baking involved, making this a convenient dessert for busy holiday gatherings. Prepare the pudding, crush the cookies, and assemble the layers before refrigerating. You can also prepare the components ahead and put the cups together closer to serving.
This guide covers the ingredients, detailed assembly instructions, tips for attractive layers, variations, storage guidance, and a complete recipe card.
What Are Christmas Tree Cake Dirt Cups?
Christmas Tree Cake Dirt Cups are a holiday variation of the classic layered pudding-and-cookie dessert.
Traditional dirt cups usually feature pudding and crushed chocolate sandwich cookies. This version uses vanilla pudding lightened with whipped topping, with chopped Christmas Tree Cakes folded into the filling.
Additional cake pieces, whipped topping, and Christmas sprinkles decorate the surface. The cookie crumbs create the “dirt,” while the decorated snack cakes supply the holiday theme.
The cups become softer as they chill. Cookie crumbs absorb moisture from the pudding, creating a texture similar to an icebox dessert. If you prefer a little crunch, reserve the final cookie topping until just before serving.
Why You’ll Love This Recipe
There is no oven required. Instant pudding and prepared snack cakes keep the process straightforward.
The portions are easy to serve. Individual cups eliminate slicing and make dessert-table setup simple.
The layers look festive. Clear cups show off the contrast between chocolate crumbs and vanilla filling.
You can prepare components ahead. Make the pudding mixture and crush the cookies the day before assembly.
The decorations are flexible. Use cake pieces, sprinkles, cookie crumbs, and small dollops of whipped topping.
It is a manageable family activity. Children can help crush cookies, spoon layers, or add sprinkles.
The recipe makes eight small servings. It is easy to double for a larger gathering.
Ingredient Breakdown
Instant Vanilla Pudding Mix — One 3.4-Ounce Package
Use instant pudding mix rather than cook-and-serve pudding.
The instant variety thickens when whisked with cold milk and needs no heating. Check the package before starting, since similarly sized boxes can contain different pudding types.
Vanilla creates a creamy background that lets the chocolate cookies and decorated cakes stand out.
Cold Whole Milk — 2 Cups
Cold milk helps the pudding set properly.
Whole milk gives the filling a rich texture. Measure carefully, since adding extra milk can make the pudding too loose to support distinct layers.
If using a different milk, check whether the pudding manufacturer provides specific preparation instructions.
Whipped Topping — 1½ Cups Total
Use 1 cup in the pudding mixture and reserve ½ cup for decorating.
Thaw frozen whipped topping in the refrigerator according to its package directions. It should be soft enough to fold smoothly without icy pieces.
Fold gently with a spatula rather than beating it into the pudding.
Vanilla Extract — ½ Teaspoon
A small amount of vanilla rounds out the pudding flavor.
Because the snack cakes and pudding mix are already sweet and flavored, there is no need for additional sugar.
Chocolate Sandwich Cookies — 18, Plus Extra Crumbs
Crush 18 cookies for the layers and reserve approximately 1 additional tablespoon of crumbs for finishing.
Leave the cream filling in the cookies. It blends into the crumbs and contributes to their familiar sweet flavor.
Aim for mostly fine crumbs with a few small pieces for texture.
Little Debbie Christmas Tree Cakes — 6 Individual Cakes
Use 2 individual cakes in the pudding mixture and 4 individual cakes for the topping.
Count individual cakes rather than wrapped packages, since package formats may vary.
Chop the filling cakes into small pieces so they distribute throughout the pudding. Cut the topping cakes into slightly larger bite-sized pieces that show their decorated surfaces.
Christmas Sprinkles — 2 Tablespoons
Red, green, and white sprinkles add a festive finish.
Some sprinkles bleed color when they sit on moist toppings. Add them close to serving if you want the cleanest appearance.
Equipment You’ll Need
- Eight small clear dessert cups, approximately 5–6 ounces each
- A large mixing bowl
- A whisk
- A flexible spatula
- Measuring cups and spoons
- A knife and cutting board
- A food processor or resealable bag and rolling pin
- A spoon or piping bag for decorating
The recipe makes small dessert portions. Larger cups can be used, but they will not be filled to the top.
How to Make Christmas Tree Cake Dirt Cups
Step 1: Prepare the Pudding
Pour the cold milk into a large bowl and add the instant vanilla pudding mix.
Whisk for approximately 2 minutes, scraping around the bowl as needed so no dry powder remains.
Let stand for 3–5 minutes, until thickened.
Step 2: Fold in the Whipped Topping
Add 1 cup thawed whipped topping and the vanilla extract.
Fold gently with a spatula, lifting the pudding over the topping until evenly combined. Stop once the mixture is smooth and no large white streaks remain.
Step 3: Crush the Cookies
Pulse the 18 chocolate sandwich cookies in a food processor until mostly fine.
Alternatively, place them in a securely closed bag and crush with a rolling pin. Work over a sturdy surface and avoid overfilling the bag.
Keep the separate tablespoon of finishing crumbs aside.
Step 4: Chop the Cakes
Cut 2 Christmas Tree Cakes into small pieces.
Gently fold these into the pudding mixture. A few visible cake pieces are desirable; excessive stirring can break them down completely.
Cut the remaining 4 cakes into bite-sized topping pieces and set aside.
Step 5: Begin the Layers
Arrange the eight dessert cups on a tray.
Divide approximately one-third of the main cookie crumbs among the bottoms of the cups.
Spoon half the pudding mixture over the crumbs, dividing it evenly. Use a small spoon to guide the pudding toward the edges.
Step 6: Repeat
Add another third of the cookie crumbs, followed by the remaining pudding mixture.
Finish with the remaining third of the crumbs. For a crunchier surface, hold back this final layer until after chilling.
Dividing each component across all eight cups before starting the next layer helps keep portions consistent.
Step 7: Chill
Cover the cups and refrigerate for at least 1 hour.
Chilling firms the filling and allows the cake and cookie flavors to mingle.
Step 8: Decorate
Divide the reserved ½ cup whipped topping among the cups.
Arrange the remaining cake pieces on top, then finish with Christmas sprinkles and the reserved tablespoon of cookie crumbs.
Adding these decorations shortly before serving keeps them looking fresh.
Tips for Attractive Layers and Creamy Filling
Let the pudding thicken first. Folding whipped topping into unset pudding can produce a loose filling.
Use completely thawed whipped topping. Partially frozen pieces are difficult to incorporate evenly.
Keep the cake pieces small inside the filling. Large chunks make layering less consistent.
Use clear cups. The chocolate-and-vanilla contrast is part of the presentation.
Spoon into the center first. Then gently spread outward to reduce smears on the cup walls.
Wipe the rims before chilling. A clean rim gives the finished cups a tidier appearance.
Leave room for decoration. Avoid filling the cups to the brim before adding whipped topping and cake.
Add sprinkles late. This helps prevent color streaks.
Expect the cookie layers to soften. For crunch, reserve some crumbs separately.
Variations to Try
Chocolate Pudding Dirt Cups
Replace the vanilla pudding with a similarly sized package of instant chocolate pudding, preparing it according to its package directions.
The result has a stronger chocolate flavor and less visual contrast between the layers.
Golden Cookie Version
Use golden sandwich cookies in place of chocolate cookies.
This creates a lighter-colored dessert with a vanilla-forward flavor, though it loses the traditional dark “dirt” appearance.
Peppermint Finish
Sprinkle a small amount of crushed candy cane over the cups immediately before serving.
Start sparingly so the mint does not overwhelm the cake and pudding. Candy pieces can become sticky as they sit.
Extra Cookie Crunch
Reserve part of the crushed cookies in a separate airtight container.
Add them after chilling so the top remains crisp while the inner layers soften.
Fewer, Larger Servings
Divide the ingredients among four larger cups instead of eight small ones.
The ingredient amounts remain the same, but each serving is twice as large.
Whole-Cake Decorations
For a more dramatic presentation, place a whole small Christmas Tree Cake on each cup just before serving.
You will need eight additional cakes if keeping all the chopped cake quantities from the original recipe. Use wider cups and position the cakes securely rather than pressing them deeply into the filling.
Serving Ideas for Holiday Gatherings
Place the cups on a tray so they can be carried from the refrigerator together.
For a coordinated dessert table, use matching clear cups and add the same amount of whipped topping to each. Keep the cake decorations visible and use a light sprinkle of red and green rather than covering the entire surface.
These cups pair well with:
- Coffee or tea: A simple contrast to the sweet filling.
- Fresh berries: Serve alongside for a fresh element.
- A cookie platter: Offer small cookies so guests can choose several desserts.
- Hot chocolate: Serve smaller portions if pairing two rich treats.
- Holiday fruit salad: A lighter addition to the dessert table.
For larger parties, set out a small number of cups at a time and replenish from the refrigerator.
Storage and Make-Ahead Instructions
Refrigerator
Cover and refrigerate at 40°F (4°C) or below for up to 3 days.
The cakes and cookies become softer over time, so the appearance and texture are best earlier in that window.
Preparing Components Ahead
Make the pudding-and-cake filling up to 1 day ahead and refrigerate in an airtight container.
Crush the cookies and store them separately in an airtight container at room temperature.
Assemble a few hours before serving, allowing at least an hour to chill.
Storing Decorated Cups
Use a covered tray or containers tall enough to protect the whipped topping and cake pieces.
If the cups have flat lids, decorate after removing the lids rather than pressing the toppings underneath them.
Freezing
Freezing is not recommended. The pudding and whipped topping can change texture after thawing, and the cookie layers lose their distinct consistency.
Serving Time
Keep the cups refrigerated until needed. Refrigerate promptly rather than leaving dairy-based desserts on the table throughout a long gathering.
Frequently Asked Questions
Can I use cook-and-serve pudding?
This method is designed for instant pudding. Cook-and-serve pudding requires separate preparation and complete cooling before folding in whipped topping.
Do I remove the filling from the cookies?
No. Crush the whole cookies, including the cream centers.
Can I use homemade whipped cream?
Yes. Whip it until it holds firm peaks and measure after whipping. The filling may be less stable during storage, so assemble closer to serving.
Why is my pudding mixture runny?
Check that you used instant pudding, measured the milk correctly, and allowed it to thicken before adding whipped topping. Some milk substitutes also affect setting.
Can I use plant-based milk?
Check the pudding package for compatible alternatives and adjusted quantities. A direct substitution does not always set properly.
Will the cookie crumbs stay crunchy?
The crumbs touching the pudding soften during chilling. Add the final cookie layer just before serving for a crisp contrast.
Can I use chocolate Christmas Tree Cakes?
Yes. They create a more chocolate-forward version. Keep the remaining quantities the same.
Can I make one large dessert instead?
Yes. Layer the ingredients in a small serving dish, adjusting the number of layers to fit. A large trifle bowl may be too big for this quantity.
Can I double the recipe?
Yes. Double all ingredients for approximately 16 small cups and prepare the pudding in a bowl large enough for gentle folding.
When should I add the cake decorations?
Shortly before serving gives the neatest appearance, especially if you want the frosting details and sprinkles to remain distinct.
Christmas Tree Cake Dirt Cups
Description
Individual no-bake desserts layered with fluffy vanilla pudding, chocolate cookie crumbs, and Christmas Tree Cake pieces.
- Prep time: 20 minutes
- Chill time: At least 1 hour
- Cook time: None
- Total time: Approximately 1 hour 20 minutes
- Servings: 8 small dessert cups
- Difficulty: Easy
Ingredients
Ingredients
For the pudding layer:
- 1 package instant vanilla pudding mix, 3.4 ounces
- 2 cups cold whole milk
- 1 cup whipped topping, thawed
- ½ teaspoon vanilla extract
For the cookie and cake layers:
- 18 chocolate sandwich cookies, finely crushed
- 2 individual Little Debbie Christmas Tree Cakes, chopped small
For topping:
- 4 additional individual Little Debbie Christmas Tree Cakes, cut into bite-sized pieces
- ½ cup whipped topping
- 2 tablespoons Christmas sprinkles
- 1 tablespoon additional crushed chocolate sandwich cookies
Instructions
Instructions
- Whisk pudding mix and cold milk for approximately 2 minutes. Let stand for 3–5 minutes.
- Gently fold in 1 cup whipped topping and vanilla.
- Crush the cookies, leaving their cream filling intact.
- Fold 2 chopped cakes into the pudding mixture.
- Divide one-third of the main cookie crumbs among eight small cups.
- Add half the pudding mixture, another third of the crumbs, and the remaining pudding.
- Finish with the remaining crumbs, reserving this final layer until serving if desired.
- Cover and refrigerate for at least 1 hour.
- Decorate with the remaining whipped topping, cake pieces, sprinkles, and finishing crumbs.
- Serve cold.
Nutrition Note
Calories vary with the cake size, cookie brand, pudding mix, and whipped topping. For an accurate estimate, total the nutrition from the products used and divide by eight, including any additional decorations.