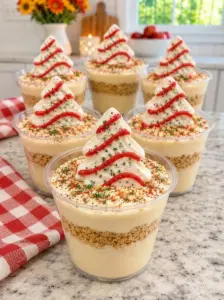
These Christmas Oreo Ornament Cookies turn classic chocolate sandwich cookies into colorful edible decorations. Each Oreo is dipped in red, green, or white candy coating, finished with festive drizzles and sprinkles, and given a small pretzel loop to resemble a Christmas tree ornament.
The candy shell adds a sweet, delicate crunch around the familiar chocolate cookie and vanilla cream filling. The pretzel contributes a little salty contrast while completing the ornament shape. Arrange the finished cookies on a platter, package them in gift boxes, or add them to a holiday cookie tray.
There is no dough to prepare and no oven required. Most of the work involves melting, dipping, and decorating, making this a fun project for a relaxed afternoon. Children can help choose sprinkle combinations and decorate while an adult handles the warm coating.
Below, you will find ingredient explanations, detailed instructions, decorating ideas, troubleshooting tips, storage guidance, and a complete recipe card.
What Are Christmas Oreo Ornament Cookies?
Christmas Oreo Ornament Cookies are whole Oreo sandwich cookies covered in colored candy coating and decorated to look like round holiday ornaments.
A small curved piece of pretzel attaches to the top edge of each coated cookie, creating the appearance of an ornament hanger. Contrasting candy drizzles, nonpareils, and edible gold sugar provide the decorative details.
Candy melting wafers are convenient because they set without the tempering process required for a polished finish with real chocolate. Their texture and melting instructions vary by brand, so follow the package guidance if it differs from the general method below.
The finished cookies are intended for serving flat on trays or packaging in protective containers. The pretzel loops are decorative and should not be used to hang the cookies.
Why You’ll Love This Recipe
There is no baking involved. Prepared cookies form the base, so you can focus on decorating.
The colors are easy to customize. Use traditional red, green, and white or choose a different holiday palette.
Every cookie can look different. Change the drizzle pattern and sprinkle placement without changing the recipe.
They work well for gifting. Once set, the cookies can be arranged in boxes with parchment between layers.
The ingredients are straightforward. Cookies, melting wafers, pretzels, and sprinkles are all you need.
You can prepare them ahead. The finished ornaments keep well when protected from heat and moisture.
They add variety to cookie trays. Their round shape and bright coatings stand out among traditional baked cookies.
Ingredient Breakdown
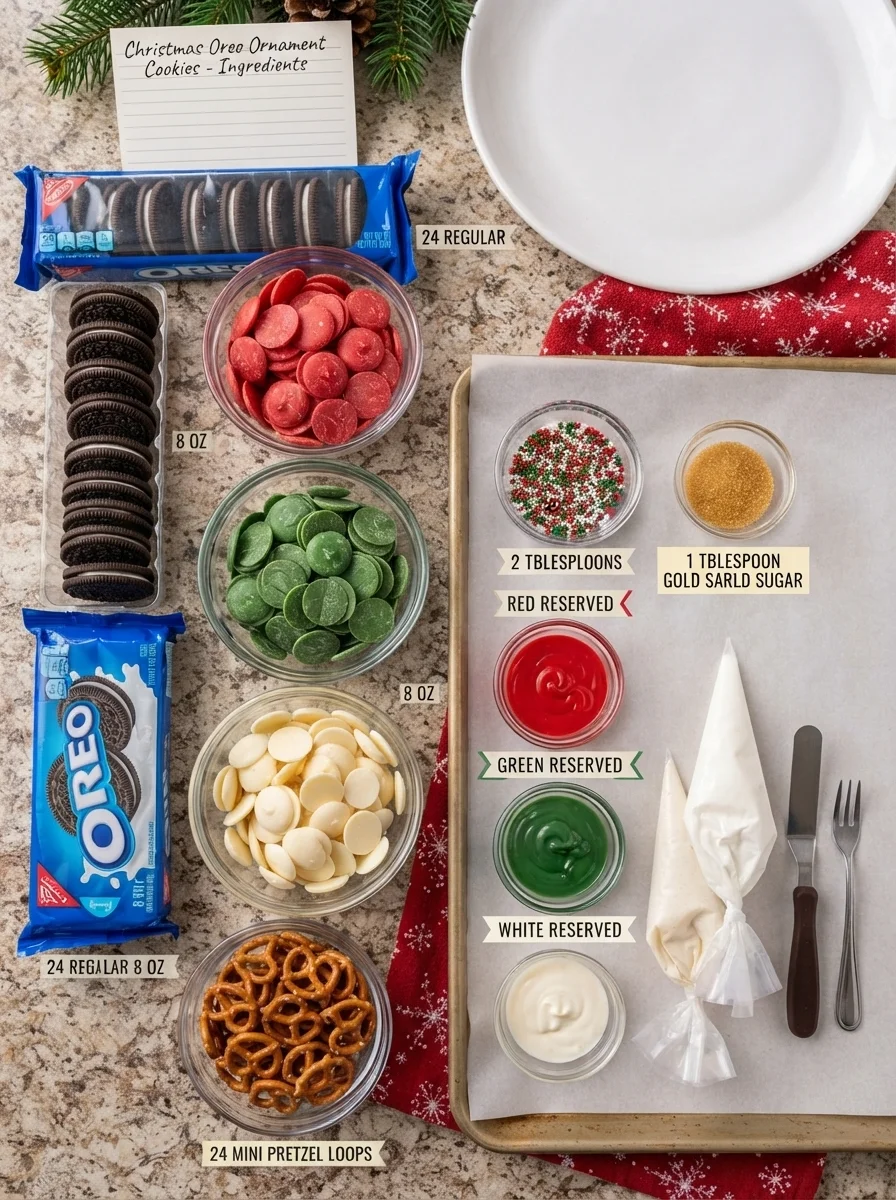
Regular Oreo Sandwich Cookies — 24
Use regular-size, classic Oreo cookies for the proportions listed.
Check for cracked cookies before starting. Intact cookies are easier to dip and less likely to separate in the warm coating.
Keep them at room temperature and dry. Chilled cookies can develop condensation, which interferes with a smooth coating.
Leave the cream filling in place.
Red Candy Melting Wafers — 8 Ounces
Red wafers provide the base coating for eight cookies, with a small amount reserved for decoration.
Using precolored wafers is simpler than coloring white coating yourself. Ordinary liquid food coloring can cause coating to thicken or seize.
Green Candy Melting Wafers — 8 Ounces
Green wafers coat another eight cookies.
Choose a shade that contrasts with your sprinkles and white drizzle. Keep a separate spoon or spatula in each bowl to prevent accidental color mixing.
White Candy Melting Wafers — 8 Ounces
White coating covers the remaining eight cookies and provides a useful contrasting drizzle for the red and green ornaments.
The full quantity of coating allows enough depth for dipping. Some will remain in the bowls after the cookies are finished.
Mini Pretzel Twists — 24, Plus Extras
Break the lower portion from each pretzel twist, leaving a small curved loop.
Pretzels vary in shape and fragility, so have extras available. Choose thin, lightweight loops that can attach without pulling away from the cookie.
Holiday Nonpareil Sprinkles — 2 Tablespoons
Small red, green, and white nonpareils add color without overwhelming the ornament shape.
Apply them while the decorative drizzle is still wet.
Edible Gold Sanding Sugar — 1 Tablespoon
Gold sanding sugar adds a sparkling finish.
Use a product labeled edible and intended for food decoration. Apply lightly so the drizzle patterns remain visible.
Equipment You’ll Need
- Two large baking sheets
- Parchment paper
- Three small microwave-safe bowls
- Three spoons or spatulas
- A fork or candy dipping tool
- Small piping bags or food-safe zip-top bags
- Scissors
- A toothpick or small spoon for attaching loops
Small, deeper bowls make dipping easier than wide, shallow bowls because the coating can surround the cookie without excessive tilting.
How to Make Christmas Oreo Ornament Cookies
Step 1: Prepare the Workstation
Line the baking sheets with parchment paper.
Arrange the cookies, pretzel loops, sprinkles, and tools within easy reach. Once dipping begins, the coating starts setting, so preparation makes the process smoother.
Set aside space where the trays can remain flat and undisturbed.
Step 2: Prepare the Pretzel Loops
Carefully break the bottom portion from each mini pretzel twist.
Keep a small curved section that resembles an ornament loop. Prepare 24 usable pieces and a few extras.
Dry-fit a loop against the edge of an Oreo to check its size. It should extend just beyond the cookie rather than dominate it.
Step 3: Melt the White Coating
Place the white wafers in a microwave-safe bowl.
Heat at 50% power in 20-second intervals, stirring thoroughly after each interval, until smooth. Follow the package instructions if they specify a different method.
Stop heating when stirring will melt the final small pieces. Reserve approximately 2 tablespoons for decorating.
Step 4: Melt the Red and Green Coatings
Repeat in separate bowls with the red and green wafers.
Reserve approximately 2 tablespoons of each color for drizzling.
If one color thickens while you work, rewarm briefly according to the package directions. Avoid repeated long heating intervals.
Step 5: Dip a Small Batch
Lower one Oreo into the white coating using a fork or dipping tool.
Turn gently to cover, lift, and let excess coating drip into the bowl. Lightly tap the tool against the bowl’s edge without shaking the cookie loose.
Transfer to parchment.
Repeat with only two or three cookies at a time, then attach their loops before the coating firms.
Step 6: Attach the Pretzel Loops
Position a pretzel loop against the top edge of each freshly dipped cookie.
Press gently into the soft coating. Add a small dab of matching melted coating over the connection if needed.
Keep the cookie and loop flat on the parchment while they set. Avoid pushing hard enough to separate the cookie halves.
Step 7: Finish Dipping
Continue until eight cookies are coated in white, eight in red, and eight in green.
Attach loops as you finish each small batch.
If the coating begins leaving thick ridges, pause and check its temperature and consistency before continuing.
Step 8: Add Decorative Drizzles
Transfer the reserved coatings to separate piping bags.
Snip a very small opening and pipe thin zigzags, stripes, or curved lines over the cookies.
Use white over red and green cookies, and red or green over white cookies for clear contrast.
Step 9: Add Sprinkles
Immediately scatter nonpareils over the wet drizzles.
Add a light pinch of gold sanding sugar to selected cookies. Work over the lined tray so excess decorations are easy to collect afterward.
Step 10: Let Set
Leave undisturbed at cool room temperature for approximately 25 minutes, or until fully firm.
If the kitchen is warm, refrigerate briefly for 5–10 minutes, checking until set.
Test one cookie gently before moving the entire batch.
Tips for Smooth Coating and Secure Decorations
Keep water away from the bowls. Even small amounts can affect melted candy coating.
Avoid overheating. Excessive heat can make wafers thick and difficult to work with.
Let excess coating drain. A thin, even shell looks neater and creates less pooling around the base.
Attach loops immediately. Once the shell firms, the pretzel needs additional melted coating to adhere.
Support the loops while setting. Keep everything flat so the attachment points are not under strain.
Use thin drizzles. Smaller piping openings provide better control.
Decorate in batches. Sprinkles need wet coating to stick.
Handle cookies by their coated edges. Lifting by the pretzel can break the connection.
Package only when completely firm. Soft coating smears easily against parchment or neighboring cookies.
Decorating Variations to Try
Classic Striped Ornaments
Pipe several thin white lines across red or green cookies.
Add a few nonpareils along one stripe rather than covering the whole surface.
White Ornaments with Holiday Swirls
Drizzle red and green coating over white cookies in loose curved patterns.
Leave some white showing for contrast.
Gold-Accented Ornaments
Use white-coated cookies with a narrow drizzle and a light scattering of gold sanding sugar.
This gives a simpler finish for gift boxes.
Peppermint Ornaments
Replace some sprinkles with finely crushed candy cane.
Add while the drizzle is wet and store airtight. Candy cane pieces can become sticky in humid conditions.
Golden Oreo Version
Use golden sandwich cookies instead of chocolate Oreos.
The decorating method remains the same, but the flavor becomes more vanilla-forward.
Chocolate-Coated Ornaments
Use chocolate-flavored melting wafers for the base and decorate with red, green, and white drizzles.
This creates a darker background with bright holiday accents.
Serving and Gifting Ideas
Arrange the cookies flat on a platter with their pretzel loops pointing outward or upward.
Alternating red, green, and white creates a balanced display. Leave a little space between cookies so guests can lift them without catching neighboring loops.
For gifting, use a shallow, rigid box lined with parchment. Arrange in a single layer when possible, especially if the pretzel loops extend far beyond the cookies.
If stacking is necessary, separate layers with parchment and avoid placing weight directly over the loops.
These cookies also work well alongside:
- Shortbread and butter cookies
- Gingerbread cookies
- Chocolate truffles
- Peppermint bark
- Small bags of holiday snack mix
Include an ingredient or allergen note when gifting if needed, using the labels from the products you selected.
Storage and Make-Ahead Instructions
Room Temperature
Store completely set cookies in an airtight container in a cool, dry place for up to one week.
Keep away from direct sunlight, heaters, and warm appliances.
Separating Layers
Place parchment between layers to protect the decorations.
Avoid overfilling containers, which can press the pretzel loops against the lid.
Refrigeration
Brief refrigeration helps set the coating in a warm kitchen, but routine cold storage is usually unnecessary for these ingredients.
If refrigerating, keep the container closed while it returns toward room temperature to reduce condensation on the cookies.
Freezing
Freezing is not recommended for the best appearance. Condensation after thawing can affect the coating, sprinkles, and pretzel texture.
Preparing Ahead
Make the cookies a day or two before a gathering, allowing time for careful dipping and complete setting before packaging.
Frequently Asked Questions
Can I use real white chocolate?
Yes, but it behaves differently from candy wafers. Proper tempering provides the best firm finish at room temperature. Candy wafers are simpler for this project.
Why is my coating thick?
It may be overheated, too cool, or affected by moisture. Follow the manufacturer’s instructions for reheating or approved thinning products. Do not add water.
Can I color white candy wafers?
Use a coloring specifically labeled suitable for candy coating, following its directions. Ordinary liquid food coloring can cause problems.
Why are the pretzel loops falling off?
The coating may have set before attachment, or the connection may be too small. Add a dab of melted coating and let the loop set flat without movement.
Can I hang these on a Christmas tree?
No. The pretzel connection is decorative and may break under the cookie’s weight.
Can I use Double Stuf Oreos?
They can work, but their extra thickness makes dipping less tidy and may require more coating. Regular Oreos are easier for this recipe.
Why are there puddles around the cookies?
Too much coating remained after dipping. Let excess drip into the bowl before transferring to parchment.
Can I use mini Oreos?
Yes, but the loops and decorations need to be much smaller. The quantities and yield will differ.
How do I avoid fingerprints?
Let the coating set completely and handle by the edges with clean, dry hands.
Can I double the recipe?
Yes. Melt manageable quantities of coating and keep dipping in small batches so you can attach each loop before the shell firms.

Description
No-bake Oreo cookies dipped in festive candy coating and decorated with pretzel loops, drizzles, and holiday sprinkles.
- Yield: 24 cookies
- Prep time: Approximately 35 minutes
- Bake time: None
- Setting time: Approximately 25 minutes
- Total time: Approximately 1 hour
- Difficulty: Easy
Ingredients
- 24 regular Oreo sandwich cookies
- 8 ounces red candy melting wafers
- 8 ounces green candy melting wafers
- 8 ounces white candy melting wafers
- 24 mini pretzel twists, plus extras for breakage
- 2 tablespoons holiday nonpareil sprinkles
- 1 tablespoon edible gold sanding sugar
Instructions
- Line two baking sheets with parchment.
- Break pretzels into 24 small curved loops.
- Melt each coating color separately according to package instructions, using short microwave intervals and frequent stirring.
- Reserve approximately 2 tablespoons of each color for decorating.
- Dip eight cookies in each color, working in batches of two or three.
- Let excess coating drip away and transfer to parchment.
- Immediately attach a pretzel loop to each cookie’s top edge, adding a dab of matching coating if needed.
- Pipe contrasting drizzles with the reserved coating.
- Add sprinkles and gold sugar while the drizzles are wet.
- Set for approximately 25 minutes, or refrigerate briefly until firm.
- Lift carefully and store airtight in a cool, dry place.