Some recipes earn their place in your regular rotation because they are simple. Others earn it because they disappear from the platter in about four minutes flat. These Crispy Cheesy Beef Tortilla Cups manage to do both.
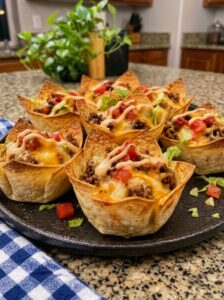
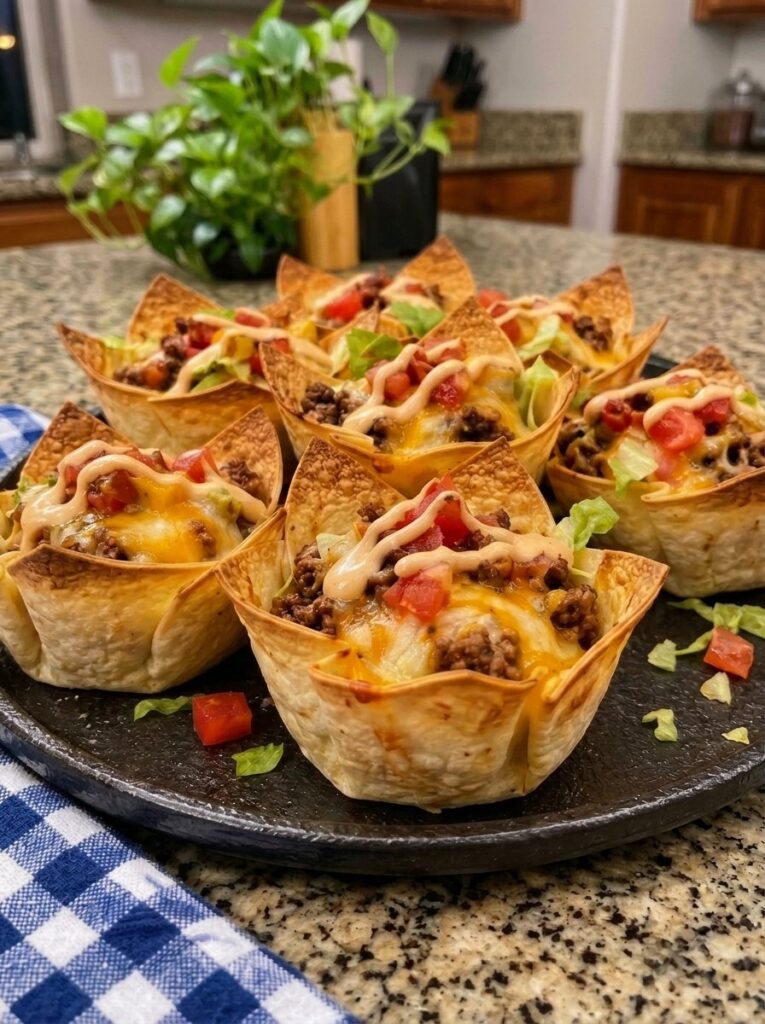
Imagine a golden, crunchy tortilla shell shaped like a little edible bowl. Inside, you will find juicy, perfectly seasoned ground beef, a blanket of melted cheddar and Monterey Jack cheese, and a pile of fresh taco toppings: juicy tomatoes, crisp lettuce, creamy avocado, and a few slices of zesty jalapeño. Then comes the finishing touch, a creamy, tangy taco sauce drizzled over the top and a sprinkle of fresh cilantro.
They taste like your favorite tacos, but without the usual mess. There is no shell cracking in half, no filling sliding out the other end, and no need for a stack of napkins just to survive one bite. Everything stays neatly in its crispy cup, and every bite has a little of everything: savory beef, gooey cheese, cool crisp vegetables, and a punchy sauce.
Whether you are planning a family dinner, a game-day spread, a birthday party, or just need an appetizer that will impress without stress, these taco cups deliver. In this guide you will find the full recipe, step-by-step instructions, pro tips for getting the crispiest shells, flavor variations, make-ahead and storage advice, serving ideas, and answers to the most common questions.
Why You Will Love These Beef Tortilla Cups
Before we get to the recipe, here is why this one deserves a spot in your recipe box.
They are crunchy and cheesy in all the right ways. Pre-baking the tortilla shells means they stay crisp even after being filled with juicy beef and melted cheese. No soggy bottoms here.
They are made with everyday ingredients. Flour tortillas, ground beef, shredded cheese, and a handful of fresh toppings. If you cook tacos at home, there is a good chance you already have most of what you need.
They are perfect for crowds. Because they bake in a standard muffin pan, you get tidy, portion-controlled servings that are easy to hand out, easy to eat with one hand, and easy to double or triple for a big party.
They are customizable. Swap the beef for chicken or turkey, change up the cheeses, add black beans or corn, or turn up the heat with extra jalapeños and hot sauce. The basic method works with almost any taco-style filling.
They look impressive but are genuinely easy. The ruffled, golden edges of the tortilla cups, the colorful toppings, and the creamy drizzle on top make them look like they came from a restaurant appetizer menu. In reality, the technique is just pressing tortillas into a muffin pan.
The sauce makes them unforgettable. The creamy taco sauce, made from mayonnaise, sour cream, lime juice, taco seasoning, and a little optional hot sauce, adds a cool, tangy, slightly spicy finish that ties every component together.
Recipe Overview
- Prep time: 20 minutes
- Cook time: 25 to 30 minutes
- Total time: About 45 to 50 minutes
- Yield: 8 tortilla cups
- Course: Appetizer, main dish, snack
- Cuisine: Tex-Mex inspired
- Difficulty: Easy
Ingredients
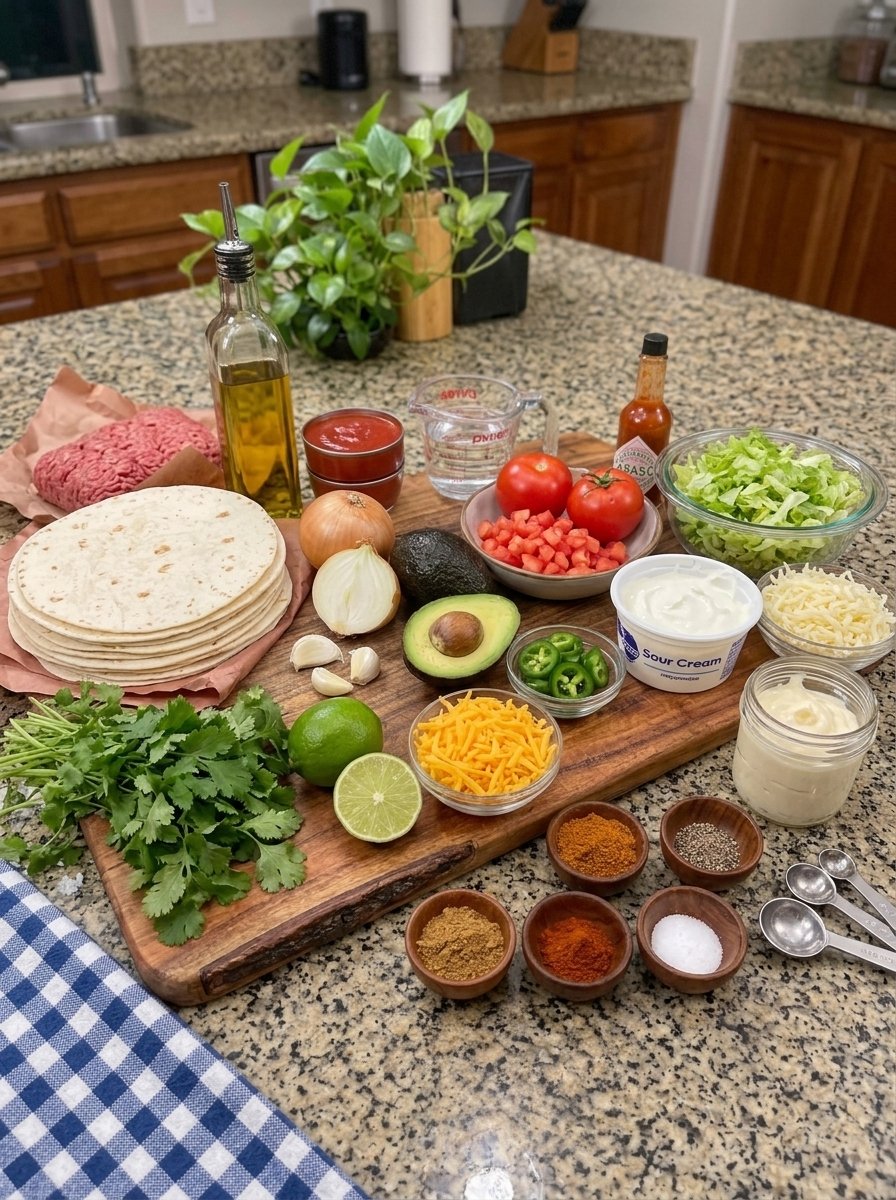
For the Tortilla Cups
- 4 large flour tortillas (10-inch)
- 2 tablespoons olive oil, divided
- Nonstick cooking spray
For the Beef Filling
- 1 lb (450 g) ground beef
- ½ small onion, finely diced
- 2 garlic cloves, minced
- 1 tablespoon taco seasoning
- ½ teaspoon ground cumin
- ¼ teaspoon smoked paprika
- ¼ teaspoon black pepper
- ¼ teaspoon salt, or to taste
- 2 tablespoons tomato sauce
- ¼ cup (60 ml) water
For the Cheese
- 1 cup (100 g) shredded cheddar cheese
- ½ cup (50 g) shredded Monterey Jack cheese
For the Fresh Toppings
- ½ cup diced tomatoes
- ½ cup shredded lettuce
- ¼ cup diced avocado
- 2 tablespoons sliced jalapeños
- 2 tablespoons chopped fresh cilantro
For the Creamy Taco Sauce
- ½ cup mayonnaise
- ¼ cup sour cream
- 1 tablespoon lime juice
- 1 teaspoon taco seasoning
- 1 teaspoon hot sauce, optional
Equipment You Will Need
- An 8-cup standard muffin pan (a 12-cup pan also works, you will just use 8 of the wells)
- A sharp knife or kitchen scissors for cutting the tortillas
- A pastry brush for oiling the tortillas
- A large skillet for cooking the beef
- A small bowl and whisk for the sauce
- A squeeze bottle or piping bag for drizzling (a zip-top bag with the corner snipped works too)
- A small spoon or offset spatula for lifting the cups out of the pan
How to Make Crispy Cheesy Beef Tortilla Cups 👩🍳
Step 1: Prepare the Oven and Muffin Pan
Preheat the oven to 375°F (190°C). Lightly coat an 8-cup muffin pan with nonstick cooking spray and set it aside. A light coating is all you need. It helps the tortillas release cleanly later and encourages the edges to brown.
Step 2: Shape the Tortilla Cups
Cut each large flour tortilla in half to create 8 pieces. Brush both sides lightly with some of the olive oil. Press each half into a muffin cup, gently folding and overlapping the edges to form a sturdy cup shape.
Do not worry about making them perfect. The ruffled, uneven edges are part of the charm, and they turn extra crispy in the oven. Make sure the bottom of each cup is pressed flat against the base of the muffin well so the finished shell can stand up on its own.
Step 3: Pre-Bake the Tortillas
Bake the shaped tortillas for 8 to 10 minutes, until the edges are lightly golden and beginning to crisp. Remove the pan from the oven and set the shells aside while you prepare the filling.
This pre-bake is the secret to crunchy cups. It dries and sets the tortilla before any moisture from the beef or cheese touches it, so the shell holds its shape and its crunch.
Step 4: Cook the Beef and Onion
Heat the remaining olive oil in a large skillet over medium-high heat. Add the diced onion and cook for 2 to 3 minutes, until softened. Add the ground beef and cook for 5 to 7 minutes, breaking it into small crumbles with a spoon until browned and fully cooked. Drain any excess grease if needed.
Small crumbles matter here. Large chunks of beef will not nestle into the cups neatly and tend to fall out when you pick them up. Use the back of a wooden spoon or a potato masher to keep the meat finely broken up as it browns.
Step 5: Season the Beef Filling
Add the minced garlic and cook for about 30 seconds until fragrant. Stir in the taco seasoning, cumin, smoked paprika, black pepper, and salt. Add the tomato sauce and water, then simmer for 3 to 4 minutes, stirring occasionally, until the beef is juicy and the mixture has thickened slightly. Remove from the heat.
The small amount of liquid is important. It keeps the beef moist and flavorful, but you want it thick rather than soupy, so the filling stays put inside the shells.
Step 6: Fill the Tortilla Cups
Divide the seasoned beef mixture evenly among the pre-baked tortilla shells. Sprinkle the cheddar and Monterey Jack cheeses evenly over the beef.
Step 7: Bake Until Golden and Cheesy
Return the muffin pan to the oven and bake for 5 to 8 minutes, until the cheese is completely melted and bubbly and the tortilla edges are golden and crispy.
Step 8: Make the Creamy Taco Sauce
While the cups bake, whisk together the mayonnaise, sour cream, lime juice, taco seasoning, and optional hot sauce in a small bowl until smooth and creamy. Transfer the sauce to a squeeze bottle or piping bag for easy drizzling.
Step 9: Add the Fresh Toppings
Remove the tortilla cups from the oven and let them cool for 1 to 2 minutes. Top each cup with diced tomatoes, shredded lettuce, avocado, and sliced jalapeños. Drizzle generously with the creamy taco sauce and finish with chopped fresh cilantro.
Step 10: Serve and Enjoy
Carefully lift the tortilla cups from the muffin pan using a small spoon or spatula. Arrange them on a serving platter and serve immediately while the shells are crispy, the beef is warm, and the cheese is deliciously melted.
Tips for the Crispiest, Most Flavorful Tortilla Cups
Choose the right tortillas
Large, 10-inch flour tortillas are ideal because cutting them in half gives you pieces that fit a standard muffin well with enough overhang for those pretty ruffled edges. Soft taco-size tortillas are too small, and very thick burrito-style tortillas can bake up tough. If your tortillas are stiff or cold, warm them for 10 to 15 seconds in the microwave so they fold without cracking.
Do not skip the olive oil
Brushing both sides of the tortilla with oil is what produces that golden, almost fried-like crunch. Use a light hand, though. You want a thin sheen, not a puddle.
Pre-baking is non-negotiable
It can be tempting to fill raw tortillas and bake everything once. Resist the urge. The two-stage bake is what keeps the bottoms from turning soft or chewy under the weight of the filling.
Drain the beef well
Excess grease is the enemy of a crisp shell. If your ground beef is on the fattier side (80/20, for example), drain it thoroughly before adding the seasonings. Leaner beef such as 90/10 needs less draining and gives a slightly lighter result.
Keep the filling thick
Simmer the beef until the liquid has reduced and the mixture clings together. A saucy filling will make the cups soggy and harder to lift out of the pan.
Shred your own cheese
Pre-shredded cheese is coated with anti-caking agents that can keep it from melting as smoothly. Shredding a block of cheddar and a block of Monterey Jack takes just a couple of minutes and gives you a noticeably creamier, stretchier melt.
Add the cold toppings last
Lettuce, tomatoes, and avocado should go on after baking, never before. Let the cups cool for a minute or two so the hot cheese does not wilt the greens instantly.
Serve right away
These are at their best within about 10 minutes of leaving the oven. If you are serving a crowd, bake in batches so the cups on the platter are always fresh and crunchy.
Flavor Variations and Substitutions
Once you have the basic method down, these tortilla cups are endlessly flexible.
Different proteins. Ground turkey, ground chicken, or shredded rotisserie chicken all work well. For turkey or chicken, add a little extra seasoning since these meats are milder. Crumbled chorizo mixed half-and-half with ground beef gives a smoky, spicy kick.
Cheeseburger-style cups. Swap the taco seasoning for a mix of garlic powder, onion powder, and a little mustard. Use cheddar only, and top with diced pickles, tomato, shredded lettuce, and a burger sauce made from mayonnaise, ketchup, and relish. Crumbled crispy bacon on top is a welcome addition.
Bacon-topped taco cups. A little crumbled crispy bacon scattered over the melted cheese adds a smoky, salty crunch that pairs beautifully with the creamy sauce.
Extra-loaded cups. Stir a spoonful of black beans, corn kernels, or refried beans into the beef mixture for added texture and to stretch the filling further.
Spicy version. Add a pinch of cayenne or chipotle powder to the beef, use pepper jack instead of Monterey Jack, and double the jalapeños. Stir extra hot sauce or a spoonful of chipotle in adobo into the creamy sauce.
Lighter version. Use lean ground turkey, reduced-fat cheese, and Greek yogurt in place of the sour cream and mayonnaise in the sauce. Whole-wheat tortillas also work, though they may brown slightly faster.
Vegetarian cups. Replace the beef with seasoned black beans, crumbled plant-based ground, or sautéed mushrooms and peppers with the same taco seasoning blend.
Different cheeses. Colby Jack, pepper jack, Mexican blend, or even a little crumbled cotija on top after baking all work well.
Extra toppings. Try pickled red onions, sliced black olives, diced green chiles, corn salsa, guacamole, or a spoonful of pico de gallo.
Make-Ahead, Storage, and Reheating
Tortilla cups are best fresh, but you can do much of the work in advance, which is a lifesaver for parties.
Make-ahead tips
- Pre-baked shells: Bake the empty tortilla cups up to 2 days ahead. Let them cool completely, then store them in an airtight container at room temperature. Re-crisp them for 2 to 3 minutes in the oven before filling if needed.
- Beef filling: Cook and season the beef up to 3 days ahead and keep it in the refrigerator. Reheat it gently in a skillet before filling the shells.
- Taco sauce: The creamy sauce can be whisked together up to 4 days ahead and stored in a covered container or squeeze bottle in the fridge. Give it a good shake or stir before using.
- Toppings: Dice the tomatoes, jalapeños, and cilantro and shred the lettuce a few hours ahead. Wait to cut the avocado until just before serving to prevent browning.
Storing leftovers
Store leftover baked cups (without the fresh toppings) in an airtight container in the refrigerator for up to 3 days. Keep toppings and sauce separate. The shells will soften in the fridge, but they can be revived in the oven.
Reheating
For the best texture, reheat in a 350°F (175°C) oven or air fryer for 5 to 8 minutes, until warmed through and crisp around the edges. The microwave will warm them quickly but leaves the shells soft, so use it only in a pinch.
Freezing
The cooked beef filling freezes beautifully for up to 3 months. Thaw it overnight in the refrigerator, reheat, and assemble fresh cups when you are ready. The baked empty shells can also be frozen in a sturdy container for up to a month, though they are fragile and need careful handling.
What to Serve With Beef Tortilla Cups
These cups work as a standalone appetizer, but they also fit comfortably into a full menu.
For a taco night dinner: Serve 2 to 3 cups per person alongside Mexican rice, refried or black beans, and a simple green salad dressed with lime.
For a game-day spread: Pair them with tortilla chips and guacamole, queso dip, seven-layer dip, buffalo wings, and a big bowl of fresh pico de gallo.
For a party buffet: Arrange the cups on a large platter with extra sauce on the side, a few lime wedges, and a scattering of cilantro leaves for color.
For drinks: Ice-cold lagers, citrusy margaritas, sparkling limeade, or a pitcher of agua fresca all complement the rich, savory flavors.
For a build-your-own bar: Bake the shells and beef, then set out bowls of toppings so guests can customize their own cups. This works wonderfully for birthday parties and casual get-togethers.
Why This Recipe Works
There is some simple food science behind why these tortilla cups turn out so well.
- Oil and heat create crunch. A thin layer of olive oil helps the tortilla dehydrate and brown evenly, creating a crisp texture similar to a baked tortilla chip.
- Pre-baking builds structure. Setting the shell before filling it prevents the moisture in the beef from soaking in.
- A little liquid goes a long way. The tomato sauce and water keep the beef tender and juicy while the simmering step thickens everything so it stays inside the cup.
- Two cheeses, two jobs. Cheddar provides sharp flavor, while Monterey Jack melts smoothly and gives that satisfying stretch.
- Fresh toppings add contrast. The cool lettuce, tomatoes, and avocado balance the hot, rich filling, while the jalapeños add a little bite.
- The sauce ties it together. Mayonnaise and sour cream give creaminess, lime juice adds brightness, and the taco seasoning echoes the flavors in the beef.
Nutrition Notes
Exact nutrition information depends on the brands you use and the fat content of your ground beef, but each tortilla cup is a satisfying, protein-rich bite. A serving of two cups is a filling appetizer portion, and three cups make a casual dinner when paired with a side salad or beans. To lighten the recipe, choose leaner beef, use reduced-fat cheese, swap Greek yogurt into the sauce, and load up on extra vegetables.
Common Mistakes to Avoid
- Skipping the pre-bake. This leads to soft, floppy shells.
- Overfilling the cups. A heaping amount of beef will spill over and make the cups hard to lift. Aim for roughly 2 to 3 tablespoons each.
- Using wet toppings. Drain diced tomatoes and pat jalapeños dry so they do not water down the cups.
- Adding toppings before baking. Fresh vegetables wilt and turn soggy in the oven.
- Removing the cups too soon. Let them rest for a minute or two so the cheese sets and the cups hold together when lifted.
- Crowding the oven. Bake on the center rack with room for air to circulate so the edges crisp evenly.
Frequently Asked Questions
Can I make these tortilla cups without a muffin pan?
Yes. You can drape the oiled tortilla halves over the backs of an inverted muffin pan, or press them into oven-safe ramekins. Another option is to shape them around small oven-safe bowls. A muffin pan is simply the easiest way to get uniform cups.
Can I use corn tortillas instead of flour?
Flour tortillas are the best choice because they are soft and pliable enough to fold into cups without cracking. Corn tortillas tend to break unless you warm them thoroughly first, and they bake up more like a hard taco shell. If you want to try it, use small corn tortillas and soften them in the microwave under a damp paper towel.
Can I make these in an air fryer?
Yes, with a small adjustment. Use silicone muffin cups or small air-fryer-safe molds, and bake the shells at 350°F (175°C) for about 4 to 5 minutes. Fill, add cheese, and cook another 3 to 4 minutes. Work in batches so the cups are not crowded.
Why did my tortilla cups turn out soggy?
The most common causes are skipping the pre-bake, using a beef mixture that is too wet, or adding fresh toppings before baking. Make sure the shells are golden before filling, simmer the beef until it has thickened, and add lettuce, tomatoes, and sauce only after the cups come out of the oven.
How do I get the cups out of the pan without breaking them?
Let them cool for 1 to 2 minutes so the cheese firms up slightly. Then slide a small spoon or offset spatula down the side of each cup and gently lift. A light coating of nonstick spray at the beginning also helps.
Can I double the recipe?
Absolutely. Use two muffin pans or bake in batches. The beef filling doubles easily in a large skillet, though you may need to cook it in two rounds so it browns rather than steams.
How spicy are these?
As written, they are mild to medium. The taco seasoning and jalapeños add gentle warmth, and the hot sauce in the creamy sauce is optional. To make them spicier, add cayenne to the beef, use pepper jack cheese, or add more jalapeños and hot sauce. To make them milder, skip the jalapeños and hot sauce.
Can I make the cups gluten-free?
You can use gluten-free large tortillas, but check that they are flexible enough to shape without cracking, and make sure your taco seasoning and other packaged ingredients are labeled gluten-free.
What kind of ground beef works best?
80/20 ground beef gives the most flavor, but it needs more draining. 85/15 or 90/10 is a good balance if you want a leaner filling that does not require much draining.
Can I prepare these for a party ahead of time?
Yes. Bake the empty shells and cook the beef up to a day or two in advance. On the day of your event, reheat the beef, fill the shells, add the cheese, and bake for 5 to 8 minutes. Add the toppings and sauce right before serving for the best result.
Final Thoughts
These Crispy Cheesy Beef Tortilla Cups are proof that great food does not need to be complicated. With a few simple ingredients, a muffin pan, and about 45 minutes, you can turn plain flour tortillas into golden, crunchy cups packed with seasoned beef, gooey melted cheese, fresh toppings, and a creamy, tangy sauce.
They are ideal for weeknight dinners when you want something fun, for game-day gatherings when the crowd is hungry, and for parties where you want a make-ahead appetizer that looks as good as it tastes. Best of all, they are easy to customize, so you can make them your own with your favorite proteins, cheeses, and toppings.
Give them a try, and do not be surprised when someone asks for the recipe before the platter is even empty. Serve them hot, crispy, and generously drizzled with that creamy taco sauce, and enjoy every cheesy bite.
Print
Crispy Cheesy Beef Tortilla Cups
- Total Time: 45 to 50 minutes •
Ingredients
For the Tortilla Cups
- 4 large flour tortillas (10-inch)
- 2 tablespoons olive oil, divided
- Nonstick cooking spray
For the Beef Filling
- 1 lb (450 g) ground beef
- ½ small onion, finely diced
- 2 garlic cloves, minced
- 1 tablespoon taco seasoning
- ½ teaspoon ground cumin
- ¼ teaspoon smoked paprika
- ¼ teaspoon black pepper
- ¼ teaspoon salt, or to taste
- 2 tablespoons tomato sauce
- ¼ cup (60 ml) water
For the Cheese
- 1 cup (100 g) shredded cheddar cheese
- ½ cup (50 g) shredded Monterey Jack cheese
For the Fresh Toppings
- ½ cup diced tomatoes
- ½ cup shredded lettuce
- ¼ cup diced avocado
- 2 tablespoons sliced jalapeños
- 2 tablespoons chopped fresh cilantro
For the Creamy Taco Sauce
- ½ cup mayonnaise
- ¼ cup sour cream
- 1 tablespoon lime juice
- 1 teaspoon taco seasoning
- 1 teaspoon hot sauce, optional
Instructions
Preheat the oven to 375°F (190°C). Lightly coat an 8-cup muffin pan with nonstick cooking spray and set it aside. A light coating is all you need. It helps the tortillas release cleanly later and encourages the edges to brown.
Step 2: Shape the Tortilla Cups
Cut each large flour tortilla in half to create 8 pieces. Brush both sides lightly with some of the olive oil. Press each half into a muffin cup, gently folding and overlapping the edges to form a sturdy cup shape.
Do not worry about making them perfect. The ruffled, uneven edges are part of the charm, and they turn extra crispy in the oven. Make sure the bottom of each cup is pressed flat against the base of the muffin well so the finished shell can stand up on its own.
Step 3: Pre-Bake the Tortillas
Bake the shaped tortillas for 8 to 10 minutes, until the edges are lightly golden and beginning to crisp. Remove the pan from the oven and set the shells aside while you prepare the filling.
This pre-bake is the secret to crunchy cups. It dries and sets the tortilla before any moisture from the beef or cheese touches it, so the shell holds its shape and its crunch.
Step 4: Cook the Beef and Onion
Heat the remaining olive oil in a large skillet over medium-high heat. Add the diced onion and cook for 2 to 3 minutes, until softened. Add the ground beef and cook for 5 to 7 minutes, breaking it into small crumbles with a spoon until browned and fully cooked. Drain any excess grease if needed.
Small crumbles matter here. Large chunks of beef will not nestle into the cups neatly and tend to fall out when you pick them up. Use the back of a wooden spoon or a potato masher to keep the meat finely broken up as it browns.
Step 5: Season the Beef Filling
Add the minced garlic and cook for about 30 seconds until fragrant. Stir in the taco seasoning, cumin, smoked paprika, black pepper, and salt. Add the tomato sauce and water, then simmer for 3 to 4 minutes, stirring occasionally, until the beef is juicy and the mixture has thickened slightly. Remove from the heat.
The small amount of liquid is important. It keeps the beef moist and flavorful, but you want it thick rather than soupy, so the filling stays put inside the shells.
Step 6: Fill the Tortilla Cups
Divide the seasoned beef mixture evenly among the pre-baked tortilla shells. Sprinkle the cheddar and Monterey Jack cheeses evenly over the beef.
Step 7: Bake Until Golden and Cheesy
Return the muffin pan to the oven and bake for 5 to 8 minutes, until the cheese is completely melted and bubbly and the tortilla edges are golden and crispy.
Step 8: Make the Creamy Taco Sauce
While the cups bake, whisk together the mayonnaise, sour cream, lime juice, taco seasoning, and optional hot sauce in a small bowl until smooth and creamy. Transfer the sauce to a squeeze bottle or piping bag for easy drizzling.
Step 9: Add the Fresh Toppings
Remove the tortilla cups from the oven and let them cool for 1 to 2 minutes. Top each cup with diced tomatoes, shredded lettuce, avocado, and sliced jalapeños. Drizzle generously with the creamy taco sauce and finish with chopped fresh cilantro.
Step 10: Serve and Enjoy
Carefully lift the tortilla cups from the muffin pan using a small spoon or spatula. Arrange them on a serving platter and serve immediately while the shells are crispy, the beef is warm, and the cheese is deliciously melted.
- Prep Time: 20 minutes •
- Cook Time: 25 to 30 minutes