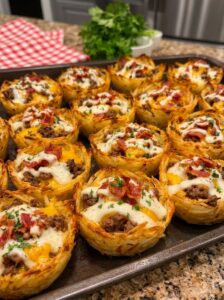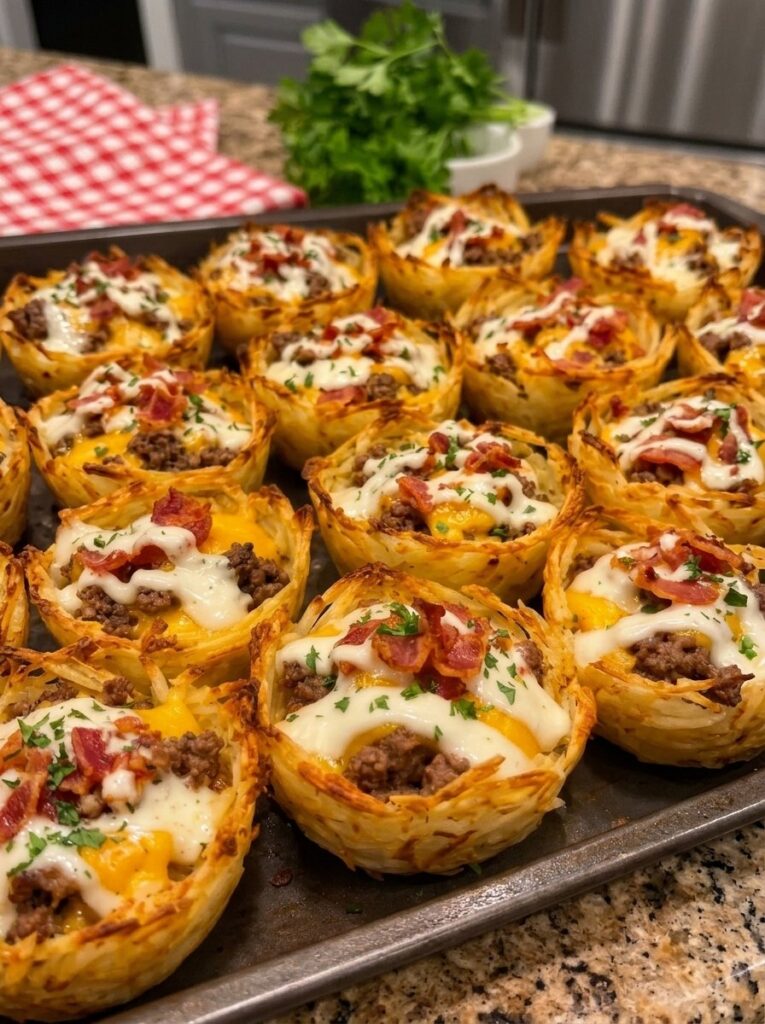
If you have ever wished a bacon cheeseburger and a pan of crispy hash browns could somehow become one irresistible bite, these Crispy Loaded Garlic Ranch Cheeseburger Cheddar Potato Crunch Cups are your answer. Golden, shredded potato shells are baked in a muffin tin until perfectly crunchy, then packed with juicy seasoned ground beef, a double layer of melted cheddar and Monterey Jack, smoky crumbled bacon, fresh tomatoes, green onions, and a generous drizzle of creamy homemade garlic ranch sauce.
They are crispy on the outside, tender and savory on the inside, and loaded with every classic cheeseburger topping you love. Best of all, they are made in a standard 12-cup muffin pan, which means they are easy to portion, easy to serve, and easy to eat with your hands. Whether you need a crowd-pleasing appetizer for game day, a fun family dinner, or a show-stopping party snack, this recipe delivers big flavor with simple ingredients.
In this guide you will find the full ingredient list, step-by-step instructions, expert tips for getting the crispiest potato shells, creative variations, make-ahead and storage advice, serving ideas, and answers to the most common questions.
Why You Will Love These Cheeseburger Potato Cups
There are plenty of loaded potato recipes out there, but these cups stand out for several reasons:
- Seriously crispy texture. Shredded hash browns bake into lacy, golden shells with crunchy edges that hold up to the juicy filling.
- All the flavor of a cheeseburger. Ground beef seasoned with Worcestershire sauce, mustard, ketchup, and smoked paprika tastes like your favorite diner burger.
- Perfect finger food. Each cup is a single serving, so there are no plates, forks, or messy slicing required.
- Easy ingredients. Frozen hash browns, ground beef, cheese, and pantry seasonings are all you need. Everything can be found at any grocery store.
- Great for any occasion. Serve them for football Sundays, birthday parties, potlucks, holiday gatherings, or a casual weeknight dinner.
- Customizable. Swap the toppings, change the cheese, or add a little heat. The recipe is a flexible base for endless variations.
- Make-ahead friendly. The shells, beef filling, and ranch sauce can all be prepared in advance, so assembly takes just minutes.
What Are Potato Crunch Cups?
Potato crunch cups, often called hash brown cups or potato nests, are bite-sized shells made from shredded potatoes pressed into a muffin tin and baked until crisp. Think of them as edible bowls with the crunch of a hash brown and the sturdiness of a tart shell. Once baked, they can be filled with practically anything: scrambled eggs for breakfast, chili for a hearty dinner, or in this case, a loaded cheeseburger filling.
Because the potatoes are bound with a little egg, flour, and cheese, the shells hold their shape beautifully, even after being filled with beef, cheese, and sauce. This is what makes them such a popular choice among muffin tin appetizers.
Ingredients for Cheeseburger Hash Brown Cups
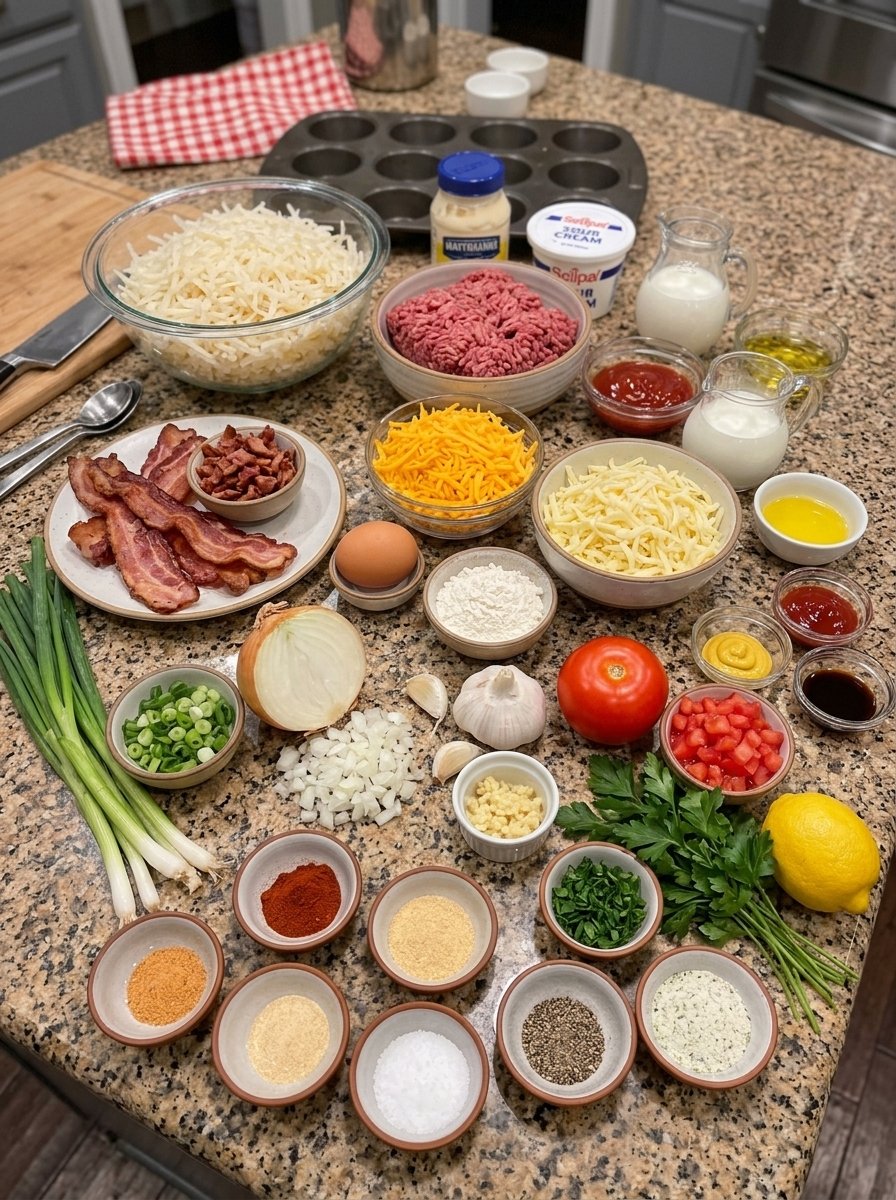
This recipe is divided into four simple components: the potato cups, the cheeseburger filling, the garlic ranch sauce, and the toppings. Here is everything you need.
For the Crispy Potato Cups
- 4 cups (about 500 g) frozen shredded hash browns, thawed
- 1 large egg
- ¼ cup (30 g) all-purpose flour
- ½ cup (50 g) shredded cheddar cheese
- 1 teaspoon garlic powder
- ½ teaspoon onion powder
- ½ teaspoon salt
- ¼ teaspoon black pepper
- 2 tablespoons olive oil or melted butter
- Nonstick cooking spray
For the Cheeseburger Filling
- 1 lb (450 g) ground beef
- ½ small onion, finely diced
- 2 cloves garlic, minced
- 1 teaspoon Worcestershire sauce
- 1 teaspoon yellow mustard
- 1 tablespoon ketchup
- ½ teaspoon smoked paprika
- ½ teaspoon garlic powder
- ½ teaspoon onion powder
- ½ teaspoon salt, or to taste
- ¼ teaspoon black pepper
- 1 cup (100 g) shredded cheddar cheese
- ½ cup (50 g) shredded Monterey Jack cheese
For the Creamy Garlic Ranch Sauce
- ½ cup mayonnaise
- ¼ cup sour cream
- 1 tablespoon milk, plus more as needed
- 1 tablespoon ranch seasoning
- 1 small garlic clove, finely minced
- 1 teaspoon lemon juice
- 1 tablespoon chopped fresh parsley
- ¼ teaspoon black pepper
For the Loaded Toppings
- 6 slices bacon, cooked until crispy and crumbled
- 2 tablespoons chopped fresh parsley
- 2 tablespoons finely diced tomatoes
- 2 tablespoons sliced green onions
- Extra shredded cheddar cheese, as desired
How to Make Crispy Loaded Cheeseburger Potato Cups (Step by Step)
Step 1: Prepare the Oven and Muffin Pan
Preheat your oven to 425°F (220°C). Generously grease a 12-cup standard muffin pan with nonstick cooking spray. Be thorough: coat the bottom and sides of every cup so the potato shells release cleanly. A well-greased pan is the difference between perfect cups and a frustrating stuck-on mess.
Step 2: Thaw and Drain the Hash Browns
Make sure your frozen hash browns are completely thawed. Transfer them to a clean kitchen towel, gather the edges, and squeeze out as much liquid as you can. This step is the secret to crispy potato cups. Excess moisture steams the potatoes instead of letting them brown, which leads to soft, soggy shells. Keep squeezing until very little water remains.
Step 3: Mix the Potato Mixture
In a large bowl, combine the drained hash browns, egg, flour, ½ cup cheddar cheese, garlic powder, onion powder, salt, black pepper, and olive oil or melted butter. Mix thoroughly with your hands or a sturdy spoon until everything is evenly coated and the mixture holds together when pressed.
Step 4: Shape the Potato Cups
Divide the mixture evenly among the 12 prepared muffin cups. Press it firmly into the bottom and up the sides of each cup using your fingers or the back of a spoon, creating a hollow center for the filling. Aim for an even layer. If the walls are too thin in places, they may burn or break; if they are too thick, the centers may stay soft.
Step 5: Bake Until Golden and Crispy
Bake for 20 to 25 minutes, until the edges are deep golden brown and crisp. If the centers still look soft or pale, bake for another 3 to 5 minutes. Remove the pan from the oven and, if the centers have puffed up, gently reshape them with a small spoon to make room for the filling.
Step 6: Cook the Ground Beef
While the potato cups bake, heat a large skillet over medium-high heat. Add the ground beef and diced onion. Cook for 6 to 8 minutes, breaking the beef into small crumbles, until browned and fully cooked through. Drain any excess grease so the filling does not make the potato shells soggy.
Step 7: Season the Cheeseburger Filling
Add the minced garlic and cook for about 30 seconds, until fragrant. Stir in the Worcestershire sauce, yellow mustard, ketchup, smoked paprika, garlic powder, onion powder, salt, and black pepper. Cook for another 2 to 3 minutes, stirring, until the beef is juicy and evenly coated. Taste and adjust the salt if needed.
Step 8: Make the Creamy Garlic Ranch Sauce
In a small bowl, whisk together the mayonnaise, sour cream, milk, ranch seasoning, minced garlic, lemon juice, parsley, and black pepper until smooth. Add a splash more milk if you want a thinner, drizzle-ready consistency. Cover and refrigerate until you are ready to serve. Chilling also lets the flavors meld together.
Step 9: Fill the Potato Cups
Carefully divide the seasoned cheeseburger beef among the crispy potato shells, filling each cup generously. Sprinkle the remaining cheddar and Monterey Jack cheeses evenly over the beef.
Step 10: Bake Until the Cheese Melts
Return the filled cups to the oven and bake for 5 to 7 minutes, until the cheese is completely melted, bubbly, and lightly golden in spots.
Step 11: Add the Loaded Toppings
Remove the pan from the oven and let the cups rest for 3 to 5 minutes. This brief rest helps the shells firm up and makes removal much easier. Top each cup with crispy crumbled bacon, diced tomatoes, and sliced green onions.
Step 12: Finish with Garlic Ranch and Serve
Drizzle the chilled garlic ranch sauce generously over the cups, then finish with freshly chopped parsley and an extra sprinkle of cheddar if you like. Use a small spoon or thin spatula to gently lift each cup from the pan, arrange them on a platter, and serve warm while the shells are crunchy and the cheese is melty.
Pro Tips for the Crispiest Potato Cups
These cups are simple, but a few small details make a big difference.
1. Squeeze, then squeeze again. Moisture is the enemy of crispiness. After thawing, wrap the hash browns in a clean towel or a few layers of paper towels and press out every drop of liquid you can.
2. Do not skimp on greasing. Use nonstick spray generously, or brush each cup with a little melted butter. For extra insurance, a silicone muffin pan also works well.
3. Press firmly and evenly. Packing the potato mixture tightly helps it bind together as it bakes. Use the bottom of a small glass or the back of a spoon to compress the base and walls.
4. Pre-bake fully before filling. Resist the urge to rush the first bake. The shells should be deep golden brown before they get any filling, because they will not get much more crisp once the beef and cheese are added.
5. Drain the beef well. Excess grease can soften the potato shells from the inside. Drain the skillet, or blot the cooked beef with a paper towel before filling.
6. Let them rest. A three to five minute rest after the final bake lets the cheese set and the shells firm up, so the cups lift out cleanly instead of crumbling.
7. Add the ranch last. Drizzle the sauce just before serving so the crunch stays intact.
Recipe Variations and Substitutions
One reason this recipe is so popular is how easy it is to customize.
Swap the Protein
- Ground turkey or chicken: A lighter option that still takes on the cheeseburger seasonings beautifully.
- Ground sausage: Adds a breakfast-style, savory twist.
- Plant-based crumbles: A great vegetarian version; just season generously.
Change the Cheese
- Use pepper jack for a spicy kick.
- Try American cheese for an authentic cheeseburger melt.
- Swap in Colby Jack, Swiss, or mozzarella depending on your taste.
Add More Toppings
- Dill pickle slices or chopped pickles for classic burger tang
- Diced jalapeños for heat
- Caramelized onions for sweetness
- A drizzle of burger sauce or Thousand Island instead of ranch
- Shredded lettuce for a full “burger in a cup” effect
Make Them Breakfast-Style
Fill the baked shells with scrambled eggs, sausage, and cheddar for a hearty brunch idea.
Gluten-Free Option
Replace the all-purpose flour in the potato mixture with a gluten-free 1-to-1 baking flour or a tablespoon or two of cornstarch. Check that your ranch seasoning and Worcestershire sauce are labeled gluten-free.
Mini Version
Use a mini muffin pan for bite-sized appetizers. Reduce the first bake to about 15 to 18 minutes and the final bake to 3 to 4 minutes, watching closely.
Make-Ahead, Storage, and Reheating Tips
Make Ahead
You can save a lot of time on party day by prepping in stages:
- Potato shells: Bake the cups up to a day ahead, cool completely, and store in an airtight container at room temperature or in the refrigerator.
- Beef filling: Cook and season the beef up to two days ahead and refrigerate it.
- Ranch sauce: Whisk the sauce up to three days ahead and keep it covered in the fridge.
- Bacon: Cook and crumble it ahead of time, too.
When it is time to serve, simply warm the shells and beef, fill, top with cheese, melt in the oven, and finish with toppings.
Storing Leftovers
Store leftover cups in an airtight container in the refrigerator for up to 3 days. Keep the ranch sauce separate for the best texture.
Reheating
For the crispiest results, reheat in a 375°F (190°C) oven or air fryer for about 8 to 10 minutes until hot and crisp again. A microwave will warm them quickly but will soften the shells, so the oven or air fryer is strongly recommended.
Freezing
Freeze the baked, unfilled potato shells in a single layer, then transfer to a freezer bag for up to 2 months. Reheat from frozen in the oven until crisp, then fill and finish as directed. The beef filling can also be frozen separately for up to 3 months.
What to Serve with Cheeseburger Potato Cups
These cups are filling enough to stand on their own as an appetizer, but they also fit into a bigger menu. Consider pairing them with:
- A crisp green salad or coleslaw to balance the richness
- Veggie sticks with extra ranch for dipping
- Chicken wings or sliders for a full game-day spread
- Fresh fruit skewers for a lighter side
- Cold beer, lemonade, or iced tea to wash it all down
For a dinner-sized portion, serve three or four cups per person alongside a simple side salad.
Perfect Occasions for Loaded Potato Cups
- Game-day gatherings and tailgates: Handheld, shareable, and crowd-pleasing.
- Birthday parties and kids’ events: Kids love the cheeseburger flavor and the crunchy shells.
- Holiday appetizer tables: Easy to make in bulk and beautiful on a platter.
- Potlucks and family dinners: Travel well and are simple to reheat.
- Casual weeknight meals: Ready in about an hour using everyday ingredients.
Nutrition and Serving Notes
This recipe makes 12 potato cups. Depending on your ingredient choices and portion sizes, a single cup is a rich, satisfying bite. Because nutrition values vary by brand and substitutions, use a nutrition calculator with your exact ingredients if you need precise numbers. To lighten the recipe, try lean ground turkey, reduced-fat cheese, Greek yogurt in place of sour cream, and turkey bacon.
Common Mistakes to Avoid
- Skipping the squeeze. Wet hash browns lead to soggy cups.
- Under-greasing the pan. Stuck potatoes are the most common problem.
- Overfilling before the first bake. The shells need to crisp up first.
- Using too much beef filling liquid. Drain well, or the cups will soften.
- Adding sauce too early. Drizzle just before serving.
- Removing them from the pan too soon. Give them a few minutes to rest.
Frequently Asked Questions (FAQ)
Can I use fresh potatoes instead of frozen hash browns?
Yes. Peel and shred about 1 pound of russet potatoes, rinse to remove excess starch, then squeeze them extremely dry in a towel. Fresh potatoes hold more moisture, so thorough drying is essential. Frozen hash browns are simply more convenient and consistent.
Do I have to thaw the hash browns?
Yes. Thawing and draining the hash browns is key to crispy results. Frozen potatoes release a lot of water as they heat, which creates steam and soft shells.
Why are my potato cups falling apart?
The mixture may be too dry or not packed firmly enough. Make sure you include the egg and flour, which act as binders, and press the potatoes tightly into the muffin cups. Letting the cups rest for a few minutes before removing them also helps.
Why are my potato cups soggy?
Usually the cause is leftover moisture in the hash browns, too much grease in the filling, or adding sauce too early. Squeeze the potatoes thoroughly, drain the beef, and add the ranch right before serving.
Can I make these in an air fryer?
Yes, if you have silicone or air-fryer-safe muffin cups. Cook at 375°F (190°C) for about 12 to 15 minutes for the shells, then fill and cook a few minutes more to melt the cheese. Work in batches.
Can I make cheeseburger potato cups ahead of time?
Absolutely. Bake the shells, cook the filling, and mix the sauce in advance. Assemble and give the cups their final bake just before serving for the best texture.
Can I use a mini muffin pan?
Yes. Mini cups make fantastic party bites. Shorten the baking times and keep a close eye on them.
What is the best ground beef for this recipe?
An 80/20 blend gives the juiciest flavor, but be sure to drain excess fat. Leaner beef such as 90/10 works too and requires less draining.
How do I get the cups out of the pan without breaking?
Grease the pan well, let the cups rest 3 to 5 minutes after baking, then run a thin spatula or butter knife around the edges and gently lift from underneath with a small spoon.
Is the garlic ranch sauce necessary?
It is not required, but it ties everything together. The cool, creamy ranch balances the savory beef, salty bacon, and sharp cheddar. You can swap in store-bought ranch if you are short on time.
Final Thoughts
These Crispy Loaded Garlic Ranch Cheeseburger Cheddar Potato Crunch Cups deliver everything people crave in a comfort-food appetizer: crunchy golden potato shells, juicy seasoned beef, gooey melted cheese, smoky bacon, fresh toppings, and a cool garlic ranch drizzle. They look impressive, taste even better, and come together with simple ingredients and straightforward steps.
Make them for your next game day, party, or family dinner and watch the pan empty in minutes. If you try the recipe, leave a rating and a comment below to let us know how it turned out, and share your favorite variations. Do not forget to save this recipe on Pinterest so you can find it again whenever a craving for loaded, cheesy cheeseburger goodness strikes!
Print
Crispy Loaded Garlic Ranch Cheeseburger Cheddar Potato Crunch Cups
Ingredients
This recipe is divided into four simple components: the potato cups, the cheeseburger filling, the garlic ranch sauce, and the toppings. Here is everything you need.
For the Crispy Potato Cups
- 4 cups (about 500 g) frozen shredded hash browns, thawed
- 1 large egg
- ¼ cup (30 g) all-purpose flour
- ½ cup (50 g) shredded cheddar cheese
- 1 teaspoon garlic powder
- ½ teaspoon onion powder
- ½ teaspoon salt
- ¼ teaspoon black pepper
- 2 tablespoons olive oil or melted butter
- Nonstick cooking spray
For the Cheeseburger Filling
- 1 lb (450 g) ground beef
- ½ small onion, finely diced
- 2 cloves garlic, minced
- 1 teaspoon Worcestershire sauce
- 1 teaspoon yellow mustard
- 1 tablespoon ketchup
- ½ teaspoon smoked paprika
- ½ teaspoon garlic powder
- ½ teaspoon onion powder
- ½ teaspoon salt, or to taste
- ¼ teaspoon black pepper
- 1 cup (100 g) shredded cheddar cheese
- ½ cup (50 g) shredded Monterey Jack cheese
For the Creamy Garlic Ranch Sauce
- ½ cup mayonnaise
- ¼ cup sour cream
- 1 tablespoon milk, plus more as needed
- 1 tablespoon ranch seasoning
- 1 small garlic clove, finely minced
- 1 teaspoon lemon juice
- 1 tablespoon chopped fresh parsley
- ¼ teaspoon black pepper
For the Loaded Toppings
- 6 slices bacon, cooked until crispy and crumbled
- 2 tablespoons chopped fresh parsley
- 2 tablespoons finely diced tomatoes
- 2 tablespoons sliced green onions
- Extra shredded cheddar cheese, as desired
Instructions
Preheat your oven to 425°F (220°C). Generously grease a 12-cup standard muffin pan with nonstick cooking spray. Be thorough: coat the bottom and sides of every cup so the potato shells release cleanly. A well-greased pan is the difference between perfect cups and a frustrating stuck-on mess.
Step 2: Thaw and Drain the Hash Browns
Make sure your frozen hash browns are completely thawed. Transfer them to a clean kitchen towel, gather the edges, and squeeze out as much liquid as you can. This step is the secret to crispy potato cups. Excess moisture steams the potatoes instead of letting them brown, which leads to soft, soggy shells. Keep squeezing until very little water remains.
Step 3: Mix the Potato Mixture
In a large bowl, combine the drained hash browns, egg, flour, ½ cup cheddar cheese, garlic powder, onion powder, salt, black pepper, and olive oil or melted butter. Mix thoroughly with your hands or a sturdy spoon until everything is evenly coated and the mixture holds together when pressed.
Step 4: Shape the Potato Cups
Divide the mixture evenly among the 12 prepared muffin cups. Press it firmly into the bottom and up the sides of each cup using your fingers or the back of a spoon, creating a hollow center for the filling. Aim for an even layer. If the walls are too thin in places, they may burn or break; if they are too thick, the centers may stay soft.
Step 5: Bake Until Golden and Crispy
Bake for 20 to 25 minutes, until the edges are deep golden brown and crisp. If the centers still look soft or pale, bake for another 3 to 5 minutes. Remove the pan from the oven and, if the centers have puffed up, gently reshape them with a small spoon to make room for the filling.
Step 6: Cook the Ground Beef
While the potato cups bake, heat a large skillet over medium-high heat. Add the ground beef and diced onion. Cook for 6 to 8 minutes, breaking the beef into small crumbles, until browned and fully cooked through. Drain any excess grease so the filling does not make the potato shells soggy.
Step 7: Season the Cheeseburger Filling
Add the minced garlic and cook for about 30 seconds, until fragrant. Stir in the Worcestershire sauce, yellow mustard, ketchup, smoked paprika, garlic powder, onion powder, salt, and black pepper. Cook for another 2 to 3 minutes, stirring, until the beef is juicy and evenly coated. Taste and adjust the salt if needed.
Step 8: Make the Creamy Garlic Ranch Sauce
In a small bowl, whisk together the mayonnaise, sour cream, milk, ranch seasoning, minced garlic, lemon juice, parsley, and black pepper until smooth. Add a splash more milk if you want a thinner, drizzle-ready consistency. Cover and refrigerate until you are ready to serve. Chilling also lets the flavors meld together.
Step 9: Fill the Potato Cups
Carefully divide the seasoned cheeseburger beef among the crispy potato shells, filling each cup generously. Sprinkle the remaining cheddar and Monterey Jack cheeses evenly over the beef.
Step 10: Bake Until the Cheese Melts
Return the filled cups to the oven and bake for 5 to 7 minutes, until the cheese is completely melted, bubbly, and lightly golden in spots.
Step 11: Add the Loaded Toppings
Remove the pan from the oven and let the cups rest for 3 to 5 minutes. This brief rest helps the shells firm up and makes removal much easier. Top each cup with crispy crumbled bacon, diced tomatoes, and sliced green onions.
Step 12: Finish with Garlic Ranch and Serve
Drizzle the chilled garlic ranch sauce generously over the cups, then finish with freshly chopped parsley and an extra sprinkle of cheddar if you like. Use a small spoon or thin spatula to gently lift each cup from the pan, arrange them on a platter, and serve warm while the shells are crunchy and the cheese is melty.