Easy No-Knead Farmhouse Bread: Crusty, Chewy, and Made with Just 6 Ingredients
SEO title (under 60 characters): Easy No-Knead Farmhouse Bread Recipe (Dutch Oven)
Meta description (under 160 characters): Make crusty no-knead farmhouse bread at home with 6 simple ingredients. Golden crust, soft chewy center, and zero kneading. Beginner-friendly recipe!
Suggested URL slug: /easy-no-knead-farmhouse-bread
Primary keyword: no-knead farmhouse bread
Secondary keywords: easy homemade bread recipe, no-knead Dutch oven bread, beginner bread recipe, crusty artisan bread, homemade bread without kneading, rustic farmhouse loaf
There is nothing quite like the smell of fresh bread baking in your own kitchen. It fills the house with warmth and makes even a plain Tuesday feel special. Many home cooks assume that kind of bread takes hours of kneading, special equipment, and years of practice. It doesn’t.
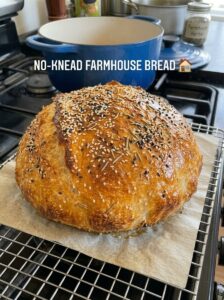
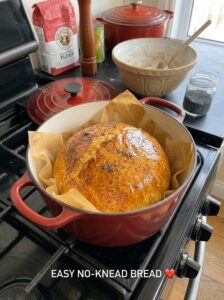
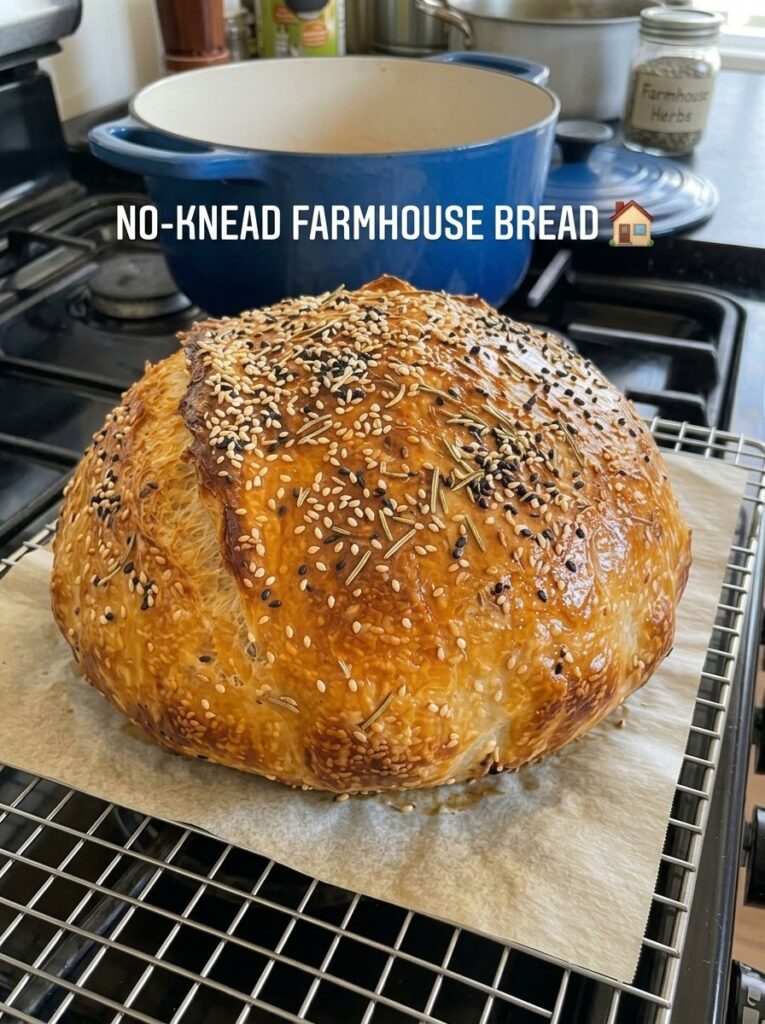
This easy no-knead farmhouse bread has a crisp golden crust, a soft and chewy center, and a rustic look that belongs on a farmhouse table. You mix the dough in one bowl with a spoon, let time do the work, and bake it in a hot Dutch oven. The whole thing takes about 15 minutes of hands-on effort.
Whether you have never baked bread before or you’re a seasoned baker who wants a reliable loaf for busy days, this recipe delivers. Below you’ll find the full recipe, step-by-step instructions, troubleshooting tips, flavor variations, serving ideas, and answers to the most common questions about no-knead bread.
What Is Farmhouse Bread?
Farmhouse bread is a rustic, homestyle loaf traditionally baked in home kitchens with simple pantry staples: flour, water, yeast, and salt. It isn’t fussy or precisely shaped. It’s meant to be sliced thick, slathered with butter, and shared around the table.
The no-knead method takes that idea further. Instead of working the dough by hand to build gluten, you use a wetter dough and a longer rise. Over 1½ to 2 hours, the flour fully hydrates and the gluten develops on its own. You get the same chewy texture and open crumb with almost no effort.
Why You’ll Love This No-Knead Farmhouse Bread Recipe
- No kneading required. Stir the ingredients until combined and walk away.
- Only 6 simple ingredients. Most of them are already in your pantry, and the olive oil is optional.
- Bakery-style crust at home. Baking in a preheated Dutch oven traps steam and creates a crisp, golden, crackly crust.
- Soft, chewy interior. A wetter dough gives a tender, airy crumb that’s perfect for slicing.
- Beginner-friendly. There’s no shaping skill to master and no stand mixer to buy.
- Incredibly versatile. Use it for toast, sandwiches, grilled cheese, soup dunking, and homemade croutons.
- Great for meal prep. The loaf keeps well and freezes beautifully.
Ingredients for No-Knead Farmhouse Bread
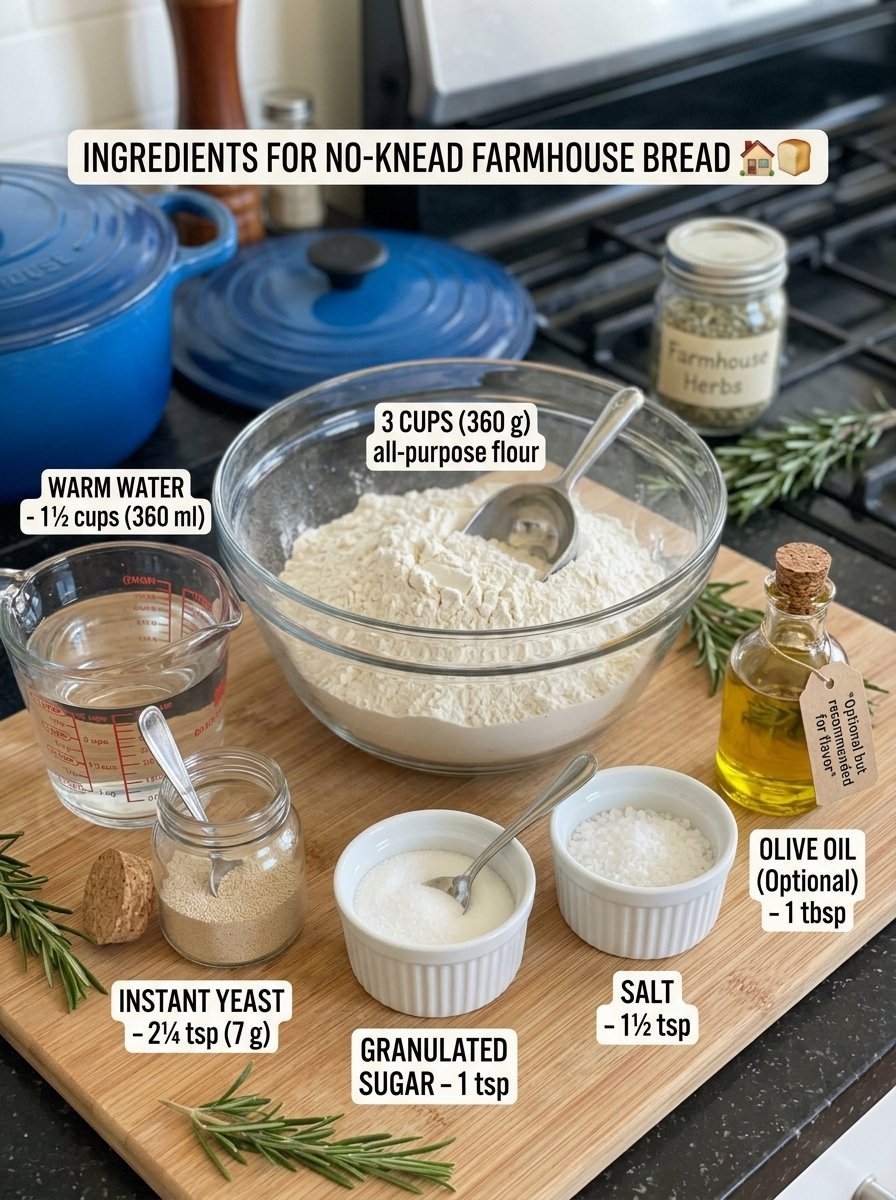
You need just a handful of basic ingredients:
- 3 cups (360 g) all-purpose flour
- 1½ cups (360 ml) warm water
- 2¼ tsp (7 g) instant yeast
- 1½ tsp salt
- 1 tsp granulated sugar or honey
- 1 tbsp olive oil (optional)
A Closer Look at the Ingredients
All-purpose flour. It’s the everyday choice and it works well here. For an even chewier loaf, swap some or all of it for bread flour. Bread flour has a higher protein content, which means more gluten structure and a slightly denser, chewier bite.
Warm water. Water temperature matters more than most people realize. Aim for warm, like a comfortable bath, not hot. Water that’s too hot can kill the yeast, and water that’s too cold makes the rise sluggish.
Instant yeast. Instant yeast can be mixed directly into the dry ingredients, so there’s no separate proofing step. If yours is old, test it by stirring a pinch into a little warm water with sugar. It should get foamy within about 10 minutes.
Salt. Salt adds flavor and also strengthens the dough structure. Don’t skip it, or the bread will taste flat.
Sugar or honey. A small amount gives the yeast a little food to get going and adds a subtle depth of flavor. It won’t make the bread sweet.
Olive oil (optional). A tablespoon of olive oil adds a touch of richness and helps keep the crumb tender.
Equipment You’ll Need
- A large mixing bowl
- A wooden spoon or spatula
- Plastic wrap, a lid, or a clean kitchen towel
- A Dutch oven with a lid (a heavy enameled cast-iron pot works beautifully)
- Parchment paper
- Oven mitts
- A sharp knife or bread lame
- A wire cooling rack
No Dutch oven? You can still make this bread. Preheat a sturdy baking sheet or baking stone, and put an oven-safe pan of hot water on a lower rack to create steam.
How to Make No-Knead Farmhouse Bread: Step by Step
Step 1: Mix the Dough
In a large mixing bowl, combine the flour, instant yeast, salt, and sugar or honey. Pour in the warm water and the olive oil, if using.
Stir with a wooden spoon or spatula until a sticky, shaggy dough forms. Don’t knead. Just make sure no large pockets of dry flour remain. The dough will look messy and wet, and that’s exactly what you want.
Step 2: Cover and Let the Dough Rise
Cover the bowl with plastic wrap, a lid, or a clean kitchen towel. Place it in a warm, draft-free spot and let it rise for about 1½ to 2 hours, until the dough has clearly expanded and looks bubbly.
Rising time depends on your kitchen temperature and the activity of your yeast. In a cool kitchen it may take longer, and in a warm one it may be quicker. Judge by how the dough looks rather than by the clock alone: it should be puffy, jiggly, and covered in bubbles.
Step 3: Prepare the Dutch Oven
About 30 minutes before you plan to bake, place your Dutch oven with its lid inside the oven and preheat to 450°F (230°C). Let the pot get thoroughly hot. A very hot pot is the secret to a great crust.
If you’re not using a Dutch oven, preheat a sturdy baking sheet or baking stone instead.
Step 4: Shape the Dough
Lightly flour your work surface and gently turn the risen dough out onto it. With lightly floured hands, fold the edges toward the center a few times to form a loose round. Flip it seam-side down and gently shape it into a ball.
Be gentle. Don’t knead or press out too much air, because that trapped air gives the finished loaf its light, airy texture.
Step 5: Let It Rest Briefly
Place the shaped dough on a piece of parchment paper and cover it loosely with a clean towel. Let it rest for 20 to 30 minutes while the oven finishes heating. The dough should look slightly puffy.
Step 6: Transfer to the Dutch Oven
Using oven mitts, carefully remove the hot Dutch oven from the oven. Lift the dough by the parchment paper and lower it into the pot.
If you like, dust the top lightly with flour and use a sharp knife or bread lame to make one shallow cut across the top. This gives the loaf a place to expand as it bakes. Then carefully put the hot lid back on.
Step 7: Bake Covered
Bake covered for 30 minutes at 450°F (230°C). The lid traps steam around the dough, which helps the loaf rise fully and develop that crackly crust.
Step 8: Finish Baking Uncovered
Remove the lid and continue baking for another 10 to 15 minutes, until the loaf is deeply golden brown and crisp. The bread should sound hollow when you gently tap the bottom.
For a darker, crunchier crust, bake a few extra minutes, but keep a close eye on it.
Step 9: Cool Before Slicing
Carefully lift the bread out of the Dutch oven and transfer it to a wire rack. Let it cool for at least 30 to 60 minutes before slicing.
This is the hardest step, but it matters. Cooling lets the crumb finish setting, so the bread stays soft and chewy instead of turning gummy.
Timing and Yield
- Prep time: about 15 minutes
- Rising time: about 1½ to 2 hours, plus 20 to 30 minutes of resting
- Baking time: about 40 to 45 minutes
- Total time: about 2½ to 3½ hours
- Yield: 1 rustic farmhouse loaf, about 10 to 12 slices
Tips for the Best Farmhouse Bread
Use warm, not hot, water. Water around body temperature wakes up the yeast gently. Hot water can kill it and leave you with a flat, dense loaf.
Embrace the sticky dough. The dough should be sticky and shaggy. It’s tempting to add extra flour, but a wetter dough is what creates a tender interior and an open crumb. Use a light dusting of flour only when shaping.
Give the dough enough time. Don’t rush the rise. The dough should be noticeably puffy and expanded, with bubbles on the surface. A properly risen dough makes a lighter loaf.
Preheat the Dutch oven thoroughly. A hot pot gives the dough an instant burst of heat, which helps it spring up and form a crisp crust.
Try bread flour for extra chew. If you love a chewier, more artisan-style texture, replace some or all of the all-purpose flour with bread flour.
Use parchment paper as a sling. Lifting the dough by the parchment makes it easy and safe to lower into the scorching hot pot, with no risk of burning your hands or deflating the loaf.
Don’t skip the cooling time. Slicing into hot bread is tempting, but the interior is still setting. Patience gives you a better crumb.
Troubleshooting: Common No-Knead Bread Problems
My bread didn’t rise. The most common culprits are old yeast or water that was too hot or too cold. Check the expiration date on your yeast, and use warm water. Also make sure the dough rises in a warm spot, since a chilly kitchen slows everything down.
My loaf is dense. This usually means the dough didn’t rise long enough, or too much air was pressed out during shaping. Let the dough get properly puffy and bubbly, and handle it gently.
The crust is too pale. Make sure the Dutch oven is fully preheated and the oven is truly at 450°F. Bake uncovered a few extra minutes for deeper color.
The crust is too dark or the bottom is burning. Ovens vary. If the bottom is browning too fast, move the rack up one position, or set the pot on a baking sheet for the covered portion of the bake.
The inside is gummy. This is almost always caused by slicing too soon. Let the bread cool for at least 30 to 60 minutes. Also confirm the loaf sounds hollow when tapped on the bottom before removing it.
The dough is too sticky to shape. It’s supposed to be sticky. Lightly flour your hands and your work surface, and use a bench scraper or spatula if it helps. Work quickly and gently rather than adding lots of extra flour.
Creative Variations: Make It Your Own
Once you’ve mastered the basic loaf, try these ideas.
Seeded farmhouse loaf. For a bakery-style finish, brush the top of the shaped dough lightly with water or beaten egg and sprinkle on sesame seeds, black sesame or nigella seeds, and a little dried rosemary before baking. The seeds toast in the oven and add crunch, nutty flavor, and a beautiful rustic look.
Herb-infused bread. Mix a tablespoon or two of your favorite dried herbs, such as rosemary, thyme, or an herb blend, into the dry ingredients for a fragrant, savory loaf.
Garlic and cheese. Fold in a handful of shredded cheddar or Parmesan and a little garlic powder when you mix the dough.
Whole wheat farmhouse bread. Replace up to a third of the flour with whole wheat flour for a nuttier flavor. The dough may need a touch more water.
Honey-oat topping. Brush the top with a little honey and sprinkle with rolled oats for a soft, slightly sweet crust.
Serving Ideas for Farmhouse Bread
This loaf is delicious in more ways than you might expect:
- Warm with butter or olive oil. Thick slices straight from the oven are hard to beat.
- Toast and toppings. Toast slices until golden and top with avocado, eggs, or cream cheese.
- Sandwiches. Use it with cheese, turkey, chicken, or fresh vegetables.
- Grilled cheese. The sturdy crumb and crisp crust make excellent grilled cheese sandwiches.
- Soups and stews. Serve alongside soups, stews, salads, or pasta for dipping and scooping.
- Homemade croutons. Cut day-old bread into cubes and toast them for crunchy salad and soup toppers.
It’s a natural fit for breakfast, brunch, lunch, dinner, and meal prep alike.
How to Store Farmhouse Bread
Room temperature. Let the loaf cool completely before storing. Keep it in a paper bag, bread bag, or loosely covered container for up to 3 days. Avoid sealing it in an airtight plastic bag right away, because trapped moisture will soften the crust.
Freezing. For longer storage, slice the cooled loaf and freeze the slices in a freezer-safe bag for up to 2 to 3 months. Slicing first means you can pull out only what you need.
Thawing. Thaw at room temperature, or toast slices directly from frozen.
Refreshing the crust. To bring back that just-baked crispness, warm the loaf in a 350°F (175°C) oven for about 5 to 10 minutes.
Frequently Asked Questions
Do I really not need to knead this bread?
Correct. The wet dough and long rise let gluten develop on its own. You only need to stir until no dry flour remains.
Can I make this bread without a Dutch oven?
Yes. Preheat a sturdy baking sheet or baking stone, and place an oven-safe pan of hot water on a lower rack to create steam. The crust may be a little less crisp than one baked in a Dutch oven, but the bread will still be delicious.
Can I use active dry yeast instead of instant yeast?
The recipe is written for instant yeast. If you only have active dry yeast, dissolve it in the warm water with the sugar or honey and let it sit until foamy, about 5 to 10 minutes, before mixing it into the flour. The rise may take a little longer.
Can I use bread flour?
Yes. Bread flour makes a chewier loaf. You can replace some or all of the all-purpose flour.
Why is my dough so sticky?
That’s normal and intentional. Sticky, shaggy dough produces a tender interior. Avoid adding lots of extra flour.
How do I know when the bread is done?
The crust should be deeply golden brown and crisp, and the bread should sound hollow when you tap the bottom.
Can I let the dough rise longer?
The recipe gives a rise of about 1½ to 2 hours, until the dough is noticeably expanded and bubbly. Rise time varies with your kitchen temperature and yeast, so go by how the dough looks.
Is the olive oil necessary?
No, it’s optional. A tablespoon adds a little richness and tenderness, but the bread is still great without it.
Can I use honey instead of sugar?
Yes. Either works, and you only need 1 teaspoon. It feeds the yeast and adds a subtle flavor.
What if I don’t have parchment paper?
Parchment makes transferring the dough much easier and safer. Without it, you can lightly dust the bottom of the pot with flour or cornmeal, but be very careful when lowering the dough into the hot pot.
How long does homemade farmhouse bread last?
About 3 days at room temperature, or 2 to 3 months in the freezer when sliced and stored in a freezer-safe bag.
Can I make a bigger batch?
This recipe makes one loaf of about 10 to 12 slices. If you want more, make separate batches, since a single Dutch oven bakes one loaf at a time.
Final Thoughts
Homemade bread doesn’t have to be complicated, time-consuming, or intimidating. This easy no-knead farmhouse bread proves that a handful of pantry staples, a little patience, and a hot Dutch oven are all you need to bake a loaf with a crisp golden crust and a soft, chewy center.
Mix it in the morning, let it rise while you go about your day, and bake it just in time for dinner. Serve it warm with butter, toast it for breakfast, or use it to soak up the last drops of soup. However you slice it, this rustic loaf makes any meal feel a little more special.
If you make this recipe, leave a comment and a star rating below, and share a photo of your loaf. Happy baking!
Print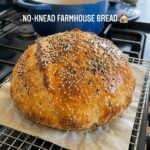
Easy No-Knead Farmhouse Bread
Ingredients
You need just a handful of basic ingredients:
- 3 cups (360 g) all-purpose flour
- 1½ cups (360 ml) warm water
- 2¼ tsp (7 g) instant yeast
- 1½ tsp salt
- 1 tsp granulated sugar or honey
- 1 tbsp olive oil (optional)
A Closer Look at the Ingredients
All-purpose flour. It’s the everyday choice and it works well here. For an even chewier loaf, swap some or all of it for bread flour. Bread flour has a higher protein content, which means more gluten structure and a slightly denser, chewier bite.
Warm water. Water temperature matters more than most people realize. Aim for warm, like a comfortable bath, not hot. Water that’s too hot can kill the yeast, and water that’s too cold makes the rise sluggish.
Instant yeast. Instant yeast can be mixed directly into the dry ingredients, so there’s no separate proofing step. If yours is old, test it by stirring a pinch into a little warm water with sugar. It should get foamy within about 10 minutes.
Salt. Salt adds flavor and also strengthens the dough structure. Don’t skip it, or the bread will taste flat.
Sugar or honey. A small amount gives the yeast a little food to get going and adds a subtle depth of flavor. It won’t make the bread sweet.
Olive oil (optional). A tablespoon of olive oil adds a touch of richness and helps keep the crumb tender.
Instructions
In a large mixing bowl, combine the flour, instant yeast, salt, and sugar or honey. Pour in the warm water and the olive oil, if using.
Stir with a wooden spoon or spatula until a sticky, shaggy dough forms. Don’t knead. Just make sure no large pockets of dry flour remain. The dough will look messy and wet, and that’s exactly what you want.
Cover the bowl with plastic wrap, a lid, or a clean kitchen towel. Place it in a warm, draft-free spot and let it rise for about 1½ to 2 hours, until the dough has clearly expanded and looks bubbly.
Rising time depends on your kitchen temperature and the activity of your yeast. In a cool kitchen it may take longer, and in a warm one it may be quicker. Judge by how the dough looks rather than by the clock alone: it should be puffy, jiggly, and covered in bubbles.
About 30 minutes before you plan to bake, place your Dutch oven with its lid inside the oven and preheat to 450°F (230°C). Let the pot get thoroughly hot. A very hot pot is the secret to a great crust.
If you’re not using a Dutch oven, preheat a sturdy baking sheet or baking stone instead.
Lightly flour your work surface and gently turn the risen dough out onto it. With lightly floured hands, fold the edges toward the center a few times to form a loose round. Flip it seam-side down and gently shape it into a ball.
Be gentle. Don’t knead or press out too much air, because that trapped air gives the finished loaf its light, airy texture.
Place the shaped dough on a piece of parchment paper and cover it loosely with a clean towel. Let it rest for 20 to 30 minutes while the oven finishes heating. The dough should look slightly puffy.
Using oven mitts, carefully remove the hot Dutch oven from the oven. Lift the dough by the parchment paper and lower it into the pot.
If you like, dust the top lightly with flour and use a sharp knife or bread lame to make one shallow cut across the top. This gives the loaf a place to expand as it bakes. Then carefully put the hot lid back on.
Bake covered for 30 minutes at 450°F (230°C). The lid traps steam around the dough, which helps the loaf rise fully and develop that crackly crust.
Remove the lid and continue baking for another 10 to 15 minutes, until the loaf is deeply golden brown and crisp. The bread should sound hollow when you gently tap the bottom.
For a darker, crunchier crust, bake a few extra minutes, but keep a close eye on it.
Carefully lift the bread out of the Dutch oven and transfer it to a wire rack. Let it cool for at least 30 to 60 minutes before slicing.
This is the hardest step, but it matters. Cooling lets the crumb finish setting, so the bread stays soft and chewy instead of turning gummy.