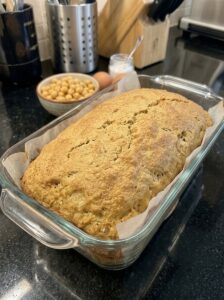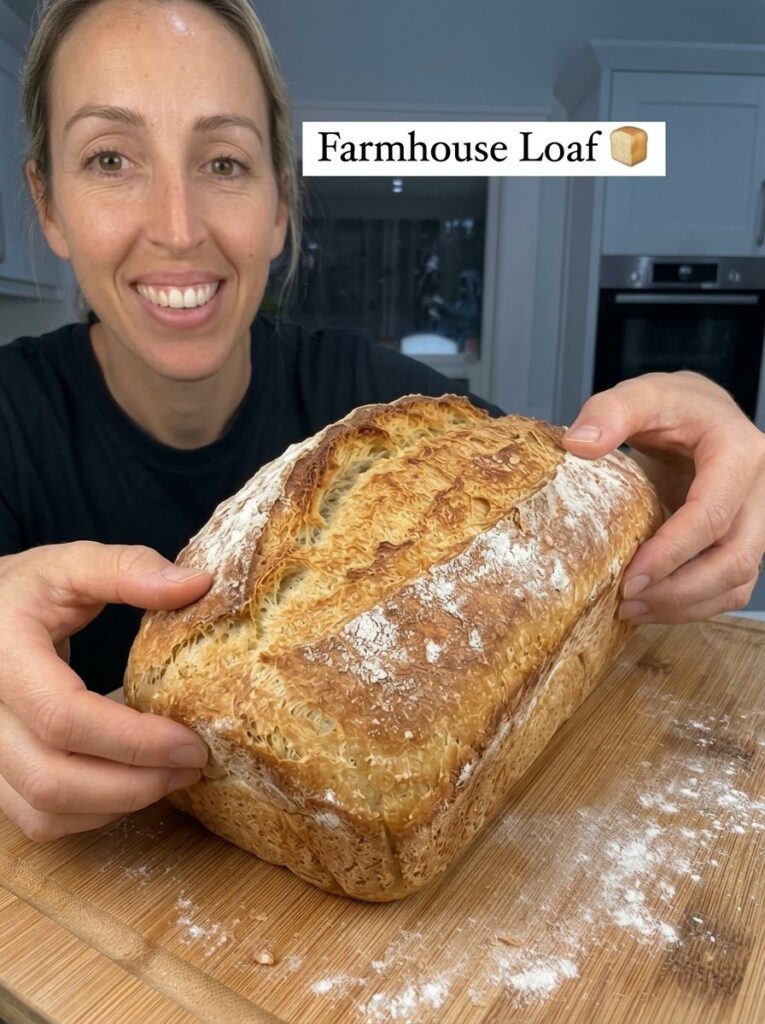
Introduction: The Joy of a Homemade Farmhouse Loaf
There is nothing quite like the smell of freshly baked bread drifting through your kitchen. It is warm, comforting and instantly makes a house feel like a home. If you have ever wanted to bake bread from scratch but felt unsure where to start, this farmhouse loaf is the perfect place to begin.
This homemade farmhouse loaf has a beautifully golden crust, a soft and fluffy center, and the classic, comforting flavor that makes every slice irresistible. It is made with simple everyday ingredients: white bread flour, instant yeast, honey, water, a little oil or butter and salt. There are no special tools, no complicated techniques and no sourdough starter to feed.
Whether you want sandwich bread for the week, thick slices of breakfast toast, or a warm slice with melted butter straight from the oven, this recipe delivers. In this complete guide, you will find the full ingredient list, a clear step-by-step method, expert tips, troubleshooting advice, tasty variations, storage instructions and answers to the most common questions about baking farmhouse bread at home.
What Is a Farmhouse Loaf?
A farmhouse loaf is a traditional, rustic-style white loaf known for its soft crumb, golden crust and generous, slightly domed top. Historically, this style of bread was baked in home kitchens and on farms, where a reliable everyday loaf was needed to feed a hungry family. It was made from basic pantry ingredients and designed to be sliced thick, buttered generously and shared around the table.
Today, the term usually describes a simple yeasted white bread baked in a loaf tin. It is softer than a crusty artisan loaf but more characterful than a plain supermarket sandwich loaf. The crumb is tender and fluffy, the crust is lightly crisp and golden, and the flavor is mild, slightly sweet and deeply satisfying.
The version in this recipe adds a touch of honey for gentle sweetness and a little olive oil or melted butter for softness. A light brush of milk on top before baking gives the crust an attractive, evenly browned finish.
Why You Will Love This Farmhouse Loaf Recipe
There are plenty of bread recipes online, so what makes this one worth your time? Here are the main reasons home bakers love it:
- Simple ingredients. You only need a handful of pantry staples. Everything is easy to find in any supermarket.
- Beginner friendly. The dough is mixed by hand with a wooden spoon, then kneaded on the counter. No stand mixer or bread machine is required.
- Soft and fluffy texture. Thanks to the honey, fat and proper kneading, the crumb stays tender and airy.
- Beautiful golden crust. A quick brush of milk gives you that classic bakery-style color.
- Versatile. It works for sandwiches, toast, soup dunking, French toast, breadcrumbs and more.
- Freezer friendly. Slice it, freeze it and enjoy fresh-tasting bread for weeks.
- Great value. A single loaf costs only a fraction of what you would pay for a good bakery loaf.
Farmhouse Loaf Ingredients
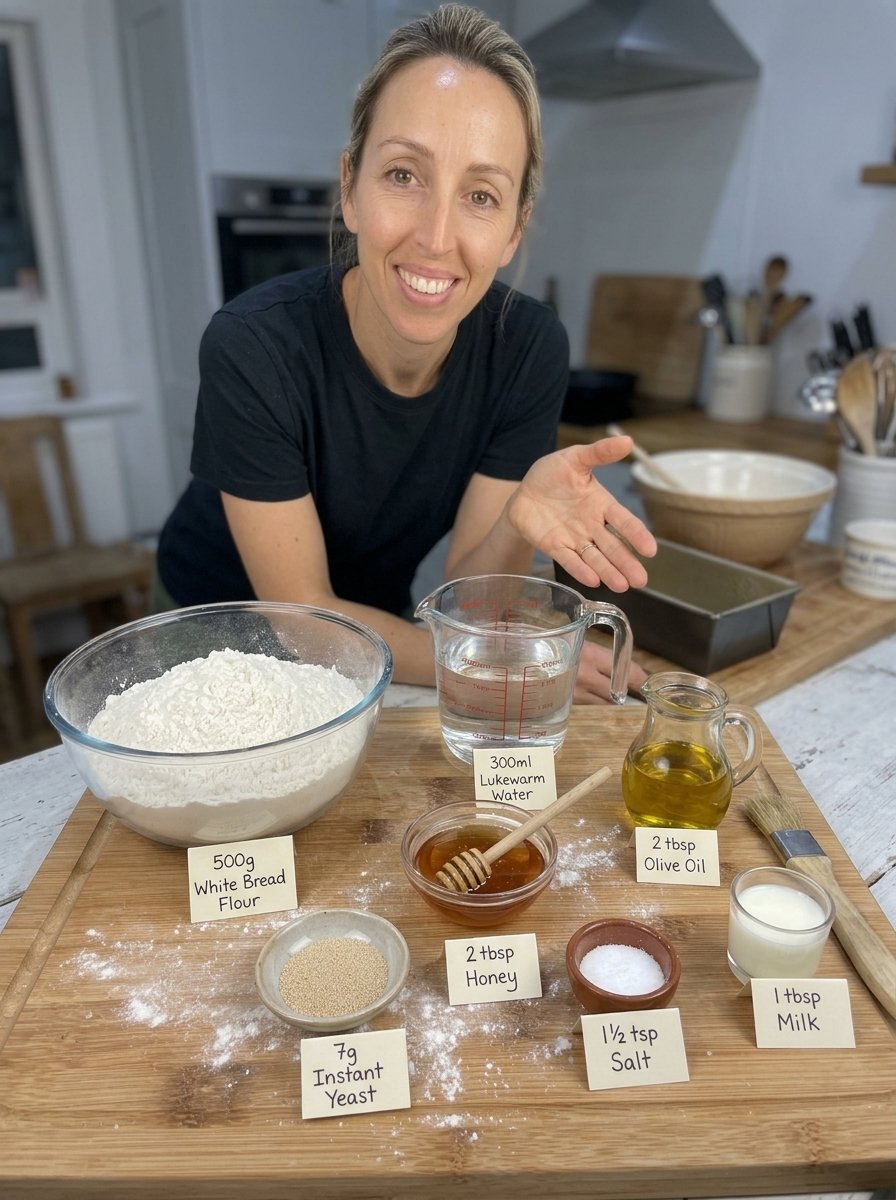
Here is everything you need to make one farmhouse loaf, yielding about 10 to 12 slices:
- 500 g (4 cups) white bread flour
- 7 g instant yeast
- 300 ml (1¼ cups) lukewarm water
- 2 tablespoons honey
- 2 tablespoons olive oil or melted butter
- 1½ teaspoons salt
- 1 tablespoon milk, for brushing the top (optional)
- A little flour, for dusting
Why Each Ingredient Matters
Understanding what each ingredient does will make you a more confident baker and help you troubleshoot if something goes wrong.
White bread flour. Bread flour contains more protein than all-purpose flour. When mixed with water and kneaded, that protein forms gluten, the stretchy network that traps gas from the yeast and gives bread its structure and chew. For a tall, soft farmhouse loaf, bread flour is the best choice.
Instant yeast. Instant yeast is fine and fast-acting, and it can be mixed straight into the liquid or the flour. It produces the carbon dioxide that makes the dough rise. In this recipe, it is stirred into the lukewarm water with the honey to ensure it is evenly distributed.
Lukewarm water. Water that is comfortably warm helps the yeast work without damaging it. If the water is too hot, it can weaken or kill the yeast and your dough will not rise properly. A good rule of thumb is that it should feel pleasantly warm on your wrist, never hot.
Honey. Honey adds a subtle sweetness, feeds the yeast and helps the crust brown beautifully. It also keeps the crumb soft and moist for longer.
Olive oil or melted butter. Fat tenderizes the dough, softens the crumb and improves flavor. Olive oil gives a lightly fruity note, while melted butter gives a richer, more traditional taste. Both work well, so choose whichever you prefer.
Salt. Salt controls the yeast, strengthens the gluten and, of course, adds flavor. Bread without enough salt tastes flat and bland.
Milk for brushing. This optional step helps the crust turn a deep, even golden brown with a slight sheen.
Equipment You Will Need
You do not need fancy gear to bake a great loaf. Here is the basic equipment list:
- A large mixing bowl
- A wooden spoon
- Measuring spoons and a jug, or better, a kitchen scale
- A clean work surface for kneading
- A 9 × 5-inch loaf pan
- A clean kitchen towel or plastic wrap
- A pastry brush for the milk
- A wire cooling rack
- Aluminum foil, in case the top browns too quickly
How to Make Farmhouse Loaf: Step-by-Step Instructions
Follow these eight steps for a soft, golden loaf every time.
Step 1: Mix the Yeast and Water
In a large mixing bowl, combine the lukewarm water, honey and instant yeast. Stir gently until the honey dissolves and the yeast is evenly distributed. This gives the yeast a friendly, slightly sweet environment to wake up in.
Step 2: Add the Remaining Ingredients
Add the bread flour, salt and olive oil or melted butter to the bowl. Mix with a wooden spoon until a rough dough forms and no dry flour remains. At this stage the dough will look shaggy and uneven, and that is completely normal.
Step 3: Knead the Dough
Transfer the dough to a lightly floured surface. Knead for about 8 to 10 minutes, until it becomes smooth, elastic and slightly tacky. To knead, push the dough away from you with the heel of your hand, fold it back over itself, give it a quarter turn and repeat.
If the dough feels very sticky, add only a small amount of flour at a time. It is tempting to add lots of flour, but too much will make your loaf dense and dry. The dough should feel soft and slightly tacky, not stiff.
Step 4: Let the Dough Rise
Place the dough in a lightly greased bowl and turn it once to coat the surface. Cover with a clean kitchen towel or plastic wrap and leave it in a warm place for about 60 to 90 minutes, or until doubled in size. The exact time depends on the temperature of your kitchen. A warmer room speeds things up, while a cooler room slows them down.
Step 5: Shape the Loaf
Gently press the dough to release excess air. Shape it into a rectangle, fold the sides inward, then roll it into a firm loaf, pinching the seam closed. Place it seam-side down in a greased 9 × 5-inch loaf pan. Shaping the dough tightly creates surface tension, which helps the loaf rise upward instead of spreading outward.
Step 6: Allow the Second Rise
Cover the loaf loosely and let it rise for another 30 to 45 minutes, or until puffy and risen just above the rim of the pan. Meanwhile, preheat the oven to 375°F (190°C). Preheating while the dough rises means your oven will be at the right temperature the moment the loaf is ready.
Step 7: Prepare and Bake
If desired, brush the top lightly with milk. Bake for 30 to 35 minutes, until the loaf is golden brown and sounds hollow when tapped on the bottom. If the crust browns too quickly, loosely cover the top with foil for the final few minutes.
Step 8: Cool and Slice
Remove the loaf from the pan and transfer it to a wire rack. Allow it to cool for at least 30 to 45 minutes before slicing. Cutting too early can make the inside gummy because the crumb is still setting. Once cooled, serve fresh with butter, toast it for breakfast or use it to make your favorite sandwiches.
Recipe Details at a Glance
- Prep time: 20 minutes
- First rise: 60 to 90 minutes
- Second rise: 30 to 45 minutes
- Bake time: 30 to 35 minutes
- Total time: Approximately 2 hours 30 minutes to 3 hours
- Yield: 1 loaf, about 10 to 12 slices
- Oven temperature: 375°F (190°C)
- Texture: Soft, fluffy interior with a golden farmhouse crust
- Difficulty: Easy to moderate
Top Tips for the Best Farmhouse Loaf
Small details make a big difference in bread baking. Keep these tips in mind for consistently excellent results.
Use lukewarm water. Water that is comfortably warm helps the yeast work without damaging it. Too cold and the rise will be sluggish, too hot and you risk killing the yeast.
Measure the flour carefully. Too much flour can make the loaf heavy. Weighing the flour gives the most consistent result, which is why the recipe lists 500 g first. If you use cups, spoon the flour into the cup and level it off rather than scooping directly from the bag, which packs in extra flour.
Let the dough rise fully. Give it enough time to become puffy and nearly double in size for a light, fluffy crumb. Rely on how the dough looks and feels rather than strictly on the clock. A gentle poke should leave an indentation that springs back slowly.
Create a golden crust. Brush the top lightly with milk before baking for a beautifully browned finish.
Cool before slicing. Letting the loaf cool helps the inside set and makes it easier to cut neat slices. It is hard to wait, but it is worth it.
Knead until the dough is smooth. Proper kneading builds gluten, which is the secret to a soft, tall loaf. If your arms get tired, take a short break and come back to it.
Choose a warm spot for rising. An oven with just the light on, a spot near a warm (not hot) appliance or a draft-free corner of the kitchen all work well.
Troubleshooting Common Farmhouse Bread Problems
Even experienced bakers run into the occasional hiccup. Here is how to fix the most common issues.
My Dough Did Not Rise
The most likely culprits are old yeast or water that was too hot or too cold. Check the expiry date on your yeast and make sure the water is only lukewarm. A cool kitchen can also slow the rise, so give the dough extra time in a warmer spot.
My Loaf Is Dense and Heavy
This is usually caused by too much flour, too little kneading or cutting the rising time short. Weigh your flour, knead until the dough is smooth and elastic, and let it rise until nearly doubled in size.
The Crust Is Too Dark
If the top browns too quickly, loosely cover it with foil for the final few minutes of baking. Check that your oven temperature is accurate, as many home ovens run hotter than the dial suggests.
The Inside Is Gummy
This typically happens when the loaf is sliced while still hot or underbaked. Make sure the loaf sounds hollow when tapped on the bottom, and let it cool on a wire rack for at least 30 to 45 minutes before cutting.
The Crust Is Soft or Damp
If the crust is soft after cooling, it may be because the loaf was stored before it was completely cool. Always allow the loaf to cool fully before storing it to prevent condensation from making the crust damp.
Delicious Variations to Try
Once you are comfortable with the basic recipe, you can experiment with different flavors and textures. Here are a few ideas.
- Butter version. Use melted butter instead of olive oil for a richer, more classic flavor.
- Seeded top. After brushing with milk, sprinkle the top with sesame, sunflower or poppy seeds before baking.
- Herb loaf. Knead in a tablespoon or two of dried herbs such as rosemary or thyme for a savory twist.
- Cheese loaf. Fold grated cheddar into the dough during shaping for a cheesy, golden loaf.
- Floured top. For a rustic look, dust the top lightly with flour instead of brushing with milk.
Note that additions can change baking time slightly, so keep an eye on the color and check that the loaf sounds hollow when tapped.
Serving Ideas for Your Farmhouse Loaf
This loaf is wonderfully versatile. Here are some of our favorite ways to enjoy it:
- Breakfast toast. Toast a slice and spread it with butter, honey or your favorite jam.
- Hearty sandwiches. Use thick slices for cheese, egg, chicken or vegetable sandwiches.
- Soup companion. Serve alongside creamy soups, stews or homemade chili.
- Fresh from the oven. Enjoy a slice with softened butter while the bread is still slightly warm.
- Sweet afternoon snack. Pair it with jam and a cup of tea or coffee.
How to Store Farmhouse Bread
Proper storage keeps your loaf tasting fresh for longer.
- Room temperature: Store the completely cooled loaf in an airtight bread bag or container for up to 3 days.
- Freezer: Slice the loaf and freeze it in a freezer-safe bag for up to 3 months.
- Reheating: Toast slices directly from frozen, or warm them briefly in the oven.
- Keep it fresh: Always allow the loaf to cool completely before storing to prevent condensation from making the crust damp.
Freezing the bread already sliced is a real time-saver. You can take out exactly as many slices as you need, so nothing goes to waste.
Frequently Asked Questions
Can I use all-purpose flour instead of bread flour?
You can, but the loaf may turn out slightly less tall and chewy because all-purpose flour has less protein. For the softest, fluffiest result, white bread flour is recommended.
Can I use active dry yeast instead of instant yeast?
Yes, though it may need a little longer to activate and rise. Stir it into the lukewarm water with the honey and let it sit until foamy before adding the other ingredients. Allow extra rising time if needed.
Should I use olive oil or butter?
Both work well. Olive oil gives a soft crumb with a mild, fruity note, while melted butter gives a richer flavor. Choose whichever suits your taste.
How do I know when my farmhouse loaf is fully baked?
The loaf should be golden brown and sound hollow when you tap the bottom. If the top is browning too fast before the loaf is done, cover it loosely with foil for the last few minutes.
Why do I need to wait before slicing the bread?
While the loaf cools, the crumb continues to set. Slicing too early can make the inside feel gummy and the slices harder to cut neatly. Waiting at least 30 to 45 minutes gives the best texture.
How long does homemade farmhouse bread last?
Stored in an airtight bread bag or container, it stays fresh for up to 3 days at room temperature. For longer storage, slice and freeze it for up to 3 months.
Can I make the dough ahead of time?
The recipe as written is designed to be made in one session, taking roughly 2 hours 30 minutes to 3 hours in total. Planning your baking around the rise times makes it easy to fit into a relaxed weekend morning or afternoon.
Is this farmhouse loaf recipe good for beginners?
Absolutely. The method is straightforward, the ingredients are simple and the dough is mixed by hand. With a little patience during the rising stages, even first-time bakers can achieve a delicious loaf.
Final Thoughts: Bake Your Own Farmhouse Loaf Today
A homemade farmhouse loaf is one of the most rewarding things you can bake. With just a few simple ingredients and a little patience, you can fill your kitchen with an irresistible aroma and put a golden, soft and fluffy loaf on the table. It is perfect for sandwiches, breakfast toast and sharing with family and friends.
Remember the essentials: use lukewarm water, measure your flour carefully, let the dough rise fully and let the loaf cool before slicing. Follow those simple rules and you will be baking bakery-quality bread at home in no time.
Print
Farmhouse Loaf
Ingredients
Here is everything you need to make one farmhouse loaf, yielding about 10 to 12 slices:
- 500 g (4 cups) white bread flour
- 7 g instant yeast
- 300 ml (1¼ cups) lukewarm water
- 2 tablespoons honey
- 2 tablespoons olive oil or melted butter
- 1½ teaspoons salt
- 1 tablespoon milk, for brushing the top (optional)
- A little flour, for dusting
Why Each Ingredient Matters
Understanding what each ingredient does will make you a more confident baker and help you troubleshoot if something goes wrong.
White bread flour. Bread flour contains more protein than all-purpose flour. When mixed with water and kneaded, that protein forms gluten, the stretchy network that traps gas from the yeast and gives bread its structure and chew. For a tall, soft farmhouse loaf, bread flour is the best choice.
Instant yeast. Instant yeast is fine and fast-acting, and it can be mixed straight into the liquid or the flour. It produces the carbon dioxide that makes the dough rise. In this recipe, it is stirred into the lukewarm water with the honey to ensure it is evenly distributed.
Lukewarm water. Water that is comfortably warm helps the yeast work without damaging it. If the water is too hot, it can weaken or kill the yeast and your dough will not rise properly. A good rule of thumb is that it should feel pleasantly warm on your wrist, never hot.
Honey. Honey adds a subtle sweetness, feeds the yeast and helps the crust brown beautifully. It also keeps the crumb soft and moist for longer.
Olive oil or melted butter. Fat tenderizes the dough, softens the crumb and improves flavor. Olive oil gives a lightly fruity note, while melted butter gives a richer, more traditional taste. Both work well, so choose whichever you prefer.
Salt. Salt controls the yeast, strengthens the gluten and, of course, adds flavor. Bread without enough salt tastes flat and bland.
Milk for brushing. This optional step helps the crust turn a deep, even golden brown with a slight sheen.
Instructions
Follow these eight steps for a soft, golden loaf every time.
In a large mixing bowl, combine the lukewarm water, honey and instant yeast. Stir gently until the honey dissolves and the yeast is evenly distributed. This gives the yeast a friendly, slightly sweet environment to wake up in.
Add the bread flour, salt and olive oil or melted butter to the bowl. Mix with a wooden spoon until a rough dough forms and no dry flour remains. At this stage the dough will look shaggy and uneven, and that is completely normal.
Transfer the dough to a lightly floured surface. Knead for about 8 to 10 minutes, until it becomes smooth, elastic and slightly tacky. To knead, push the dough away from you with the heel of your hand, fold it back over itself, give it a quarter turn and repeat.
If the dough feels very sticky, add only a small amount of flour at a time. It is tempting to add lots of flour, but too much will make your loaf dense and dry. The dough should feel soft and slightly tacky, not stiff.
Place the dough in a lightly greased bowl and turn it once to coat the surface. Cover with a clean kitchen towel or plastic wrap and leave it in a warm place for about 60 to 90 minutes, or until doubled in size. The exact time depends on the temperature of your kitchen. A warmer room speeds things up, while a cooler room slows them down.
Gently press the dough to release excess air. Shape it into a rectangle, fold the sides inward, then roll it into a firm loaf, pinching the seam closed. Place it seam-side down in a greased 9 × 5-inch loaf pan. Shaping the dough tightly creates surface tension, which helps the loaf rise upward instead of spreading outward.
Cover the loaf loosely and let it rise for another 30 to 45 minutes, or until puffy and risen just above the rim of the pan. Meanwhile, preheat the oven to 375°F (190°C). Preheating while the dough rises means your oven will be at the right temperature the moment the loaf is ready.
If desired, brush the top lightly with milk. Bake for 30 to 35 minutes, until the loaf is golden brown and sounds hollow when tapped on the bottom. If the crust browns too quickly, loosely cover the top with foil for the final few minutes.
Remove the loaf from the pan and transfer it to a wire rack. Allow it to cool for at least 30 to 45 minutes before slicing. Cutting too early can make the inside gummy because the crumb is still setting. Once cooled, serve fresh with butter, toast it for breakfast or use it to make your favorite sandwiches.