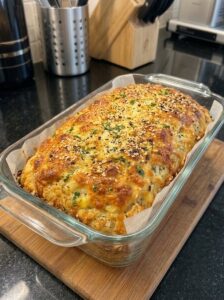
Homemade No-Knead Buttery Milk Bread: Soft, Fluffy & Easy (No Mixer Needed)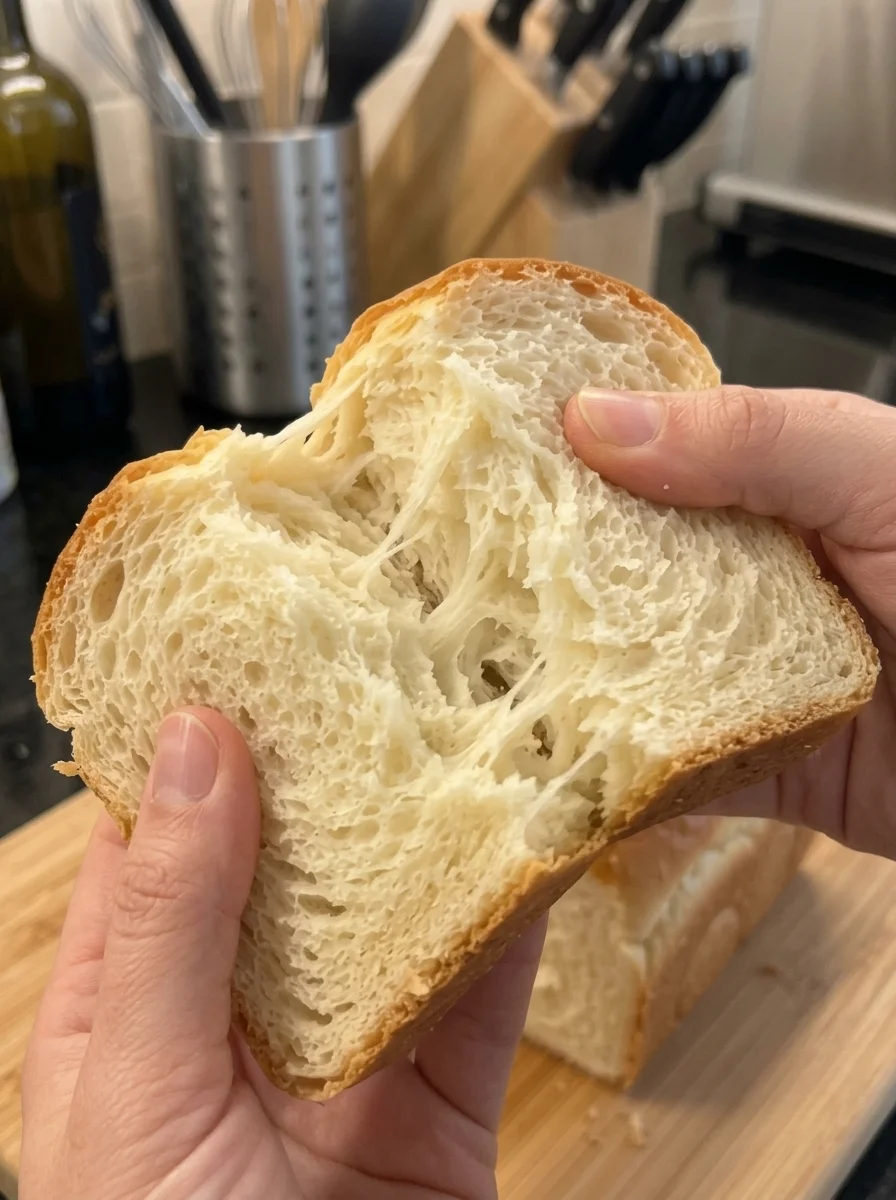
SEO title: No-Knead Buttery Milk Bread Recipe (Soft, Fluffy & Easy)
Meta description: Make soft, fluffy, buttery no-knead milk bread at home with simple pantry ingredients. No mixer, no kneading. Step-by-step recipe, tips, variations, storage, and FAQ.
Focus keyword: no-knead milk bread
Secondary keywords: buttery milk bread, homemade milk bread recipe, easy no-knead bread, soft sandwich bread, no-knead sandwich loaf, milk bread without mixer, fluffy homemade bread, beginner bread recipe
If you have ever dreamed of baking a soft, fluffy, buttery loaf of bread at home but felt put off by kneading, stand mixers, and fussy techniques, this recipe is for you. This no-knead buttery milk bread has a delicate golden crust, a pillowy interior, and a rich, milky flavor that practically melts in your mouth. It is the kind of loaf that disappears quickly at the breakfast table.
The best part is how simple it is. You stir the ingredients together in one bowl, let the dough rise, shape it, let it rise again, and bake. A final brush of melted butter over the warm loaf gives it a beautiful sheen and an irresistible buttery aroma. You do not need a stand mixer, a bread machine, or any special skills.
In this guide you will find the full recipe, step-by-step instructions, an explanation of how each ingredient works, tips for the softest possible loaf, troubleshooting advice, easy variations, serving ideas, storage and freezing instructions, and answers to the questions home bakers ask most often about milk bread.
Why You’ll Love This No-Knead Milk Bread
There are plenty of bread recipes out there, so what makes this one worth baking? Here are the main reasons it earns a place in your regular rotation.
- No kneading required. A sturdy spoon or spatula does all the work. You just need to make sure no dry patches of flour remain.
- Soft and fluffy. Milk, butter, and egg create a tender, pillowy crumb that stays soft for days.
- Rich, buttery flavor. The butter in the dough and the butter brushed on after baking give the loaf a wonderful flavor and a soft crust.
- Simple ingredients. Flour, milk, yeast, sugar, butter, egg, and salt are all you need.
- Beginner friendly. The dough is forgiving, and the method has very few steps.
- Versatile. It is excellent for sandwiches, toast, French toast, and eating warm with butter and jam.
- Great for freezing. Slice the cooled loaf and freeze it, then toast slices whenever you like.
Recipe Overview
- Prep time: 15 to 20 minutes
- First rise: 60 to 90 minutes
- Second rise: 30 to 45 minutes
- Bake time: 30 to 35 minutes
- Total time: Approximately 2½ to 3 hours
- Yield: 1 loaf, approximately 10 to 12 slices
- Pan size: 23 × 13 cm (9 × 5-inch) loaf pan
- Difficulty: Easy
Ingredients for No-Knead Buttery Milk Bread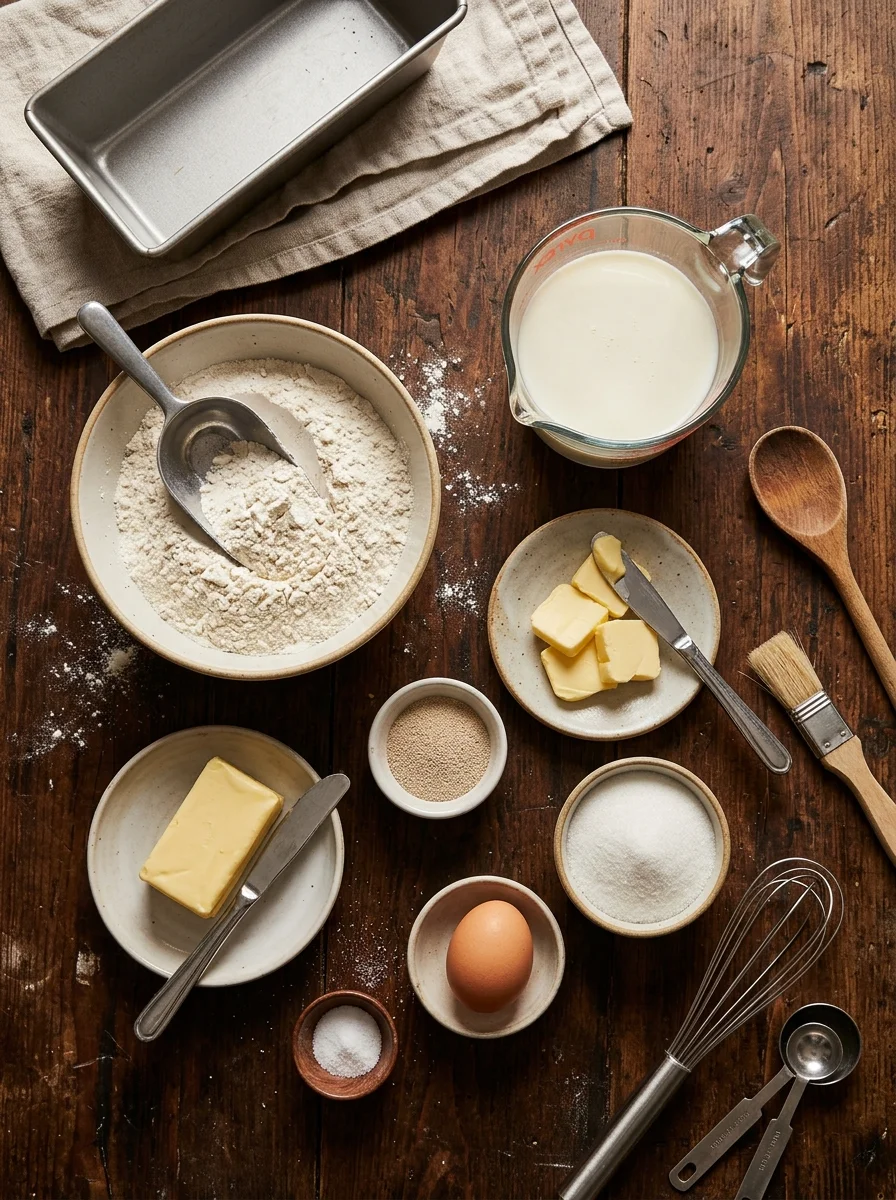
- 375 g all-purpose flour or bread flour (approximately 3 cups)
- 240 ml warm milk (1 cup)
- 7 g instant yeast (2¼ teaspoons)
- 30 g sugar (2 tablespoons)
- 45 g unsalted butter, softened or melted and cooled (3 tablespoons)
- 1 large egg, at room temperature
- 6 g salt (approximately 1 teaspoon)
- 1 tablespoon milk, for brushing
- 1 tablespoon melted butter, for brushing after baking (optional)
Ingredient tips: Use whole milk for a richer, softer loaf. The milk should feel comfortably warm, not hot. If using salted butter, slightly reduce the added salt.
A Closer Look at the Key Ingredients
Flour. All-purpose flour gives a soft, tender loaf, while bread flour has more protein and creates a slightly taller, chewier crumb. Either works well in this recipe. Since there is no kneading, a soft, slightly sticky dough is exactly what you want.
Warm milk. Milk is what makes this a milk bread. Its proteins, fats, and natural sugars soften the crumb, enrich the flavor, and help the crust brown evenly. The milk should feel comfortably warm, not hot, because excessive heat can damage the yeast.
Instant yeast. Instant yeast can be stirred directly into the milk. If you only have active dry yeast, let it stand with the milk and sugar for 5 to 10 minutes until foamy before adding the other ingredients.
Sugar. Just 2 tablespoons feeds the yeast and adds a subtle sweetness without making the bread taste like cake. It also helps the crust turn golden.
Butter. Butter enriches the dough, tenderizes the crumb, and adds that unmistakable bakery flavor. You can use it softened or melted and cooled. Unsalted butter lets you control the salt.
Egg. The egg adds richness, color, and structure. A room-temperature egg blends more smoothly into the milk mixture than a cold one.
Salt. Salt strengthens the dough, balances the sweetness, and brings out the flavor of the milk and butter. Do not skip it.
Milk and butter for brushing. A light brush of milk before baking encourages a soft, lightly golden crust, and the melted butter brushed on after baking adds shine, aroma, and extra softness.
How to Make No-Knead Buttery Milk Bread: Step by Step
Step 1: Prepare the Milk Mixture
Pour the warm milk into a large mixing bowl. Add the sugar and instant yeast, then stir gently.
Add the egg and softened butter, mixing until everything is combined. The butter does not need to disappear completely into the milk at this stage.
If using active dry yeast instead of instant yeast, let the milk, sugar, and yeast mixture stand for 5 to 10 minutes until foamy before adding the other ingredients.
Step 2: Mix the Dough
Add the flour and salt to the bowl.
Using a wooden spoon or sturdy spatula, mix until all the flour is incorporated and a thick, sticky dough forms.
The dough should be soft and tacky rather than firm like traditional kneaded bread dough. If it seems unusually dry, add 1 teaspoon of milk at a time. If it is sticky, resist the temptation to add lots of extra flour.
No kneading is required. Simply make sure there are no dry patches of flour remaining.
Step 3: Let the Dough Rise
Cover the bowl with plastic wrap or a clean kitchen towel.
Leave the dough in a warm, draft-free place for approximately 60 to 90 minutes, or until it has roughly doubled in size.
The rising time will depend on the temperature of your kitchen. In a cooler room, the dough may need longer. Watch the dough rather than the clock, and look for a noticeable increase in volume and a puffy, bubbly surface.
Step 4: Shape the Loaf
Lightly grease a loaf pan measuring approximately 23 × 13 cm (9 × 5 inches).
Lightly flour your work surface and gently transfer the dough onto it. Because the dough is soft, use a spatula or lightly greased hands to handle it.
Gently pat it into a rectangle. Fold the sides inward, then roll it into a log, pinching the seam closed.
Place the dough seam-side down in the prepared loaf pan.
For an even easier method, you can transfer the sticky dough directly into the pan with a spatula and smooth the top with damp or greased hands. The loaf may have a slightly more rustic shape, but it will still taste delicious.
Step 5: Let the Dough Rise Again
Cover the pan loosely and let the dough rise for another 30 to 45 minutes, or until it looks puffy and approaches the top of the pan.
Meanwhile, preheat the oven to 180°C (350°F).
Avoid letting the dough rise too far beyond the rim, as overproofing can cause the loaf to collapse during baking.
Step 6: Brush and Bake
Lightly brush the top of the loaf with milk for a soft, lightly golden crust.
Bake for 30 to 35 minutes, until the top is golden brown and the loaf is cooked through.
If the top browns too quickly, loosely cover it with aluminum foil for the remaining baking time.
For extra reassurance, the center of the loaf should reach approximately 88 to 93°C (190 to 200°F) when checked with a food thermometer.
Step 7: Add the Buttery Finish
Remove the bread from the oven and let it rest in the pan for 5 to 10 minutes.
Carefully transfer it to a wire rack. While the bread is still warm, brush the top with melted butter.
This final touch adds a beautiful sheen, a delicious buttery aroma, and an extra-soft crust.
Allow the loaf to cool for at least 30 to 45 minutes before slicing so the interior can set properly.
Why No-Knead Bread Works
Traditional bread recipes rely on kneading to develop gluten, the protein network that gives bread its structure. Kneading physically stretches and aligns the gluten strands. In a no-knead recipe, time does much of that work instead. As the wet, sticky dough rests and ferments, the flour fully hydrates and the gluten gradually strengthens on its own, helped by gentle movement as the yeast produces gas.
The result is a loaf with a slightly more open, rustic crumb than a heavily kneaded sandwich bread, but with plenty of softness thanks to the milk, butter, and egg. A wetter dough also tends to bake into a moist, tender loaf. That is why this recipe tells you to resist adding extra flour. The tackiness is a feature, not a flaw.
Tips for Extra-Soft, Fluffy Milk Bread
A few small habits make a big difference in the final texture. Keep these tips in mind.
- Use warm, not hot, milk. Excessive heat can damage the yeast and prevent the dough from rising properly.
- Do not add too much flour. A soft, slightly sticky dough helps produce a tender crumb.
- Give the dough enough time to rise. Look for a noticeable increase in volume instead of relying only on the clock.
- Use softened butter. It incorporates more easily and helps create a rich texture.
- Do not skip the second rise. This helps the loaf develop a lighter, more even crumb.
- Brush with butter after baking. It helps keep the crust soft and adds a wonderful flavor.
- Cool before slicing. Cutting too early can compress the soft interior and make it seem gummy.
- Weigh your flour if you can. A kitchen scale is the most reliable way to avoid a dry, dense loaf.
Troubleshooting Common Problems
My dough did not rise. Check that your yeast is fresh and that the milk was warm, not cold or hot. A cool kitchen can also slow things down, so move the bowl to a warmer spot and give it more time.
The dough is too sticky. No-knead dough is meant to be soft and tacky. Handle it with a spatula or lightly greased hands, and avoid adding a lot of extra flour.
The dough seems too dry. Add 1 teaspoon of milk at a time until all the flour is incorporated and the dough is soft and tacky.
The loaf collapsed in the oven. This usually means the dough overproofed during the second rise. Bake it as soon as it looks puffy and approaches the top of the pan.
The top is browning too fast. Milk and sugar encourage browning. Loosely cover the loaf with foil for the remaining baking time.
The crumb is gummy. The loaf may have been sliced before it cooled, or it may be underbaked. Use a food thermometer to confirm the center reaches 88 to 93°C (190 to 200°F), and let the loaf cool before slicing.
The bread is dense. The dough may have too much flour or may not have risen enough. Measure carefully and let the dough roughly double during the first rise.
Easy Variations
Honey Butter Milk Bread. Replace the sugar with 2 tablespoons of honey for a gentle sweetness and a lovely aroma.
Extra-Buttery Milk Bread. Increase the butter to 55 g for a richer loaf. If the dough feels too loose, allow it to rest briefly before shaping.
Sweet Breakfast Bread. Add ½ teaspoon of vanilla extract and a little extra sugar for a lightly sweet loaf that is delicious with jam.
Garlic Butter Bread. Mix 1 teaspoon of garlic powder into the flour. After baking, brush the loaf with melted butter mixed with a little garlic and dried parsley.
Dairy-Free Version. Use an unsweetened plant-based milk and dairy-free butter. The texture and flavor will vary slightly depending on the products used.
Serving Ideas
This versatile milk bread is delicious in many ways:
- Serve warm with butter, honey, or your favorite jam.
- Make soft sandwiches with cheese, eggs, chicken, or fresh vegetables.
- Toast slices and top with peanut butter or chocolate spread.
- Use it to make French toast for a special breakfast.
- Serve alongside soup or a simple homemade dinner.
- Enjoy a thick slice with tea, coffee, or warm milk.
Because the crumb is so soft and rich, this loaf is particularly good for French toast and grilled sandwiches, where it soaks up flavor and crisps nicely on the outside.
Storage and Freezing
- Room temperature: Once completely cool, store in an airtight bag or container for up to 3 days.
- Refrigerator: Avoid refrigerating unless necessary, as it can make bread stale more quickly.
- Freezer: Slice the loaf and freeze in a sealed freezer-safe bag for up to 3 months.
- Reheating: Toast slices directly from frozen or warm them briefly in the oven.
For the softest texture, keep the bread sealed once it has cooled completely.
Frequently Asked Questions
Do I really not need to knead this bread?
Correct. Simply mix until no dry flour remains. The long rise and the wet dough allow the gluten to develop on its own.
Can I use bread flour instead of all-purpose flour?
Yes. Both work. Bread flour makes a slightly taller, chewier loaf, while all-purpose flour gives a soft, tender crumb.
Can I use active dry yeast?
Yes. Let the milk, sugar, and active dry yeast stand for 5 to 10 minutes until foamy before adding the other ingredients.
Should the butter be softened or melted?
Either works. Softened butter or melted and cooled butter both blend into the dough well. Avoid adding very hot butter, which could harm the yeast.
What if I use salted butter?
If you use salted butter, slightly reduce the added salt.
Why is my dough so sticky?
No-knead dough is meant to be soft and tacky. Use a spatula or lightly greased hands to handle it, and avoid adding too much extra flour.
How do I know when the second rise is finished?
The dough should look puffy and approach the top of the pan. Avoid letting it rise far beyond the rim, since overproofing can cause the loaf to collapse.
How can I tell when the bread is fully baked?
The top should be golden brown, and the center should reach approximately 88 to 93°C (190 to 200°F) when checked with a food thermometer.
Why brush the loaf with butter after baking?
It adds a beautiful sheen and buttery aroma, and it helps keep the crust soft.
Can I make this dairy-free?
Yes. Use an unsweetened plant-based milk and dairy-free butter. The texture and flavor will vary slightly depending on the products.
Can I freeze milk bread?
Yes. Slice the loaf and freeze it in a sealed freezer-safe bag for up to 3 months. Toast slices straight from the freezer.
Final Thoughts
This homemade no-knead milk bread is buttery, milky, fluffy, and soft from crust to center, all without kneading. It is perfect for everyday breakfasts, sandwiches, toast, and sharing with family, and its simple method makes it a great starting point for new bakers.
Best tip: Keep the dough soft and slightly sticky, let it rise until puffy, and wait for the loaf to cool before slicing.
Bake it once, and it may quickly become one of your favorite homemade bread recipes.
Print
Homemade No-Knead Buttery Milk Bread
Ingredients
- 375 g all-purpose flour or bread flour (approximately 3 cups)
- 240 ml warm milk (1 cup)
- 7 g instant yeast (2¼ teaspoons)
- 30 g sugar (2 tablespoons)
- 45 g unsalted butter, softened or melted and cooled (3 tablespoons)
- 1 large egg, at room temperature
- 6 g salt (approximately 1 teaspoon)
- 1 tablespoon milk, for brushing
- 1 tablespoon melted butter, for brushing after baking (optional)
Ingredient tips: Use whole milk for a richer, softer loaf. The milk should feel comfortably warm, not hot. If using salted butter, slightly reduce the added salt.
A Closer Look at the Key Ingredients
Flour. All-purpose flour gives a soft, tender loaf, while bread flour has more protein and creates a slightly taller, chewier crumb. Either works well in this recipe. Since there is no kneading, a soft, slightly sticky dough is exactly what you want.
Warm milk. Milk is what makes this a milk bread. Its proteins, fats, and natural sugars soften the crumb, enrich the flavor, and help the crust brown evenly. The milk should feel comfortably warm, not hot, because excessive heat can damage the yeast.
Instant yeast. Instant yeast can be stirred directly into the milk. If you only have active dry yeast, let it stand with the milk and sugar for 5 to 10 minutes until foamy before adding the other ingredients.
Sugar. Just 2 tablespoons feeds the yeast and adds a subtle sweetness without making the bread taste like cake. It also helps the crust turn golden.
Butter. Butter enriches the dough, tenderizes the crumb, and adds that unmistakable bakery flavor. You can use it softened or melted and cooled. Unsalted butter lets you control the salt.
Egg. The egg adds richness, color, and structure. A room-temperature egg blends more smoothly into the milk mixture than a cold one.
Salt. Salt strengthens the dough, balances the sweetness, and brings out the flavor of the milk and butter. Do not skip it.
Milk and butter for brushing. A light brush of milk before baking encourages a soft, lightly golden crust, and the melted butter brushed on after baking adds shine, aroma, and extra softness.
Instructions
Pour the warm milk into a large mixing bowl. Add the sugar and instant yeast, then stir gently.
Add the egg and softened butter, mixing until everything is combined. The butter does not need to disappear completely into the milk at this stage.
If using active dry yeast instead of instant yeast, let the milk, sugar, and yeast mixture stand for 5 to 10 minutes until foamy before adding the other ingredients.
Add the flour and salt to the bowl.
Using a wooden spoon or sturdy spatula, mix until all the flour is incorporated and a thick, sticky dough forms.
The dough should be soft and tacky rather than firm like traditional kneaded bread dough. If it seems unusually dry, add 1 teaspoon of milk at a time. If it is sticky, resist the temptation to add lots of extra flour.
No kneading is required. Simply make sure there are no dry patches of flour remaining.
Cover the bowl with plastic wrap or a clean kitchen towel.
Leave the dough in a warm, draft-free place for approximately 60 to 90 minutes, or until it has roughly doubled in size.
The rising time will depend on the temperature of your kitchen. In a cooler room, the dough may need longer. Watch the dough rather than the clock, and look for a noticeable increase in volume and a puffy, bubbly surface.
Lightly grease a loaf pan measuring approximately 23 × 13 cm (9 × 5 inches).
Lightly flour your work surface and gently transfer the dough onto it. Because the dough is soft, use a spatula or lightly greased hands to handle it.
Gently pat it into a rectangle. Fold the sides inward, then roll it into a log, pinching the seam closed.
Place the dough seam-side down in the prepared loaf pan.
For an even easier method, you can transfer the sticky dough directly into the pan with a spatula and smooth the top with damp or greased hands. The loaf may have a slightly more rustic shape, but it will still taste delicious.
Cover the pan loosely and let the dough rise for another 30 to 45 minutes, or until it looks puffy and approaches the top of the pan.
Meanwhile, preheat the oven to 180°C (350°F).
Avoid letting the dough rise too far beyond the rim, as overproofing can cause the loaf to collapse during baking.
Lightly brush the top of the loaf with milk for a soft, lightly golden crust.
Bake for 30 to 35 minutes, until the top is golden brown and the loaf is cooked through.
If the top browns too quickly, loosely cover it with aluminum foil for the remaining baking time.
For extra reassurance, the center of the loaf should reach approximately 88 to 93°C (190 to 200°F) when checked with a food thermometer.
Remove the bread from the oven and let it rest in the pan for 5 to 10 minutes.
Carefully transfer it to a wire rack. While the bread is still warm, brush the top with melted butter.
This final touch adds a beautiful sheen, a delicious buttery aroma, and an extra-soft crust.
Allow the loaf to cool for at least 30 to 45 minutes before slicing so the interior can set properly.