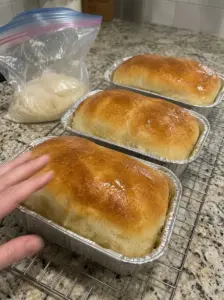
Homemade Wonder Bread-Style Sandwich Bread: Extra Soft & Fluffy White Loaf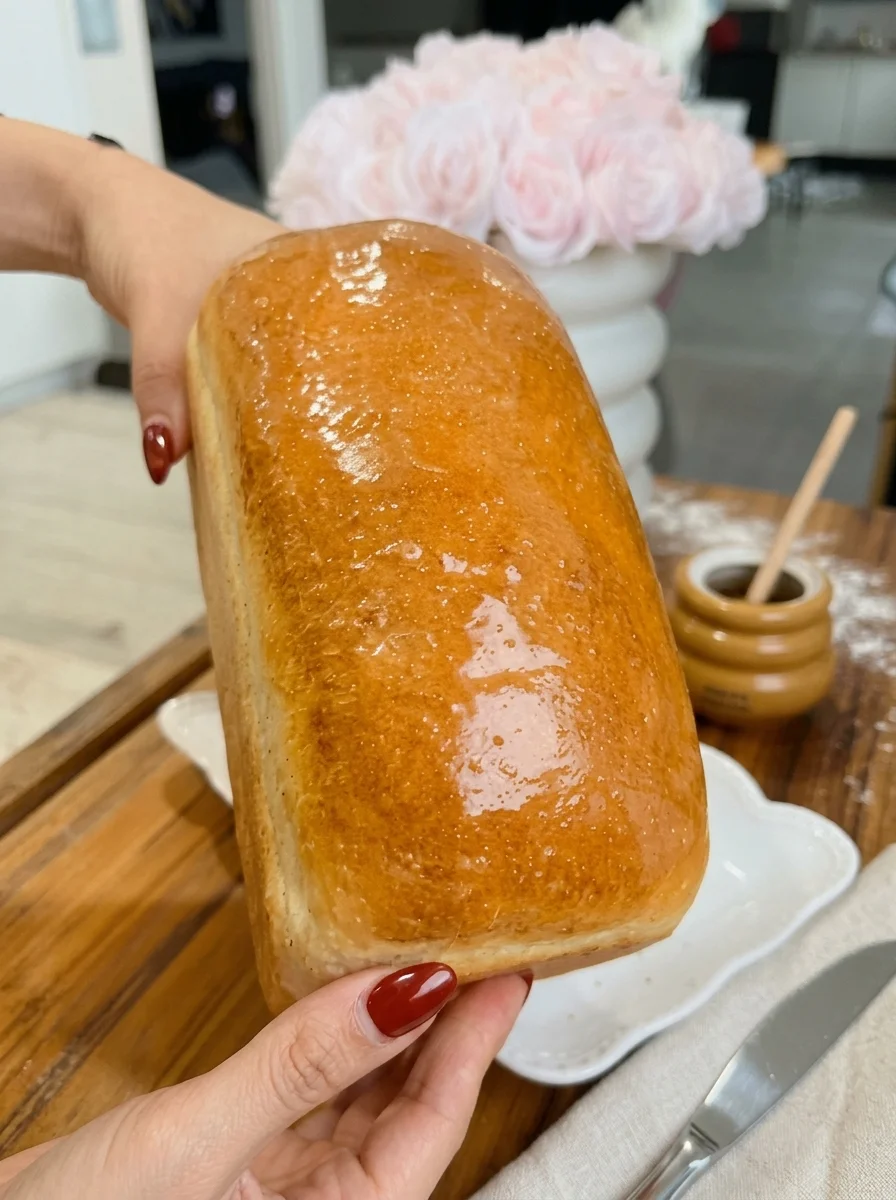
SEO title: Homemade Soft White Sandwich Bread Recipe (Wonder Bread-Style, Extra Fluffy)
Meta description: Bake extra soft and fluffy homemade white sandwich bread with milk and butter. This Wonder Bread-style loaf is perfect for PB&J, grilled cheese, toast, and French toast. Full recipe, tips, and FAQ.
Focus keyword: homemade soft white sandwich bread
Secondary keywords: Wonder Bread style bread, homemade white bread, fluffy sandwich bread, milk and butter bread, soft sandwich loaf, bread for French toast, homemade bread for sandwiches, how to make soft bread, copycat white bread
There is a particular kind of bread that most of us remember from childhood: pillowy white slices with a soft golden crust, a gentle sweetness, and a texture so tender it practically melts around a spoonful of peanut butter and jelly. It is the bread of lunchboxes, grilled cheese sandwiches, and Saturday-morning French toast. The good news is that you can make a homemade soft white sandwich bread in that same spirit, with a fluffy white center, a lightly sweet, buttery flavor, and none of the preservatives found in most packaged loaves.
This Wonder Bread-style sandwich bread uses simple ingredients: all-purpose flour, instant yeast, a little sugar, fine salt, whole milk, water, and softened butter. A brush of melted butter on the hot loaf keeps the crust soft and adds a glossy, golden finish. The recipe is written for hand kneading or a stand mixer, and it produces a tall, evenly shaped loaf that slices cleanly for sandwiches.
Wonder Bread is a registered trademark of its owner. This recipe is an independent, homemade loaf inspired by the style of classic soft white sandwich bread and is not affiliated with or endorsed by the brand.
In this guide you will find the full recipe, step-by-step instructions, an explanation of how each ingredient works, shaping and baking tips, troubleshooting advice, serving ideas, storage and freezing instructions, and answers to the questions bakers ask most often about soft white sandwich bread.
Why You’ll Love This Soft White Sandwich Bread
There are plenty of sandwich bread recipes, so what makes this one worth baking? Here are the main reasons.
- Extra soft and fluffy. Milk, butter, and a well-kneaded dough create a tender, pillowy crumb.
- Lightly sweet and buttery. A small amount of sugar and a brush of melted butter give the loaf a gentle, nostalgic flavor.
- Slices beautifully. A snug shape and proper cooling produce neat, even slices that hold up to fillings.
- Simple ingredients. Flour, yeast, sugar, salt, milk, water, and butter are all you need.
- No preservatives. You know exactly what is in your bread.
- Versatile. It is excellent for sandwiches, toast, grilled cheese, French toast, and bread pudding.
- Freezer friendly. Slice and freeze for easy weekday sandwiches.
Recipe Information
- Prep time: 25 minutes
- Rise time: 1 hour 45 minutes to 2 hours 30 minutes
- Bake time: 35 to 40 minutes
- Cooling time: 90 minutes
- Total time: Approximately 4 hours 15 minutes to 5 hours 5 minutes
- Yield: 1 loaf, approximately 12 slices
- Pan size: 9 × 5-inch (23 × 13 cm) metal loaf pan
- Difficulty: Easy to moderate
Ingredients for Homemade Soft White Sandwich Bread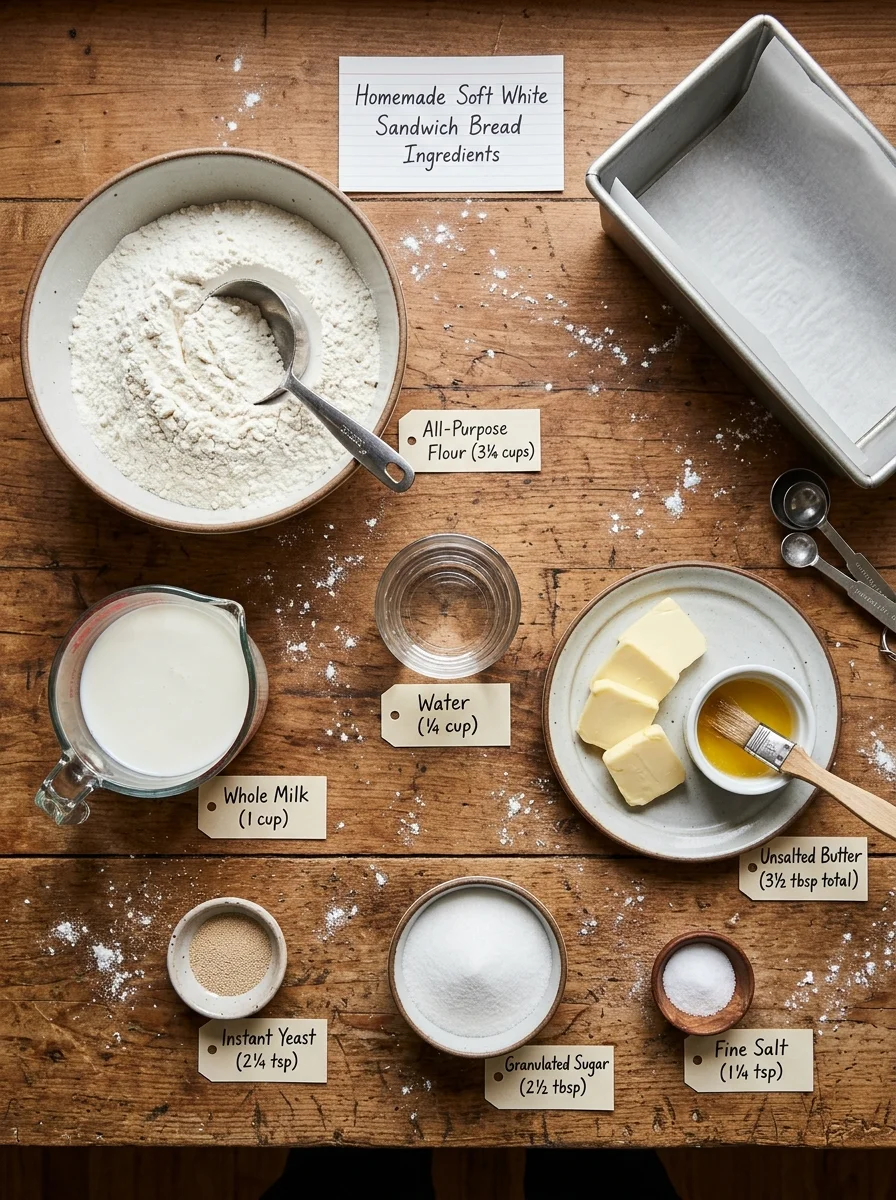
For the dough
- 3¼ cups (390 g) all-purpose flour
- 2¼ teaspoons (7 g) instant yeast
- 2½ tablespoons (30 g) granulated sugar
- 1¼ teaspoons (7 g) fine salt
- 1 cup (240 ml) whole milk, lukewarm
- ¼ cup (60 ml) water, lukewarm
- 3 tablespoons (42 g) unsalted butter, softened
For finishing
- ½ tablespoon (7 g) unsalted butter, melted
A Closer Look at the Key Ingredients
All-purpose flour. All-purpose flour gives a soft, tender crumb, which is exactly what you want in a classic white sandwich loaf. Bread flour would make a chewier, more structured loaf, but all-purpose is the right choice for pillowy softness. Weighing the flour is the most reliable way to avoid a dry, dense loaf.
Instant yeast. Instant yeast is mixed directly with the dry ingredients, so there is no separate proofing step. It provides the rise that makes the bread light and fluffy.
Granulated sugar. Two and a half tablespoons feed the yeast, soften the crumb, and give the bread its gentle sweetness. The sugar also helps the crust brown to a pretty golden color.
Fine salt. Salt flavors the bread, strengthens the dough, and controls the speed of the rise. Fine salt dissolves quickly and distributes evenly through the dough.
Whole milk. Milk is what makes this bread extra soft. The fat and proteins in milk tenderize the crumb and help the crust brown evenly. It should be lukewarm, comfortably warm to the touch but not hot, since hot liquid can damage the yeast.
Water. A small amount of water balances the milk and helps the dough reach the right consistency.
Softened unsalted butter. Butter enriches the dough, adds flavor, and keeps the crumb tender and moist. Softened butter works into the dough more easily than cold butter. Using unsalted butter lets you control the salt.
Melted butter for finishing. Brushing the hot loaf with melted butter softens the crust, adds shine, and gives a rich, buttery aroma.
How to Make Homemade Soft White Sandwich Bread: Step by Step
Step 1: Mix the Dough
Combine the flour, yeast, sugar, and salt in a large bowl. Add the lukewarm milk and water. Stir until a shaggy dough forms, then work in the softened butter.
Step 2: Knead Until Elastic
Knead by hand for 10 to 12 minutes, or with a dough hook on low to medium-low speed for 8 to 10 minutes. The dough should become smooth, stretchy, and slightly tacky. Avoid adding flour unless it remains unmanageably sticky after kneading.
Kneading is where the soft, even crumb of this loaf is built. A properly kneaded dough forms a strong gluten network that traps gas from the yeast and expands into a tall, fluffy loaf. To check, pinch off a small piece of dough and stretch it gently. If it stretches into a thin, translucent membrane before tearing, it is ready.
Step 3: First Rise
Shape the dough into a ball, return it to the bowl, and cover. Let it rise in a warm, draft-free spot for 60 to 90 minutes, until doubled.
Rising time depends on the temperature of your kitchen. Watch the dough rather than the clock. It should look puffy and domed, and a gently pressed fingertip should leave an indentation that fills back slowly.
Step 4: Prepare the Pan
Line a 9 × 5-inch metal loaf pan with parchment, leaving an overhang for lifting.
The parchment sling makes it easy to lift the finished loaf out of the pan without damaging the soft sides.
Step 5: Shape the Loaf
Gently press the dough into an approximately 8 × 12-inch rectangle, releasing large air bubbles. Starting at an 8-inch edge, roll into a snug log. Pinch the seam and ends closed, then place seam-side down in the pan.
Rolling the dough snugly is the key to a loaf without large tunnels or gaps. Each turn of the roll should be tight enough to eliminate big air pockets, and a firmly pinched seam keeps the loaf from unrolling as it bakes.
Step 6: Second Rise
Cover loosely and let rise for 45 to 60 minutes, until the center crowns about 1 inch above the rim. During the final 20 minutes, preheat the oven to 350°F (175°C).
Avoid letting the dough rise much beyond the target height. Overproofed dough can collapse in the oven and produce a loaf with a sunken top.
Step 7: Bake
Bake on the middle rack for 35 to 40 minutes, until golden and the center registers approximately 190 to 195°F (88 to 91°C). Loosely tent with foil if the top browns too quickly.
An instant-read thermometer is the most reliable way to confirm the loaf is done. A golden crust alone does not guarantee that the center is fully baked.
Step 8: Soften the Crust
Immediately brush the hot loaf with the ½ tablespoon of melted butter.
The butter soaks into the hot crust, keeping it tender and giving the loaf a soft sheen and rich flavor.
Step 9: Cool Completely
Rest in the pan for 10 minutes, then transfer to a wire rack. Cool for at least 80 more minutes before slicing.
This cooling time is essential. While the bread is hot, the crumb is still setting, and cutting too soon can leave the slices gummy or compressed. Waiting gives you clean, even slices that hold together in a sandwich.
What Makes Sandwich Bread Soft and Fluffy?
The tender, cloud-like texture of classic white sandwich bread comes from a handful of choices that work together.
Enriched dough. Milk and butter add fat and protein, both of which tenderize the crumb. Fat coats the flour proteins and shortens the gluten strands, which makes the bread soft rather than chewy. That is the main difference between this loaf and a lean, crusty artisan bread.
A little sugar. Sugar feeds the yeast and softens the crumb. It also helps retain moisture, so the loaf stays soft longer and the crust browns evenly.
Thorough kneading. Good gluten development gives the dough the strength to rise high while keeping an even, fine crumb. Under-kneaded dough tends to produce a dense or crumbly loaf.
Proper rising. A full first rise builds flavor and volume, and a second rise in the pan gives the loaf its final lift. Both are visual cues, so watch the dough rather than the clock.
A snug shape. Rolling the dough tightly removes large air pockets and builds surface tension, which helps the loaf rise evenly and slice cleanly.
Finishing with butter. Brushing the hot loaf with melted butter keeps the crust soft, so the whole slice is tender from edge to edge.
Tips for Success
A few simple habits make the difference between a good loaf and a perfect one.
- Weigh the flour when possible. Excess flour makes a firmer loaf.
- Keep the milk and water comfortably lukewarm. Liquid that is too hot can damage the yeast, and liquid that is too cold slows the rise.
- Knead until a small piece of dough stretches into a thin membrane before tearing. This confirms the gluten is well developed.
- Roll the loaf snugly to help prevent large tunnels. Tight shaping gives a tidy, even crumb.
- Cool completely for neat sandwich slices. Patience gives the best texture.
- Use a metal loaf pan. Metal conducts heat well and helps the loaf brown evenly.
- Check the internal temperature. A reading of approximately 190 to 195°F (88 to 91°C) confirms the loaf is fully baked.
Troubleshooting Common Problems
The loaf is dense. The most common causes are too much flour, too little kneading, or not enough rising time. Weigh the flour, knead until the dough passes the stretch test, and let it double during the first rise.
The dough did not rise. Check that the yeast is fresh and the milk and water were lukewarm, not hot or cold. A cool kitchen slows fermentation, so move the dough to a warmer spot and allow more time.
The dough is too sticky. The dough should feel slightly tacky. Knead it fully before adding any flour, since gluten development makes the dough less sticky. If it is still unmanageable, add flour a teaspoon at a time.
The loaf has large holes or tunnels. The dough may not have been rolled snugly, or large air bubbles were not released. Press the dough firmly into a rectangle and roll it tightly, pinching the seam closed.
The top collapsed or sank. The loaf may have overproofed during the second rise. Bake when the center crowns about 1 inch above the rim, rather than letting it rise much higher.
The crust is too dark. Loosely tent the loaf with foil if the top browns too quickly, and confirm your oven temperature is accurate.
The crust is too hard. Brush the hot loaf with melted butter right after baking, and store it airtight once cool.
The slices are gummy. The loaf may have been cut too soon, or it may be underbaked. Use a thermometer to confirm the center reaches 190 to 195°F (88 to 91°C), and cool completely before slicing.
Serving Suggestions
This soft white loaf is made for classic comfort food. Try it for:
- Peanut butter and jelly sandwiches
- Grilled cheese sandwiches
- Egg salad sandwiches
- Thick-cut French toast
- Simple buttered toast with jam
- Bread pudding or breakfast casseroles
Because the crumb is so tender, it is especially good for French toast, where thick slices soak up custard without falling apart. For sandwiches, use a serrated knife and a gentle sawing motion for the cleanest slices.
Storage Instructions
Store the cooled loaf airtight at room temperature for up to 3 days. Freeze individual slices for up to 2 months, separating them with parchment for easy removal.
For the best texture, make sure the loaf is completely cool before wrapping it, since trapped steam can make the crust soggy. To use frozen slices, toast them straight from the freezer or let them thaw on the counter for a few minutes.
Frequently Asked Questions
Is this really like Wonder Bread?
This recipe is inspired by the style of classic soft white sandwich bread: a golden crust, a fluffy white center, and a gently sweet, buttery flavor. It is a homemade loaf and is not affiliated with the brand.
Can I use bread flour instead of all-purpose flour?
Bread flour will work, but it creates a chewier, more structured loaf. All-purpose flour gives the softest, most tender result, which is the goal of this recipe.
Can I use active dry yeast instead of instant yeast?
Yes. Dissolve it in the lukewarm milk and water with the sugar and let it stand for 5 to 10 minutes until foamy before adding the flour.
Can I use a stand mixer?
Yes. Use the dough hook on low to medium-low speed for 8 to 10 minutes, until the dough is smooth, stretchy, and slightly tacky.
Can I use low-fat milk or a plant-based milk?
Whole milk gives the softest, richest result. Lower-fat or plant-based milks may produce a slightly less tender crumb and a paler crust.
Why does the dough need to be slightly tacky?
A slightly tacky dough contains enough moisture to produce a soft, fluffy crumb. Too much added flour makes the loaf firm and dry.
How do I know when the second rise is done?
The center of the dough should crown about 1 inch above the rim of the pan. Avoid letting it rise much higher, since overproofed dough can collapse in the oven.
How do I know when the bread is done?
The loaf should be golden, and the center should register approximately 190 to 195°F (88 to 91°C) on an instant-read thermometer.
Why do I brush the loaf with butter?
The butter softens the crust, adds shine, and gives the bread a rich, buttery flavor.
How long does homemade sandwich bread last?
Store the cooled loaf airtight at room temperature for up to 3 days. For longer storage, freeze individual slices for up to 2 months.
Can I freeze the whole loaf?
Slicing before freezing is more convenient, because you can take out only what you need. Separate the slices with parchment so they do not stick together.
Final Thoughts
This homemade Wonder Bread-style sandwich bread has a soft golden crust, a fluffy white center, and a gently sweet, buttery flavor. Milk and butter create tender slices that work beautifully for sandwiches, French toast, and everyday toast, and the simple method makes it a rewarding bake for beginners and experienced bakers alike.
Soft, fluffy, golden, and made with simple ingredients. Bake a loaf this weekend, let it cool completely, and make the best peanut butter and jelly sandwich of your week.
Print
Homemade Wonder Bread – Extra Soft, Fluffy & Perfect for Sandwiches
Ingredients
For the dough
- 3¼ cups (390 g) all-purpose flour
- 2¼ teaspoons (7 g) instant yeast
- 2½ tablespoons (30 g) granulated sugar
- 1¼ teaspoons (7 g) fine salt
- 1 cup (240 ml) whole milk, lukewarm
- ¼ cup (60 ml) water, lukewarm
- 3 tablespoons (42 g) unsalted butter, softened
For finishing
- ½ tablespoon (7 g) unsalted butter, melted
A Closer Look at the Key Ingredients
All-purpose flour. All-purpose flour gives a soft, tender crumb, which is exactly what you want in a classic white sandwich loaf. Bread flour would make a chewier, more structured loaf, but all-purpose is the right choice for pillowy softness. Weighing the flour is the most reliable way to avoid a dry, dense loaf.
Instant yeast. Instant yeast is mixed directly with the dry ingredients, so there is no separate proofing step. It provides the rise that makes the bread light and fluffy.
Granulated sugar. Two and a half tablespoons feed the yeast, soften the crumb, and give the bread its gentle sweetness. The sugar also helps the crust brown to a pretty golden color.
Fine salt. Salt flavors the bread, strengthens the dough, and controls the speed of the rise. Fine salt dissolves quickly and distributes evenly through the dough.
Whole milk. Milk is what makes this bread extra soft. The fat and proteins in milk tenderize the crumb and help the crust brown evenly. It should be lukewarm, comfortably warm to the touch but not hot, since hot liquid can damage the yeast.
Water. A small amount of water balances the milk and helps the dough reach the right consistency.
Softened unsalted butter. Butter enriches the dough, adds flavor, and keeps the crumb tender and moist. Softened butter works into the dough more easily than cold butter. Using unsalted butter lets you control the salt.
Melted butter for finishing. Brushing the hot loaf with melted butter softens the crust, adds shine, and gives a rich, buttery aroma.
Instructions
Combine the flour, yeast, sugar, and salt in a large bowl. Add the lukewarm milk and water. Stir until a shaggy dough forms, then work in the softened butter.
Step 2: Knead Until Elastic
Knead by hand for 10 to 12 minutes, or with a dough hook on low to medium-low speed for 8 to 10 minutes. The dough should become smooth, stretchy, and slightly tacky. Avoid adding flour unless it remains unmanageably sticky after kneading.
Kneading is where the soft, even crumb of this loaf is built. A properly kneaded dough forms a strong gluten network that traps gas from the yeast and expands into a tall, fluffy loaf. To check, pinch off a small piece of dough and stretch it gently. If it stretches into a thin, translucent membrane before tearing, it is ready.
Step 3: First Rise
Shape the dough into a ball, return it to the bowl, and cover. Let it rise in a warm, draft-free spot for 60 to 90 minutes, until doubled.
Rising time depends on the temperature of your kitchen. Watch the dough rather than the clock. It should look puffy and domed, and a gently pressed fingertip should leave an indentation that fills back slowly.
Step 4: Prepare the Pan
Line a 9 × 5-inch metal loaf pan with parchment, leaving an overhang for lifting.
The parchment sling makes it easy to lift the finished loaf out of the pan without damaging the soft sides.
Step 5: Shape the Loaf
Gently press the dough into an approximately 8 × 12-inch rectangle, releasing large air bubbles. Starting at an 8-inch edge, roll into a snug log. Pinch the seam and ends closed, then place seam-side down in the pan.
Rolling the dough snugly is the key to a loaf without large tunnels or gaps. Each turn of the roll should be tight enough to eliminate big air pockets, and a firmly pinched seam keeps the loaf from unrolling as it bakes.
Step 6: Second Rise
Cover loosely and let rise for 45 to 60 minutes, until the center crowns about 1 inch above the rim. During the final 20 minutes, preheat the oven to 350°F (175°C).
Avoid letting the dough rise much beyond the target height. Overproofed dough can collapse in the oven and produce a loaf with a sunken top.
Step 7: Bake
Bake on the middle rack for 35 to 40 minutes, until golden and the center registers approximately 190 to 195°F (88 to 91°C). Loosely tent with foil if the top browns too quickly.
An instant-read thermometer is the most reliable way to confirm the loaf is done. A golden crust alone does not guarantee that the center is fully baked.
Step 8: Soften the Crust
Immediately brush the hot loaf with the ½ tablespoon of melted butter.
The butter soaks into the hot crust, keeping it tender and giving the loaf a soft sheen and rich flavor.
Step 9: Cool Completely
Rest in the pan for 10 minutes, then transfer to a wire rack. Cool for at least 80 more minutes before slicing.
This cooling time is essential. While the bread is hot, the crumb is still setting, and cutting too soon can leave the slices gummy or compressed. Waiting gives you clean, even slices that hold together in a sandwich.