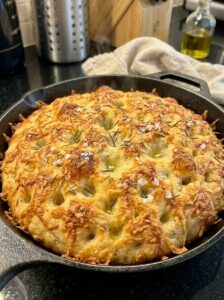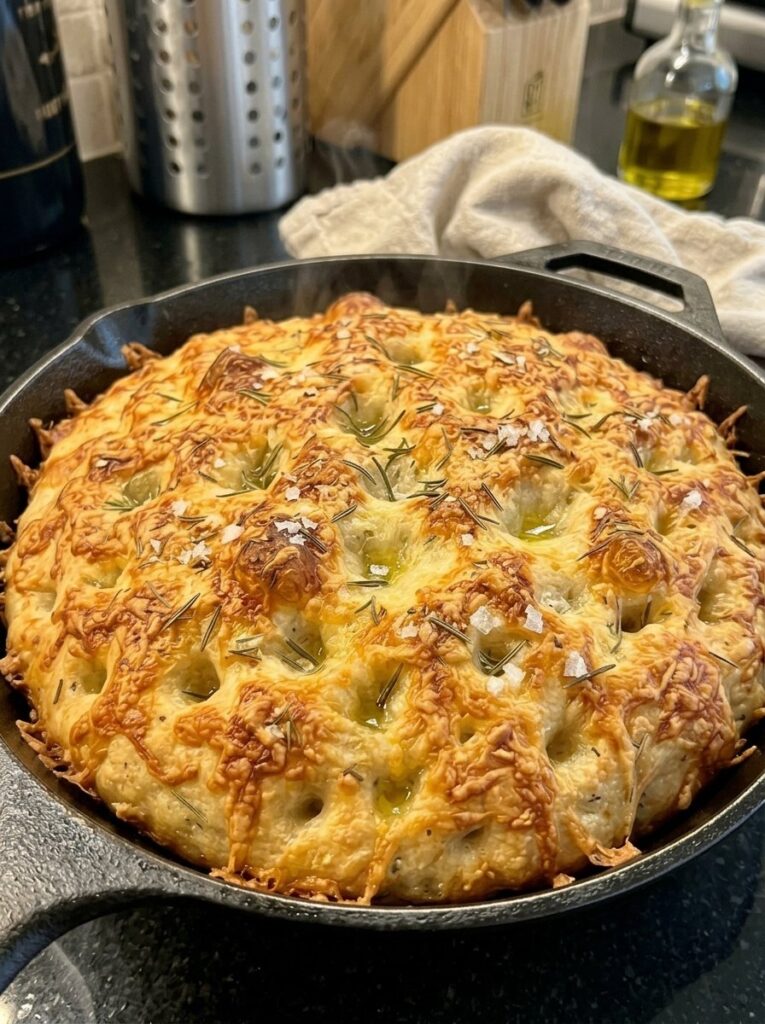
There are few things in the kitchen as satisfying as pulling a skillet of golden, bubbling focaccia out of the oven. The smell of olive oil, rosemary, and melting Parmesan fills the whole house, and the first crackle of the crust under your knife makes every minute of waiting worth it. This cast iron Parmesan focaccia delivers all of that without a stand mixer, without kneading, and without a huge batch that goes stale before you can finish it.
It is a small-batch recipe built for a single 9-inch cast iron skillet, and it uses only a handful of pantry staples: flour, water, yeast, salt, olive oil, fresh rosemary, and freshly grated Parmesan. Whether you are a first-time bread baker or someone who simply wants a reliable, weeknight-friendly focaccia, this recipe is for you.
In this guide, you will find the full recipe, the science behind why it works, step-by-step tips, troubleshooting help, creative variations, serving ideas, and storage instructions. Let’s get baking.
Table of Contents
- Why You’ll Love This Cast Iron Parmesan Focaccia
- Why Bake Focaccia in a Cast Iron Skillet?
- Ingredients You’ll Need
- Ingredient Notes and Substitutions
- Step-by-Step Instructions
- Tips for the Best Parmesan Focaccia
- Common Mistakes and How to Fix Them
- Variations to Try
- What to Serve with Focaccia
- How to Store, Freeze, and Reheat
- Timing at a Glance
- Frequently Asked Questions
- Final Thoughts
Why You’ll Love This Cast Iron Parmesan Focaccia
Before we dive into the details, here is what makes this recipe worth bookmarking:
- No kneading required. You simply stir the dough together with a spoon until no dry patches remain. The long, gentle rise does the work of developing structure.
- Only seven ingredients. Nothing fancy, nothing hard to find. If you bake even occasionally, you probably have most of this on hand.
- Small-batch size. One 9-inch skillet yields roughly 6 to 8 pieces, which is perfect for a family dinner or a small gathering, with minimal waste.
- Ready in about 2 to 2½ hours. Most of that time is hands-off rising, so you can do other things while the dough works.
- Crispy, golden edges and a soft, airy center. The cast iron skillet and generous olive oil create that coveted fried-style bottom crust.
- Savory Parmesan crust. Freshly grated Parmesan melts and browns on top, adding a nutty, salty depth that plain focaccia cannot match.
- Beginner-friendly. The dough is forgiving, and the recipe includes clear cues so you know exactly what to look for at every stage.
Why Bake Focaccia in a Cast Iron Skillet?
Focaccia is traditionally baked in a rectangular sheet pan, so why switch to a skillet? There are several good reasons.
Superior heat retention
Cast iron holds and distributes heat exceptionally well. When the oil-coated dough hits the hot, heavy pan, the bottom begins to sizzle and fry almost immediately. That is how you get a deeply golden, crisp underside that a thin aluminum sheet pan struggles to produce.
Built-in structure for a tall, fluffy loaf
The tall sides of a 9-inch skillet encourage the dough to rise upward rather than spread out thin. The result is a thicker, pillowy focaccia with a pleasantly chewy crumb, even when you are making just a small batch.
Crispy, oily edges
Because the skillet is generously coated with olive oil, the edges of the dough essentially shallow-fry as they bake. Those crunchy, caramelized edges are often the first pieces to disappear from the table.
A rustic, show-stopping presentation
A golden focaccia sitting in a seasoned skillet looks effortlessly impressive. You can bring it straight to the table, slice it into wedges, and serve it warm.
It gets better with time
A well-seasoned cast iron pan only improves with use, and the olive oil in this recipe actually helps maintain that seasoning. Just be sure to clean and dry the skillet properly afterward.
Ingredients You’ll Need
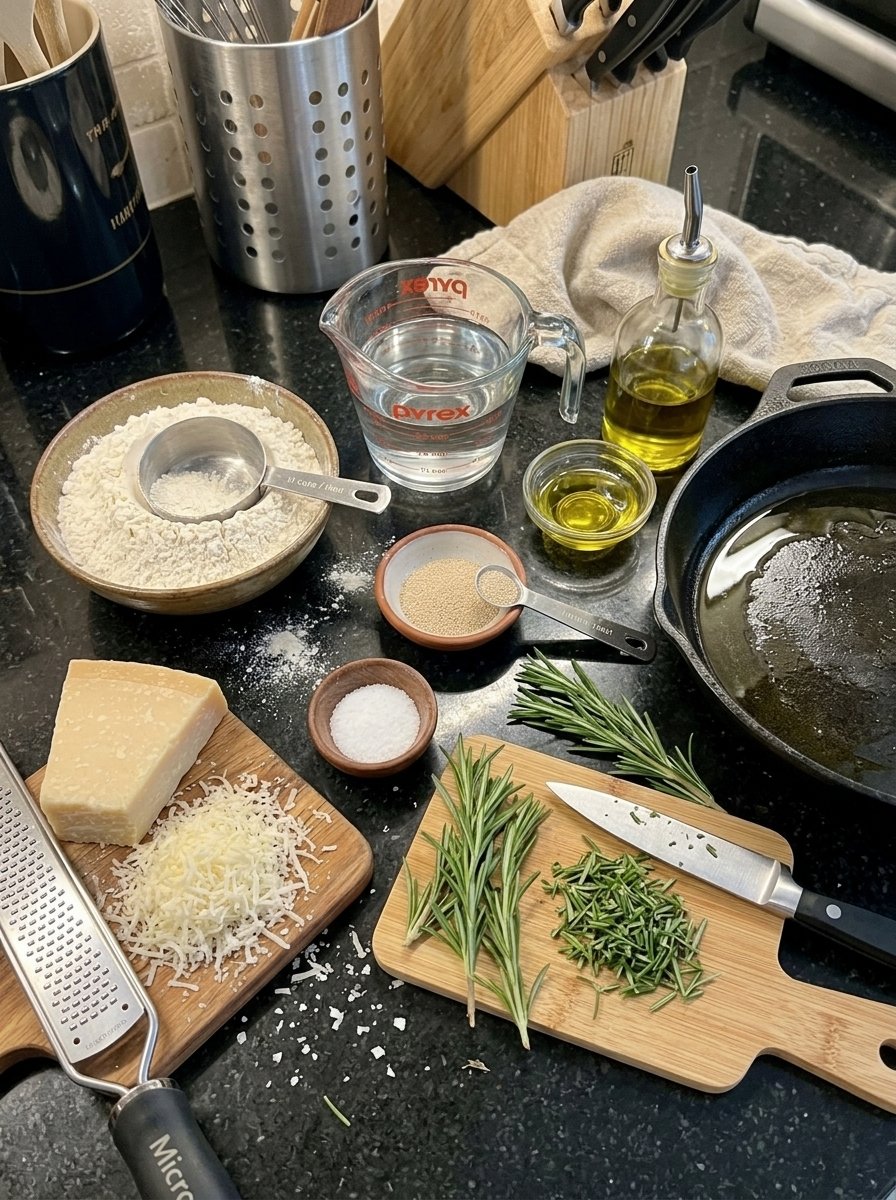
For the Focaccia
- 250 g (about 2 cups) all-purpose flour
- 225 g (about ¾ cup + 2 tbsp) lukewarm water
- 1½ tsp (5 g) instant yeast
- 1 tsp salt
- 2 tbsp olive oil, plus more for the skillet and topping
- ¼ cup (25 g) freshly grated Parmesan cheese
- 1 tbsp fresh rosemary, finely chopped
Equipment: a large mixing bowl, a wooden spoon or sturdy spatula, plastic wrap or a clean kitchen towel, a 9-inch cast iron skillet, and a kitchen scale (optional but recommended).
Ingredient Notes and Substitutions
Understanding each ingredient helps you bake with confidence and adapt the recipe when needed.
All-purpose flour
All-purpose flour gives this focaccia a tender, soft crumb with just enough chew. If you prefer a chewier, more bakery-style texture, you can swap in bread flour. Because bread flour absorbs slightly more water, you may find the dough a touch firmer, but it should still be soft and sticky. Weighing your flour is the most accurate way to measure. Scooping with a cup can add up to 20 percent more flour than intended, which leads to a denser loaf.
Lukewarm water
Aim for water that feels comfortably warm to the touch, not hot. Water that is too hot can kill the yeast, while water that is too cold slows it down significantly. The high hydration of this dough (225 g water to 250 g flour, or 90 percent) is what creates the open, airy texture, so resist the urge to add extra flour.
Instant yeast
Instant yeast can be mixed directly into the dough, but this recipe blooms it in the water for a few minutes first. That brief rest is a useful check: you should see a little foam or activity. If you only have active dry yeast, use the same amount, give it a slightly longer bloom of about 5 to 10 minutes, and expect the rises to take a little longer.
Salt
Salt controls fermentation and builds flavor. Do not skip it. Remember that Parmesan is salty too, so use fine salt and measure carefully.
Olive oil
Olive oil is the star of focaccia. It enriches the dough, keeps the crumb tender, and fries the bottom crust in the skillet. Use a good-quality extra-virgin olive oil, since you will taste it clearly in the finished bread. Do not be shy with the amount in the pan and on top.
Freshly grated Parmesan
Freshly grated Parmesan melts better and tastes far more flavorful than the pre-grated, powdery kind, which often contains anti-caking agents. A block of Parmigiano-Reggiano grated on a fine or medium grater is ideal. If you do not have Parmesan, Pecorino Romano is a sharper, saltier alternative, and Asiago works nicely too.
Fresh rosemary
Fresh rosemary adds a piney, aromatic note that pairs beautifully with olive oil and cheese. Chop it finely so the needles do not turn sharp or overly crisp in the oven. No rosemary? Fresh thyme is a lovely substitute, or you can use about 1 teaspoon of dried rosemary in a pinch.
Step-by-Step Instructions
Step 1: Mix the dough
In a large mixing bowl, combine the lukewarm water and instant yeast. Let it sit for about 2 to 3 minutes. Add the flour, salt, and 2 tablespoons of olive oil. Stir with a wooden spoon or sturdy spatula until all the flour is incorporated and a soft, sticky dough forms.
There is no need to knead. Simply mix until no dry patches remain. The dough will look shaggy and wet, and that is exactly what you want.
Step 2: First rise
Cover the bowl loosely with plastic wrap or a clean kitchen towel. Place the dough in a warm, draft-free area and let it rise for about 45 to 60 minutes, or until it is noticeably puffed and bubbly on the surface.
A turned-off oven with the light on, the top of the refrigerator, or a spot near (not on) a warm appliance all work well. If your kitchen is cool, the rise may take a little longer. Judge by the dough, not the clock.
Step 3: Prepare the cast iron skillet
Generously coat a 9-inch cast iron skillet with olive oil, making sure the bottom and sides are well covered. Pour a little extra olive oil into the center of the skillet. This pool of oil is what creates those crisp, golden, almost fried edges.
Step 4: Transfer and stretch the dough
Drizzle a little olive oil over your hands to keep the sticky dough from clinging to your fingers. Gently transfer the risen dough into the prepared skillet.
Using your fingertips, carefully stretch the dough toward the edges of the skillet. If the dough springs back, let it rest for about 10 minutes and then try again. Once it reaches most of the edges, allow it to relax and spread naturally. You do not need to force it into every corner.
Step 5: Second rise
Cover the skillet loosely and let the dough rise again for about 30 to 45 minutes, until it looks light, puffy, and airy. While it rises, preheat your oven to 425°F (220°C) so it is fully hot when the focaccia is ready.
Step 6: Dimple the focaccia
Drizzle the surface generously with olive oil. Using well-oiled fingertips, gently press deep dimples all over the dough, pressing toward the bottom of the skillet without completely deflating it. These dimples create the signature focaccia look and collect pools of olive oil that crisp and flavor the top.
Scatter the finely chopped rosemary evenly over the surface.
Step 7: Add the Parmesan
Sprinkle the freshly grated Parmesan evenly over the top of the dimpled dough. Add another small drizzle of olive oil if you like. Adding the cheese shortly before baking helps it turn savory and golden without becoming overly dark.
Step 8: Bake
Place the skillet in the preheated oven and bake for about 20 to 25 minutes, or until the focaccia is puffed, golden brown, and crisp around the edges. The Parmesan should be melted and beautifully golden, while the center stays soft and airy.
Step 9: Cool and serve
Remove the skillet from the oven (use oven mitts, because cast iron stays very hot) and let the focaccia cool for about 10 to 15 minutes. Carefully transfer it to a cutting board and slice into wedges or small squares. Serve warm for the best texture and flavor.
Tips for the Best Parmesan Focaccia
These small details make a big difference in the final result.
- Keep the dough soft and sticky. Adding too much flour is the most common way to ruin focaccia. A wetter dough creates a lighter, airier crumb with those characteristic large holes.
- Use freshly grated Parmesan. It delivers better flavor and a more beautifully crisp, cheesy crust than pre-shredded cheese.
- Be generous with the olive oil in the skillet. This is not the time to be sparing. The oil is what produces golden, crispy edges and prevents sticking.
- Oil your hands. Oiled hands make stretching and dimpling much easier and keep the dough from tearing.
- Rise in a warm, draft-free place. Consistent warmth gives the best volume and flavor.
- Add the Parmesan late. Topping the dough shortly before baking prevents the cheese from sinking, drying out, or darkening too much.
- Let it rest before slicing. A 10 to 15 minute cool-down lets the crumb set so the slices stay neat instead of gummy.
- Use the visual cues. Puffy, bubbly, and jiggly dough is ready. Golden, crisp edges mean it is done. Trust what you see more than the timer.
Common Mistakes and How to Fix Them
My focaccia turned out dense
Density usually comes from too much flour, under-proofing, or expired yeast. Weigh your flour, check that your yeast is fresh (look for foaming in the water), and make sure both rises are complete. The dough should be visibly puffy and full of bubbles before you move on.
The dough keeps springing back when I stretch it
This is just gluten tightening up. Walk away for about 10 minutes, cover the skillet, and then return. The dough will be much more relaxed and will stretch easily. Never force it, since tearing makes it tough.
The bottom is greasy rather than crisp
If the skillet is not hot enough or the oven is not at full temperature, the oil will soak into the dough instead of frying it. Make sure the oven is fully preheated and bake the focaccia on the center or lower rack. Also avoid pooling an excessive amount of oil far beyond what the recipe suggests.
The Parmesan burned
Ovens vary. If the cheese is browning too quickly, loosely tent the skillet with foil for the last few minutes of baking, or move the rack down a level. Adding the cheese only just before baking, as this recipe directs, also helps.
The focaccia stuck to the skillet
A well-seasoned skillet plus plenty of olive oil should release easily. If it does stick, let it cool for a few minutes and run a thin spatula around the edge and underneath before lifting.
The dough didn’t rise
The usual suspects are old yeast, water that was too hot or too cold, or a very chilly kitchen. Try again with fresh yeast, lukewarm water, and a warmer spot. If the kitchen is cold, simply give the dough more time.
Variations to Try
Once you have mastered the base recipe, there are endless ways to customize your cast iron focaccia.
- Garlic Parmesan focaccia: Mix a few thinly sliced garlic cloves into the olive oil and press them into the dimples before baking.
- Cherry tomato and basil: Press halved cherry tomatoes into the dough and finish with fresh basil after baking.
- Olive and lemon zest: Add pitted olives to the dimples and sprinkle with a little lemon zest for brightness.
- Everything-bagel style: Swap the rosemary for everything bagel seasoning.
- Hot honey finish: Drizzle the baked focaccia with a little hot honey for a sweet and spicy contrast.
- Caramelized onion: Top with soft caramelized onions and a little extra cheese for a richer, sweeter profile.
- Flaky sea salt: A pinch of flaky salt right before baking adds a delightful crunch.
- Herb swap: Use thyme, oregano, sage, or a mix of Italian herbs in place of rosemary.
What to Serve with Cast Iron Parmesan Focaccia
This focaccia is versatile enough to play nearly any role at the table.
- With olive oil for dipping. Serve warm with a small dish of extra-virgin olive oil, perhaps with a splash of balsamic vinegar.
- Alongside soups and salads. It is wonderful with tomato soup, minestrone, or a crisp green salad.
- With pasta or roasted vegetables. Use it to mop up sauce or pan juices.
- As an appetizer. Arrange with olives, cheese, and cured meats for an easy antipasto board.
- As sandwich bread. Slice squares in half and fill with mozzarella, tomato, and basil, or roasted vegetables and pesto.
- As a simple snack. Honestly, a warm slice straight from the oven needs nothing at all.
How to Store, Freeze, and Reheat
Room temperature
Store leftover focaccia in an airtight container at room temperature for up to 2 days. Avoid the refrigerator, which can dry out bread and make it stale faster.
Freezing
For longer storage, wrap individual pieces tightly and freeze for up to 2 to 3 months. Wrapping portions separately means you can pull out just what you need.
Reheating
Reheat thawed pieces in a 350°F (175°C) oven for several minutes to restore some of the crispness. A quick return to the oven or a hot skillet revives the edges far better than a microwave, which tends to make focaccia soft and chewy.
Make-ahead tip
If you want to plan ahead, you can bake the focaccia earlier in the day and warm it just before serving. It is at its absolute best fresh and warm, but it holds up well.
Timing at a Glance
| Stage | Time |
|---|---|
| Prep | About 15 minutes |
| First rise | 45 to 60 minutes |
| Second rise | 30 to 45 minutes |
| Bake | 20 to 25 minutes |
| Total | About 2 to 2½ hours |
Yield: 1 small 9-inch cast iron focaccia, approximately 6 to 8 pieces.
Frequently Asked Questions
Can I make this focaccia without a cast iron skillet?
Yes. You can use an oven-safe 9-inch round cake pan or a similarly sized baking dish, generously oiled. The bottom will not be quite as crisp as it is in cast iron, but it will still be delicious.
Is this focaccia really no-knead?
Yes. The high hydration and extended rise develop gluten on their own. You only need to stir until no dry flour remains.
Can I use active dry yeast instead of instant yeast?
Yes, in the same amount. Let it bloom in the lukewarm water a little longer, about 5 to 10 minutes, until foamy, and expect the rise times to run slightly longer.
Can I make the dough ahead of time?
You can slow the first rise in the refrigerator for several hours or overnight for deeper flavor. Bring the dough back toward room temperature before stretching it into the skillet, and allow the second rise to finish until puffy.
Why is my dough so sticky?
It is supposed to be. A sticky, high-hydration dough is the secret to an airy, open crumb. Oil your hands and your tools instead of adding more flour.
Can I double the recipe?
Yes, though you would need a larger pan, such as a 12-inch skillet or a quarter sheet pan, and baking time may increase slightly. Watch for golden edges and a puffed center.
Can I use pre-grated Parmesan?
You can, but freshly grated Parmesan melts better, tastes richer, and crisps more attractively. It is worth the extra minute of grating.
How do I know when the focaccia is done?
Look for a puffed, golden-brown top, crisp edges, and melted, golden cheese. The bottom should be deeply browned when you lift a corner with a spatula.
Can I freeze the dough?
This recipe is written for baking the same day, and the baked focaccia freezes well. If you want to freeze it, wrap baked pieces tightly and freeze for up to 2 to 3 months.
What can I do with leftover focaccia?
Turn it into croutons, toast it for breakfast with eggs, or split and grill it for sandwiches. Day-old focaccia also makes a fantastic base for mini pizzas.
Final Thoughts
This cast iron Parmesan focaccia proves that bakery-quality bread does not need to be complicated. With a quick stir, two relaxed rises, a skillet full of olive oil, and a handful of rosemary and Parmesan, you end up with a golden, crackly-edged, tender-crumbed loaf that tastes like it took all day.
It is small enough to finish in one sitting, simple enough for a beginner, and flexible enough to dress up with your favorite toppings. Make it for a cozy weeknight dinner, bring it to a gathering, or bake it just because the weekend calls for something warm and comforting.
If you try this recipe, leave a comment and a star rating, and share how you served yours. Happy baking! 🧀
Print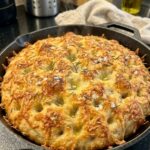
Small-Batch Cast Iron Parmesan Focaccia
Ingredients
For the Focaccia
- 250 g (about 2 cups) all-purpose flour
- 225 g (about ¾ cup + 2 tbsp) lukewarm water
- 1½ tsp (5 g) instant yeast
- 1 tsp salt
- 2 tbsp olive oil, plus more for the skillet and topping
- ¼ cup (25 g) freshly grated Parmesan cheese
- 1 tbsp fresh rosemary, finely chopped
Equipment: a large mixing bowl, a wooden spoon or sturdy spatula, plastic wrap or a clean kitchen towel, a 9-inch cast iron skillet, and a kitchen scale (optional but recommended).
Instructions
In a large mixing bowl, combine the lukewarm water and instant yeast. Let it sit for about 2 to 3 minutes. Add the flour, salt, and 2 tablespoons of olive oil. Stir with a wooden spoon or sturdy spatula until all the flour is incorporated and a soft, sticky dough forms.
There is no need to knead. Simply mix until no dry patches remain. The dough will look shaggy and wet, and that is exactly what you want.
Cover the bowl loosely with plastic wrap or a clean kitchen towel. Place the dough in a warm, draft-free area and let it rise for about 45 to 60 minutes, or until it is noticeably puffed and bubbly on the surface.
A turned-off oven with the light on, the top of the refrigerator, or a spot near (not on) a warm appliance all work well. If your kitchen is cool, the rise may take a little longer. Judge by the dough, not the clock.
Generously coat a 9-inch cast iron skillet with olive oil, making sure the bottom and sides are well covered. Pour a little extra olive oil into the center of the skillet. This pool of oil is what creates those crisp, golden, almost fried edges.
Drizzle a little olive oil over your hands to keep the sticky dough from clinging to your fingers. Gently transfer the risen dough into the prepared skillet.
Using your fingertips, carefully stretch the dough toward the edges of the skillet. If the dough springs back, let it rest for about 10 minutes and then try again. Once it reaches most of the edges, allow it to relax and spread naturally. You do not need to force it into every corner.
Cover the skillet loosely and let the dough rise again for about 30 to 45 minutes, until it looks light, puffy, and airy. While it rises, preheat your oven to 425°F (220°C) so it is fully hot when the focaccia is ready.
Drizzle the surface generously with olive oil. Using well-oiled fingertips, gently press deep dimples all over the dough, pressing toward the bottom of the skillet without completely deflating it. These dimples create the signature focaccia look and collect pools of olive oil that crisp and flavor the top.
Scatter the finely chopped rosemary evenly over the surface.
Sprinkle the freshly grated Parmesan evenly over the top of the dimpled dough. Add another small drizzle of olive oil if you like. Adding the cheese shortly before baking helps it turn savory and golden without becoming overly dark.
Place the skillet in the preheated oven and bake for about 20 to 25 minutes, or until the focaccia is puffed, golden brown, and crisp around the edges. The Parmesan should be melted and beautifully golden, while the center stays soft and airy.
Remove the skillet from the oven (use oven mitts, because cast iron stays very hot) and let the focaccia cool for about 10 to 15 minutes. Carefully transfer it to a cutting board and slice into wedges or small squares. Serve warm for the best texture and flavor.