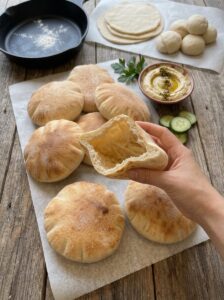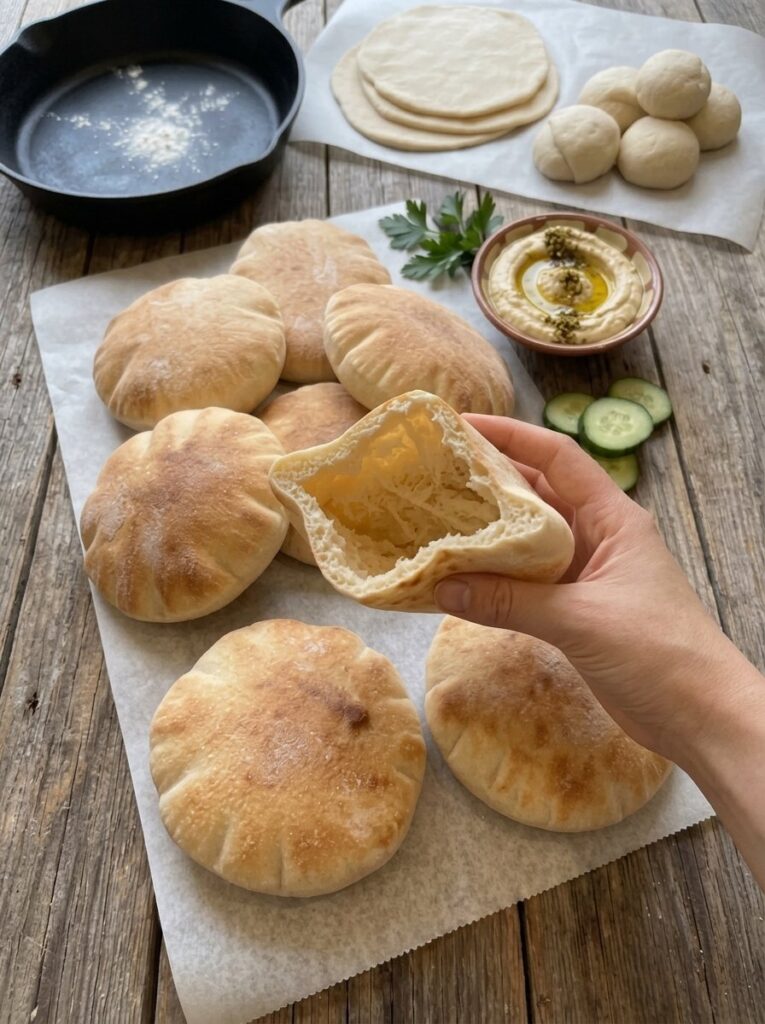
There is something almost magical about watching a flat disc of dough balloon into a golden, hollow pocket right in your skillet. If you have never made pita bread at home, this soft and fluffy pocket pita bread recipe is the perfect place to start. It uses just six simple pantry ingredients, requires no special equipment, and delivers warm, pillowy pitas that taste far better than anything from a plastic bag at the grocery store.
In this complete guide, you will learn exactly how to make homemade pita bread with a perfect pocket, why each step matters, how to troubleshoot common problems, and how to serve and store your pitas so they stay soft for days. Whether you are planning gyros, falafel sandwiches, or a simple dinner with hummus, this recipe will become a staple in your kitchen.
Why You Will Love This Homemade Pita Bread Recipe
Store-bought pita often turns out dry, stiff, and prone to cracking when you try to open it. Homemade pita is a completely different experience. Here is why this recipe stands out:
- Only six ingredients. Flour, water, yeast, sugar or honey, salt, and olive oil are all you need.
- Soft and flexible. Proper kneading and covering the pitas after cooking keeps them pliable, so they fold without breaking.
- Reliable pockets. Following the tips on thickness, heat, and steam gives you the hollow center that makes pita so useful for stuffing.
- No oven required. A hot cast-iron or heavy-bottomed skillet does all the work on the stovetop.
- Quick cooking. Each pita cooks in about a minute or two, so the whole batch finishes fast once the dough is ready.
- Freezer friendly. Make a double batch and keep pitas on hand for weeks.
What Is Pocket Pita Bread?
Pita is a round, yeast-leavened flatbread that originated in the Middle East and Mediterranean regions and is now enjoyed all over the world. What makes pocket pita special is the hollow interior. When a thin round of dough hits a very hot surface, the moisture inside turns to steam almost instantly. That steam pushes the top and bottom layers apart, inflating the bread like a balloon. As the pita cools, it deflates slightly but keeps a natural pocket inside, perfect for filling with meats, vegetables, spreads, and sauces.
Understanding this simple science is the key to success. Every tip in this recipe, from dough thickness to skillet temperature, exists to help that steam do its job.
Ingredients for Soft Pocket Pita Bread
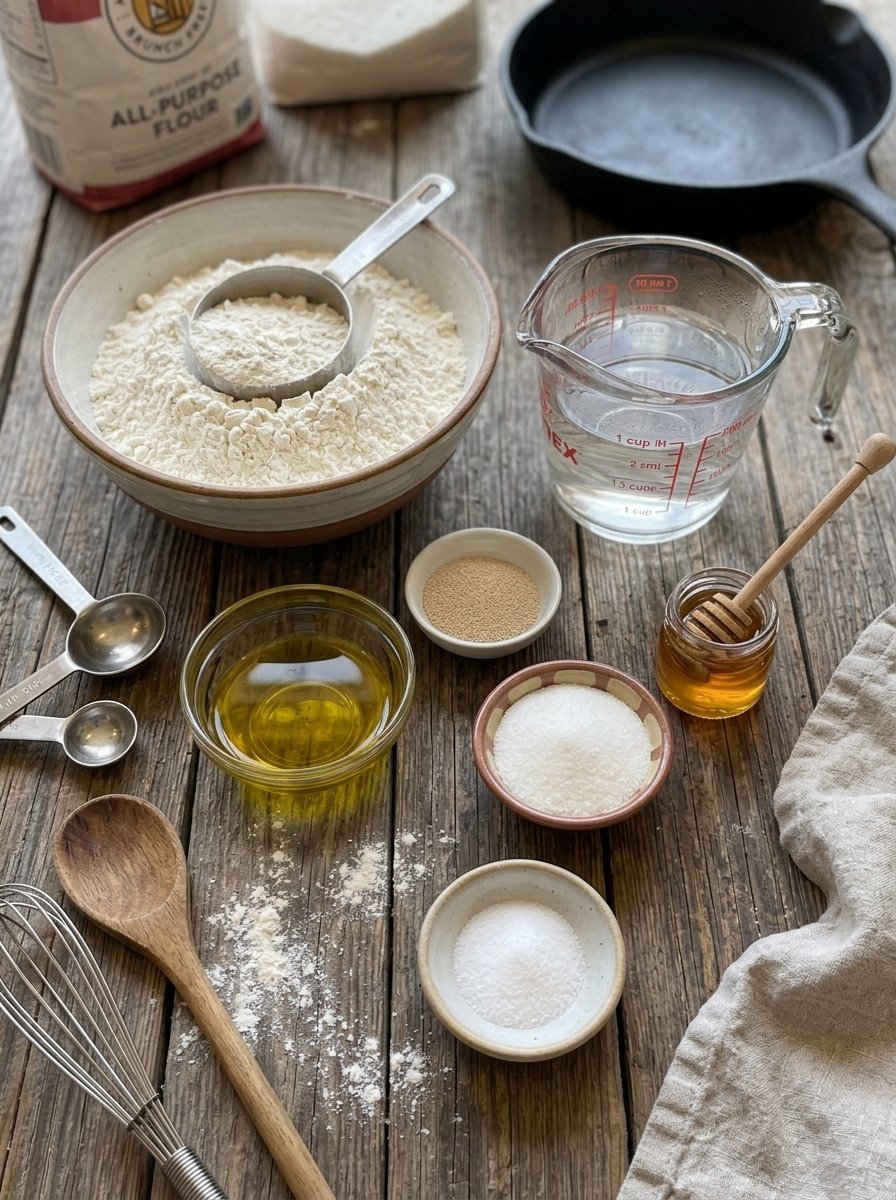
This recipe makes 8 soft pocket pitas.
- 3 cups (375 g) all-purpose flour
- 1 cup (240 ml) warm water, about 105–110°F (40–43°C)
- 2¼ tsp (7 g) instant yeast
- 1 tsp sugar or honey
- 1½ tsp salt
- 1 tbsp olive oil
Ingredient Notes
All-purpose flour: All-purpose flour has enough protein to create a stretchy dough that traps steam, while still producing a soft, tender bite. Measuring by weight (375 g) is the most accurate method. If you use cups, spoon the flour into the measuring cup and level it off rather than scooping directly from the bag, which packs in too much flour and makes the dough dry.
Warm water: Temperature matters. Water that is too cold slows the yeast, and water that is too hot can kill it. Aim for the comfortable warmth of a baby bottle, about 105–110°F (40–43°C).
Instant yeast: Instant yeast is reliable and easy to use. The foamy mixture you see in Step 1 confirms that your yeast is alive before you commit the rest of your ingredients.
Sugar or honey: Just one teaspoon gives the yeast a little food to wake up quickly. It is not there to make the bread sweet.
Salt: Salt adds flavor and strengthens the dough structure. Do not skip it, or the pitas will taste flat.
Olive oil: A tablespoon of olive oil makes the dough softer and more flexible, and it adds subtle richness.
Tips for the Best Pocket Pita Bread
Before you start, read through these tips. They make the difference between flat, cracker-like rounds and perfectly puffed pitas.
- Use warm water, not hot. Warm water activates the yeast properly. Hot water can damage it.
- Knead until smooth and elastic. Good gluten development gives you the softest, most flexible pitas.
- Let the dough roughly double in size. Proper fermentation helps create the steam needed for the pocket.
- Roll the dough evenly. Thin or thick spots can prevent the pita from puffing properly.
- Get your skillet very hot. High heat creates steam fast, which is the engine behind the puff.
- Do not press down while cooking. Pressing releases the steam trapped inside and can ruin the hollow center.
- Cover finished pitas with a clean kitchen towel. Trapped steam keeps them soft and pliable.
How to Make Pocket Pita Bread: Step-by-Step
Step 1: Activate the Yeast
Add the warm water, sugar or honey, and instant yeast to a large mixing bowl. Stir gently and let the mixture sit for about 5 minutes. It should turn slightly foamy, which tells you the yeast is active. If nothing happens after 10 minutes, your yeast may be old or your water may have been the wrong temperature. It is best to start over with fresh yeast.
Step 2: Make the Dough
Add the flour, salt, and olive oil to the yeast mixture. Stir with a wooden spoon until a shaggy dough forms and no large patches of dry flour remain. At this stage the dough will look rough and uneven. That is completely normal, since kneading will smooth it out.
Step 3: Knead the Dough
Transfer the dough to a lightly floured work surface and knead for about 5–7 minutes. Push the dough away from you with the heel of your hand, fold it back over itself, give it a quarter turn, and repeat. The dough is ready when it feels smooth, soft, and elastic.
The finished dough should be soft and slightly tacky. If it feels excessively sticky, add a very small amount of flour at a time. Resist the urge to add too much, because extra flour leads to dry, tough pitas.
Tip: To check your kneading, press a finger into the dough. If it springs back slowly and the surface looks smooth, you are ready for the next step.
Step 4: First Rise
Place the dough in a lightly oiled bowl and turn it once so the surface is lightly coated. Cover the bowl with a clean kitchen towel or plastic wrap. Let the dough rise in a warm, draft-free place for about 1–1½ hours, or until it has roughly doubled in size.
A turned-off oven with the light on, or a spot near (but not on) a warm appliance, works well if your kitchen is cool. Rise time varies with room temperature, so judge by the dough rather than the clock.
Step 5: Divide and Rest
Gently press down the risen dough to release excess air. Divide it into 8 equal pieces. For even pitas, you can weigh the pieces on a kitchen scale. Shape each piece into a smooth ball by pulling the edges underneath and pinching them together at the bottom.
Cover the dough balls and let them rest for 10–15 minutes. This resting time allows the gluten to relax, which makes rolling much easier and prevents the dough from springing back.
Step 6: Roll the Pitas
Lightly flour your work surface. Roll each dough ball into a round approximately 6–7 inches (15–18 cm) wide and about ¼ inch (6 mm) thick. Keep the dough as evenly thick as possible from the center to the edges. This helps the pita puff evenly and form a proper pocket.
Use only a light dusting of flour. Too much flour on the surface can scorch in the hot skillet and leave a bitter taste. Keep the rolled pitas covered with a towel while you work through the rest so they do not dry out.
Step 7: Heat the Skillet
Place a large cast-iron or heavy-bottomed skillet over high heat. Allow it to become thoroughly hot before cooking. The high heat is essential for creating steam inside the pita. Do not add oil to the skillet, since pitas cook best on a dry surface.
A good test is to flick a few drops of water onto the pan. If they sizzle and evaporate immediately, the skillet is ready.
Step 8: Cook and Puff
Place one rolled pita onto the hot, dry skillet. Cook for about 30–45 seconds, until bubbles begin appearing across the surface. Flip and cook for another 30–45 seconds. As the pita heats, it should begin inflating as steam forms inside the dough.
Flip once more if needed and cook for another 15–30 seconds, until the pita is fully puffed and lightly golden in spots. Remember: do not press down on the pita while it cooks. Let the steam do its work.
Step 9: Keep the Pitas Soft
Immediately transfer the cooked pita to a plate and cover it with a clean kitchen towel. Continue cooking the remaining pitas, stacking them under the towel as they finish. The trapped steam softens the crust, so by the time you are done cooking, the whole stack will be tender and pliable. Once slightly cooled, each pita will have a soft, hollow center ready to fill.
Time and Yield
- Prep time: About 25 minutes
- Rising time: About 1–1½ hours
- Cooking time: About 15–20 minutes
- Total time: About 2–2½ hours
- Yield: 8 soft pocket pitas
Most of the time is hands-off while the dough rises, so you can use that window to prepare fillings, make a dip, or tidy the kitchen.
Why Did My Pita Not Puff? Common Problems and Fixes
Even experienced bakers sometimes end up with flat pitas. Here are the most common causes and how to solve them.
The pita stayed flat
The most frequent culprit is a skillet that is not hot enough. If the pan is only medium-hot, the pita cooks through before enough steam builds up to inflate it. Let the skillet heat for a few extra minutes and try again. Another cause is uneven rolling. If one side of the round is thinner, steam escapes through the weak spot instead of lifting the whole pita.
The pita puffed on one side only
This usually points to uneven thickness or a small tear in the dough. Roll with consistent pressure from the center outward, and rotate the dough a quarter turn between passes. Also avoid pinching or stretching the edges when moving the round to the pan.
The pita is dry or stiff
Overcooking is the usual reason. Keep each pita on the heat only until it is puffed and lightly golden in spots. Also remember to cover finished pitas immediately with a clean kitchen towel. Left uncovered, they dry out and harden quickly. Adding too much flour during kneading or rolling can have the same effect.
The dough did not rise
If your dough barely grew after 1½ hours, the room may be too cold, or the yeast may have been inactive. Check that you saw foam in Step 1, move the bowl to a warmer spot, and give it extra time. Dough that has not properly fermented will not create the steam you need.
The pita is pale and doughy
This suggests low heat or too little cooking time. Aim for light golden spots and a fully puffed shape. A well-heated cast-iron skillet is the best tool for this job because it holds steady heat from the first pita to the last.
Variations to Try
Once you have mastered the basic recipe, it is easy to customize your homemade pita bread.
- Whole wheat pita: Replace up to half of the all-purpose flour with whole wheat flour. You may need a splash more water, since whole wheat absorbs more liquid.
- Garlic herb pita: Knead in a teaspoon of garlic powder and a teaspoon of dried oregano or za’atar for an aromatic flatbread.
- Mini pitas: Divide the dough into 12 or 16 pieces for small pitas that are ideal for dips, appetizers, and kids’ lunches.
- Seeded pita: Brush the rolled dough lightly with water and press on sesame or nigella seeds before cooking.
If you adjust the recipe, keep an eye on dough texture. It should always feel soft and slightly tacky, never dry or stiff.
What to Serve With Pocket Pita Bread
Fresh pita is endlessly versatile. Here are some of the best ways to enjoy it:
- Gyros: Fill with chicken, beef, or lamb gyros and fresh vegetables.
- Falafel pitas: Stuff with falafel, hummus, cucumber, tomato, and tahini sauce.
- Grilled chicken pitas: Combine grilled chicken, lettuce, tomato, and creamy tzatziki.
- Breakfast pitas: Use for breakfast sandwiches with eggs, avocado, and fresh vegetables.
- Dip companion: Serve warm alongside hummus, baba ganoush, or your favorite dip.
- Homemade pita chips: Cut into wedges and toast for crunchy chips that are perfect for snacking.
For a complete Mediterranean-style meal, pair your pitas with a simple cucumber and tomato salad, a bowl of olives, and something grilled. Because the dough takes a couple of hours, many home cooks make the pitas ahead and warm them briefly just before serving.
How to Store Pita Bread
Proper storage keeps your pitas soft and delicious.
Room temperature: Store completely cooled pitas in an airtight bag or container at room temperature for up to 2–3 days. Make sure they are fully cool before sealing, or condensation can make them soggy.
Freezer: For longer storage, place a piece of parchment paper between the pitas so they do not stick together, then place them in a freezer-safe bag. They will keep for up to 2–3 months.
Thawing and reheating: Thaw at room temperature, then reheat briefly in a dry skillet or in the microwave until soft and warm. Reheating restores the soft, fresh-baked texture.
Frequently Asked Questions About Homemade Pita Bread
Can I make pita bread without a pocket?
Yes. If your pitas do not puff, they are still delicious as flatbread for scooping dips, wrapping fillings, or serving alongside meals. The taste and texture are the same, even without the hollow center.
What kind of pan is best for pita bread?
A large cast-iron or heavy-bottomed skillet is best because it holds high heat evenly. Thin pans lose heat quickly, which makes puffing less reliable.
Do I need to add oil to the skillet?
No. Cook pitas on a dry, very hot skillet. Oil in the pan can cause uneven browning and is not needed for puffing.
Can I use honey instead of sugar?
Absolutely. The recipe works equally well with either. You only need one teaspoon, and its purpose is to help the yeast activate.
Why shouldn’t I press down on the pita while it cooks?
Pressing can release the steam trapped inside the dough. That steam is what separates the layers and creates the pocket, so it is best to leave the pita alone as it inflates.
Can I make the dough ahead of time?
You can prepare the dough through the first rise, then continue with dividing, resting, and cooking when you are ready. For best results, follow the timing in the recipe and judge the dough by its size and texture.
How thick should I roll the dough?
Aim for about ¼ inch (6 mm) thick and 6–7 inches (15–18 cm) wide. Even thickness matters more than perfect roundness.
How do I keep pita bread soft?
Cover each pita with a clean kitchen towel as soon as it comes off the skillet, and store cooled pitas in an airtight bag. The trapped steam and sealed storage prevent the bread from drying out.
Can I freeze homemade pita?
Yes. Separate the pitas with parchment paper, place them in a freezer-safe bag, and freeze for up to 2–3 months. Thaw at room temperature and reheat in a dry skillet or microwave.
Final Thoughts
Making pocket pita bread at home is easier than most people expect, and the reward is huge: warm, soft, beautifully puffed pitas that make every meal feel special. The recipe comes down to a few key habits. Activate your yeast, knead until the dough is smooth, let it rise until doubled, roll it evenly, cook it on a very hot dry skillet, and never press down while it puffs. Cover the finished pitas, and they will stay tender and ready to stuff.
Once you taste fresh homemade pita, it is hard to go back to store-bought. Try this recipe for your next gyro night, falafel feast, or simple dip platter, and enjoy the little thrill of watching each pita puff up in the pan.
If you loved this recipe, save it for later, share it with a friend who loves baking, and leave a comment with your favorite filling.
Print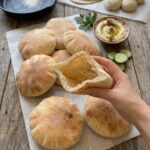
Soft & Fluffy Pocket Pita Bread
Ingredients
This recipe makes 8 soft pocket pitas.
- 3 cups (375 g) all-purpose flour
- 1 cup (240 ml) warm water, about 105–110°F (40–43°C)
- 2¼ tsp (7 g) instant yeast
- 1 tsp sugar or honey
- 1½ tsp salt
- 1 tbsp olive oil
Ingredient Notes
All-purpose flour: All-purpose flour has enough protein to create a stretchy dough that traps steam, while still producing a soft, tender bite. Measuring by weight (375 g) is the most accurate method. If you use cups, spoon the flour into the measuring cup and level it off rather than scooping directly from the bag, which packs in too much flour and makes the dough dry.
Warm water: Temperature matters. Water that is too cold slows the yeast, and water that is too hot can kill it. Aim for the comfortable warmth of a baby bottle, about 105–110°F (40–43°C).
Instant yeast: Instant yeast is reliable and easy to use. The foamy mixture you see in Step 1 confirms that your yeast is alive before you commit the rest of your ingredients.
Sugar or honey: Just one teaspoon gives the yeast a little food to wake up quickly. It is not there to make the bread sweet.
Salt: Salt adds flavor and strengthens the dough structure. Do not skip it, or the pitas will taste flat.
Olive oil: A tablespoon of olive oil makes the dough softer and more flexible, and it adds subtle richness.
Instructions
Add the warm water, sugar or honey, and instant yeast to a large mixing bowl. Stir gently and let the mixture sit for about 5 minutes. It should turn slightly foamy, which tells you the yeast is active. If nothing happens after 10 minutes, your yeast may be old or your water may have been the wrong temperature. It is best to start over with fresh yeast.
Add the flour, salt, and olive oil to the yeast mixture. Stir with a wooden spoon until a shaggy dough forms and no large patches of dry flour remain. At this stage the dough will look rough and uneven. That is completely normal, since kneading will smooth it out.
Transfer the dough to a lightly floured work surface and knead for about 5–7 minutes. Push the dough away from you with the heel of your hand, fold it back over itself, give it a quarter turn, and repeat. The dough is ready when it feels smooth, soft, and elastic.
The finished dough should be soft and slightly tacky. If it feels excessively sticky, add a very small amount of flour at a time. Resist the urge to add too much, because extra flour leads to dry, tough pitas.
Tip: To check your kneading, press a finger into the dough. If it springs back slowly and the surface looks smooth, you are ready for the next step.
Place the dough in a lightly oiled bowl and turn it once so the surface is lightly coated. Cover the bowl with a clean kitchen towel or plastic wrap. Let the dough rise in a warm, draft-free place for about 1–1½ hours, or until it has roughly doubled in size.
A turned-off oven with the light on, or a spot near (but not on) a warm appliance, works well if your kitchen is cool. Rise time varies with room temperature, so judge by the dough rather than the clock.
Gently press down the risen dough to release excess air. Divide it into 8 equal pieces. For even pitas, you can weigh the pieces on a kitchen scale. Shape each piece into a smooth ball by pulling the edges underneath and pinching them together at the bottom.
Cover the dough balls and let them rest for 10–15 minutes. This resting time allows the gluten to relax, which makes rolling much easier and prevents the dough from springing back.
Lightly flour your work surface. Roll each dough ball into a round approximately 6–7 inches (15–18 cm) wide and about ¼ inch (6 mm) thick. Keep the dough as evenly thick as possible from the center to the edges. This helps the pita puff evenly and form a proper pocket.
Use only a light dusting of flour. Too much flour on the surface can scorch in the hot skillet and leave a bitter taste. Keep the rolled pitas covered with a towel while you work through the rest so they do not dry out.
Place a large cast-iron or heavy-bottomed skillet over high heat. Allow it to become thoroughly hot before cooking. The high heat is essential for creating steam inside the pita. Do not add oil to the skillet, since pitas cook best on a dry surface.
A good test is to flick a few drops of water onto the pan. If they sizzle and evaporate immediately, the skillet is ready.
Place one rolled pita onto the hot, dry skillet. Cook for about 30–45 seconds, until bubbles begin appearing across the surface. Flip and cook for another 30–45 seconds. As the pita heats, it should begin inflating as steam forms inside the dough.
Flip once more if needed and cook for another 15–30 seconds, until the pita is fully puffed and lightly golden in spots. Remember: do not press down on the pita while it cooks. Let the steam do its work.
Immediately transfer the cooked pita to a plate and cover it with a clean kitchen towel. Continue cooking the remaining pitas, stacking them under the towel as they finish. The trapped steam softens the crust, so by the time you are done cooking, the whole stack will be tender and pliable. Once slightly cooled, each pita will have a soft, hollow center ready to fill.