The scent of warm bread baking in the oven is a nostalgic and irresistible invitation, wrapping itself around you like a cozy blanket on a chilly evening. The moment your sourdough loaf emerges from its steamy cocoon, its crust capturing the golden hue of the sun’s last rays, you can already imagine the profound joy of breaking it apart. With each gentle tear, the air fills with an earthy aroma, hinting at the tanginess of the fermentation process, a complex interplay of flavors waiting to dance on your palate.
Picture this: you slice through the crust, a symphony of crunch announces the shattering of your painstaking efforts, only to give way to an airy, slightly chewy crumb that seems to whisper stories of ancient grains and time-honored techniques. As you spread a generous smear of butter, it melts willingly into the warm crevices, while you savor the experience of savoring every bite. What could be more rewarding than homemade sourdough bread, a culinary journey that offers both the comfort of a familiar favorite and the thrill of mastering a beloved skill?
Why You’ll Love This Sourdough Bread
Sourdough bread stands apart in the culinary world, and for good reason. The complex flavors heralded by its unique fermentation process are simply irreplaceable. You’ll relish the tangy bite paired with its nutty undertones, creating a multifaceted taste that keeps your taste buds captivated. The slightly chewy texture and crunch of that golden crust create a mouthfeel that invites you to come back for more. Whether you’re enjoying it alongside a hearty bowl of soup or transforming it into a gourmet sandwich, your sourdough deserves a place at every table.
This bread isn’t just a staple; it’s an experience. You might whip up a loaf for a casual family dinner or elevate your brunch game at your next gathering, impressing friends with the delightful surprise of homemade goodness. The best part? With a little patience, you delve into the art of sourdough—an endeavor that’s deeply rewarding. Your heart swells with pride every time you present your beautifully crafted loaf, a testament to your time, effort, and culinary love.
Preparation Phase & Tools to Use
Before you embark on your sourdough adventure, gathering a few essential tools is vital for your success.
- Mixing Bowl: A sturdy, large mixing bowl allows you to knead and mix without making a mess as the dough expands.
- Kitchen Scale: Measuring ingredients by weight ensures accuracy—it’s crucial for bread making. A precise scale guarantees your dough achieves the perfect consistency, yielding magnificent results every time.
- Bench Scraper: This handy tool makes shaping your loaf a breeze and reduces your risk of tearing the dough.
- Dutch Oven: Perfect for achieving that marvelous crust, using a Dutch oven traps steam, which is essential for the rise and texture of your bread.
- Proofing Basket: Also known as a banneton, this helps the dough hold its shape while it proves, creating that lovely, artisanal look we all admire.
As you gather these tools, enjoy the process of preparing your kitchen. It’s a ritual, setting the mood for your sourdough adventure. Remember, good things come to those who wait, especially when it comes to sourdough!
Ingredients for Sourdough Bread
- 500g Bread Flour: The backbone of your loaf, bread flour offers a higher protein content for the perfect structure.
- 350g Water: Hydration is key! The right water content keeps the crumb light and airy.
- 100g Active Sourdough Starter: This starter captures wild yeast and beneficial bacteria, creating the delightful tang and rise in your bread.
- 10g Salt: While it enhances flavor, salt also strengthens gluten and controls fermentation.
Substitution possibilities play nicely with this recipe. For a whole grain twist, consider using whole wheat flour or rye and enjoy the slight change in flavor and texture.
How to Make Sourdough Bread
-
Combine and Rest: In a large mixing bowl, combine the flour and water. Mix until just blended, then let it rest for 30 minutes. This process, known as autolyse, allows the flour to absorb water and begin developing gluten.
-
Mix in Starter and Salt: Add your active sourdough starter and salt to the dough. Don’t rush this step; mix until thoroughly combined.
-
Knead the Dough: Knead the mixture for about 10 minutes until it transforms into a smooth, elastic dough. Don’t hesitate to use your bench scraper to help you along.
-
Let It Rise: Place your dough in a lightly oiled bowl, cover it, and let it rise at room temperature for 4-6 hours or until it doubles in size. Find a warm and cozy spot in your kitchen for optimal rising conditions.
-
Shape the Dough: After rising, gently deflate your dough and shape it into a round loaf. Place it into a generously floured proofing basket, seam side up this time.
-
Final Rise: Cover and let it rise for an additional 1-2 hours. The dough should look puffy and ready for the oven.
-
Preheat the Oven: Preheat your oven to 450°F (230°C) with your Dutch oven inside for at least 30 minutes. This step is crucial for that golden crust!
-
Bake the Bread: Carefully transfer the dough into the hot Dutch oven and cover it. Bake for 30 minutes before removing the lid and baking for an additional 15 minutes. Watch your dough transform into a golden masterpiece!
-
Cool Down: Allow your masterpiece to cool on a wire rack. This may be the hardest part, but letting the bread rest lets the flavors develop.
Chef’s Notes & Helpful Tips
- Make-Ahead: If you wish to lighten your schedule, consider the refrigerator for a slow, cold rise. Shape your bread and place it in the fridge overnight, then let it warm up before you bake.
- Cooking Alternatives: In a pinch, you can use an air fryer set to a similar temperature, but ensure you watch the baking time closely, as air fryers can vary greatly.
- Customization: Don’t hesitate to add flavors—think rosemary, olives, or sun-dried tomatoes—to create a signature loaf that reflects your tastes.
Common Mistakes to Avoid
Even the best bakers encounter pitfalls. Here’s how to steer clear of common mistakes:
- Under-Mixing: Failing to combine ingredients well can leave pockets of undeveloped flour or uneven salt distribution. Ensure every bit of flour absorbs water fully.
- Short Rising Time: Timing matters; rushing the rise may result in dense bread. Allow it ample time to expand.
- Skipping the Dutch Oven: If you bake without a proper steam chamber, you may miss out on that crusty exterior that everyone craves. Invest in a Dutch oven, it’s worth it!
- Cutting Too Soon: Slicing the bread while still hot can lead to gumminess; patience pays off with perfectly sliced pieces.
What to Serve With Sourdough Bread
Sourdough pairs wonderfully with various culinary delights. Here are some suggestions to elevate your serving experience:
- Soups: Enjoy with a steaming bowl of tomato basil soup, where the tang of the bread beautifully complements the freshness of the tomatoes.
- Cheese: Craft an artisanal cheese platter, featuring tangy blue cheese or creamy brie. The textures harmonize perfectly.
- Avocado Toast: Smash ripe avocados over your toasted sourdough, sprinkled with red pepper flakes and sea salt for an upscale breakfast.
- Charcuterie Boards: Elevate your gatherings with thinly sliced meats, olives, and pickles served with crusty bread for an indulgent snack.
- Egg Dishes: Top with poached eggs, hollandaise sauce, and a sprinkle of chives for a delightful brunch dish.
- Spread a Pastry Cream: Try your hand at dessert by making an indulgent pastry cream topping; the sweet and tangy flavors play nicely together.
- Use for French Toast: Transform leftover bread into a luscious French toast dish for an exciting breakfast treat.
Storage & Reheating Instructions
Store your sourdough bread in a paper bag, which allows it to breathe and stay crusty. Keep it at room temperature for up to 3 days. For longer preservation, slice and place it in an airtight container or freezer bag and freeze for up to three months.
To reheat, embrace the oven! Preheat it to 350°F (175°C) and wrap the bread in foil to keep the crust soft. Heat for about 10-15 minutes until warm.
Estimated Nutrition Information
Approximate values per slice (56g):
- Calories: 150
- Protein: 5g
- Carbs: 30g
- Fat: 0.5g
- Fiber: 1g
(Note: Nutrition values will vary based on specific ingredients and adjustments.)
FAQs
What can I substitute for bread flour?
You can use all-purpose flour, but the texture may deviate from traditional sourdough. For whole grain lovers, try incorporating whole wheat flour, ensuring you adjust the liquid as needed since whole grain absorbs more moisture.
How do I know my sourdough starter is active?
A healthy starter will double in size within 4-6 hours after feeding and have a pleasant, slightly tangy smell. Conduct a float test; take a small spoonful of starter and place it in water—if it floats, it’s ready!
Can I make sourdough without a Dutch oven?
Yes! If needed, bake your bread on a preheated baking stone or sheet, adding a pan of water at the bottom of the oven to maintain steam.
Why is my crust not crunchy?
A soft crust can result from not enough steam during baking or from wrapping the bread too soon after baking. Proper steaming and cooling time are essential for achieving a crunchy exterior.
What if my dough is too sticky?
It’s common for sourdough to be stickier than other doughs. You can lightly flour your hands and workspace instead of adding too much extra flour. Practice kneading to build gluten structure, which will help with stickiness.
Conclusion
As you knead, shape, and cradle your sourdough, you’re not just crafting bread; you are participating in an age-old tradition deeply rooted in many cultures worldwide. Each loaf you bake becomes a piece of art, a token of patience, and an expression of love.
Imagine serving warm slices to family and friends, each piece holding not just flavor, but the essence of your effort and care. So, roll up your sleeves, embrace the process, and let your kitchen fill with the unforgettable aroma of homemade sourdough bread. It’s more than a recipe; it’s an experience waiting to be shared. Happy baking!
Print
Sourdough Bread
- Total Time: 75 minutes
- Yield: 1 loaf 1x
- Diet: Vegetarian
Description
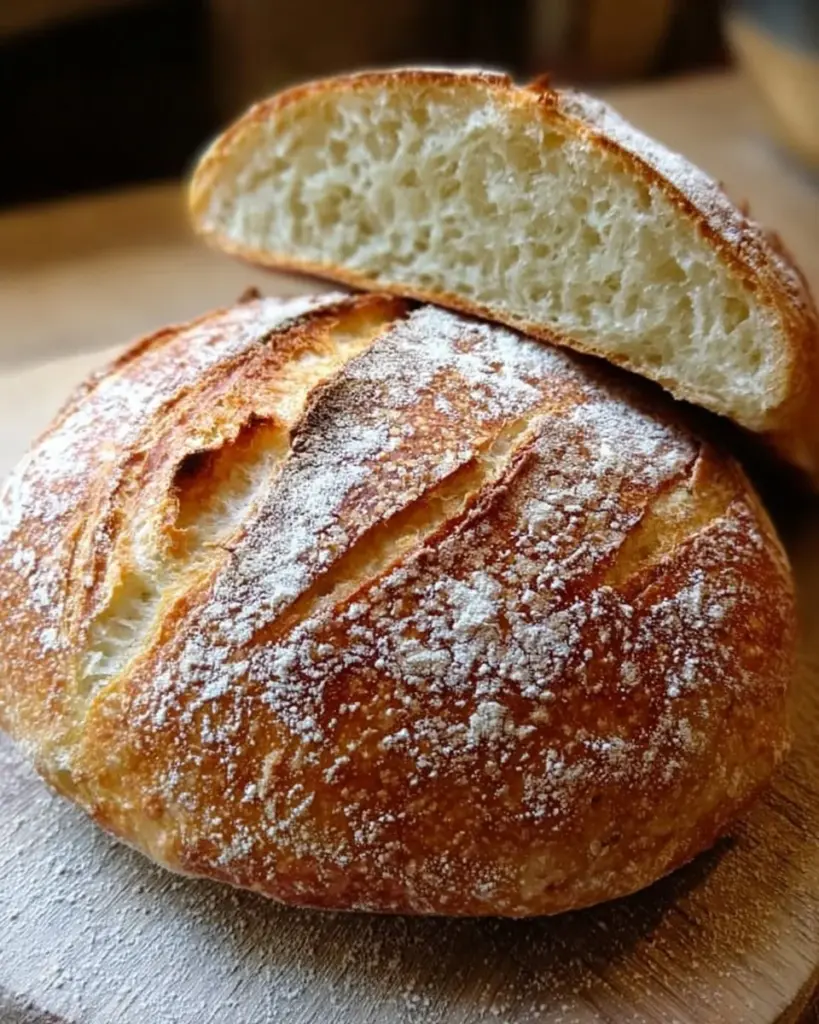
Homemade sourdough bread with a crunchy crust and airy, chewy crumb.
Ingredients
- 500g Bread Flour
- 350g Water
- 100g Active Sourdough Starter
- 10g Salt
Instructions
- Combine and rest: In a large mixing bowl, combine the flour and water. Mix until just blended, then let it rest for 30 minutes.
- Mix in starter and salt: Add your active sourdough starter and salt to the dough. Mix until thoroughly combined.
- Knead the dough: Knead the mixture for about 10 minutes until it transforms into a smooth, elastic dough.
- Let it rise: Place your dough in a lightly oiled bowl, cover it, and let it rise at room temperature for 4-6 hours or until it doubles in size.
- Shape the dough: Gently deflate your dough and shape it into a round loaf. Place it into a floured proofing basket, seam side up.
- Final rise: Cover and let it rise for an additional 1-2 hours until puffy.
- Preheat the oven: Preheat your oven to 450°F (230°C) with your Dutch oven inside for at least 30 minutes.
- Bake the bread: Transfer the dough into the hot Dutch oven and cover it. Bake for 30 minutes, then remove the lid and bake for an additional 15 minutes.
- Cool down: Allow your bread to cool on a wire rack before slicing.
Notes
For a different flavor, experiment with adding herbs or spices to the dough.
- Prep Time: 30 minutes
- Cook Time: 45 minutes
- Category: Bread
- Method: Baking
- Cuisine: American
Nutrition
- Serving Size: 1 slice
- Calories: 150
- Sugar: 0g
- Sodium: 400mg
- Fat: 0.5g
- Saturated Fat: 0g
- Unsaturated Fat: 0g
- Trans Fat: 0g
- Carbohydrates: 30g
- Fiber: 1g
- Protein: 5g
- Cholesterol: 0mg
Keywords: sourdough, homemade bread, baking, artisan bread, savory snacks