The aroma of freshly baked bread wafts through the kitchen, a warm hug that wraps you in the comforting embrace of nostalgia. You close your eyes and breathe it in, letting that tantalizing scent transport you back to simpler times. But the magic of that heavenly loaf wouldn’t be possible without one crucial element: a thriving sourdough starter. Bursting with life, it takes center stage in the culinary dance, transforming humble ingredients into a masterpiece of flavor and texture. Its tangy richness, combined with a crust that is perfectly crisp and a crumb that’s soft yet wonderfully elastic, creates an experience that is nothing short of enchanting.
Feeding your sourdough starter might just become one of your favorite kitchen rituals. Each feeding nurtures its growth, coaxing out the wild yeasts and bacteria that render your bread extraordinary. There’s an unbeatable satisfaction in watching it bubble and expand, a clear indication that your efforts are being rewarded. The delicate balance of tangy and savory flavors that this living culture provides elevates any dish it joins, whether it’s a loaf of rustic bread, soft pancakes, or even artisanal pita. And let’s not forget the tenderness—the kind that welcomes you with a warm embrace, beckoning you to indulge in another slice.
Why You’ll Love This Sourdough Starter Feeding Ratio
The beauty of nurturing a sourdough starter lies not only in the incredible flavors it brings but also in the sense of connection it fosters with your food. Using the right feeding ratio can make all the difference in creating a robust and active starter. With the perfect balance—commonly a 1:1:1 ratio of starter to flour to water—you unlock the potential for extraordinary bread, rich in complexity and flavor. Imagine sitting down to a slice of your homemade sourdough, its crust crackling softly under the knife, releasing steam as you slice through its airy interior. Each bite fills your mouth with a slightly tangy punch paired with the comforting earthiness of the grains.
This feeding ratio not only maximizes the yeast’s activity but also simplifies your baking process. Just think of the convenience during busy mornings when you can whip up a breakfast of sourdough waffles or a last-minute dinner roll—each infused with that signature sour note which draws everyone to the table. The possibilities are endless, making your sourdough starter not just a recipe but a beloved companion in your kitchen adventures.
Preparation Phase & Tools to Use
Before diving into your sourdough starter journey, arm yourself with a few essential tools that will help you nurture your creation effectively.
- Glass Jar or Container: A clear glass jar allows you to observe the growth of your starter while being non-reactive, preserving the beneficial bacteria and yeasts inside.
- Kitchen Scale: Precision is key when it comes to feeding your starter, making a digital kitchen scale indispensable for achieving accurate measurements.
- Spatula or Spoon: For mixing your flour and water into that lively concoction, a spatula or wooden spoon helps combine the ingredients seamlessly, ensuring an even consistency.
- Measuring Cups: Although a scale is preferred, measuring cups are practical for those who enjoy tactile cooking.
- Warm Environment: Find a cozy, warm spot in your kitchen to keep your starter thriving; sourdough loves warmth!
Practical preparation tips include using filtered or bottled water if possible, as chlorine from tap water may hinder yeast growth. Also, don’t forget to watch the temperature; a too-hot environment can speed up fermentation, while a cooler one may slow it down.
Ingredients for Sourdough Starter Feeding Ratio
The simplicity of the ingredients makes this recipe beautifully approachable. You only need:
- Active Sourdough Starter: Your already established culture that requires feeding. If it’s been hibernating in your refrigerator, wake it up by feeding it a day before you plan to bake.
- Flour: All-purpose flour is a great starting point, but feel free to mix in whole wheat or rye flour for added flavor and nutrition.
- Water: Room temperature water allows your starter to thrive, but make sure it’s non-chlorinated to encourage the growth of good bacteria.
These key ingredients come together to craft your flourishing starter. If needed, experiment with different flour types to discover unique flavor profiles.
How to Make Sourdough Starter Feeding Ratio
Creating the perfect feeding ratio for your sourdough starter is simple and incredibly rewarding. Follow these steps:
-
Prepare Your Ingredients: Take your active sourdough starter and measure out equal parts by weight of flour and water. For example, if you have 50g of starter, use 50g of flour and 50g of water.
-
Combine Ingredients: In your glass jar, add the flour to the starter. Gradually pour in the water while mixing it in with your spatula. Aim for a smooth consistency without lumps.
-
Mix Thoroughly: Continue mixing until no dry flour remains, creating a homogenous mix. This step is crucial as it helps distribute moisture evenly.
-
Cover and Let Rest: Securely cover the jar with a breathable lid or cloth, allowing for airflow while keeping dust and debris out. Place the jar in a warm spot (ideally, around 75°F-85°F) to encourage fermentation.
-
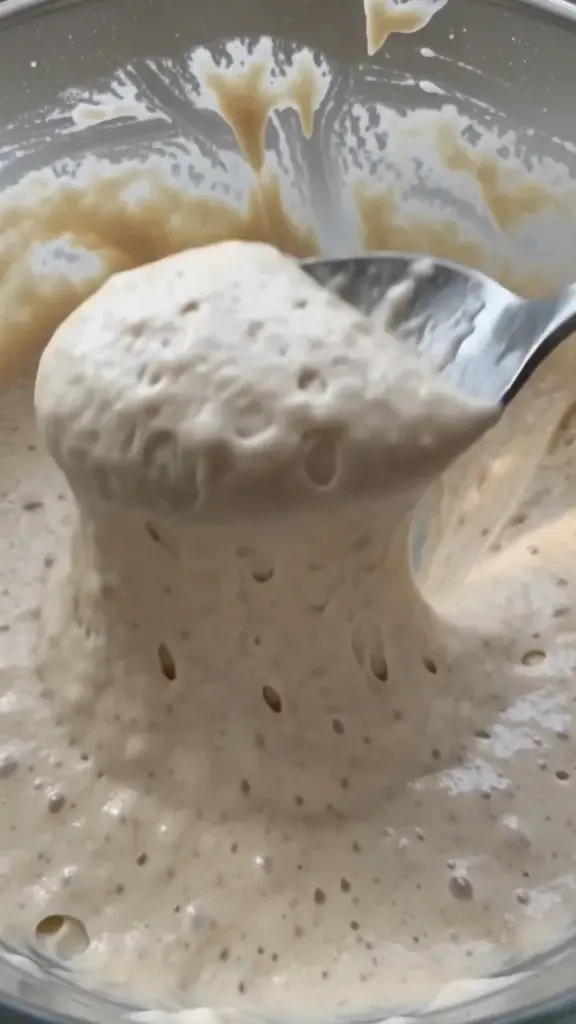
Wait and Observe: After 4 to 8 hours, check your starter. It should have nearly doubled in size, with bubbly activity indicating that it’s ready to use or feed again.
-
Repeat: Feed your starter every 12 hours leading up to baking day to keep it vigorous and lively.
Small tip: For an extremely bubbly starter, try to feed it before it fully deflates after its peak rise.
Chef’s Notes & Helpful Tips
- Make-Ahead Tips: Consider feeding your starter every time you’re about to bake. This keeps it healthy and ready for action.
- Cooking Alternatives: While steaming bread is classic, try your sourdough starter in pancakes or waffles for a delightful twist. The light tanginess enhances the flavor beautifully.
- Customization Ideas: For even more personality, experiment with adding herbs, spices, or seeds during the feeding process, turning your starter into a delightful blend of flavors.
Common Mistakes to Avoid
Making sourdough can seem daunting, but you can easily sidestep pitfalls with a little awareness. Avoid these common mistakes:
- Feeding Too Late: Allowing your starter to starve for too long can lead to sluggish fermentation. Stick to a regular feeding schedule.
- Using Cold Ingredients: Cold flour or water can shock the yeast. Ensure your water is at room temperature.
- Ignoring the Bubbles: If your starter doesn’t bubble after feeding, check your water, temperature, and feeding schedule. It may need some extra attention before it’s ready to bake.
What to Serve With Sourdough Starter
Your sourdough starter serves as a versatile base for a myriad of delicious dishes. Consider pairing your creations with the following:
- Sourdough Bread: The star of the show, with its perfect crust and warm, airy crumb.
- Grilled Cheese Sandwich: A hearty, satisfying option that pairs wonderfully with a bowl of tomato soup.
- Pancakes: Fluffy, tangy stacks topped with maple syrup or fresh berries make for a delightful breakfast.
- Sourdough Pizza: Create a gourmet pizza night at home with your starter, featuring fresh toppings that tantalize your taste buds.
- Crackers: Crunchy, salty bites perfect for serving with cheese boards or hummus.
- Waffles: Crisp on the outside, fluffy on the inside—treat yourself to a sweet or savory twist.
- Pita Bread: Airy pockets that are excellent for filling with salads or grilled meats.
Storage & Reheating Instructions
Storing your sourdough starter correctly ensures its longevity and vitality.
- In the Fridge: If not baking regularly, store your starter in the refrigerator with a secure lid. Feed it once a week or so to keep it alive.
- In the Freezer: For long-term storage, consider freezing portions of your starter in small containers. Just remember to allow it to thaw and feed it before using it again.
- Reheating: When ready to revive your starter, allow it to come to room temperature. Feed it several times before baking to ensure it’s fully active.
Estimated Nutrition Information
The nutrition values for homemade sourdough starter feeding depend on the proportions used, but a rough estimate (per 100g of flour) is:
- Calories: 364
- Total Fat: 1g
- Carbohydrates: 76g
- Protein: 10g
This is an approximation, so consider nutrients from your specific flour choice.
FAQs
1. How long does it take to create a strong starter?
Creating a robust sourdough starter typically takes about 5 to 14 days. This timeline varies based on ambient temperature, the type of flour used, and how often you feed it.
2. Can I use tap water for feeding my starter?
Using filtered water is advisable. Tap water containing chlorine can kill beneficial yeast and slow down fermentation. If you must use tap water, letting it sit overnight allows chlorine to dissipate.
3. How will I know when my starter is ready to use?
Your starter is ready when it has doubled in size, boasts a bubbly surface, and releases a pleasant, tangy aroma. Conduct a “float test” by dropping a spoonful in water; if it floats, it’s ready.
4. Can I feed my starter less frequently?
Yes, if you store it in the refrigerator, you can extend feedings to every 1-2 weeks. Just remember to take it out and feed it a day or two before you plan to bake.
5. What should I do if my starter is too thick or too runny?
Adjust the water and flour ratio depending on consistency. A good starter resembles a thick pancake batter—just tweak it slightly during the next feeding until it feels right.
Conclusion
Embrace the delightful journey of nurturing your sourdough starter with this innovative feeding ratio, and witness how it transforms everyday ingredients into extraordinary dishes. The joy of creating and sharing homemade bread is a timeless experience that brings people together. Encourage your inner baker, embark on this culinary adventure, and let the enticing aroma and heartwarming flavors fill your home with love and happiness. Gather your ingredients, follow the steps, and let your sourdough starter open up a world of creative possibilities—delicious moments await!
Print
Sourdough Starter Feeding Ratio
- Total Time: 8 hours
- Yield: Varies based on feeding
- Diet: Vegetarian
Description
A guide to feeding your sourdough starter with the perfect 1:1:1 ratio of starter, flour, and water for optimal flavor and texture.
Ingredients
- Active Sourdough Starter
- All-purpose Flour (or whole wheat/rye flour)
- Room Temperature Water (non-chlorinated)
Instructions
- Prepare your ingredients: Measure out equal parts by weight of flour and water to your active sourdough starter.
- Combine ingredients in a glass jar, adding the flour to the starter and gradually pouring in the water.
- Mix thoroughly until no dry flour remains.
- Cover the jar with a breathable lid or cloth and place in a warm spot (75°F-85°F).
- Wait and observe for 4 to 8 hours until the starter nearly doubles in size.
- Repeat the feeding process every 12 hours leading up to baking day.
Notes
Consider using filtered water for feeding and maintaining a consistent feeding schedule for best results.
- Prep Time: 5 minutes
- Cook Time: 0 minutes
- Category: Bread
- Method: Nurturing
- Cuisine: Bread Making
Nutrition
- Serving Size: 100g of flour
- Calories: 364
- Sugar: 0g
- Sodium: 0mg
- Fat: 1g
- Saturated Fat: 0g
- Unsaturated Fat: 0g
- Trans Fat: 0g
- Carbohydrates: 76g
- Fiber: 3g
- Protein: 10g
- Cholesterol: 0mg
Keywords: sourdough, bread making, starter, baking, fermentation